


Photopea and GIMP are two popular free image editors, but they take different approaches to photo editing and graphic design. Photopea runs in a web browser and offers a Photoshop-like interface, making it convenient for quick edits and PSD projects. GIMP is a free, open-source desktop editor with extensive customization options and support for plugins and scripting.
So, which one is better: Photopea or GIMP? The answer depends on your workflow, the features you need, and how you prefer to work with images. This comparison looks at their key differences, pros and cons, and practical use cases to help you choose. If your photos still look blurry, noisy, or pixelated after editing, we'll also look at how a dedicated image enhancer can complement either editor.
Quick Answer: Photopea vs GIMP, Which One to Choose?
Photopea is ideal for browser-based editing and PSD workflows, while GIMP suits users who prefer customizable, open-source desktop software.
- Choose Photopea for quick edits, PSD projects, and editing without installation.
- Choose GIMP for desktop editing, plugins, and workflow customization.
- Consider an AI image enhancer if you need to reduce noise, improve detail, or upscale low-resolution photos.
The best choice depends on your editing needs and workflow.
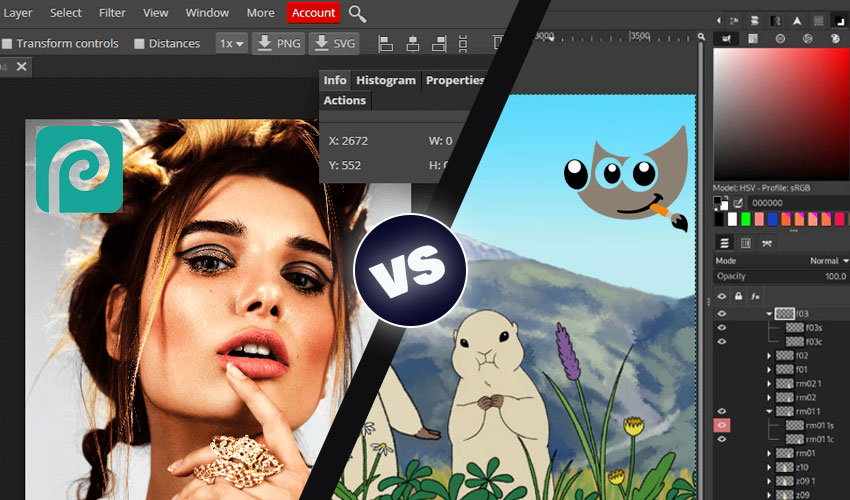
Photopea vs GIMP: At-a-Glance Comparison
Photopea vs GIMP: Key Differences
Photopea and GIMP share many core image editing capabilities, including layers, masks, selections, and color adjustments. Their biggest differences lie in how you access these tools, customize your workflow, handle PSD files, and work with images on different devices.
Interface and Ease of Use
Winner: Photopea for Photoshop users; GIMP for interface customization.
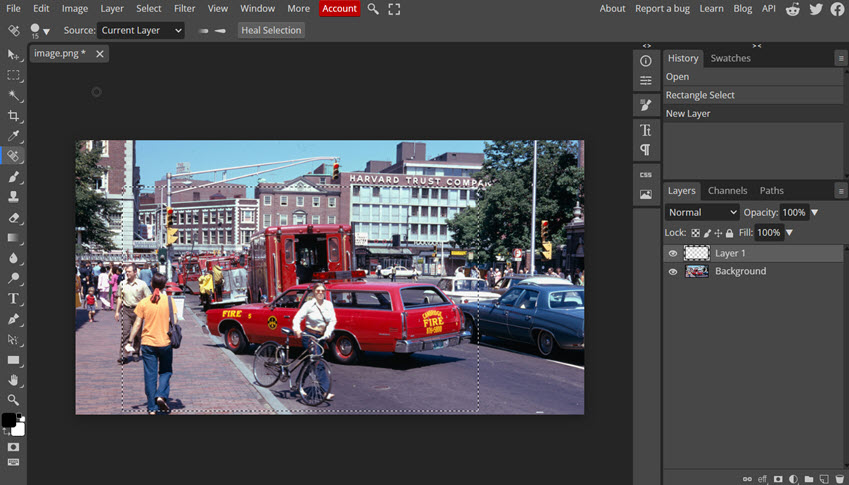
Photopea uses a Photoshop-like interface, with familiar panels, toolbars, and layer controls. If you've used Photoshop before, you may find it easier to navigate Photopea without spending much time learning a new layout. Since it runs in a web browser, you can start editing without installing a full desktop application. More for Photopea vs Photoshop >>
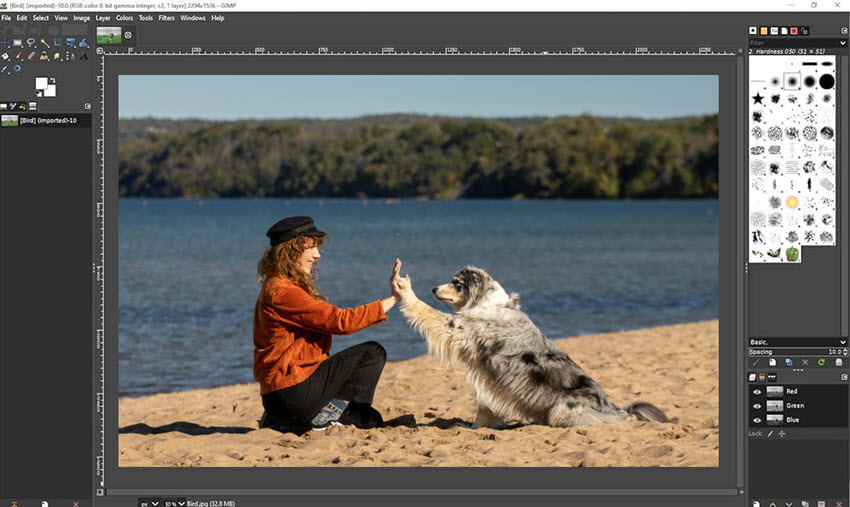
GIMP has its own interface and workflow, which may take some getting used to, especially if you're accustomed to Photoshop. However, it offers customizable workspaces and interface options, allowing you to arrange tools and panels around your preferences.
Neither editor is automatically easier for everyone. Photopea may feel more intuitive to Photoshop users, while GIMP may appeal to those who prefer a customizable desktop environment.
Editing Features and Retouching Tools
Verdict: Tie for everyday editing; the better choice depends on your retouching and design needs.
Photopea offers a Photoshop-style toolset for photo editing and graphic design. Its selection tools, layer masks, blending modes, adjustment layers, and text tools are useful for isolating subjects, combining images, editing posters, and creating social media graphics. You can also use tools such as the Spot Healing Brush, Clone Stamp, and other retouching options to remove small imperfections or clean up distracting elements. Adjustment layers and blend modes make it easier to refine colors and tones while keeping edits flexible.
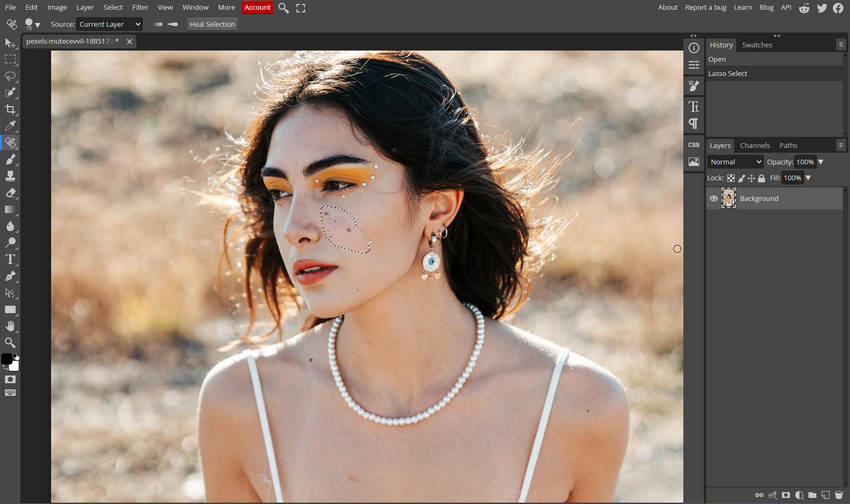
Learn More: How to Use Photopea to Edit Photos for Beginners
GIMP provides a comprehensive set of tools for photo correction, retouching, and image compositing. Its selection tools, layer masks, paths, and customizable brushes support precise edits, while tools such as the Clone, Heal, and Perspective Clone tools can help repair imperfections or correct specific areas. GIMP also offers color adjustment tools for managing brightness, contrast, levels, curves, and color balance. For complex compositions, its layers, masks, and blend modes provide control over how different image elements interact.
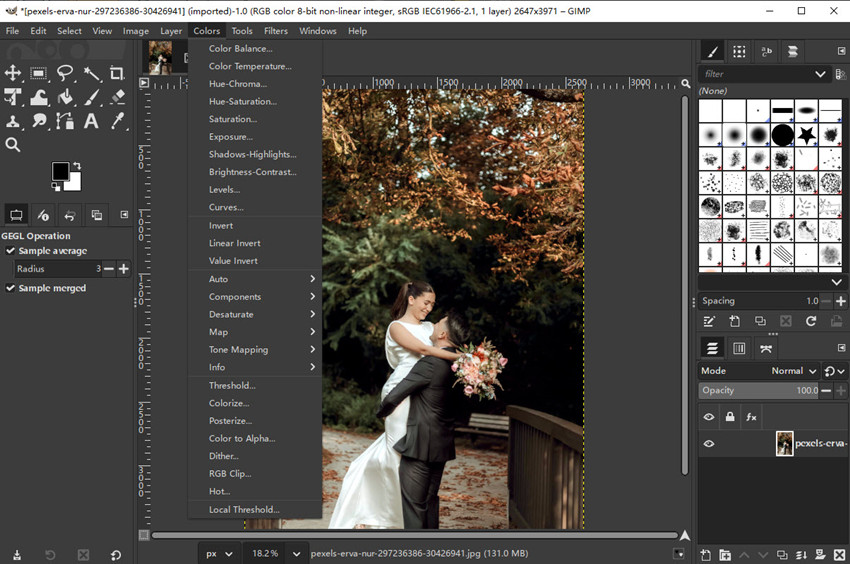
Both editors can handle tasks such as removing blemishes, adjusting colors, combining multiple images, and designing graphics. The difference is often in the workflow: Photopea may feel more familiar to Photoshop users, while GIMP offers a flexible desktop environment with extensive customization options. For most routine edits, neither has a universal advantage; the tools you need and the way you prefer to work matter more than the feature list alone.
Plugins, Extensions, and Customization
Winner: GIMP for plugins and workflow customization.
GIMP has an established ecosystem of third-party plugins and scripts that can extend its functionality. Depending on the tools available, these extensions can support specialized image processing, automate repetitive tasks, or adapt the editor to a particular workflow. This makes GIMP a strong option for users who want to customize their editing environment beyond its built-in features.
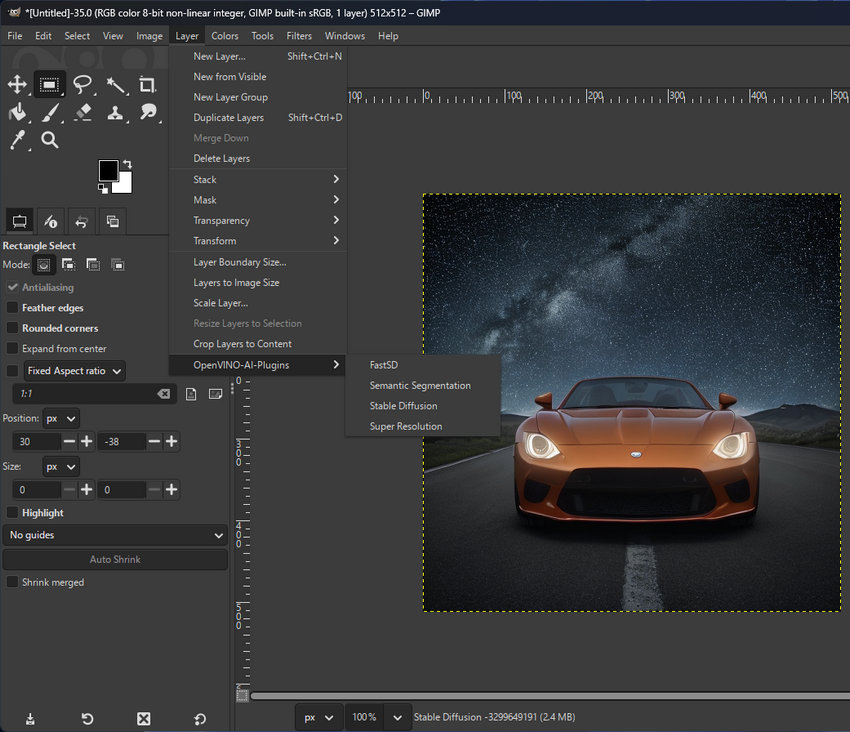
Photopea includes a substantial set of built-in editing tools and supports certain scripting and automation workflows. However, its extension options work differently from the traditional desktop plugin ecosystem available to GIMP.
If plugins, scripts, and deeper customization are priorities, GIMP generally has the advantage. If the built-in tools already meet your needs and you value being able to edit directly in a browser, Photopea may be the more convenient choice. Keep in mind that plugin availability, compatibility, and setup requirements can vary.
PSD and File Format Support
Winner: Photopea for PSD compatibility and editing.
Photopea is particularly convenient for working with Photoshop documents (PSD). You can open PSD files in your browser and continue editing many of their existing elements, making it useful when you need to make changes to a design without opening Photoshop.
GIMP can also open and export PSD files, but compatibility may vary depending on how a document was created. Certain layer effects, smart objects, adjustment layers, and other Photoshop-specific features may not transfer as expected, especially in complex projects.
If you frequently exchange editable files with Photoshop users, Photopea is often the more convenient option. For either editor, check important layers and effects after importing a complex PSD, and verify the exported file before sharing it with others.
Performance, Privacy, and Offline Use
Winner: GIMP for offline desktop editing.
Photopea runs in a browser, so its performance can depend on your browser, available memory, device specifications, and the size and complexity of the image. Smaller projects may run smoothly on modest hardware, while large files with many layers can require more resources. Its browser-based workflow is convenient, but it is not the same as having a fully independent desktop application.
GIMP processes images locally through its installed desktop application and can be used offline once installed. This makes it a practical choice for users who prefer a desktop workflow or need to work without a continuous internet connection.
Privacy also deserves separate consideration. Browser-based operation does not automatically mean that every image is uploaded to a cloud service, and local desktop editing does not by itself guarantee complete privacy. Review the relevant software's data-handling practices and consider your own security requirements, especially when working with sensitive images.
If you regularly edit large files or use a lower-powered computer, test both editors with representative projects before committing to a workflow.
Pricing and Accessibility
Winner: Tie. GIMP is fully free; Photopea is easier to access.
GIMP is a free and open source editor, with no paid subscription required to use its core editing features. You can download it for supported desktop operating systems and customize your setup as needed.
Photopea offers a free version supported by ads, along with paid options for users who want an ad-free experience or other premium benefits. Because it runs in a browser, you can start using it without going through a traditional desktop installation process.
Both editors provide capable tools for many everyday image editing tasks without requiring a conventional paid editing subscription. The better value depends on what matters to you: GIMP's open-source desktop environment and extensibility, or Photopea's browser-based accessibility and convenient PSD workflow.
Photopea vs GIMP: Which Is Better for Your Workflow?
Photopea and GIMP can both handle a wide range of image editing tasks, but the better choice depends on how you work. Consider whether you need quick access to PSD files, a customizable desktop environment, or a tool that fits your existing editing habits.
Choose Photopea for Quick Edits and PSD Projects
Best for: Browser-based editing, quick design changes, and Photoshop file workflows.
Photopea is a practical choice when you need to edit an image without installing desktop software. You can open it in a browser, make your changes, and export the finished file, making it convenient for occasional editing tasks or working on a computer where you cannot install applications.
Photopea is especially useful for tasks such as:
- Opening an existing PSD file to update text, images, layers, or other design elements.
- Creating or modifying social media graphics, posters, banners, and promotional materials.
- Making quick photo adjustments or retouching images without launching a full desktop editor.
- Switching between computers where installing and configuring desktop software is inconvenient.
Its browser-based workflow also makes it easy to get started. However, a stable internet connection is generally the most reliable way to access Photopea, and performance can vary with your browser, device, and project complexity. If you frequently work with complex PSD files, check that important layers and effects remain intact after opening them.
Verdict: Choose Photopea if convenience, browser access, and editing PSD files are your main priorities.
Choose GIMP for Advanced Desktop Editing
Best for: Customizable editing workflows, detailed image manipulation, and local desktop work.
GIMP is better suited to users who want a desktop editor they can configure and use over the long term. Its selection, masking, retouching, and compositing tools support detailed image manipulation, while third-party plugins and scripts can extend the software for more specialized tasks.
GIMP may be a better fit if you regularly:
- Build complex compositions with multiple layers, masks, and image elements.
- Retouch photographs or make precise adjustments to specific areas of an image.
- Use plugins and scripts to extend editing capabilities or automate repetitive tasks.
- Prefer open-source software that runs locally and remains available for offline editing after installation.
GIMP does require installation, and its interface and workflow may take time to learn if you are used to Photoshop. Some advanced tasks may also require additional plugins or a different approach than in other editors. Still, its flexibility makes it a strong option for users who want more control over their desktop editing environment.
Verdict: Choose GIMP if you value customization, extensibility, and a desktop-based editing workflow.
Reading More: How to Edit Photos in GIMP
Choose Based on Your Editing Habits and Environment
Features are only part of the decision. The software that fits your routine is often the one that lets you finish your work with fewer interruptions.
- You work across different computers: Photopea can be more convenient when you need browser access and cannot install software on every device. Keep in mind that access to your files and the editor's full functionality still depends on your setup.
- You mainly edit on one computer: GIMP may suit you better if you want a desktop application and plan to maintain a customized collection of tools, plugins, or scripts.
- You collaborate with Photoshop users: Photopea is often a convenient option for opening and continuing to edit PSD projects, although complex effects and layers should still be checked for compatibility.
- You already know one editor well: If your current software handles your regular tasks, there may be little reason to switch just because the other editor offers a few different features.
In short, choose based on the tasks you perform most often, the files you exchange, and the environment in which you work. You do not need to switch editors simply to access a longer feature list.
What If Your Photo Still Doesn't Look Right After Editing?
Photopea and GIMP offer tools for adjusting colors, retouching details, and sharpening images, but some quality issues need more than conventional editing. Heavy noise, compression artifacts, strong blur, and low resolution can be difficult to correct without losing fine textures or introducing unwanted artifacts.
If you are happy with your current editor but still struggle with image quality, you do not necessarily need to switch tools. A dedicated image enhancement tool can complement your existing workflow by reducing noise, improving perceived detail, and upscaling images. Results depend on the original photo, and missing information cannot always be recovered accurately.
Enhance Photo Quality with Aiarty Image Enhancer
If Photopea or GIMP already fits your editing workflow, you do not need to replace it to address image quality issues. Aiarty Image Enhancer is designed to complement traditional editing software by focusing on clarity, noise reduction, detail enhancement, and image upscaling.
What Aiarty Image Enhancer Can Help With
Instead of replacing your regular editing tools, Aiarty focuses on image quality problems that can be difficult to address through manual adjustments alone.
- Reduce image noise: AI denoising helps reduce grain and unwanted noise, particularly in photos taken in low light or at high ISO settings.
- Improve clarity and detail: AI enhancement can help improve the appearance of soft or slightly blurry images and bring out visible textures. Results vary with the severity of the blur and the quality of the source image.
- Upscale low-resolution photos: Enlarge images for larger displays, prints, or other output requirements while reconstructing plausible details.
- Reduce JPEG artifacts: Help clean up some compression-related blemishes and blocky textures in heavily compressed images.
- Choose an appropriate output size: Enhance images at their original dimensions or upscale them using available enlargement options, depending on the intended use.
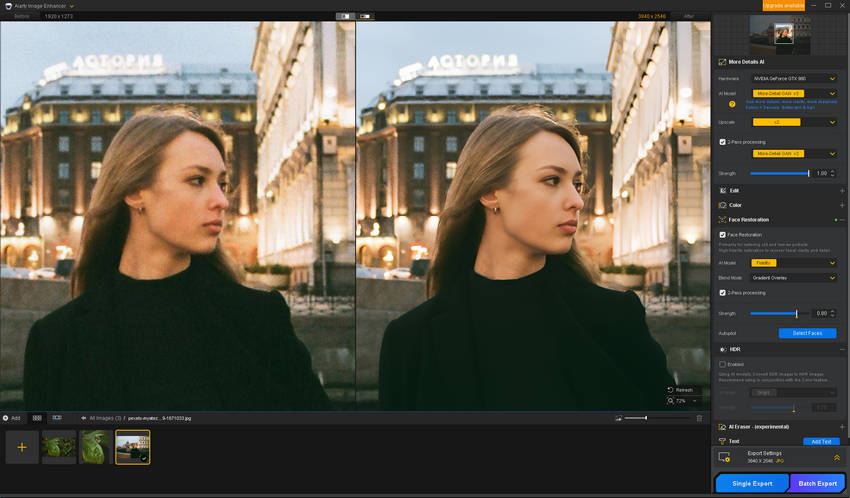
The goal is to improve the image's visual quality while retaining a natural appearance. AI-generated details may not match the original scene exactly, so review important textures and facial features rather than assuming every enhancement is accurate.
Ready to improve your photos? Try Aiarty Image Enhancer for clearer details and better image quality.
How to Combine Aiarty with Photopea or GIMP
You can keep Photopea or GIMP as your main editor and use Aiarty only when a photo needs additional enhancement. The best order depends on the image and the type of editing involved.
- Edit: Open the image in Photopea or GIMP to crop it, adjust composition and colors, work with layers and masks, or make the necessary retouching edits.
- Enhance: If the image still has noticeable noise, softness, compression artifacts, or insufficient resolution, process it with Aiarty Image Enhancer.
- Review: Compare the enhanced result with the original. Check fine textures, hair, feathers, skin, and other detailed areas for unnatural patterns or excessive sharpening.
- Finish: If you still need to add text, adjust a layout, or combine design elements, bring the enhanced image back into Photopea or GIMP.
For a simple photograph, enhancing it before the final adjustments may work well. For a layered design or an image that already contains text and graphics, consider the file format and whether you need to preserve editable elements before choosing when to enhance it.
Before-and-After Example: Improving a Low-Quality Photo
To test Aiarty Image Enhancer, we used a downloaded close-up photo of a bee collecting nectar, measuring 1276 × 1255 pixels. We applied the MoreDetail GAN V3 AI model with 2× upscaling and a Strength setting of 0.57.
The enhanced result showed improved overall clarity, with noise reduced in both the bee and the background without an obvious loss of fine detail. The bee's tiny hairs became distinctly visible, while the petal textures looked clearer and natural. Edges were well-defined without appearing excessively sharp, and no obvious residual blur remained in the enhanced image.
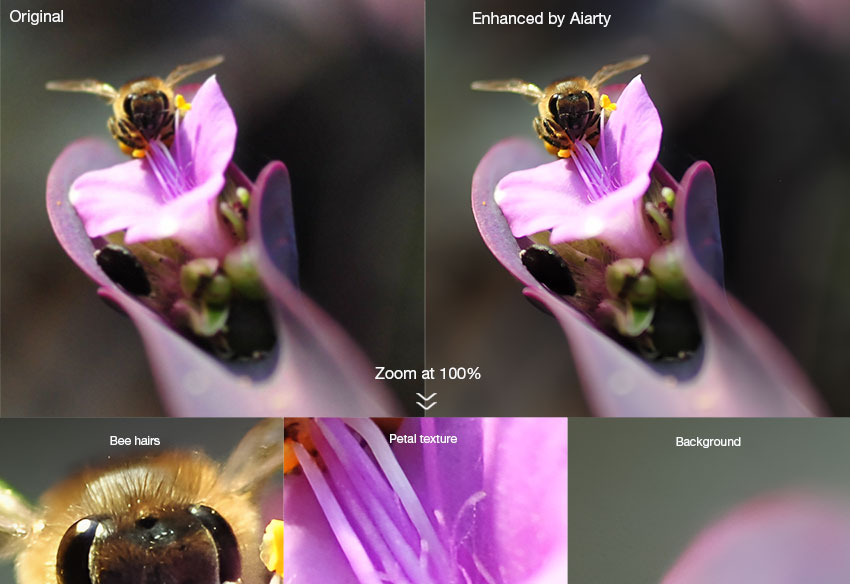
This example shows how AI enhancement can improve fine textures and reduce noise while maintaining a natural-looking result. Actual results will vary depending on the source image, so it's worth checking both the overall image and close-up details when evaluating an enhancement.
Need more clarity or resolution in your photos? Try Aiarty Image Enhancer to improve image quality while keeping Photopea or GIMP as your main editing tool.
Final Verdict: Photopea or GIMP?
Photopea and GIMP are both capable image editors, but they suit different workflows. Photopea is a better fit for browser-based editing, convenient PSD workflows, and quick design tasks, while GIMP is better suited to users who want a free, open-source desktop editor with extensive plugin support and customization options.
If your main challenge is not editing flexibility but image quality, such as blurry details, visible noise, or low resolution, either editor can be complemented by a dedicated image enhancement tool. The best choice ultimately depends on your device, editing habits, and the tasks you need to accomplish.
 FAQs About Photopea vs GIMP
It depends on your workflow. Photopea is more convenient for browser-based editing, quick design tasks, and working with PSD files. GIMP is a better fit for users who prefer desktop software, open-source tools, and extensive plugin support. Neither is universally better for every editing task.
Yes. GIMP is free, open-source software with no required subscription or paid license. Photopea also offers a free version, supported by ads, along with an optional Premium plan.
Yes. GIMP can open and export PSD files, but some Photoshop features may not transfer perfectly. Layers and other common elements may be retained, while certain effects, text properties, or blending features can change. Photopea is generally more convenient for editing PSD files directly, although complex files should still be checked for compatibility.
Photopea may be easier for beginners who are familiar with Photoshop or want to make quick edits without installing software. GIMP may take longer to learn because of its interface and range of tools, but it offers more flexibility for users who want to build a customizable desktop editing workflow.
Both Photopea and GIMP offer sharpening and other editing tools that can improve the appearance of slightly soft photos. However, heavy blur, image noise, and low resolution can be harder to address with conventional editing alone. A dedicated AI image enhancer may help reduce noise, improve perceived detail, and upscale images, although results depend on the original photo and cannot guarantee recovery of missing information.
You May Also Like


This post was written by Brenda Peng, a seasoned editor at Digiarty Software who focuses on practical image-editing workflows. With AI assistance for brainstorming and drafting, the article is reviewed for accuracy by our expert Abby Poole.
