If you want to explore a powerful, free image editor, GIMP is an excellent choice. As a cost-free alternative to Photoshop, it offers everything from basic photo corrections to advanced editing, drawing, and image enhancement. This GIMP tutorial will guide you step by step through GIMP’s essential tools and workflows, helping beginners and intermediate users alike learn how to use GIMP to edit photos, create drawings, and enhance images effectively.
In this complete GIMP tutorial, you'll learn:
- How to use GIMP for beginners
- How to edit photo in GIMP step by step
- How to enhance and denoise images in GIMP
- When GIMP is not enough (and how to fix it with AI tools)
What Is GIMP and Why Use It?
GIMP is a free, open-source image editor used for photo editing, image retouching, graphic design, drawing, etc. It’s widely used by beginners and professionals who want a cost-free alternative with powerful features.
Some of the key features of GIMP include:
- Photo Editing & Retouching: Adjust colors, brightness, contrast, sharpen images, remove noise, fix imperfections.
- Drawing & Illustration: Use brushes, pencils, and paths to create digital art directly within the program.
- Graphic Design: Add text, shapes, and effects for posters, social media graphics, or web content.
- Layer Management: Work non-destructively by stacking edits and effects on separate layers.
- Extensibility: Supports plugins and scripts to automate tasks or add new features.
Because GIMP is feature-rich and open-source, its interface can feel overwhelming at first. There are multiple panels, tool options, and menus to navigate, which can be intimidating for beginners. While this complexity allows for advanced control, it also creates a learning curve for new users. That’s why many beginners search for GIMP tutorials or step-by-step guides.

How to Use GIMP to Edit Photos Step by Step
To help beginners and intermediate users alike understand how to use GIMP software effectively, from basic adjustments to more advanced techniques like enhancing and denoising images, drawing, and adding text. Throughout this tutorial, we’ll cover essential functions such as cropping, scaling, correcting colors, managing layers, and applying creative effects.
By the end of this GIMP editing tutorial, you’ll not only know how to use GIMP for beginners, but also gain practical tips for combining manual edits with AI enhancements for sharper, cleaner, and more polished images.
1. Start with GIMP
Go to the official website of GIMP. Download and install the latest version for Windows/Mac/Linux. Then run it and click File to open the photo that you want to edit.
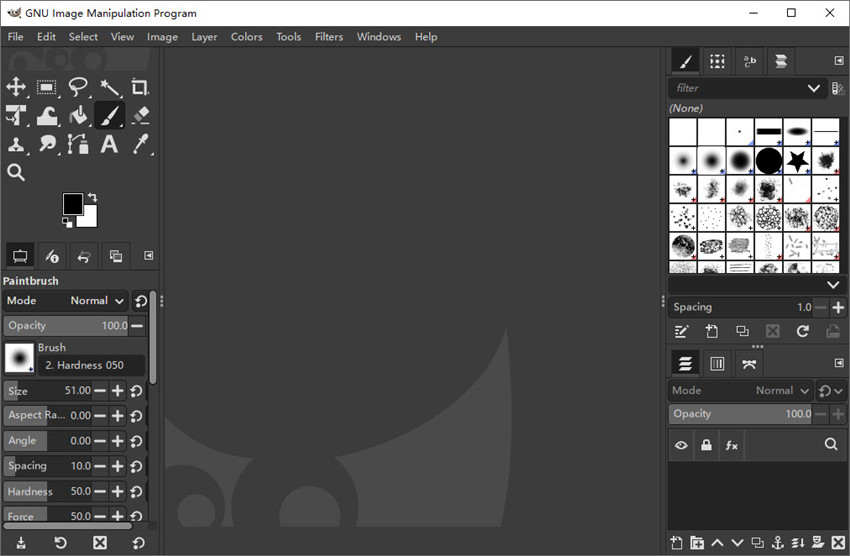
Familiarize yourself with the main panels:
- Toolbox (left): selection, brush, eraser, and transform tools.
- Layers panel (right): for managing different layers non-destructively.
- Canvas (center): where your image is displayed.
Tip: If you’re a beginner, take a few minutes to hover over each tool and read the tooltips. Knowing your workspace is the first step in learning how to use GIMP for beginners.
2. How to Crop and Scale Image in GIMP?
Cropping and scaling are the foundation of any GIMP photo editing workflow. Proper composition ensures your image focuses on the subject, while scaling adjusts the size for your intended output.
When you need to improve composition, remove unwanted areas, or focus on a subject, you can use the Crop Tool. Just select the Crop Tool (Shift + C) from the toolbox. Then click and drag over the area you want to keep and adjust the handles to fine-tune the selection. After that, press Enter to apply the crop.
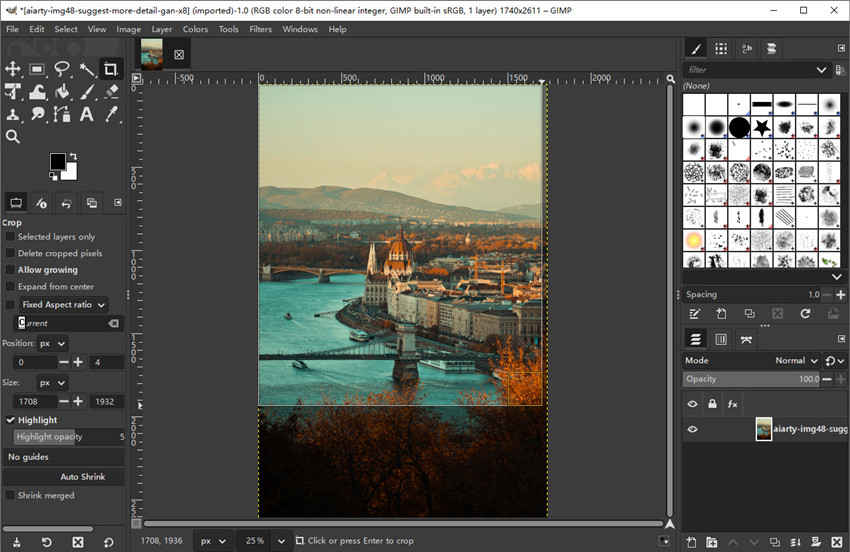
Pro tip: Use the Rule of Thirds overlay to make your composition more visually appealing. Cropping before scaling ensures you focus only on the most important parts of your image.
When you need to change image size or resolution for web, social media, or printing, you can use the Scale Image option. To scale images in GIMP, go to Image and choose Scale Image. Then enter the desired width and height. You can adjust X and Y resolution if preparing for print or web.
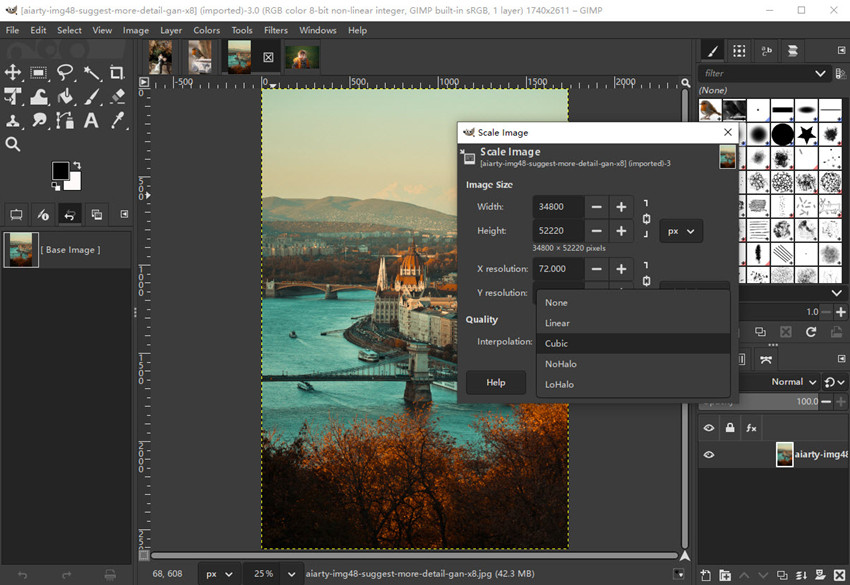
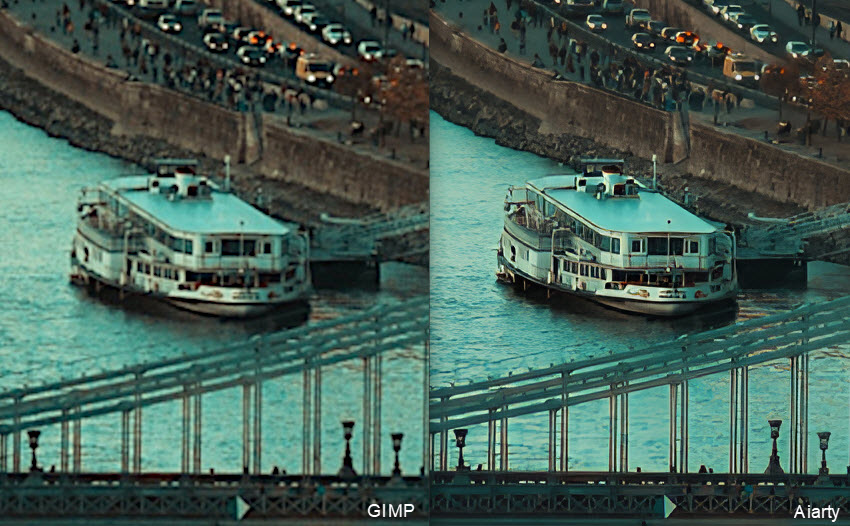
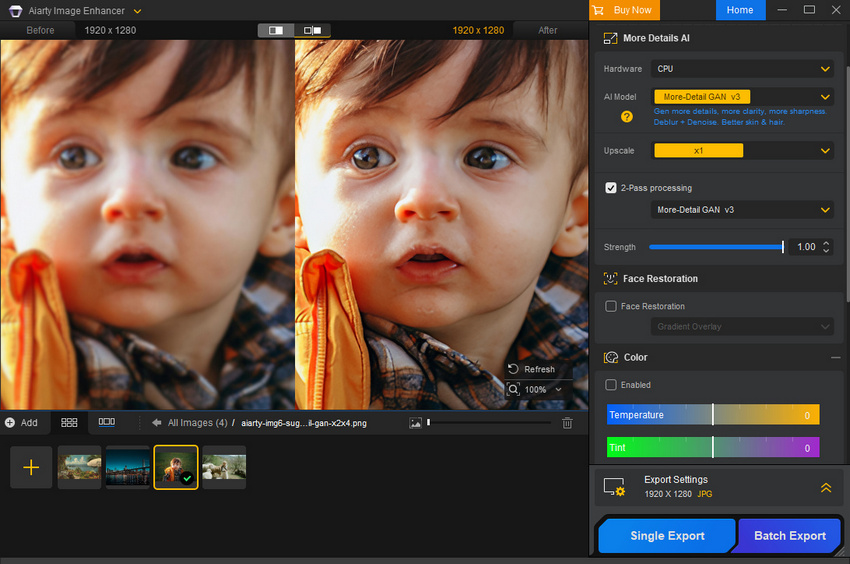
Note: Scaling up (enlarging) in GIMP can result in blurry or pixelated images, especially for low-resolution photos. If you want to improve photo resolution/quality, you can try tools like Aiarty Image Enhancer. It uses AI algorithms to upscale images to 4K/8K/32K, reconstruct textures, reduce noise, and produce sharper edges than traditional interpolation.
By combining GIMP with AI enhancement, you can safely increase image size for print, social media, or portfolio use without sacrificing quality.
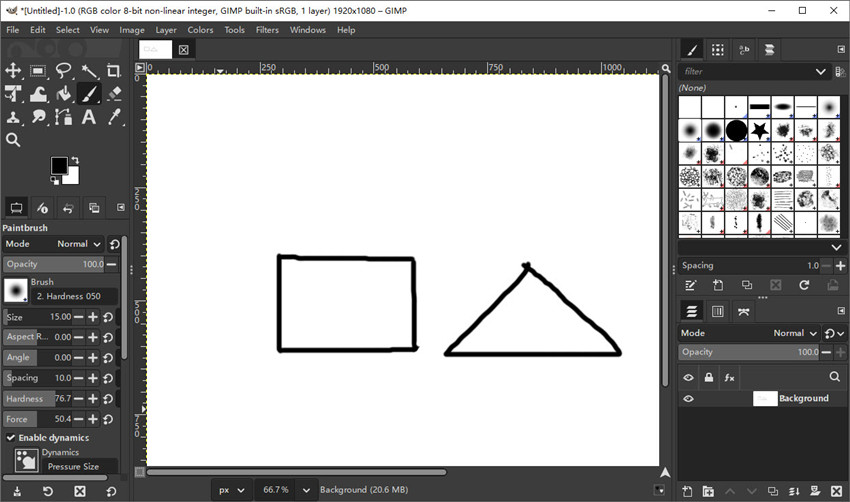
3. How to Draw in GIMP?
GIMP is not only for photo editing; you can also use it for digital drawing and illustration, which makes it a versatile tool if you want to edit photos and create graphics in one place.
When you want to create simple drawings, annotations, or custom graphics, you can start with the Brush Tool. Go to File > New and create the canvas. Then select the Brush Tool (P) from the toolbox, then choose the brush type, size, and hardness based on your needs. After that, you can draw directly on the canvas.
For better results, you can use a graphics tablet to enable pressure sensitivity, which gives you more natural strokes. You can also combine the Brush Tool with the Eraser Tool to refine lines and clean up edges.
Tip: It’s a good idea to draw on a new layer so you can edit or remove your drawings without affecting the original image. This is especially useful when learning how to use GIMP for beginners.
4. How to Change Color in GIMP?
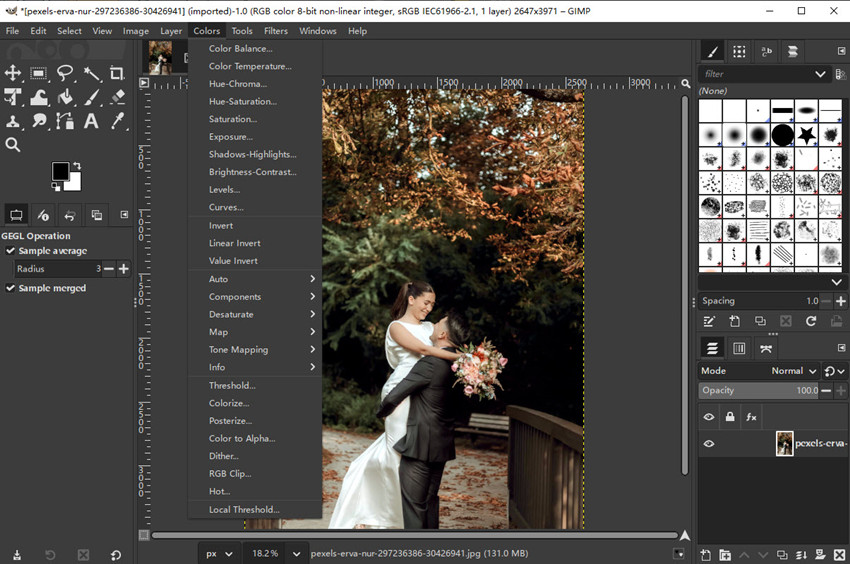
Correcting colors, contrast, and brightness is one of the most important parts of how to use GIMP for photo editing, especially if your image looks too dark, flat, or washed out.
When you need to quickly adjust overall brightness, you can go to Colors > Brightness-Contrast and move the sliders to make your image lighter or darker.
For more precise control, you can use Colors > Levels, where you can adjust shadows, midtones, and highlights to improve exposure balance. If you want more advanced control, Colors > Curves allows you to fine-tune contrast and color tones for a more professional look.
Tip: Before making major adjustments, it’s a good idea to duplicate your layer so you can preserve the original image. This is a common practice in any GIMP editing tutorial.
5. Layers (Essential for Non-Destructive Editing)
After applying basic edits, you may want more control over your changes. This is where layers become essential in editing photos in GIMP.
Layers allow you to make adjustments without permanently changing the original image. To get started, you can right-click your image layer and choose Duplicate Layer, then apply edits on the new layer.
You can also add different layers for color correction, sharpening, or effects, and use layer masks to apply changes only to specific parts of the image. This gives you much more flexibility compared to editing everything directly on one layer. Remember to name your layers to stay organized, especially when working on more complex edits involving multiple adjustments and drawings.
6. How to Erase in GIMP?
When you need to remove unwanted parts or refine edges after editing or drawing, you can use the Eraser Tool (Shift + E). Find the Eraser Tool in the Toolbox (usually on the left) or use the shortcut Shift + E. Then adjust the brush size and hardness depending on how precise you need to be. Softer edges work better for blending, while harder edges are useful for clean removals.
The eraser works best when used together with layers. For example, if you’ve drawn something on a separate layer, you can erase parts of it without affecting the original image underneath.
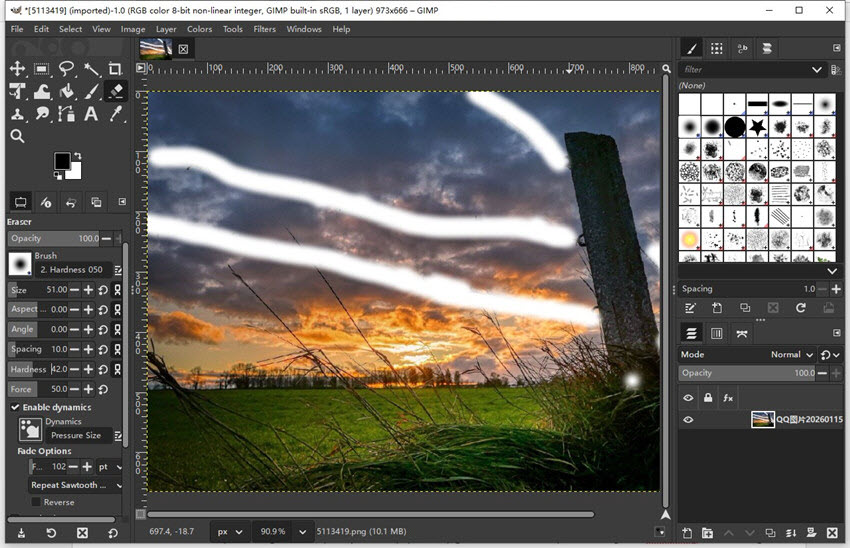
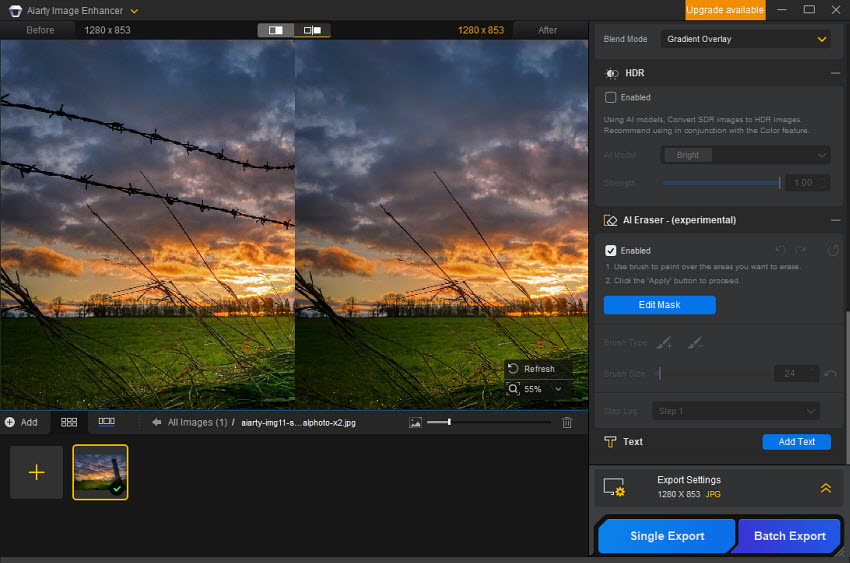
Tip: The Eraser Tool in GIMP only removes pixels, turning them transparent (Alpha channel); it cannot automatically replace or preserve the background. If you want to remove objects while keeping the background intact, you can use Aiarty Image Enhancer’s AI Eraser, which intelligently erases unwanted elements and reconstructs the background seamlessly.
7. How to Add Effects in GIMP (Denoise, Sharpen, Creative Filters)?
Applying effects is a key step if you want to enhance images in GIMP and make them look sharper or more visually appealing.
For creative edits, you can explore Filters > Artistic, such as Oilify or Canvas, to give your image a stylized look. You can also use Filters > Light and Shadow to add depth and dimension.
When you need to improve image sharpness, you can go to Filters > Enhance > Unsharp Mask and adjust the radius, amount, and threshold to bring out more details. Or if you want to enhance some grainy or low-light images, you can also find filtesr like High Pass, Despeckle, etc. to improve image quality in GIMP.

However, keep in mind that traditional sharpening and effects in GIMP are mostly manual and can sometimes introduce noise or artifacts. If your image is low-quality or noisy, you may get better results by enhancing and denoising it first using AI tools like Aiarty Image Enhancer, then returning to GIMP for final edits.
Bonus tips: To bridge this gap, many creators combine GIMP with Aiarty Image Enhancer, which uses AI to upscale and enhance photos. By learning from large training datasets, Aiarty can predict missing details, restore natural patterns, and suppress noise in one unified workflow. This makes it especially effective for restoring low-resolution photos, compressed web images, and old or blurry pictures, where GIMP’s traditional Enhance and Scale tools reach their limits.
8. How to Rotate in GIMP
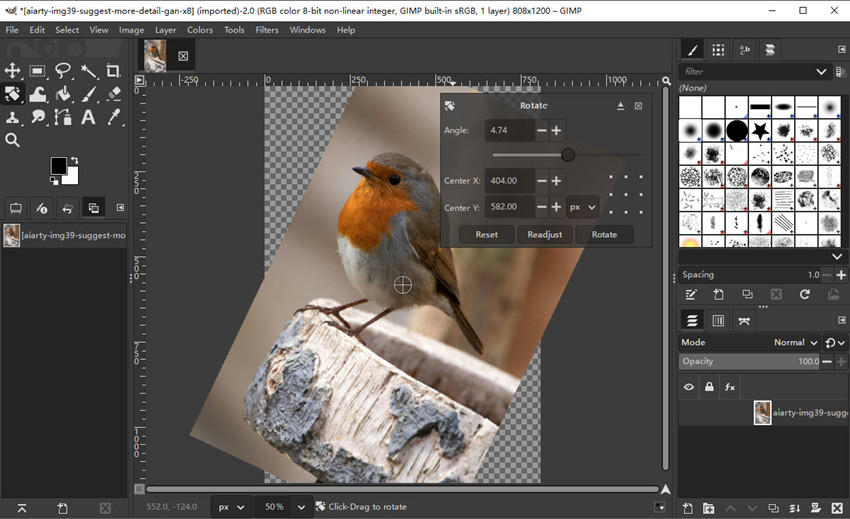
When your image or a specific layer is tilted, you can easily correct it using GIMP’s Rotate Tool. To do this, go to Tools on the top menu bar and choose Transform Tools. Click Rotate and the Rotate dialog box will appear with several options. This is especially useful for straightening horizons, correcting tilted photos, or rotating individual objects to improve composition. Knowing how to rotate in GIMP ensures your images are properly aligned and ready for further editing.
If your photo has perspective issues, such as leaning buildings, skewed objects, or product shots photographed at an angle, use the Perspective Tool (Tools > Transform Tools > Perspective). Click and drag the corners to correct the distortion and make the image look natural. For best results, apply rotations and perspective corrections after cropping but before applying final effects, so you maintain image quality throughout your workflow.
9. How to Select and Deselect in GIMP?
Selections allow you to isolate parts of your image for precise edits, adjustments, or effects. Mastering selections is essential in any edit photo GIMP workflow.
Common Selection Tools
- Rectangle Select Tool: Quickly select rectangular areas.
- Free Select Tool (Lasso): Draw freehand selections for irregular shapes.
- Fuzzy Select Tool (Magic Wand): Automatically select areas of similar color.
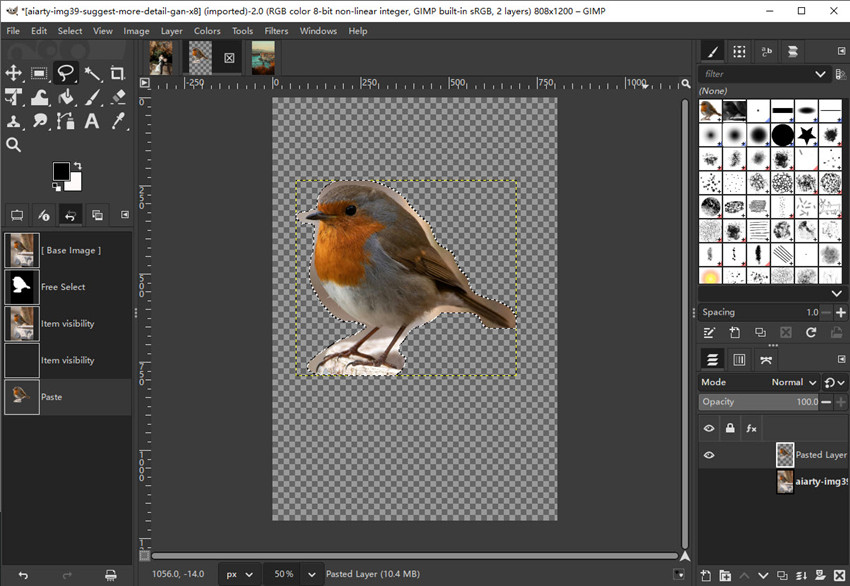
- Alpha to Selection: Alpha to Selection automatically selects all non-transparent areas in a layer. It's used to select objects in PNGs or layers with transparency and prepare to remove backgrounds or apply localized edits.
To use Alpha selection in GIMP, go to Layer > Transparency > Alpha to Selection. The non-transparent areas will become the selection. This method is especially useful for detailed objects like logos, illustrations, or portraits.
As to how to deselect in GIMP. After finishing edits on a selection, you often need to deselect before continuing. Go to Select > None. Or use the shortcut: Shift + Ctrl + A (Windows) / Shift + Command + A (Mac). Always deselect before starting a new selection to avoid accidental edits.
Combine selections with layers or masks for non-destructive edits. Save complex selections via Select > Save to Channel to reuse later. Use Alpha to Selection plus Aiarty Image Matting for AI-assisted background removal on complex images—this saves time and preserves fine details.
10. How to Remove Background in GIMP?
Removing the background is one of the most requested tasks in edit photo GIMP workflows, especially for product photos, portraits, or creative projects.
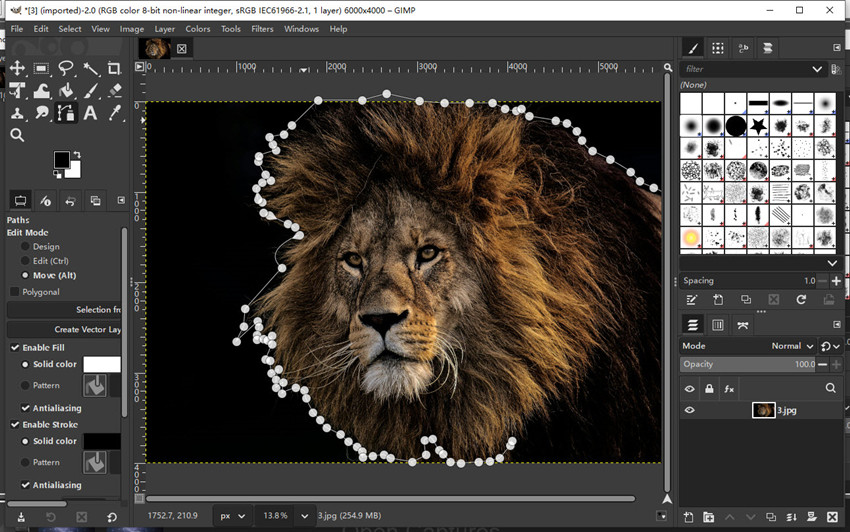
Manual Method (Fuzzy Select or Paths Tool):
- Fuzzy Select (Magic Wand): Select background areas and delete
- Paths Tool: Draw around the subject and convert path to selection for precise masking
While these manual methods work, they can be time-consuming and require careful adjustments, especially for images with fine details like hair or complex edges.
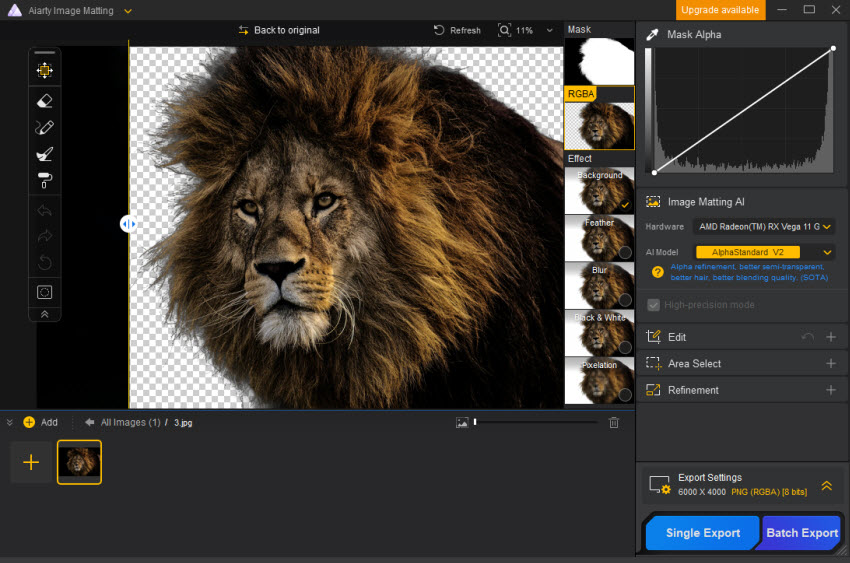
For faster results, you can use AI-powered tools like Aiarty Image Matting, which automatically detect and remove backgrounds in just a few clicks. This one-step operation preserves fine details, reduces errors, and saves significant editing time compared to manual selection. After removing the background, you can continue refining your image in GIMP, adding new backgrounds, effects, or final touches as needed.
11. Advanced Tools (Paths, Text, and Creative Design)
If you want to go beyond basic photo editing, GIMP also includes tools for design and creative work. When you need to add text, you can use the Text Tool (T) to insert and format text directly on your image, adjusting font, size, and color. For more advanced control, the Paths Tool (B) lets you create precise curves and shapes, which can be converted into selections or used for design elements like logos and outlines.
You can even convert text into editable shapes using Text to Path, which is useful for custom typography and creative effects. These tools are especially useful for graphic design tasks, but are optional if your main goal is basic photo editing.
Final Verdict
GIMP is a powerful and flexible tool for photo editing, drawing, and image enhancement, especially for users looking for a free alternative to professional software. By learning how to use essential tools like crop, scale, layers, selection, and effects, you can handle most everyday editing tasks with ease.
At the same time, combining GIMP with modern AI tools can significantly improve your workflow. Tasks like denoising, background removal, and image enhancement can be done faster and more accurately, allowing you to focus on creativity rather than manual adjustments.
Whether you’re just starting to learn GIMP or looking to refine your editing process, mastering these steps will help you create cleaner, sharper, and more professional-looking images.
 FAQ
FAQ
GIMP is beginner-friendly in terms of cost and functionality, but its interface can feel complex at first. As a free, open-source image editor, it offers powerful tools for photo editing, drawing, and image enhancement, which may require some time to learn. With a structured GIMP tutorial and step-by-step practice, most beginners can quickly get comfortable using it.
To edit a photo in GIMP, start by opening your image (File > Open), then apply basic adjustments like cropping, resizing, and color correction. You can use tools such as Brightness/Contrast, Levels, and Curves to improve the image, and apply sharpening or effects for final touches. Using layers and selections helps you make more precise edits in any edit photo GIMP workflow. For different tasks, just follow the how to edit photos in GIMP tutorials above.
Photoshop is generally considered easier for beginners due to its more polished interface and guided tools. GIMP, on the other hand, has a steeper learning curve but offers similar capabilities for photo editing and graphic design at no cost. If you’re willing to learn through a GIMP editing tutorial, it can become just as effective for most editing tasks.
To start using GIMP, download and install it from the official website, then open the software and load an image (File > Open). Familiarize yourself with the Toolbox, Layers panel, and Canvas. From there, begin with basic actions like crop, scale, and color adjustments to understand how to use GIMP for beginners.
One disadvantage of using GIMP is that some tasks, such as advanced background removal or high-quality image enhancement, can be more time-consuming compared to newer AI-based tools. While GIMP provides powerful manual controls, achieving professional results may require more steps and experience, especially when working with complex images.
You May Also Like
This post was written by Brenda Peng who is a seasoned editor at Digiarty Software who loves turning ordinary photos into extraordinary works of art. With AI assistance for brainstorming and drafting, the post is reviewed for accuracy by our expert Abby Poole for her expertise in this field.