


Photopea is a free, browser-based photo editor that lets you edit images without installing desktop software. Whether you want to crop a photo, adjust colors, remove a background, work with layers and masks, or create curved text, you can do it directly in Photopea. This step-by-step Photopea tutorial covers the essential tools and editing techniques, from opening an image to exporting the finished result.
Quick Answer: How to Use Photopea (Beginner Workflow)
To use Photopea, go to Photopea.com, open an image, and select the tools you need from the toolbar and menus. Follow these basic steps:
- Open an image: Go to File > Open to import a photo.
- Edit the photo: Crop, resize, adjust colors, or remove the background.
- Use layers and text: Apply layers and masks, rasterize when needed, or add and curve text.
- Enhance if needed: Reduce noise, improve clarity, or upscale with a tool like Aiarty Image Enhancer.
- Export the result: Choose File > Export As to save as JPG or PNG, or save as PSD to preserve editable layers.
Photopea is sufficient for many everyday editing tasks. If the original photo still needs additional enhancement after editing, you can incorporate an AI enhancement tool into your workflow before delivering the final image.
Get Started with Photopea
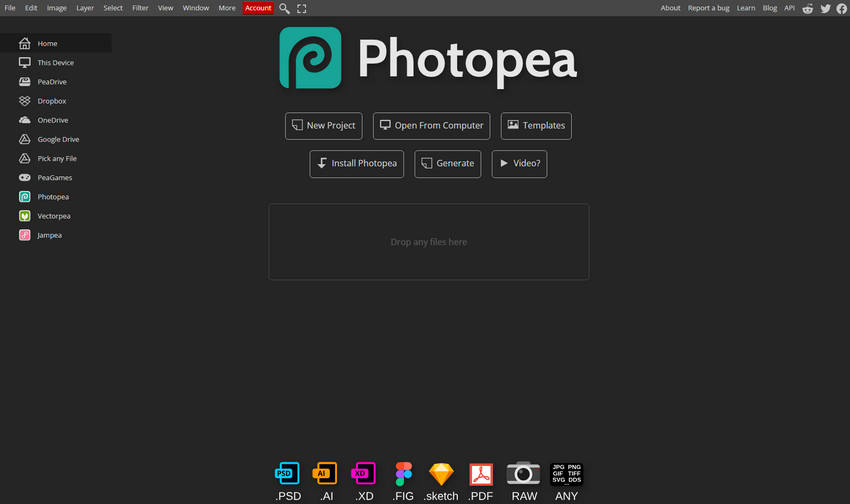
Open Photopea and Import an Image
Photopea is a browser-based photo editor, so you can start editing without installing software. Visit Photopea.com, then choose File > Open to upload an image from your computer. You can also select New Project to create a blank canvas with custom dimensions. Photopea supports common image formats such as JPG, PNG, WebP, and PSD.
Understand the Photopea Interface
The Photopea editor interface includes several main areas:
- Menu bar: Access commands for files, image adjustments, layers, filters, and exporting.
- Toolbar: Select tools for cropping, moving, selecting, painting, retouching, and adding text.
- Options bar: Adjust settings for the currently selected tool.
- Canvas: View and edit your image.
- Layers panel: Select layers, change their order, and control visibility.
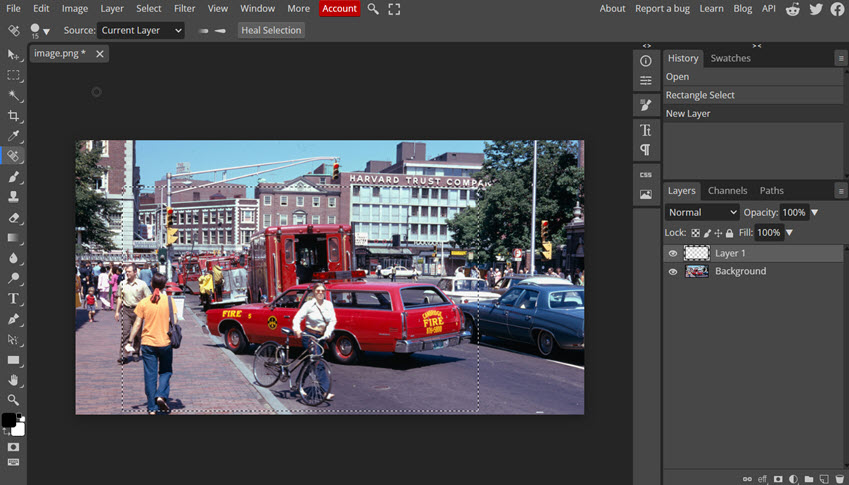
Before editing, check that you have selected the correct layer in the Layers panel. The available tool options change depending on the tool you choose.
Understand Layers Before Editing
Layers let you edit different elements of an image independently. For example, text, background elements, and pasted images can each sit on separate layers. Use the eye icon to show or hide a layer, and drag layers to change their stacking order. To protect your original image, keep an untouched copy or duplicate the layer before making major edits.
Related Reading: Photopea vs Photoshop: Which One Fits Your Workflow
How to Make Basic Photo Edits in Photopea
Photopea includes tools for common editing tasks, from cropping and resizing to color correction and background removal.
1. Crop an image: To crop a photo in Photopea, select the Crop Tool from the toolbar or press C. Drag the handles around the image to define the area you want to keep, adjust the crop boundaries, and press Enter to apply the crop. Cropping removes unwanted areas from the composition, but it does not increase the image’s actual resolution.
2. Resize an image: Go to Image > Image Size and enter the desired dimensions. Keep the aspect ratio locked to avoid distortion, and remember that enlarging a small image may reduce its apparent sharpness.
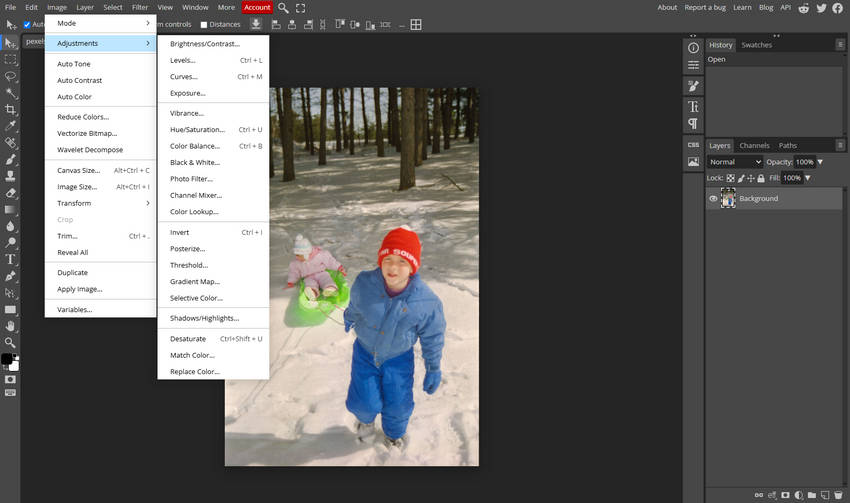
3. Adjust Brightness, Contrast, and Colors: Open Image > Adjustments and choose tools such as Brightness/Contrast, Hue/Saturation, or Color Balance. Make gradual changes to preserve natural-looking colors and details.
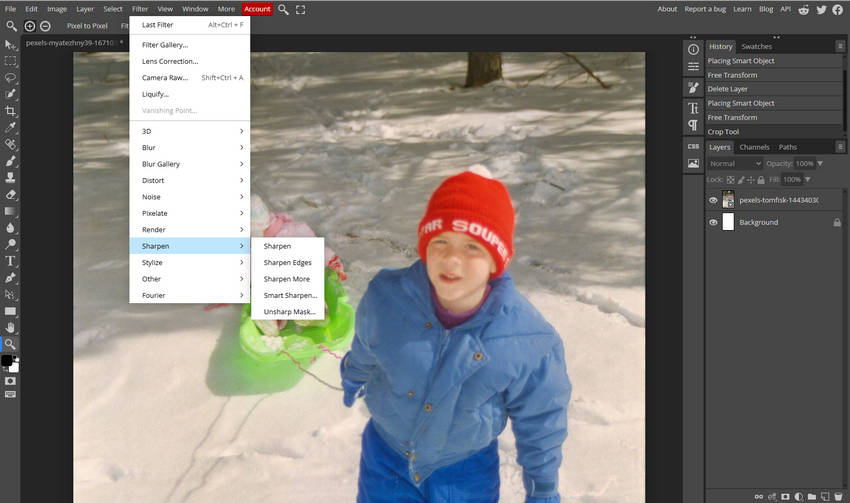
4. Sharpen an image: To make slightly soft details appear clearer, open the Filter menu and look for a sharpening filter, such as Unsharp Mask, if available in your current interface. Adjust the settings gradually and preview the result at 100% zoom. Avoid excessive sharpening, which can create halos around edges and emphasize noise. Sharpening can improve the appearance of existing details, but it cannot fully restore details lost through severe blur or low resolution.
5. Remove a Background: Use a selection tool, such as the Magic Wand or Quick Selection Tool, to select the background, then remove it or apply a layer mask. Export as PNG to preserve transparency.
How to Use Layers and Masks in Photopea
Layers let you edit and combine different image elements independently. Understanding how to manage layers, use masks, and control selections makes more complex edits easier to handle.
How to Add, Select, and Reorder Layers
Use the Layers panel to manage image elements. Click the new layer icon to create a layer, select a layer to edit it, or drag layers up and down to change their stacking order. You can also duplicate a layer when you want to keep the original unchanged. The eye icon toggles layer visibility, helping you compare edits or isolate individual elements.
How to Rasterize a Layer in Photopea
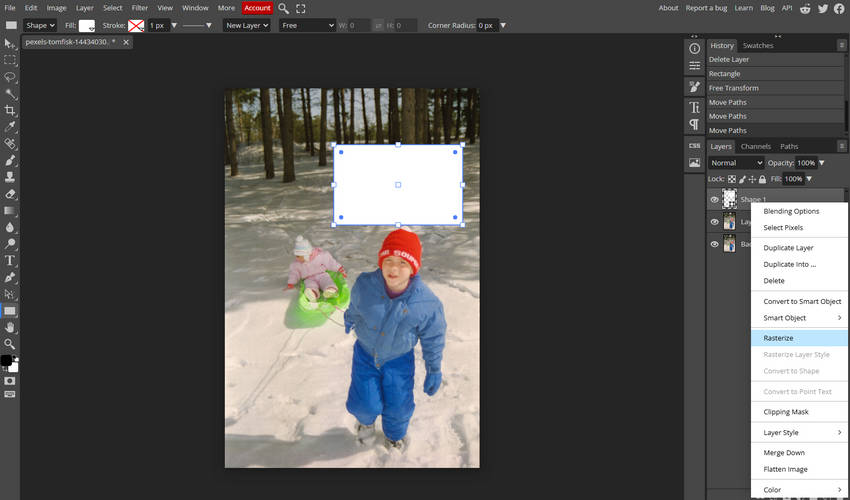
Rasterizing converts text, shapes, or other supported layer types into pixel-based content, allowing direct pixel editing. To rasterize a layer, right-click it in the Layers panel and choose Rasterize, if available for that layer type.
Rasterizing can remove the original editability of text and shapes, so keep a duplicate if you may need to change them later.
How to Mask in Photopea
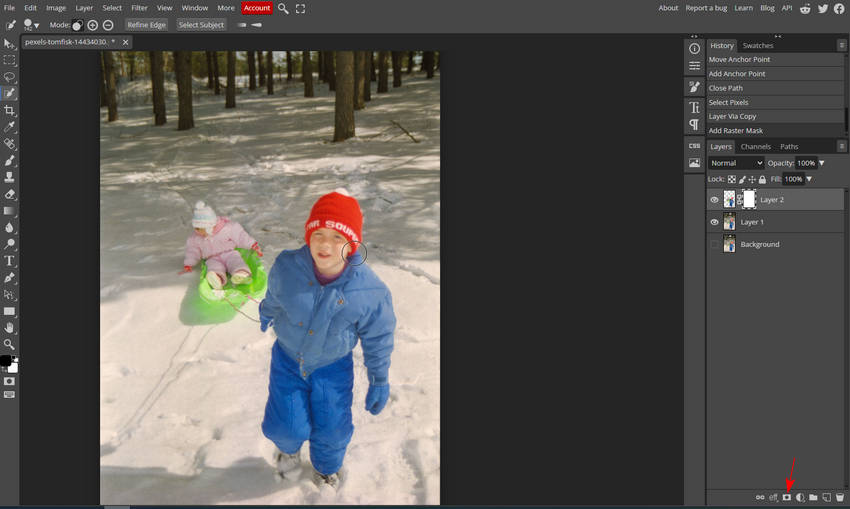
A layer mask lets you hide or reveal parts of a layer without permanently deleting the image content. Select a layer and click Add Raster Mask at the bottom of the Layers panel. Paint on the mask with black to hide areas, white to reveal them, and gray to partially reveal them. For example, you can hide part of a background to blend two images while keeping the original pixels available.
Learn More: How to Make a Clipping Mask in Photoshop
How to Deselect in Photopea
After making a selection, press Ctrl + D on Windows or Cmd + D on Mac, or choose Select > Deselect from the menu. This removes the active selection boundary so it no longer limits your edits. Deselecting does not delete pixels or remove a layer mask; it only clears the current selection.
How to Add and Curve Text in Photopea
Photopea lets you add text to photos, create curved headlines, and design text-based elements such as banners and badges. Keep text on editable text layers whenever possible so you can adjust the wording and appearance later.
How to Add and Edit Text in Photopea
Select the Type Tool (T) and click or drag on the canvas to create a text layer. Type your text, then use the options bar to change the font, size, color, and alignment. Select the Move Tool (V) to reposition the text, and use the Layers panel to adjust its position relative to other elements. >> More for how to edit texts
For a clean result, choose a font that fits the image, maintain sufficient contrast with the background, and position the text where it does not obscure important details. Keep the text layer editable until you are satisfied with the design.
How to Curve Text in Photopea
To create curved text, first draw a curved path with the Pen Tool or a shape tool. Select the Type Tool and move the cursor over the path until the text-on-path cursor appears, then click the path and type. The text will follow the curve, allowing you to create arched headlines, circular badges, and similar designs. Adjust the path or text placement to refine the result.
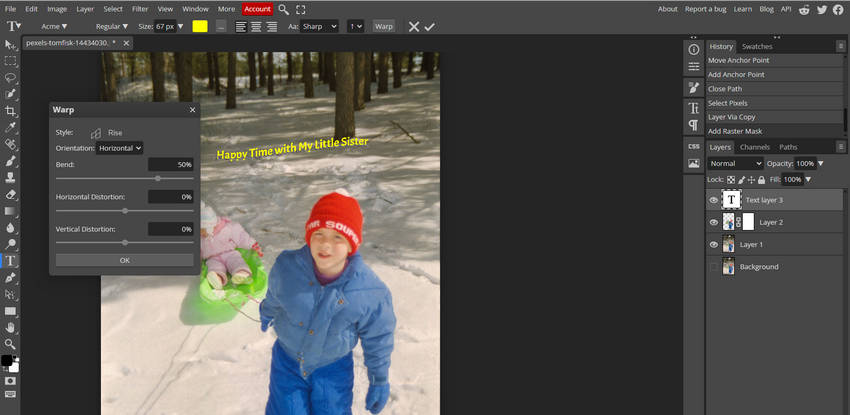
Text on a path is different from Warp Text, which bends or distorts the text itself into a shape. Use a path when you want text to follow a curve, and Warp Text when you want a more stylized deformation. Keep the text editable so you can revise it later.
A Travel Photo Editing Workflow for Social Media with Photopea and Aiarty
Suppose you want to turn a travel photo into a social media post with an eye-catching title. Photopea lets you crop the image, adjust its colors, work with layers, and add text in your preferred style. If the photo still looks noisy, slightly blurry, or lacks detail after editing, you can use an image enhancement tool as an optional step before publishing.
Step 1. Edit Your Social Media Photo in Photopea
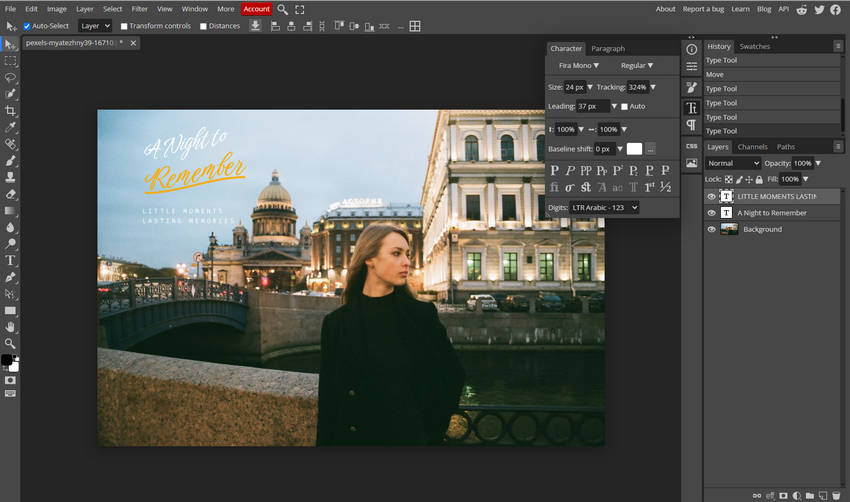
Open your travel photo in Photopea and crop it to fit your target platform's preferred aspect ratio. Adjust brightness, contrast, and color balance to give the image a consistent look. If you want to add a title or decorative elements, keep them on separate layers so you can reposition or edit them without changing the original photo.
Choose a readable font and a text color that contrasts with the background. You can also use a layer mask to make room for the text or blend graphic elements into the photo. Before moving on, check the composition at the size people are likely to see it on their phones.
Step 2. Export a Copy from Photopea
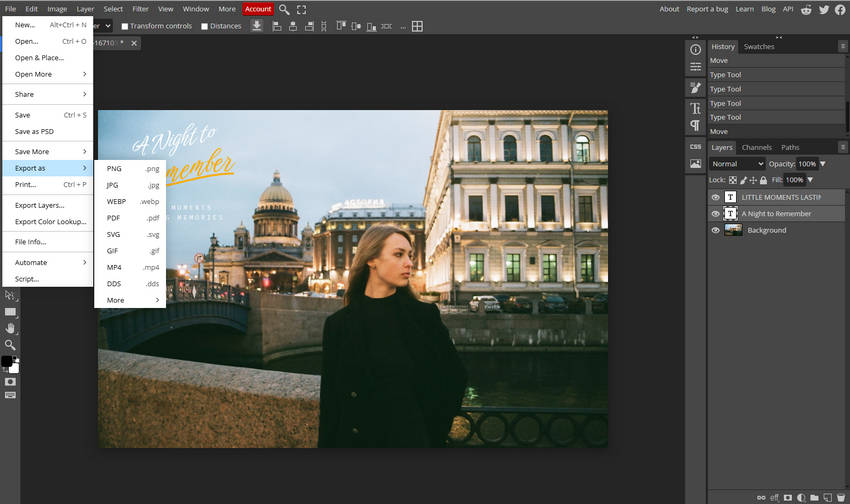
When your design is ready, choose File > Export As and select a format based on how you plan to use the image:
- PSD: Keeps the project layers editable, making it easier to revise the text or layout later.
- PNG: Useful for graphics that need lossless output or transparent areas.
- JPG: A practical choice for photo-based social media posts and website images.
Set the image dimensions to suit your intended platform and check the JPG quality setting if you choose that format. Exporting at a larger size will not recover detail missing from the original photo, so keep a copy of the exported image in case it needs further enhancement.
Step 3. Check the Image Quality Before Publishing
Open the exported image and inspect it at full size. Check whether the background still looks clean, fine details remain visible, and the text edges look sharp. A photo that appears slightly soft or noisy on the editing canvas may look more noticeable when viewed at full size.
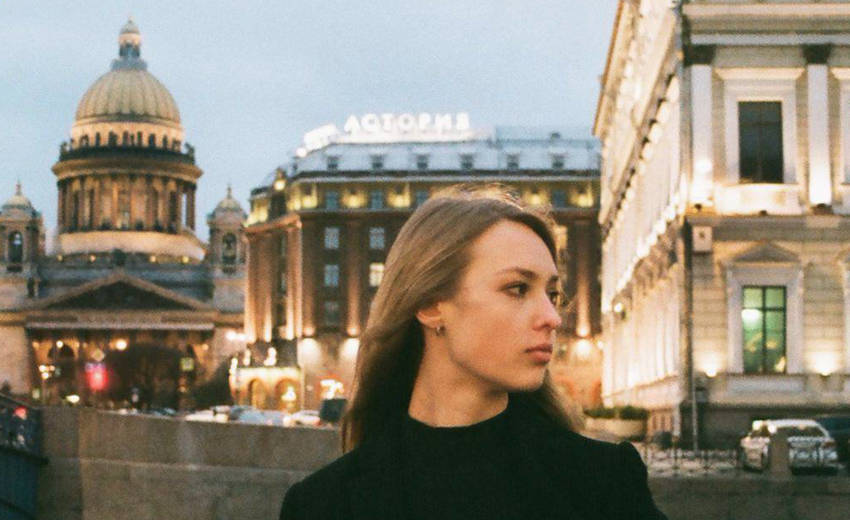
If the image already looks clear and detailed enough for social media, you can publish it as it is. If you notice visible noise, mild blur, JPEG compression artifacts, or insufficient resolution, consider enhancing the photo before using it in your final design.
Step 4. Enhance the Photo with Aiarty Image Enhancer
If the original photo needs a quality boost, Aiarty Image Enhancer can help reduce noise, improve the appearance of fine details, clean up compression artifacts, and upscale the image. Choose a suitable enhancement model, adjust the output size if needed, and preview the result before exporting.
Compare the enhanced image with the original at the same zoom level. Pay attention to details such as foliage, buildings, fabric, and other textures. The goal is to make the photo look cleaner and clearer without introducing artificial-looking edges or overly smooth textures.
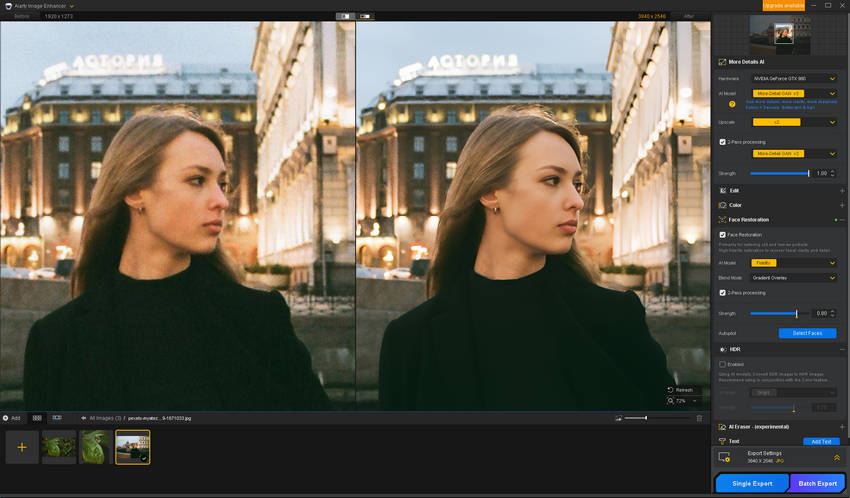
If your photo still needs better clarity or resolution, try Aiarty Image Enhancer.
Step 5. Publish Your Design on Social Media
Once your design is ready, export the final image in the format and dimensions recommended for your target platform. Preview it on a phone or at a smaller display size to make sure the text is readable and the photo looks clear. Then upload it to Instagram, Facebook, or your preferred social media platform, and add a caption that complements the image.
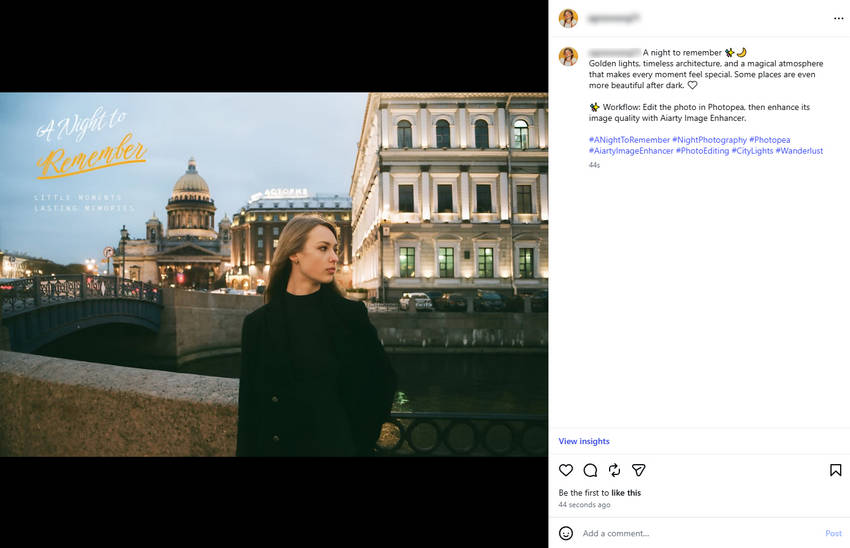
Before publishing, check the final image for unwanted artifacts, blurry details, or text that blends into the background. A well-balanced combination of photo quality and typography helps your post look polished and engaging.
Conclusion
Photopea provides a convenient way to edit photos in your browser, from basic adjustments and background removal to layer masking and curved text. Once your edits are complete, export the image in a format suited to your needs. If the result still has noticeable noise, blur, or limited resolution, you can use a tool like Aiarty Image Enhancer as an optional step to improve image quality before final delivery.
 FAQs About Photopea
1. Is Photopea free to use?
Yes, Photopea offers a free version that you can use directly in your browser without installing desktop software. Paid options are also available for users who want additional benefits, such as an ad-free experience.
2. Can you use Photopea offline?
Photopea is primarily designed to run in a web browser and relies on browser-based resources. Some functionality may remain available after the site has loaded, but offline access is not guaranteed in every situation. An internet connection is recommended for reliable use.
3. How do you rasterize a layer in Photopea?
In the Layers panel, right-click the layer you want to convert and choose the Rasterize option if it is available for that layer type. Rasterizing converts supported content, such as text or shapes, into pixels for direct editing. Keep a duplicate if you may need to edit the original content later.
4. How do you deselect in Photopea?
Press Ctrl + D on Windows or Cmd + D on Mac, or choose Select > Deselect from the menu. This clears the active selection without deleting image content or changing the layer itself.
5. Can Photopea open and save PSD files?
Yes, Photopea can open and save Photoshop PSD files, allowing you to work with layers and continue editing a project later. However, compatibility may vary for some advanced effects and features.
6. Can Photopea make a blurry photo clear?
Photopea offers sharpening and other adjustments that can improve the appearance of slightly soft images, but it cannot reliably recover details that were never captured. For photos with noise, mild blur, or compression artifacts, a dedicated AI image enhancer such as Aiarty Image Enhancer may help improve perceived clarity. Results depend on the original image quality.
7. Can you increase image resolution in Photopea without losing quality?
You can increase pixel dimensions through Image > Image Size, but enlarging an image does not automatically restore missing details. Traditional resizing may make the result look soft or pixelated. AI upscaling can help produce a larger image with more convincing detail, although the result should be checked for artifacts.
You May Also Like


This post was written by Brenda Peng who is a seasoned editor at Digiarty Software who loves turning ordinary photos into extraordinary works of art. With AI assistance for brainstorming and drafting, the post is reviewed for accuracy by our expert Abby Poole for her expertise in this field.
