Darktable is a powerful, open-source photography workflow application that allows you to manage your digital negatives and edit RAW images. Many Mac users, especially those with M1 or M2 chips, have experienced challenges installing or opening Darktable.
This article covers step-by-step instructions on installing, updating, and troubleshooting Darktable on Mac, along with a quick usage guide. For users looking to take their photo quality even further, we also introduce Aiarty Image Enhancer, a tool that can automatically enhance photo details, colors, and clarity after Darktable editing.
Can You Use Darktable on a Mac?
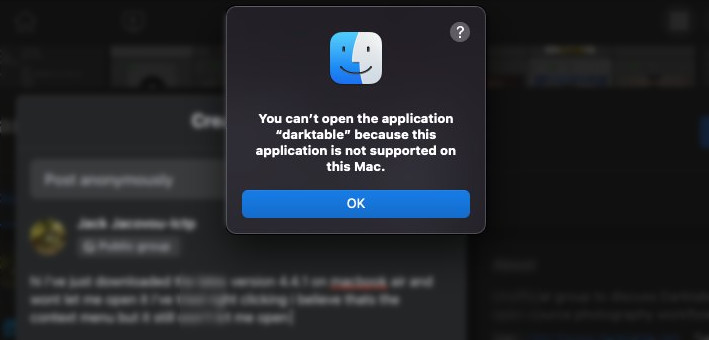
Darktable is fully compatible with macOS starting from Ventura 13.5. However, some users encounter errors like "You can’t open the application Darktable because this application is not supported on this Mac."
Hot search: How to Edit Raw Photos for Best Quality >>
This usually occurs on older macOS versions or due to security settings. Mac users with M1 or M2 chips may need to install Rosetta 2 for full compatibility. Always ensure your macOS is up to date and check security settings in System Preferences > Security & Privacy to open it safely on Mac.
How to Install Darktable on Mac
Now that your Mac is ready, let's go through the step-by-step process to install Darktable.
1. Download from Official Site
The easiest method is downloading directly from the official Darktable website. Download the appropriate .dmg file for your processor (Apple Silicon ARM64 or Intel) and follow the installation prompts.
2. Open Darktable on Mac
Open the downloaded .dmg file and drag the Darktable icon into your Applications folder. Then open Darktable from your Applications folder.
Troubleshooting Security Warnings
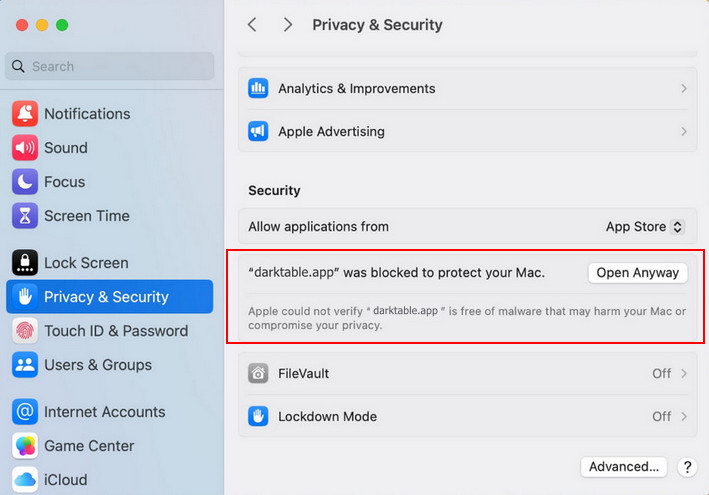
If macOS warns that the app is damaged or cannot be opened because it’s from an unidentified developer, you can use one of these methods to open Darktable without showing the warning:
- System Settings: Open System Settings > Privacy & Security, scroll down to the section that shows the blocked app warning, and click Open Anyway to allow Darktable to run.
- Terminal: Open Terminal. Run the command
xattr -d com.apple.quarantine /Applications/darktable.appto remove the quarantine attribute.
More Ways for Darktable Mac Installation
If you prefer using package managers, Darktable can also be installed through MacPorts or Homebrew:
- MacPorts: Open Terminal and run
sudo port install darktable - Homebrew: Open Terminal and run
brew install darktable
How to Update Darktable on Mac
Keeping Darktable up to date is essential to ensure compatibility with the latest macOS versions, access new features, and benefit from bug fixes and performance improvements. Regular updates also help prevent issues like crashes or unexpected behavior.
Visit the Darktable official releases page to see the most recent version available for macOS. Make note of the version number to confirm if your installation is outdated. Then you can update Darktable in two ways:
- Download the latest .dmg file from the official website and follow the installation prompts. This method ensures a fresh installation without affecting your configuration.
- Update via Homebrew if you installed Darktable using a package manager. Open Terminal and run
brew upgrade darktable
Pro Tip: Before updating, always backup your Darktable database and configuration files. This safeguards your existing edits, presets, and metadata in case anything goes wrong during the update process. You can find your configuration files in ~/.config/darktable/.
Darktable Not Opening on Mac – Common Fixes
Sometimes, after installing Darktable on Mac, the application may fail to open. This can be caused by macOS security restrictions, outdated settings, or compatibility issues, especially on M1 or M2 Macs. Here are the most common solutions to get Darktable running again:
- Check Security & Privacy Settings: Ensure Darktable is allowed to run in macOS System Preferences > Security & Privacy > General.
- Delete Configuration Files: Sometimes old settings prevent opening. Navigate to
~/.config/darktable/and back up/delete config files. - Install Rosetta 2: Required for M1/M2 Mac compatibility. Run
softwareupdate --install-rosettain Terminal. - Check Logs: Open Console to see error messages that indicate the root cause.
Following these steps usually resolves the majority of “Darktable not opening” problems on Mac, allowing you to move on to editing your photos without further interruptions.
How to Use Darktable on Mac
Once Darktable is installed and running on your Mac, you can start editing your photos right away. Even if you are new to RAW editing, the following step-by-step guide will help you get professional-looking results quickly.
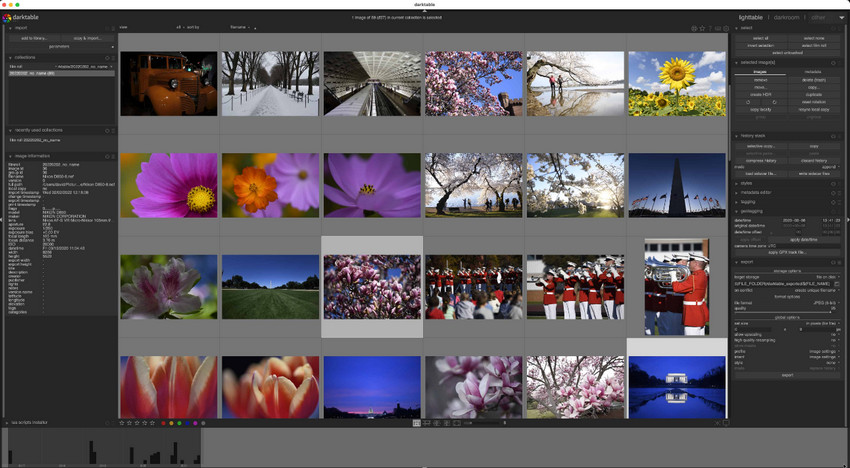
Step 1: Import Photos
Open Darktable’s Lighttable view and drag your RAW or JPEG files into the library. You can organize images into collections or albums for easy navigation, and use the search and filter tools to quickly locate the files you want to edit.
Step 2: Basic Adjustments
After photos imported, it’s important to start with fundamental corrections and composition adjustments. Here’s an adjustment with the specific modules you’ll use:
- Exposure Adjustment (Exposure Module): Correct the overall brightness to properly reveal details in highlights and shadows. This is the foundation for all other edits.
- White Balance Correction (White Balance Module): Adjust the color temperature and tint to ensure accurate and natural-looking tones.
- Contrast and Shadows (Tone Curve or Levels Module): Enhance dynamic range to bring out textures and depth in both highlights and shadows.
- Crop and Rotate (Crop and Rotate Module): Refine composition by removing unnecessary edges and correcting alignment. Use the rotation tool to straighten horizons or vertical lines for a professional look.
These adjustments form the foundation for more advanced edits.
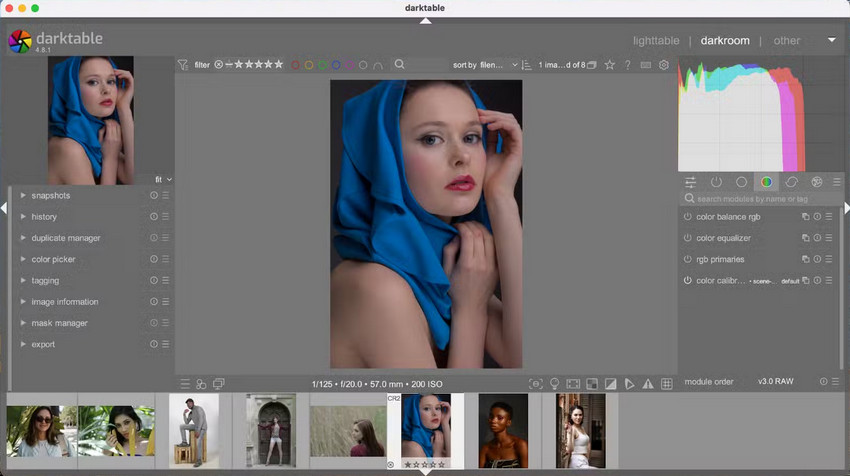
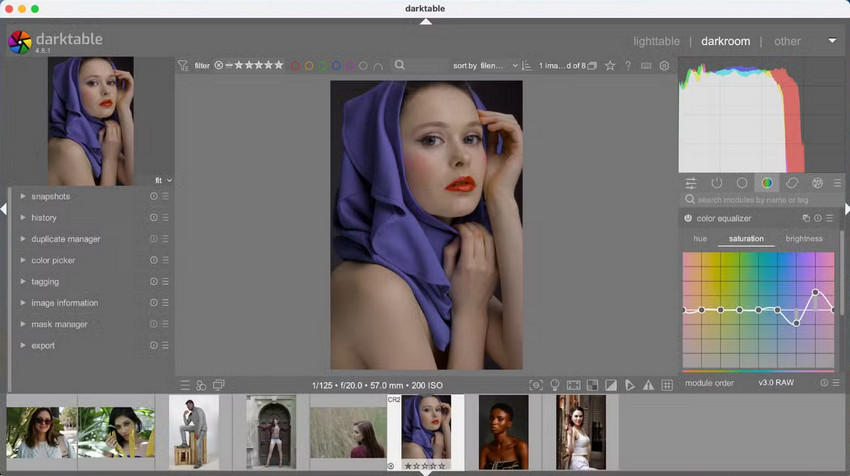
Step 3: Apply Basic Color Corrections
After basic adjustments and cropping, refine your photo’s color and tone using these modules:
- Saturation (Color Balance or Vibrance Module): Adjust overall or channel-specific saturation to make colors vivid.
- Hue (Color Zones Module): Correct specific color ranges like skin tones or skies.
- Tonal Control (Tone Curve Module): Adjust highlights, midtones, and shadows for balanced contrast.
- Dynamic Range (Filmic RGB Module): Compress highlights and lift shadows naturally, preserving detail in high-contrast scenes.
Step 4: Basic Adjustments
You can also use Darktable to improve clarity while keeping images clean:
- Sharpening: Apply the Sharpen module to accentuate edges and bring out fine textures. Adjust the amount carefully to avoid artifacts.
- Noise Reduction: Use the Denoise (profiled) or Denoise (non-local means) modules to reduce grain, especially in high ISO or low-light shots, while preserving detail.
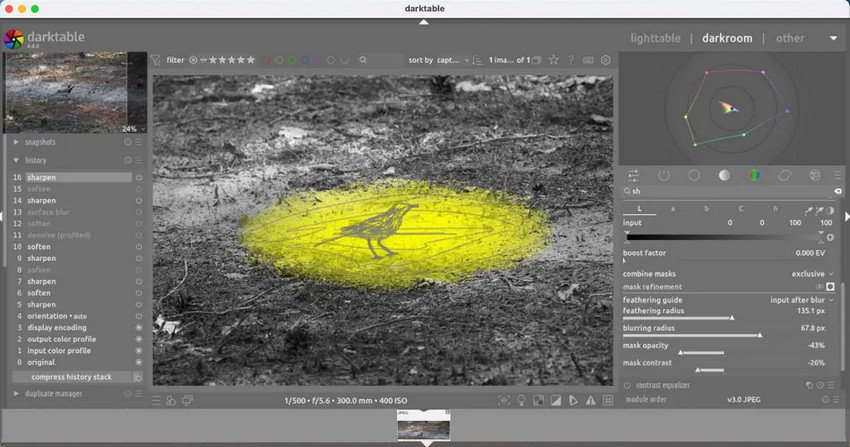
Pro Tip: Darktable’s Sharpen and Denoise (profiled) modules are powerful, but they can be tricky to balance—too much sharpening may create artifacts, while strong noise reduction can soften fine details, especially in high-ISO images. For a more consistent and natural result, you can export your image and use Aiarty Image Enhancer to intelligently reduce noise, remove blur, and enhance details with higher realism and fidelity.
Step 5: Export
After editing, export your photos in high resolution for printing, online portfolios, or social media. Darktable allows customization of file format, resolution, and compression settings.
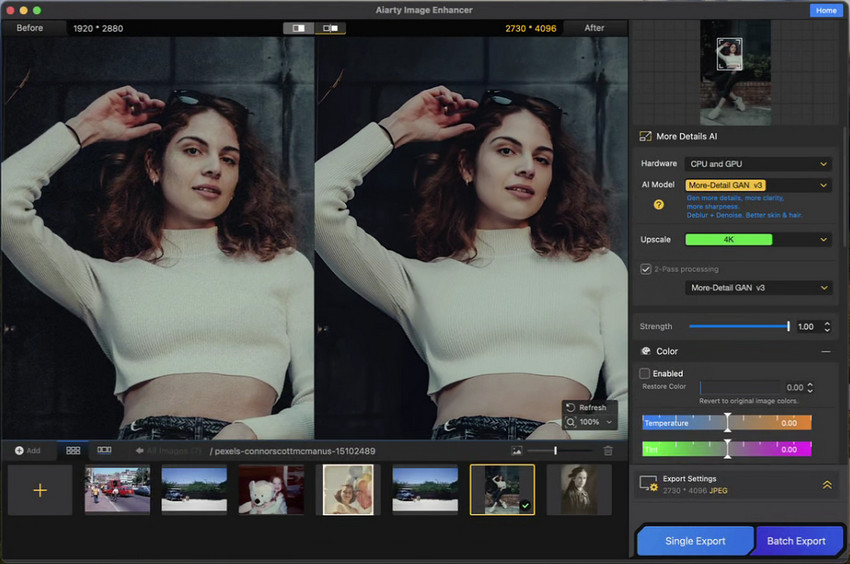
Enhancing Your Photos After Darktable
While Darktable is excellent for RAW editing and general photo adjustments, Aiarty Image Enhancer can take your photos to the next level. Here’s what it offers:
- Realistic Detail Enhancement: Automatically sharpens edges and textures while preserving natural realism and fidelity.
- Advanced Denoise & Deblur: Reduces noise and removes motion or focus blur for cleaner, crisper images.
- Smart Upscaling for Printing: Upscales images to high resolution for large prints without losing detail or clarity.
- High-Fidelity Color Optimization: Balances tones and colors for vibrant yet true-to-life results.
- Batch Processing Efficiency: Apply all enhancements to multiple images at once, saving time without compromising quality.
Workflow Example:
- Edit RAW photos in Darktable to adjust exposure, white balance, and basic tone.
- Export to JPEG or TIFF.
- Open them in Aiarty Image Enhancer to improve clarity, enhance textures, reduce noise, remove blur, optimize colors, and upscale for print.
This combination provides Mac photographers with a complete, high-quality editing workflow—from initial RAW adjustments to final polished images ready for display or print.
Conclusion
Darktable on Mac is a powerful tool for photographers, but installation, updates, and occasional troubleshooting may require attention, especially for M1/M2 users. By following this guide, you can:
- Install and update Darktable on Mac.
- Solve common issues like “Darktable not opening.”
- Quickly use Darktable for basic photo editing, including enhancing details.
- Take your photo quality even further with Aiarty Image Enhancer, achieving professional results suitable for printing or social media.
Start your workflow today and combine Darktable with Aiarty to fully unlock your photos’ potential.
 FAQs about Darktable on Mac
1. Is Darktable safe on Mac?
Yes, Darktable is open-source and widely trusted in the photography community. It is considered safe to use as long as you download it from the official website or trusted repositories.
2. Can I edit JPEG and RAW files in Darktable?
Yes, Darktable supports both JPEG and RAW files. However, RAW files provide significantly more flexibility and higher-quality results because they retain more original image data for editing.
3. Does Darktable work with M1/M2 Mac?
Yes, Darktable works on M1 and M2 Macs. In some cases, it may require Rosetta 2 to ensure full compatibility, depending on the version and installation method.
4. Why does Darktable crash or not open?
Common causes include outdated macOS versions, missing Rosetta 2 on Apple Silicon Macs, or corrupted configuration files. Updating the system or resetting Darktable settings often resolves the issue.
5. What’s the best workflow with Darktable and Aiarty Image Enhancer?
The best workflow is to first edit RAW photos in Darktable for exposure, white balance, and basic tone adjustments. Then export the image as JPEG or TIFF and refine it in Aiarty Image Enhancer to improve realism, enhance fine details, reduce noise, remove blur, optimize colors, and upscale for high-resolution printing.
You May Also Like
This post was written by Brenda Peng who is a seasoned editor at Digiarty Software who loves turning ordinary photos into extraordinary works of art. With AI assistance for brainstorming and drafting, the post is reviewed for accuracy by our expert Abby Poole for her expertise in this field.