If you’re looking for a free alternative to Lightroom, Darktable is one of the most powerful RAW photo editors available. However, many beginners struggle not because it lacks features, but because they don’t have a clear workflow.
This guide simplifies everything. You’ll learn how to use Darktable, understand the essential modules, and follow a step-by-step workflow to edit photos efficiently.
Quick Answer: How to Use Darktable (Beginner Workflow)
To use Darktable for photo editing:
- Import your photos in Lighttable.
- Rate and filter images to select the best shots.
- Adjust exposure, tone, and color in Darkroom using core modules.
- Enhance sharpness and reduce noise.
- Export the final image in JPEG or TIFF format.
Darktable works best when you follow a structured workflow: organize → adjust → refine → export.
Darktable Basics You Actually Need (Interface & Key Modules)
Before diving into editing, you don’t need to understand every panel or module in Darktable. In fact, most beginners get overwhelmed because they try to learn everything at once. The key is to focus only on what matters for a simple, repeatable workflow.
Two Main Views
Darktable is built around two main workspaces: Lighttable and Darkroom. Lighttable is where you import, organize, and review your photos—it functions as your image library. Once you’ve selected the images you want to edit, you switch to Darkroom, which is the dedicated editing environment where all adjustments are made.
Understanding this separation is essential, because an efficient Darktable workflow always starts with organization before editing.
Only Focus on These Core Modules First
One of the biggest beginner mistakes in Darktable is trying to use too many modules at once. Instead, focus on a small set of essential tools that form the foundation of a solid workflow:
- Exposure – Adjust overall brightness and correct under/overexposed images.
- Filmic RGB – Control highlights and shadows with a natural dynamic range (a core module that often replaces contrast).
- Tone Equalizer – Fine-tune specific brightness areas without affecting the whole image.
- Color Calibration – Fix color casts and achieve more accurate, balanced colors.
- Lens Correction – Automatically correct distortion based on your camera and lens profile.
- Crop & Rotate – Improve composition and straighten your image.
You don’t need dozens of modules, just mastering these core tools is enough to handle most edits and build a consistent Darktable workflow.
How to Use Darktable: Step-by-Step Workflow (From RAW to Final Image)
Now that you understand the basics, let’s walk through a complete Darktable beginner workflow.
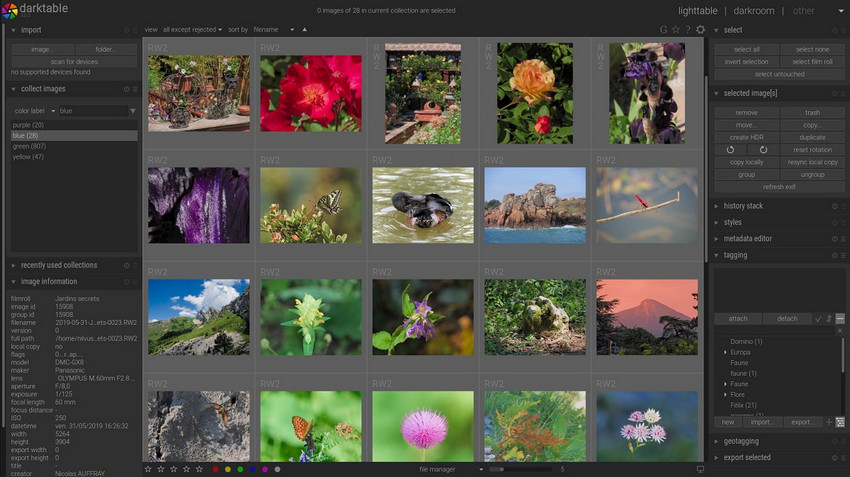
Step 1: Import & Organize Photos
Open Darktable, go to Lighttable view (default screen) and click “Import” (top-left panel). Select image..., folder... or scan for devices as it's available, then choose your folder and click Open. Your images will now appear in the Lighttable grid.
Step 2: Cull and Rate Your Images
Click on a photo to preview it. Then use number keys: press 1–5 to assign star ratings and 0 to remove rating. After then, you can use the filter bar (top) to show only selected ratings. This helps you quickly narrow down to your best shots.
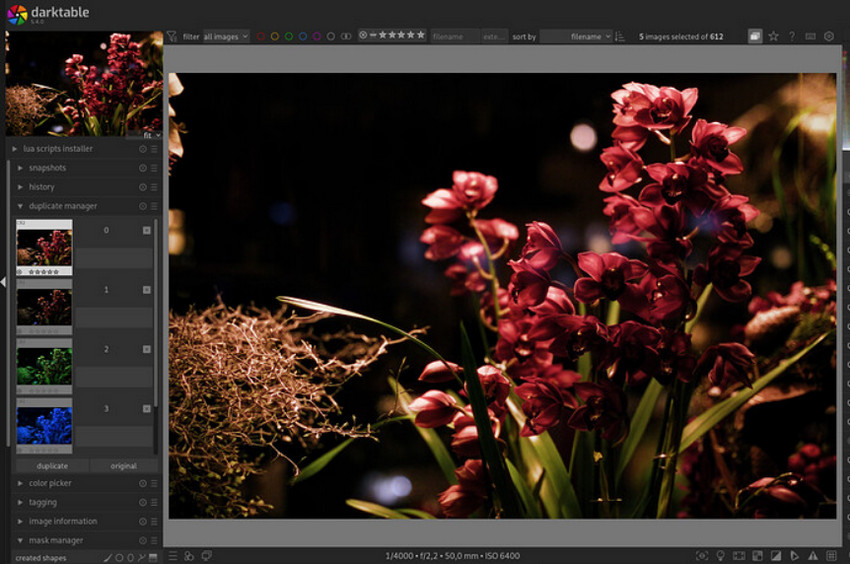
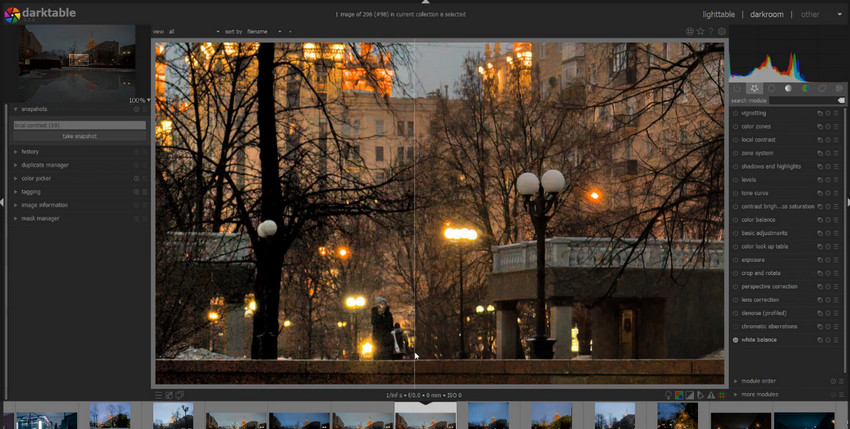
Step 3: Open Photo in Darkroom
Double-click a photo or select image → click “Darkroom” (top-right) to open it in Darkroom. You are now in the editing workspace.
Step 4: Basic Adjustments
On the right-side panel, search or scroll modules:
- Adjust Exposure: Find Exposure module, and move the Exposure slider to increase or decrease the brightness.
- Fix White Balance: Open White Balance, and choose Camera reference (default) or use eyedropper tool to click neutral area.
- Crop & Straighten: Open Crop and Rotate, drag corners to crop, and adjust angle slider to straighten horizon.
Step 5: Tone and Color Correction
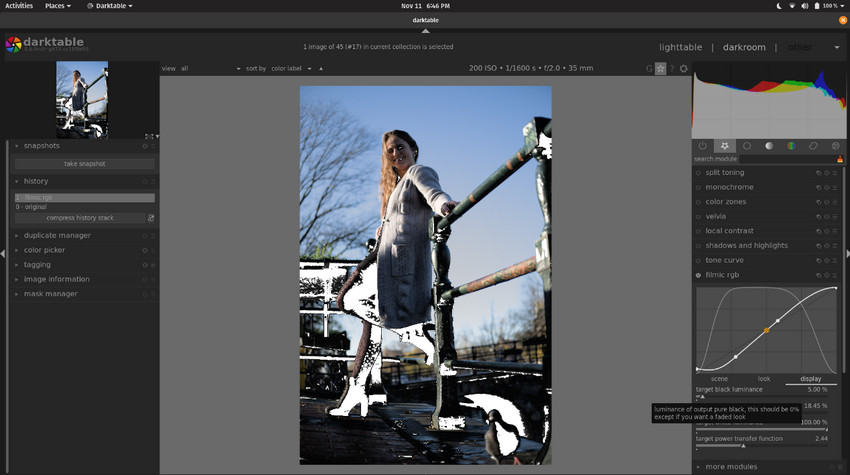
1. Use Filmic RGB (Most Important Tool)
Open Filmic RGB module, click “Auto-tune levels” . Here you can adjust white relative exposure and black relative exposure. This replaces traditional contrast adjustments.
2. Fine-Tune with Tone Equalizer
Open Tone Equalizer, click “Masking → Use guided filter”. Then drag curve points to Brighten shadows and Reduce highlights.
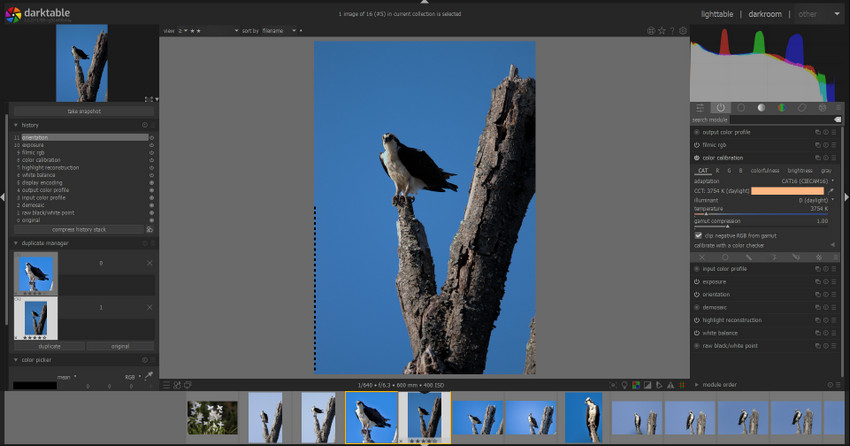
3. Adjust Colors
Open Color Calibration, where you can adjust saturation, channel balance (RGB) and more.
Step 6: Enhance Details (Sharpness & Noise)
1. Sharpen Image
Open the Diffuse or Sharpen module, then choose the preset Sharpen demosaicing (default). This helps recover fine details lost during RAW processing. Adjust the strength carefully to avoid halos or an overly sharp, unnatural look.
2. Reduce Noise
Open Denoise (Profiled), which is especially useful for images shot in low light or at high ISO. In most cases, the default settings work well, but you can slightly increase the strength to reduce visible noise while preserving as much detail as possible.
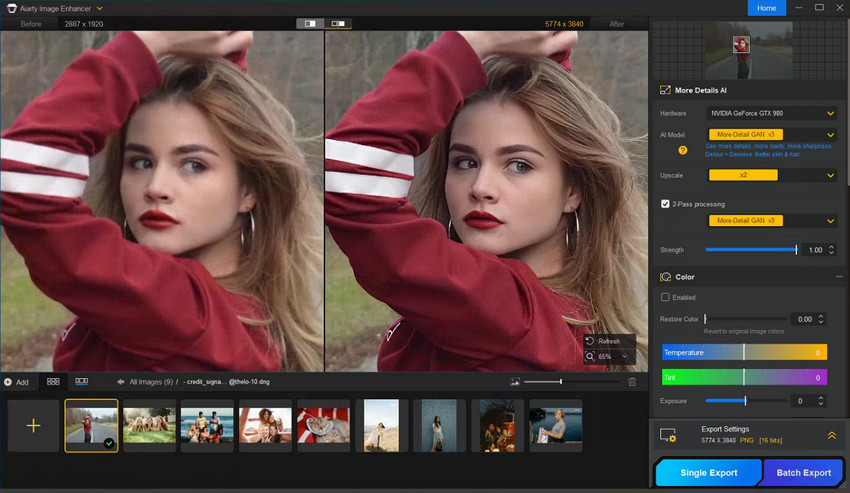
⚠ But here’s a key limitation:
Darktable’s sharpening and denoise tools don’t always recover fine texture or resolution, especially for large prints, cropped images, and product photography.
To improve this, you can export your image and enhance it using Aiarty Image Enhancer, which uses AI to upscale resolution and restore details. This is especially useful when you need sharper, print-ready images.
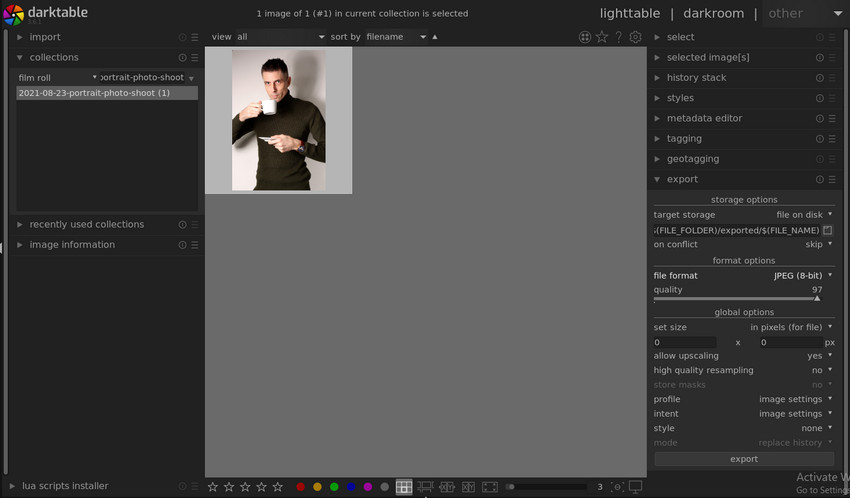
Step 7: Export Final Image
Return to Lighttable and select your edited image, then open Export selected in the right panel. From there, set your export options, including format (JPEG or TIFF), quality (90–100), and color profile (sRGB for most uses). Once everything is configured, click Export. Your final image is now ready for sharing or printing.
Common Darktable Mistakes Beginners Should Avoid
Even with a solid workflow, many beginners still run into common issues when learning how to use Darktable. Most of these problems aren’t caused by a lack of features, but by how those features are used.
- Using too many modules: It’s tempting to experiment with everything, but stacking multiple adjustments often leads to over-editing and inconsistent results.
- Ignoring Filmic RGB: Skipping this module can result in harsh highlights or flat shadows, since it plays a key role in managing dynamic range.
- Editing in the wrong order: Jumping randomly between modules can break your workflow and make it harder to achieve balanced edits.
- Over-sharpening: Applying too much sharpening creates halos and unnatural textures, especially in detailed areas like hair or edges.
Most issues in Darktable come from workflow confusion rather than a lack of tools. Keeping your process simple and consistent will lead to much better results.
Is Darktable Enough? When You Might Need Additional Tools
As your editing skills improve, you may start to notice that while Darktable is extremely powerful for RAW processing, it has certain limitations, especially when it comes to newer, AI-driven enhancements. For example, tasks like AI-based sharpening, image upscaling for large prints, automatic detail and texture recovery are not the main focus of Darktable’s module-based system. It excels at precise, manual control, but requires more effort to achieve results that some modern tools can produce automatically.
Because of this, many photographers don’t rely on a single tool. Instead, they combine different solutions depending on the stage of their workflow. This leads to a more practical question: how does Darktable compare to other popular editing tools such as Adobe Lightroom, and where do AI-based enhancers like Aiarty Image Enhancer fit in?
Related Search: Darktable vs Lightroom: Is Darktable Worth Switching To?
Darktable vs Adobe Lightroom vs Aiarty Image Enhancer
In practice, these tools serve different roles. Darktable is ideal for photographers who want full control over RAW adjustments, while Lightroom offers a more streamlined, all-in-one experience with built-in AI features. On the other hand, Aiarty Image Enhancer focuses specifically on enhancing final image quality, especially when it comes to resolution and fine detail.
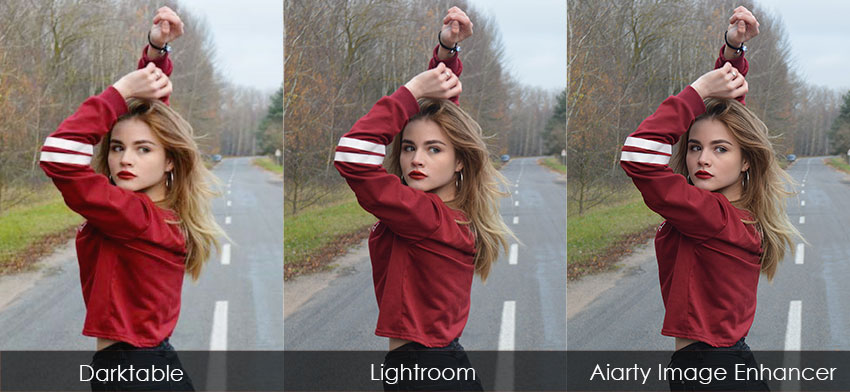
You can see the diffenence obviously:
- Darktable delivers natural tones and balanced exposure, but limited micro-detail recovery.
- Lightroom gets cleaner output with some AI enhancement, but still constrained by resolution.
- Aiarty Image Enhancer improves photo quality with sharper textures, clearer edges, and higher-resolution output.
Rather than choosing one over the others, a more effective approach is to combine them based on your needs: use Darktable for editing, and AI tools for enhancing the final output.
Try Aiarty Image Enhancer for AI upscaling and detail enhancement after Darktable workflow.
Final Thoughts: Build a Practical Editing Workflow
Darktable is powerful but the key to mastering it isn’t using more tools. It’s using the right workflow. A practical setup looks like this:
- Darktable for RAW editing and color control.
- Aiarty Image Enhancer for final detail and resolution boost.
This combination allows you to produce high-quality images efficiently, whether for web, social media, or print.
 FAQs about Darktable Beginner Tutorial
1. Is Darktable good for beginners?
Yes, Darktable is good for beginners, but it requires a clear and structured workflow to avoid confusion. Once you understand the basic modules and editing order, it becomes much easier to use effectively.
2. Is Darktable harder than Lightroom?
Yes. Darktable is generally harder than Lightroom because of its module-based system. While it offers more flexibility and control, it is less intuitive for beginners compared to Lightroom’s more guided and streamlined interface.
3. What is the best Darktable workflow?
The best Darktable workflow follows a simple structure: Import photos → Cull and rate images → Basic adjustments (exposure and white balance) → Tone and color correction → Detail enhancement → Export final image. Keeping this order consistent helps avoid editing mistakes and improves efficiency.
4. Can I edit a JPEG in Darktable?
Yes, Darktable can edit JPEG files. It works as a non-destructive editor, meaning all adjustments are stored in sidecar files or its internal database rather than directly modifying the original image. Although Darktable is primarily designed for RAW processing, it still supports JPEG editing for tasks such as cropping, exposure correction, and color adjustments. However, it offers less flexibility compared to working with RAW files.
You May Also Like
This post was written by Brenda Peng who is a seasoned editor at Digiarty Software who loves turning ordinary photos into extraordinary works of art. With AI assistance for brainstorming and drafting, the post is reviewed for accuracy by our expert Abby Poole for her expertise in this field.