How to Enlarge a Photo for Printing (Resolution, DPI & AI Upscaling Guide)
Quick Answer: How to Enlarge a Photo for Printing
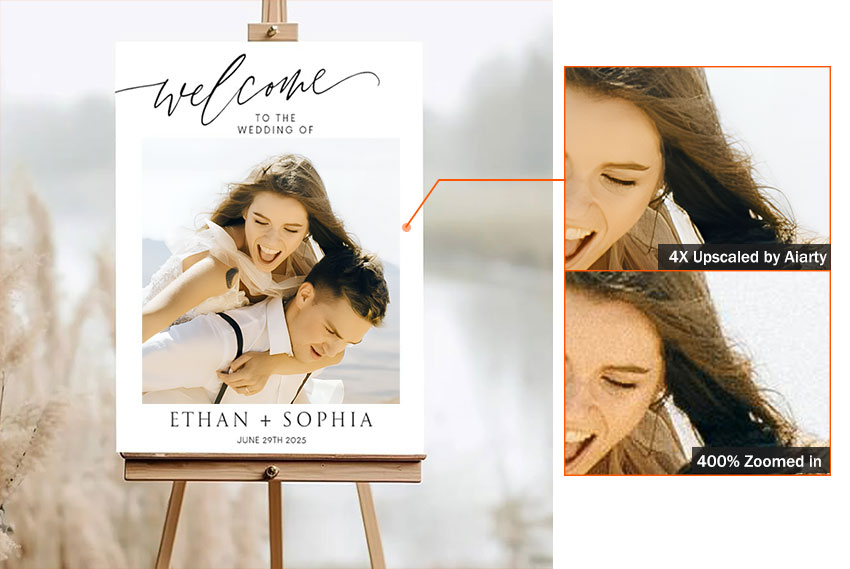
Traditional resizing often causes blur. To achieve gallery-ready prints, use Aiarty Image Enhancer:
- Open your photo in Aiarty.
- Select the AI model and choose your desired upscale scale (2x, 4x, or 8x).
- The AI rebuilds details and removes noise. Export as a 300 DPI TIFF or JPEG, print-ready.
Trying to print a photo only to realize it’s too small? Maybe you downloaded an image, or you’re using an old phone photo and want to print it bigger, like 8×10, A4, or even poster size. The problem is: when you enlarge a photo too much, it often becomes blurry or pixelated.
The good news is that you don’t need to guess anymore. In this guide, you’ll learn:
- Why photos become pixelated when enlarged?
- How big your image can actually print?
- What to do if the resolution isn’t high enough?
- How AI tools can upscale photos without destroying detail?
By the end, you’ll know exactly how to enlarge a photo without losing quality so it prints sharp and detailed instead of blurry and disappointing.
Why Photos Become Pixelated When Enlarged
Every digital photo is made of pixels, tiny squares of color that form the image. When you blow up an image to print beyond its original resolution, those pixels don’t magically multiply. Instead, the image enlargers stretche the existing pixels, making them larger and more visible.
That’s when you start seeing pixelation, including jagged edges, blurry textures and blocky “square” artifacts.
For example, a photo at 400% enlargement, edges start to break apart and fine details disappear. It can look like a mosaic of colored blocks. This is why simply dragging the corner of an image to make it bigger rarely works for printing.
Traditional resizing tools only scale pixels, but they don’t create new detail. When you need a much larger print, like a framed photo or poster, you need a smarter way to enlarge the image. But before jumping into AI photo enlargement tools, there’s one important thing to check first: how big your photo can already print.
How Big Can You Print a Photo? (Resolution vs Print Size)
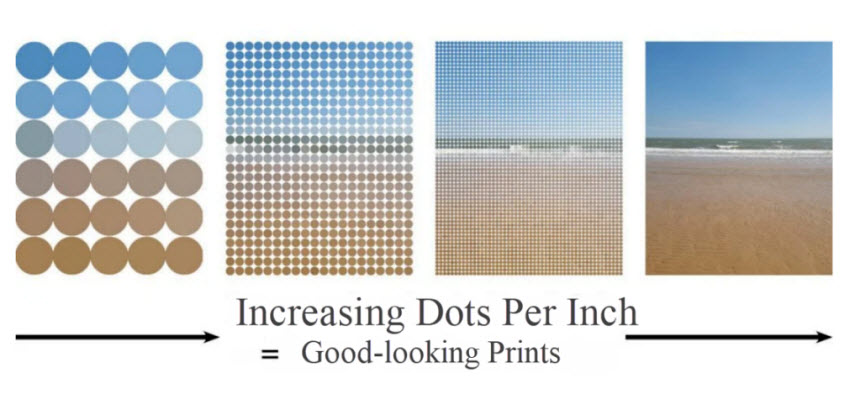
One of the biggest surprises for people is that screen images and print images follow completely different rules. A photo that looks sharp on a screen may still be too small for printing. The key factor is DPI (dots per inch). DPI tells a printer how many pixels should be packed into every inch of paper. Higher DPI means more detail and sharper prints.
Recommended DPI for Photo Printing
Most digital photos captured on phones or cameras are set at 72 DPI—a resolution far too low for sharp physical prints. To achieve professional results, print labs follow these industry standards:
- 300 DPI for professional photo prints, typically used in photo albums or framed photos
- 200 DPI for standard prints, commonly used for casual prints or posters
- 150 DPI for large wall prints, suitable for viewing from a distance
Learn More: How to Increase DPI of an Image (300/600 DPI for Printing & Design)
Resolution to Print Size Chart
Use the table below to estimate how large your photo can print at different quality levels.
To make it easier to estimate your print size, you can use a simple calculation: Print Width = Pixel Width ÷ 300.
For example, if a photo taken with your phone is 4,000 pixels wide, dividing 4,000 by 300 gives 13.3 inches. This means the image can print at about 13.3 inches wide at 300 DPI. If you want a 20-inch wide print, the image must be enlarged to at least 6,000 pixels.
Photo Too Small to Print? Enlarge It with Aiarty Image Enhancer
If your image doesn’t have enough resolution for the print size you want, simply resizing it won’t solve the problem. Instead, you need image upscaling. Aiarty Image Enhancer can analyze the photo and reconstruct missing details instead of just stretching pixels.
Unlike basic resizing or Photoshop remastering, Aiarty's AI photo enlargement reconstructs missing details, sharpens edges, and can upscale images 4×–8× while keeping textures clear. This results in noticeably sharper prints for framed photos, posters, canvas wall art, and old photo restorations.
How to Enlarge a Picture for Printing Without Losing Quality
Step 1. Import your photo into Aiarty Image Enhancer.
Download and launch Aiarty Image Enhancer on your computer. Simply drag and drop the image you want to enlarge into the workspace. This is the starting point for preparing a small image for a larger print.
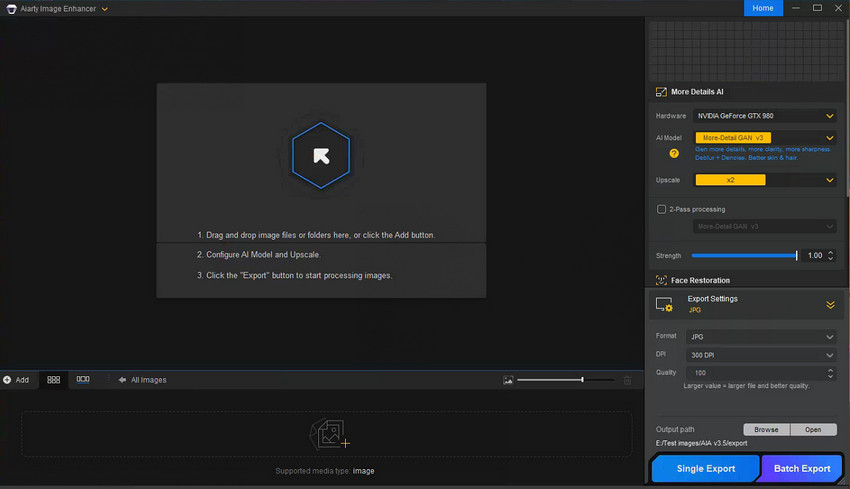
Step 2. Select the appropriate AI enhancement model.
On the right-side panel, switch hardware acceleration to GPU for faster processing if available. Then pick the AI model that best matches your image type. For example, More-Detail GAN v3 works well when you need to blow up an image to print with sharper textures and clearer edges. AIGCsmooth v3 is ideal for anime or AI-generated artwork, while Real-Photo focuses on restoring natural photographic details.
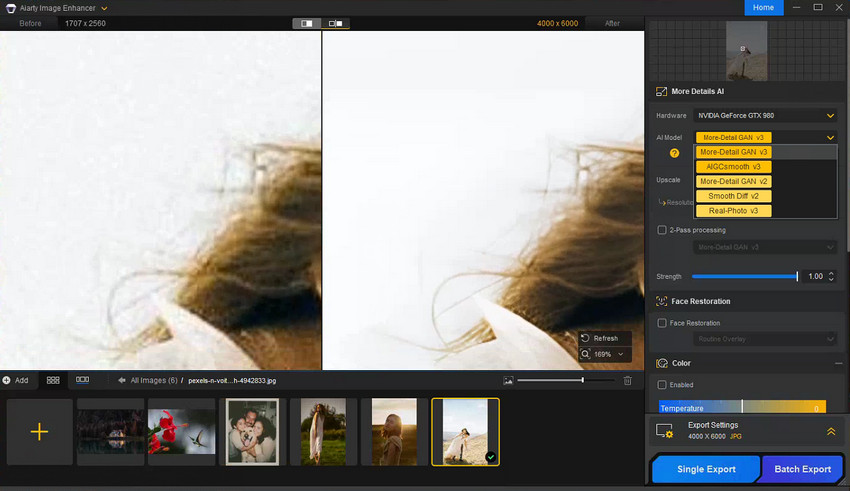
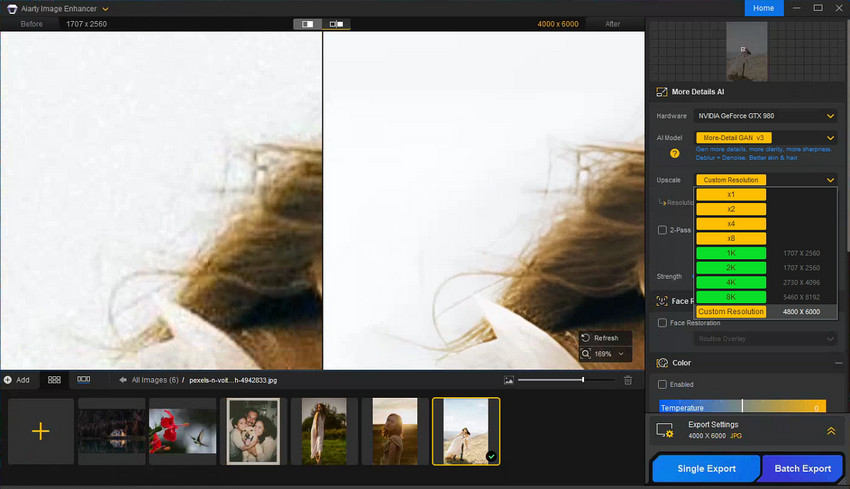
Step 3. Choose the upscale level based on your print size.
Next, decide how much you want to enlarge the image based on the final print size. The upscale menu lets you increase resolution by 2×, 4×, or 8×, or directly output standard sizes like 2K, 4K, or 8K. This ensures you to enlarge a picture for printing without losing quality, whether you're preparing a photo for a poster, frame, or canvas wall print.
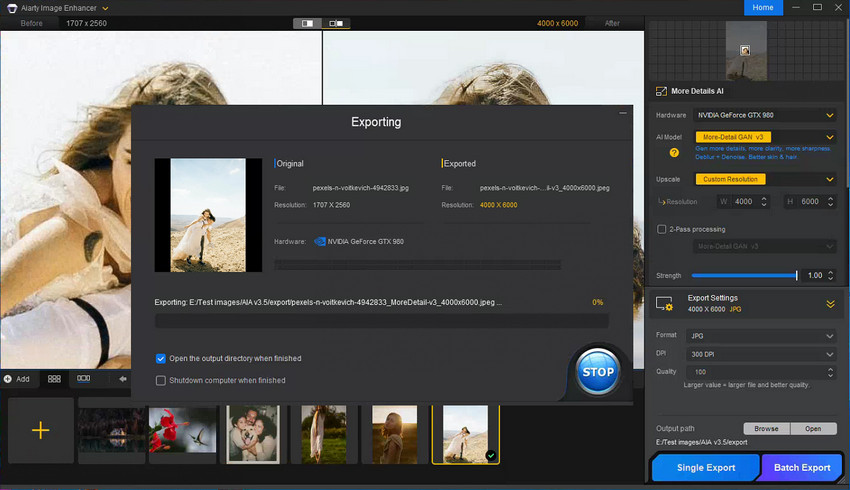
Step 4. Export the enlarged image with print-ready settings.
Finally, open the Export panel and choose your output settings. Set the image to 300 DPI or higher. Use TIFF for professional printing, or export as a high-quality JPEG (100 quality) to avoid compression artifacts. Then click Single Export for one image or Batch Export to process multiple photos.
Common Printing Scenarios (And What Quality You Need)
Different types of prints have different quality expectations. Understanding the viewing distance and purpose helps you choose the right resolution to enlarge picture to print.
#1. Printing for Photo Frames
Framed photos are usually viewed up close, so they benefit from 300 DPI resolution. Common sizes include: 5 × 7 inches, 8 × 10 inches, and 11 × 14 inches.
If the photo will be displayed on a desk or wall at eye level, aim for the highest resolution possible.
#2. Printing Posters or Wall Art
Large posters are often viewed from farther away. Because of that, 150–200 DPI is often sufficient. This allows larger print sizes without blow up a picture to extremely high-resolution for printing.
#3. Enlarging Old Photos
Old photos present a unique challenge. They often have: low resolution, film grain, scratches or fading
AI enhancement tools can help restore missing detail while enlarging the image, making them suitable for reprinting and framing.
Aspect Ratio: Why Your Photo May Get Cropped When Printed
Another common printing issue has nothing to do with resolution, it’s aspect ratio. Aspect ratio is the proportional relationship between an image’s width and height.
For example:
If your photo’s aspect ratio doesn’t match your desired print size, the printing service may automatically crop the edges. To avoid losing key details, resize or crop your image manually beforehand to ensure you maintain full control over your composition.
A Simple Checklist Before You Print Your Photo
If you want to avoid wasting money on blurry prints, run through this quick checklist before ordering a print.
- ✅ Resolution matches print size
- ✅ Aspect ratio fits frame
- ✅ Exported in TIFF or high-quality JPEG
- ✅ Color profile set to sRGB
- ✅ Preview looks sharp at print size
If the image still looks soft or pixelated at full resolution on your screen, don't risk the print. You can easily bridge that quality gap with Aiarty Image Enhancer.
Enlarge your images, reconstruct missing details, and remove noise instantly for printing.
 FAQs
FAQs
Yes. If you use advanced upscaling methods such as AI image enhancement. Traditional resizing often causes blur because it simply stretches existing pixels, whereas AI-powered tools intelligently reconstruct missing details.
For most photo prints, 300 DPI is considered the gold standard to ensure crisp, professional quality. However, larger prints like posters and wall art can still look excellent at 150–200 DPI, as they are typically viewed from a greater distance.
Traditional resizing usually works only for small, minor adjustments (around 10–20%). In contrast, professional AI upscaling tools can often enlarge images by 4× to 8× while preserving and even enhancing the original detail.
Screens display images at a much lower pixel density than printers require. A photo that looks perfectly clear on a phone or laptop screen may not have enough actual pixels to print sharply once scaled up to larger physical dimensions.
TIFF is the preferred format for high-end professional printing due to its lossless nature. However, high-quality JPEG files (with minimal compression) are widely accepted and sufficient for most standard printing services.
You May Also Like
This post was written by Brenda Peng who is a seasoned editor at Digiarty Software who loves turning ordinary photos into extraordinary works of art. With AI assistance for brainstorming and drafting, the post is reviewed for accuracy by our expert Abby Poole for her expertise in this field.