Cropping a photo on Mac is easy with built-in apps like Preview and Photos. You can quickly remove unwanted areas, change aspect ratios, or resize images for social media and websites without installing Photoshop. For higher-quality results, especially when cropped photos become blurry or low-resolution, AI-powered tools can further enhance image clarity after cropping.
In this guide, you'll learn the fastest ways to crop photos on Mac, how to avoid quality loss, and when advanced AI tools can improve your workflow.
The fastest way to crop a photo on Mac is with Preview. Simply open the image, drag to select the area you want to keep, press Command + K, and save the cropped photo.
If you need more advanced editing, here are the main differences between popular Mac photo cropping tools:
- Preview: best for quick cropping; fast, free, and built into macOS.
- Photos: ideal for library management and non-destructive photo editing.
- Aiarty Image Enhancer: great for cropping while improving image quality with AI upscaling, detail recovery, and batch processing.
Need better quality after cropping? Aiarty Image Enhancer can upscale and sharpen cropped photos with AI-powered enhancement.
Why Crop an Image on a Mac?
Before jumping into the step-by-step methods, it helps to understand why cropping is such a common part of photo editing on Mac. Whether you're editing personal photos, social media content, screenshots, or product images, cropping can instantly improve how an image looks and fits different platforms.
Many Mac users crop photos to:
- Remove unwanted backgrounds or distracting objects
- Fit images for Instagram, TikTok, YouTube, or other platforms
- Highlight subjects, faces, or product details
- Resize screenshots, wallpapers, or thumbnails
- Improve composition and overall visual balance
Luckily, macOS already includes built-in tools for basic cropping, while AI-powered photo editors can help improve image quality after cropping.
How to Crop a Photo on Mac Using Preview
Preview is a built-in macOS app that makes it easy to crop photos without installing additional software. With just a few clicks, you can quickly trim images, resize photo dimensions, and make basic edits directly on your Mac.
Step 1: Open the Image in Preview
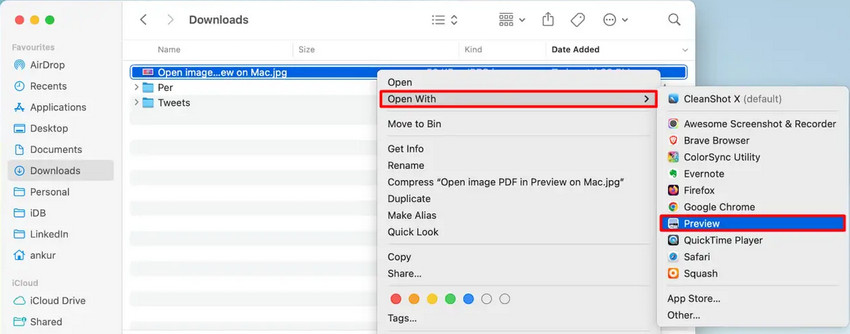
Double-click your image. Most photos open in Preview automatically on macOS. If not, right-click the image and choose Open With > Preview.
Step 2: Select the Area to Keep
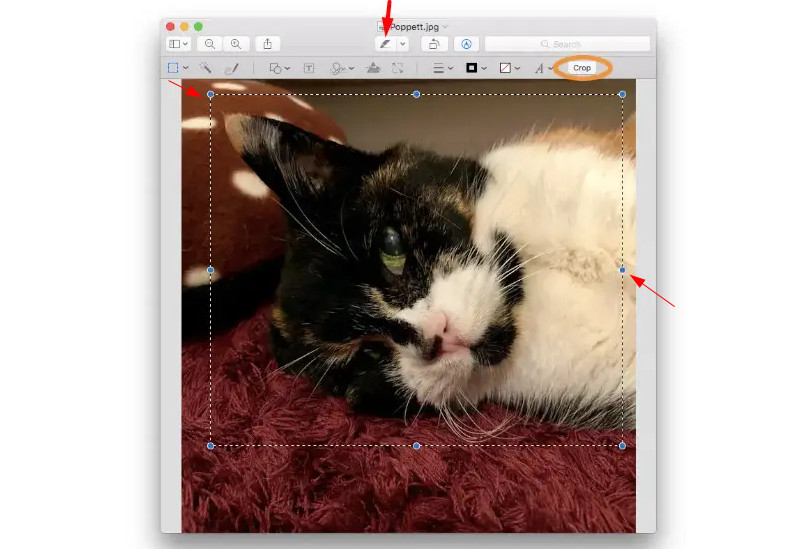
Click and drag your cursor over the part of the image you want to keep. You can adjust the selection by dragging the corners.
Step 3: Crop the Photo
Press Command + K or go to Tools > Crop. Preview will instantly remove the outside area.
Step 4: Save the Cropped Image
Click File > Save. Or export a new copy if you want to keep the original image untouched.
How to Crop Photos in the Mac Photos App
The Photos app offers more flexible editing tools than Preview while keeping your original image intact through non-destructive editing. Besides cropping, you can straighten photos, adjust aspect ratios, rotate images, and make basic enhancements without permanently changing the original file. This makes it a convenient option for users who regularly manage and edit photos on Mac.
Step 1: Open Photos
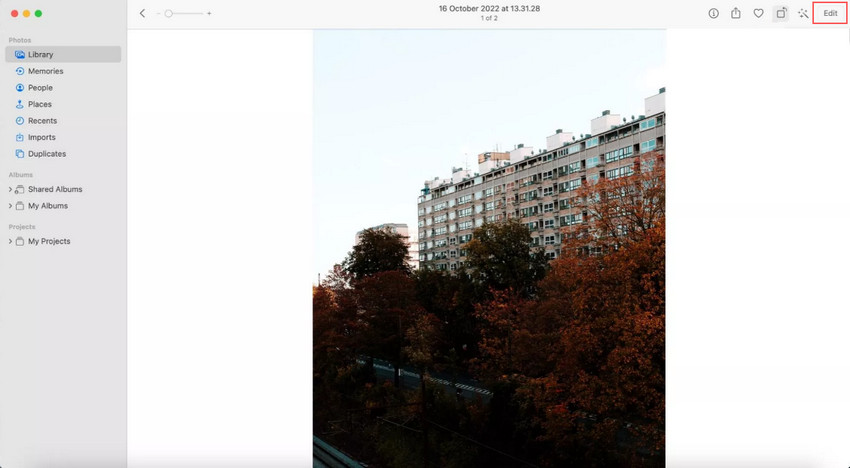
Launch the Photos app and double-click the image you want to edit.
Step 2: Enter Edit Mode
Click the Edit button in the upper-right corner.
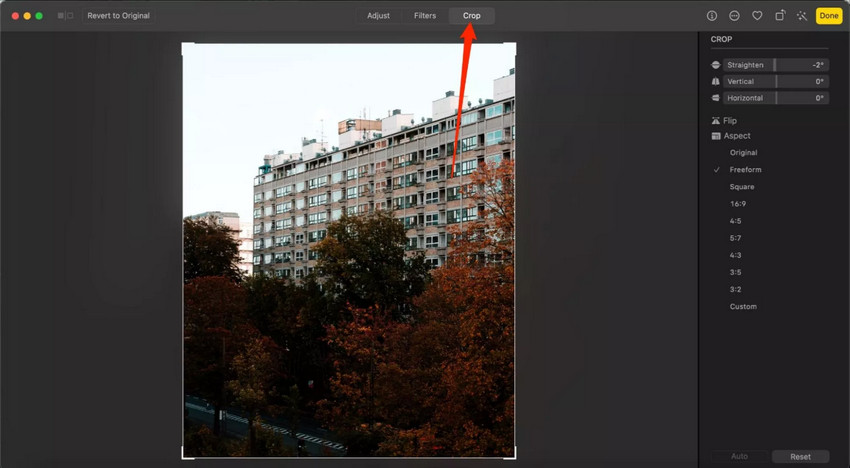
Step 3: Use the Crop Tool
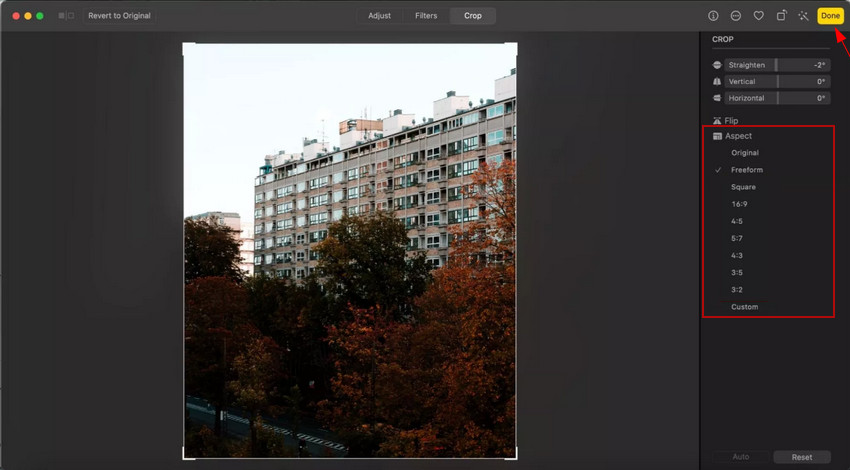
Select the Crop tab. You can freely crop the image, rotate or straighten photos, choose preset aspect ratios such as Square (1:1), 16:9, 4:5, and original ratio.
Step 4: Save Changes
Click Done to apply the crop. Unlike Preview, Photos uses non-destructive editing, meaning you can revert to the original later.
Why Cropped Photos Sometimes Look Blurry/Pixelated on Mac
Many users notice that cropped photos become softer or blurry after editing. This happens because cropping removes pixels from the original image. The more aggressively you crop, the fewer pixels remain, the lower the resolution becomes, and the less detail the image retains.
This is especially common with old photos, screenshots, zoomed-in images, social media exports, and heavily compressed JPEGs. These types of images usually have limited resolution to begin with, so cropping removes even more pixels and can quickly make details look soft, blurry, or pixelated.
How to Crop Photos on Mac Without Losing Quality
To keep cropped photos sharp, it helps to combine cropping with image enhancement.
Crop First, Then Enhance the Image
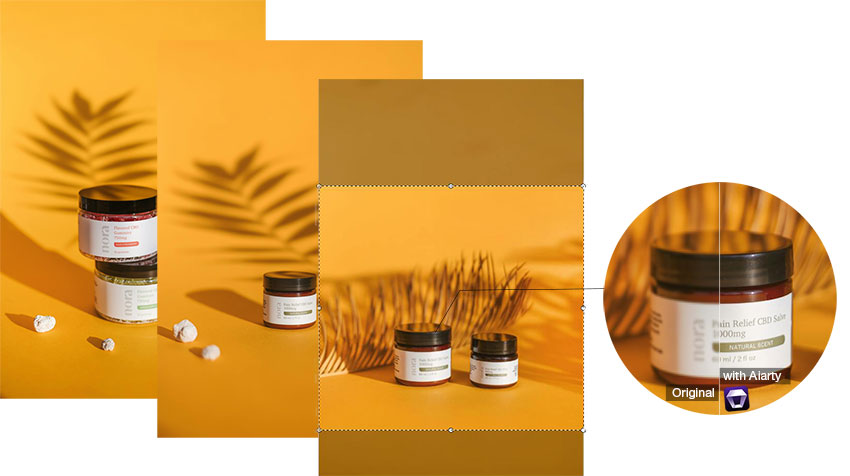
One useful option is Aiarty Image Enhancer, which can upscale cropped images, sharpen blurry details, reduce noise, and automatically improve texture quality. This workflow is especially helpful for ecommerce product photos, old family pictures, social media content, anime or AI-generated images, as well as screenshots and thumbnails.
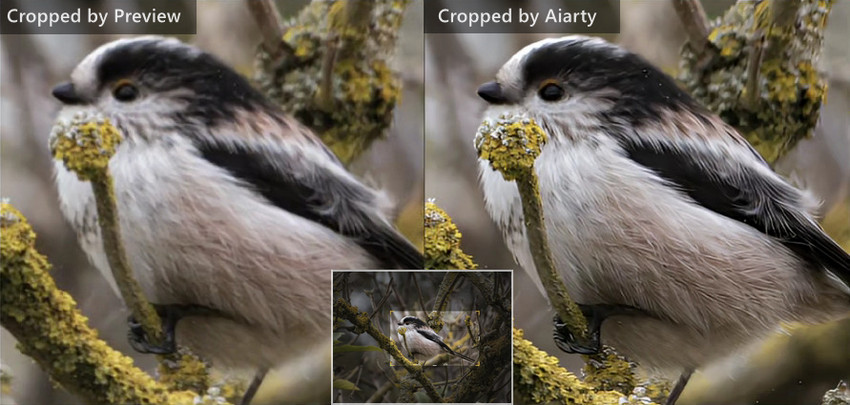
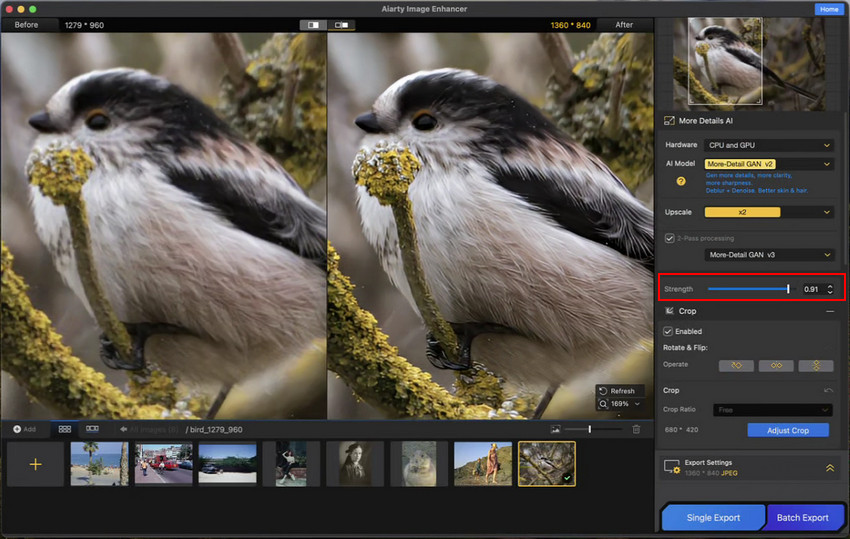
For example, if a cropped wildlife photo looks soft or loses detail after zooming in, AI enhancement can help recover sharp edges and natural textures, making it easier to refine composition and highlight the subject in the frame.
How to Enhance Cropped Photos with Aiarty Image Enhancer
Step 1: Download and launch the app on your Macbook Air/Pro, iMac, or Mac Mini.
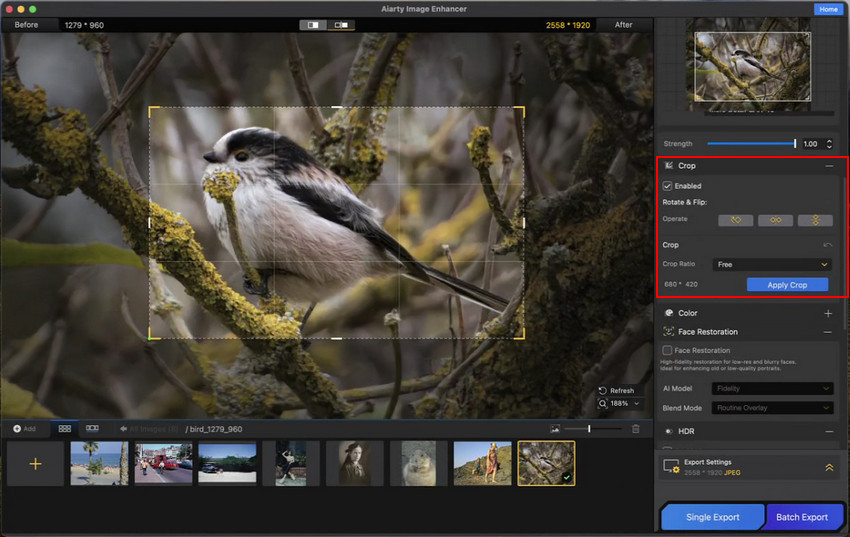
Step 2: Drag and drop your photo into Aiarty Image Enhancer to start.
Step 3: Enable the Edit option, and click on the Adjust Crop button. Now you can choose a Crop Ratio or customize it freely depending on your final use. When you're done, click on the Apply Crop to resize the photo size.
Step 4: Choose the most suitable AI model based on your image type, and determine the Upscale level as needed. Then click on the Start button to enhance the cropped photo for more details and better clarity.
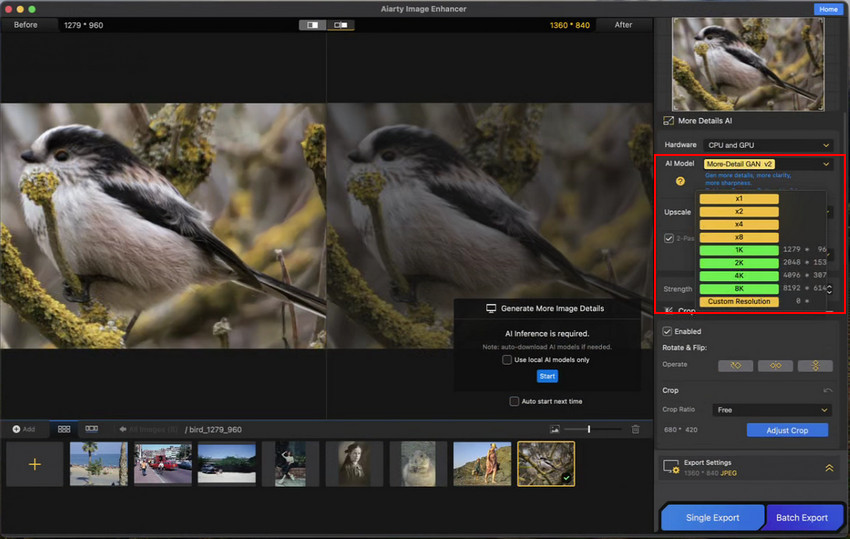
Step 4: Preview the enhanced cropped photo in the preview window. If the result looks slightly over-smoothed, adjust the Strength value to make it more natural. You can also switch AI models and experiment until you find the best balanced result.
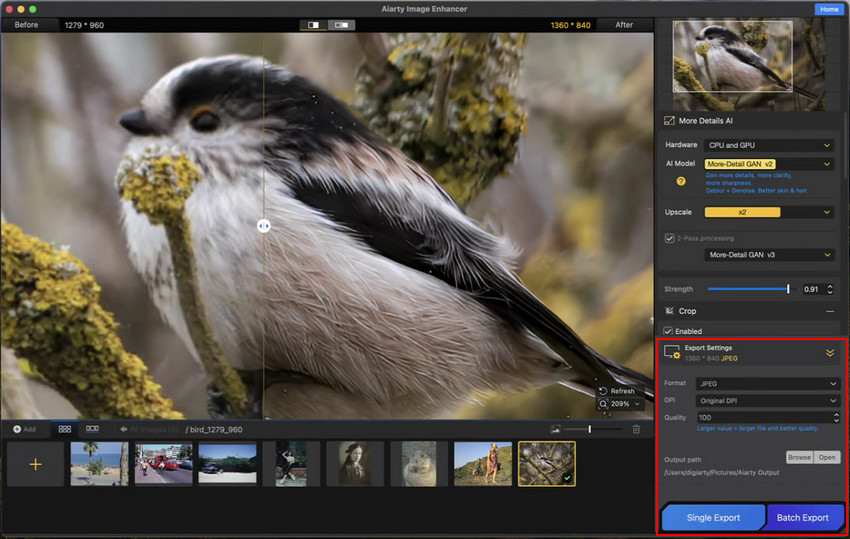
Step 5: Open Export Settings to choose format (JPEG, PNG, TIFF, DNG), quality, and DPI. Then click Single Export or Batch Export to save your high-quality image.
Batch Crop and Enhance Multiple Photos
Preview and Photos work well for occasional edits, but creators, photographers, and online sellers often need to process large batches of images more efficiently. With Aiarty Image Enhancer, you can batch crop and upscale multiple photos, optimize image resolution for ecommerce or social media, and significantly reduce editing time.
This is especially useful for Etsy sellers, online stores, content creators, real estate listings, and photography workflows that require consistent image quality across many files.
Best Aspect Ratios for Cropping Photos on Mac
Different platforms use different image ratios. Choosing the right crop size helps avoid awkward framing or unwanted compression.
- Instagram Post: 1:1
- Instagram Story: 9:16
- TikTok: 9:16
- YouTube Thumbnail: 16:9
- Etsy Product Image: 4:5
- Facebook Cover: 16:9
- Desktop Wallpaper: 16:10
If you frequently prepare images for multiple platforms, AI editing tools with batch export features can simplify the process.
Preview vs Photos vs AI Crop Tools on Mac
Here’s how the most common Mac photo cropping tools compare in terms of speed, flexibility, and output quality. Each tool serves a different purpose, from quick basic edits to more advanced AI-powered enhancement workflows.
If your goal is simply trimming an image, Preview is enough. But for restoring quality after cropping, AI-enhanced workflows are often more effective.
Common Cropping Mistakes on Mac
Even though cropping on Mac is simple, a few common mistakes can easily affect image quality or composition. Here are the most frequent issues to avoid when editing photos:
- Cropping too aggressively: Extreme crops reduce image resolution and fine details.
- Using the wrong aspect ratio: Images may look stretched or poorly framed on social platforms.
- Overwriting the original file: Always keep a backup copy before saving edits.
- Cropping low-resolution images: Small images become blurry or pixelated quickly after cropping.
- Exporting highly compressed JPEGs: Excessive compression can introduce artifacts and reduce sharpness.
While these issues are common, most of them can be avoided with proper cropping habits or by using tools that preserve image quality during editing.
Final Thoughts
Cropping a photo on Mac is simple using Preview or the Photos app, but maintaining image quality after cropping can be challenging, especially when working with low-resolution or zoomed-in images.
In many cases, users also need to enhance clarity, restore details, or process multiple images efficiently—something built-in Mac tools cannot fully handle.
For a smoother workflow, you can try Aiarty Image Enhancer, which helps you crop, upscale, and enhance images with AI-powered detail recovery and batch processing.
 FAQs about Cropping Photos on Mac
You can crop pictures using Preview or the Photos app, both built into macOS.
The shortcut is Command + K.
Yes. The Photos app supports custom aspect ratios, and AI tools can further improve image quality for social media uploads.
Cropping removes pixels from the image, which lowers resolution and can make the image appear blurry. AI enhancement tools like Aiarty Image Enhancer can help restore clarity after cropping.
Built-in Mac apps have limited batch editing support, but AI-powered tools offer more efficient workflows for processing multiple images at once.
Open the screenshot in Preview, drag to select the area you want, then press Command + K.
You May Also Like
This post was written by Brenda Peng who is a seasoned editor at Digiarty Software who loves turning ordinary photos into extraordinary works of art. With AI assistance for brainstorming and drafting, the post is reviewed for accuracy by our expert Abby Poole for her expertise in this field.