Clipping masks are one of those incredibly useful Photoshop features, letting you cleverly control the visibility of a layer based on the shape of the layer beneath it. They're a cornerstone technique for countless creative compositions and targeted photo edits.
Learning how to make a clipping mask in Photoshop is pretty fundamental for anyone serious about image editing. That said, many users initially find the layer setup a bit confusing, or they hit a wall when trying to create really precise mask shapes efficiently, especially when dealing with intricate subjects.
💡 Common Problems Making a Clipping Mask in Photoshop
Photoshop's clipping mask is a fantastic tool. But sometimes, getting the shape you need for the mask can be the tricky part, especially if it's not just simple text. Here's what can slow you down:
- Creating Photoshop masks from complex shapes in other photos is time-consuming.
- Getting clean edges around things like hair or fur for your mask shape is tough to do manually.
- Need unique shapes from many different photos? Doing them one-by-one in Photoshop is slow.
Is it possible to create perfect shape layer in seconds?
That's where Aiarty Image Matting can help. Its smart AI automatically isolate complex objects with sharp and natural edges, even handling tricky hair easily. It can do many images at once and works offline.
Free download Aiarty now to quickly create perfect shape layers for Photoshop clipping masks!
Part 1. First Things First: What Is a Clipping Mask
So, what's the big deal with clipping masks? Think of it like using a stencil or a cookie-cutter. The layer on the bottom acts as the stencil shape, and you only get to see the layer directly above it through that specific shape. It's a fantastic, non-destructive way to control exactly where one layer shows up based on the form of another layer below it.
Clipping Mask vs. Layer Mask
Now, you might ask, how is this different from a Layer Mask? Good question! A Layer Mask uses black, white, and gray paint on that specific layer to hide or reveal parts of it.
A Clipping Mask, however, uses the actual pixel content and transparency of a completely separate base layer to do the job. Clipping masks are brilliant for quickly fitting images into text or shapes.
4 Common Uses for Clipping Masks
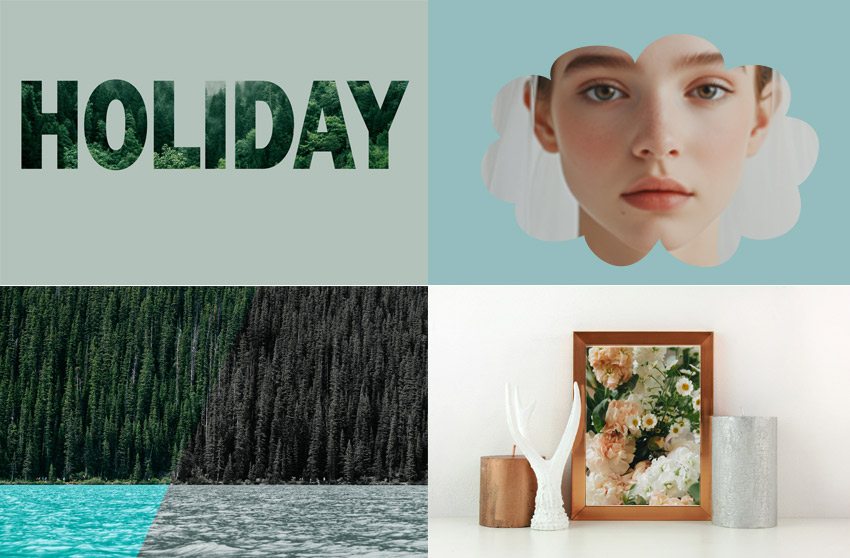
Here are a few common and inspiring things people use them for:
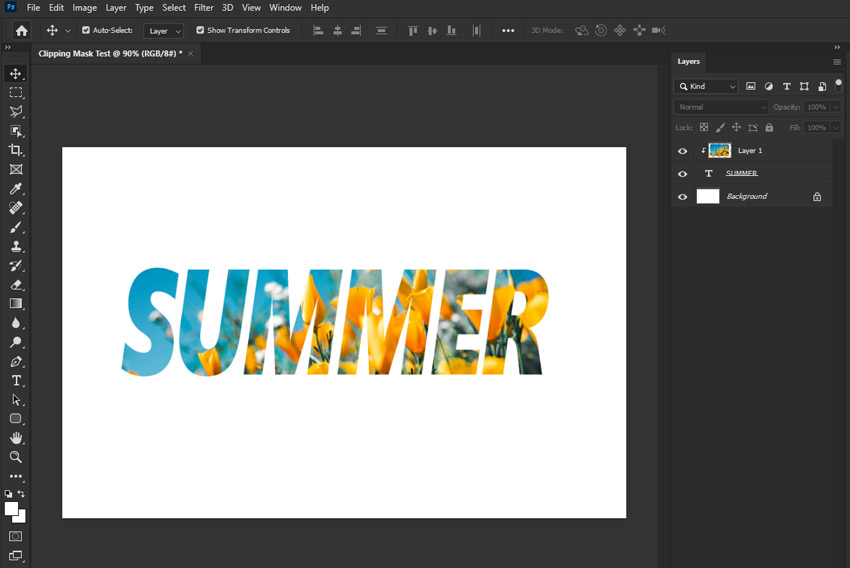
- Placing a photograph neatly inside text. This can create eye-catching typography effects.
- Adding subtle textures to logos, shapes, or illustrations without affecting the background.
- Making an adjustment layer (like Brightness/Contrast/Hue) affect only the single layer directly beneath it.
- Using custom shapes or silhouettes as frames for your photos.
Part 2. How to Make a Clipping Mask in Photoshop
Alright, let's get to the practical steps. It's easier than you might think! There are two main ways to do it.
Method 1. Using the Layer Menu
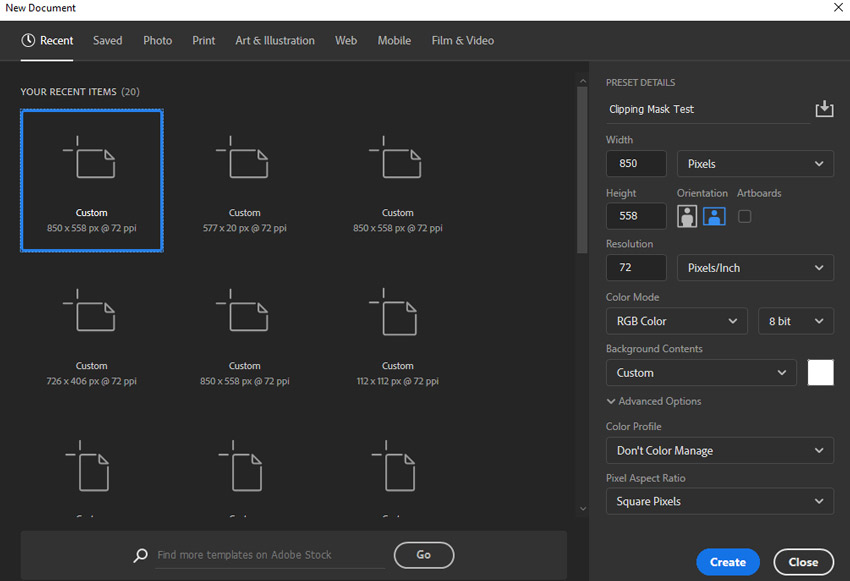
Step 1. Start with a New Document.
After launching Photoshop, go to the top menu and click File, then choose New. This opens the New Document window.
Here, you can set up your project. Choose basic settings like Resolution (usually 72 DPI for web images, 300 DPI for printing) and Color Mode (typically RGB Color for web work). Click Create to open your blank canvas.
Step 2. Create Your Shape Layer (The Mask Shape).
This layer will define the shape of your clipping mask. You can use different things for your shape:
- Use an Image as a Shape: To use an image as your shape, click File > Open and select the image you want to use as the mask. This could be a silhouette, a logo, or any object.
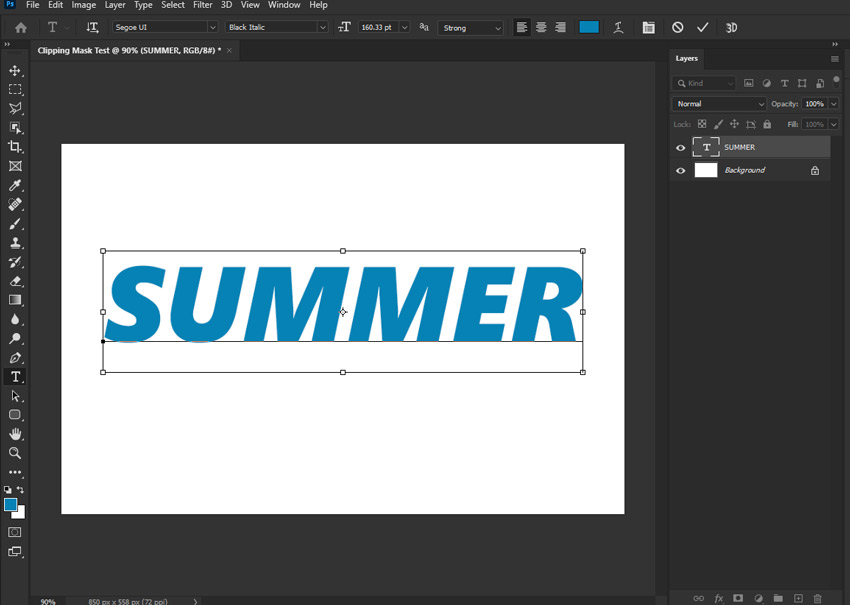
- Draw a Shape in Photoshop: Alternatively, you can draw a shape directly in Photoshop. Select tools like the Text Tool (to type words), Shape Tools (like rectangles or circles), or the Pen Tool from the toolbar.
For this example, let's use the Text Tool. Click the T icon in the toolbar and type a word on your canvas. This creates a text shape layer.
Step 3. Add Your Content Layer (The Image to Clip).
Now, you need the image that you want to show inside the shape. Click File > Open again and choose the image you want to clip. This is your content layer.
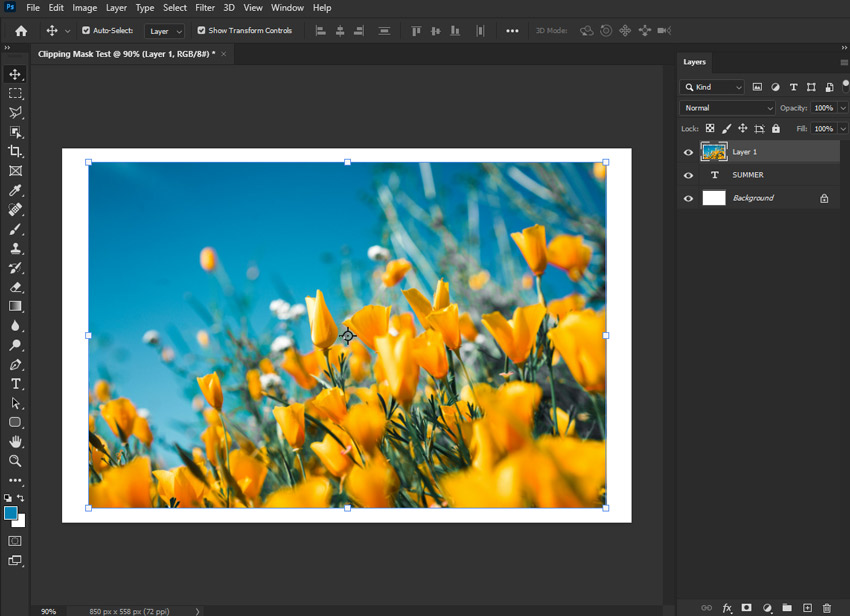
Important: Layer Order Matters!
This is the most crucial thing to remember! In the Layers panel (usually on the right side of your screen), make sure your content layer (the image you want to clip) is positioned directly above your shape layer (the text or shape you created).
Think of it like this: the shape layer is on the bottom, holding the shape, and the content layer sits on top, ready to be clipped into that shape.
Step 4. Apply the Clipping Mask Command.
In the Layers panel, right-click on the top layer (which is your content layer). A menu will pop up (this is called a context menu). From this menu, choose Create Clipping Mask. That's it!
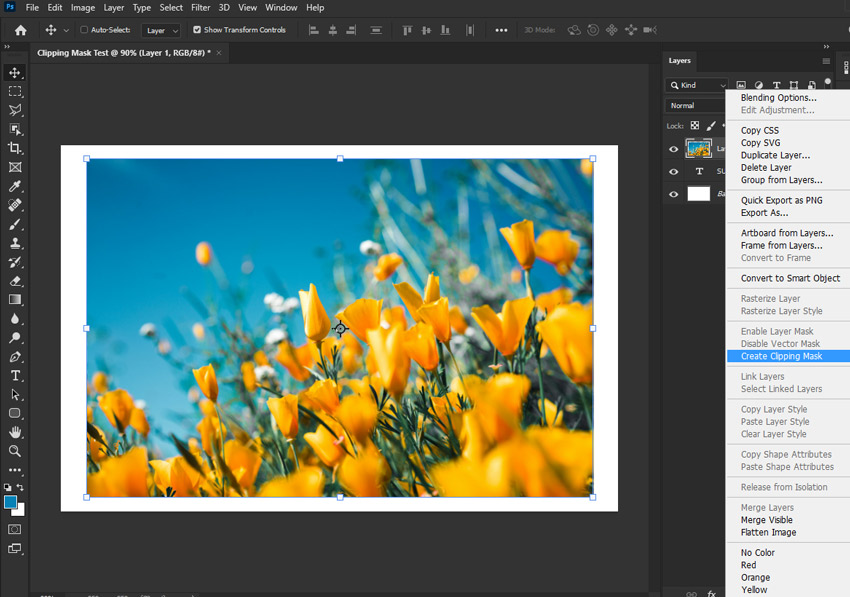
Look for the Visual Cue: You'll see two things happen in the Layers panel:
- The content layer will indent slightly to the right.
- A small downward-pointing arrow will appear next to the content layer's thumbnail.
These are visual signals that the clipping mask is active!
Method 2: The Alt/Option Click Shortcut
Once you're comfortable with the basics, this shortcut is much faster! It's a favorite among Photoshop pros.
Step 1. Double-Check Your Layer Order.
Just like in Method 1, make absolutely sure your content layer is directly above your shape layer in the Layers panel. Layer order is always key for clipping masks!
Step 2. Get Ready to Alt/Option Click.
With the Alt/Option key held down, move your mouse cursor into the Layers panel. Position your cursor precisely on the thin horizontal line that you see between your content layer and your shape layer. Your mouse cursor will change into a small icon: a square with a bent arrow. This is the clipping mask icon! When you see this icon, simply click your mouse button once. Instantly, the clipping mask is created!
Note:
If the clipping mask doesn't work right away, the most common reason is incorrect layer order. Double-check that your content layer is directly above your shape layer in the Layers panel!
Quick Tips: Editing and Releasing Clipping Masks
Editing: Non-Destructive Flexibility. The beauty of clipping masks is that even after clipping, you can still independently select either layer (the content layer or the shape layer) and move it, resize it, rotate it, or apply filters and adjustments without affecting the mask itself. Changes to the shape layer will automatically and dynamically update the clipping mask's boundaries. Experiment and refine your composition without fear of permanently altering your images!
Releasing: Easy to Undo. Changed your mind or want to adjust the clipping? No problem. Just select the clipped (top) layer in the Layers panel and go to Layer > Release Clipping Mask from the top menu. Or, even faster, use the same Alt/Option-click shortcut right on the line between the two layers again to instantly toggle the clipping on or off. Clipping masks are completely reversible and adjustable at any time.
Part 3. Try Aiarty for Faster Photoshop Clipping Masks
While Photoshop is king for applying clipping masks, actually creating the perfect, complex base shape layer can be the most time-consuming part. Manually cutting out intricate objects, detailed silhouettes, or subjects with fuzzy edges using Photoshop's selection tools takes patience and skill. What if you could generate that perfect shape layer almost instantly?
This is where Aiarty Image Matting shines as a powerful partner for your Photoshop workflow. This powerful image background remover uses specialized AI to automatically and precisely isolate subjects or objects from images, making it incredibly easy to create those complex shapes you need for your clipping masks.
Workflow Overview: Aiarty with Photoshop
- Isolate with Aiarty: Use Aiarty Image Matting's AI to instantly isolate the complex object or subject you need as your shape. It automatically handles difficult edges like hair or fur with precision.
- Export Transparent PNG: Save the clean cutout from AIAM as a PNG file with a transparent background.
- Use in Photoshop: Import this PNG into Photoshop. It's now your perfect base layer for applying a clipping mask.
Let's download download and use Aiarty for the heavy lifting, then use Photoshop for creative masking!
Step-by-Step: Getting Your Shape Layer from Aiarty
Now, let's walk through creating that shape layer in Aiarty Image Matting:
Step 1. Load your source image.
Drag and drop the photo that contains the specific object you want to cut out and use as the shape for your Photoshop clipping mask onto this image matting software.
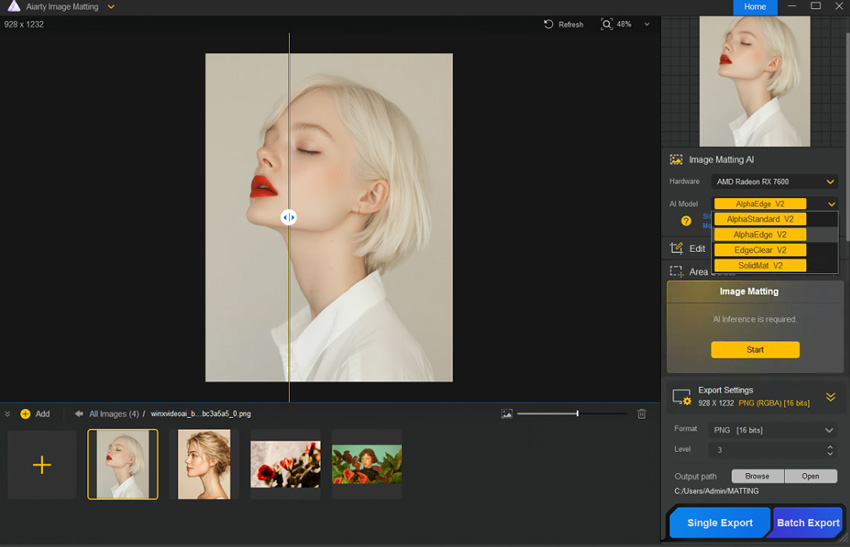
Step 2. Let AI isolate the object.
Choose the AI model that fits your subject and click Start. It will automatically generate a precise cutout. Tip: Need shapes from multiple photos? You're allowed to process images in batch.
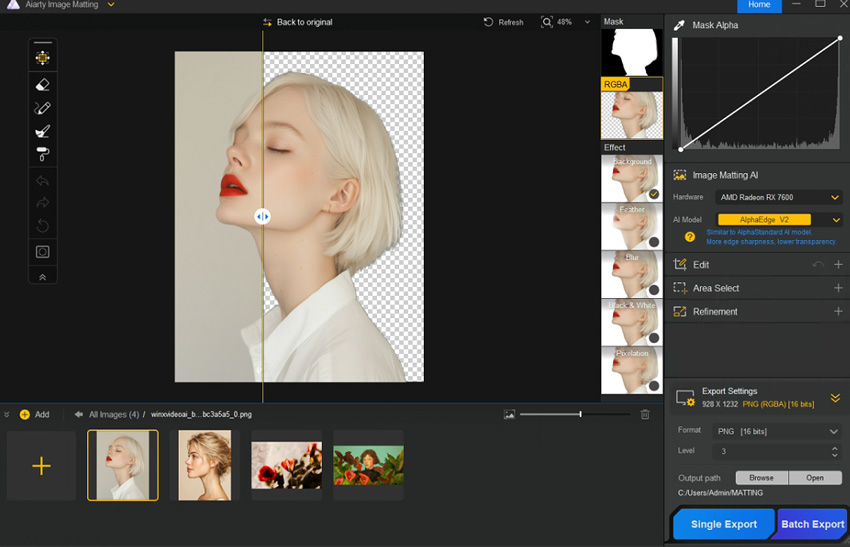
Step 3. Export the shape as a PNG.
Make sure your background is set to Transparent before you proceed. Then, simply click Single Export. The export will provide you with 3 files: an RGBA image, a mask image, and an image with a transparent background. For our purposes, the transparent background image is the one we'll be working with.
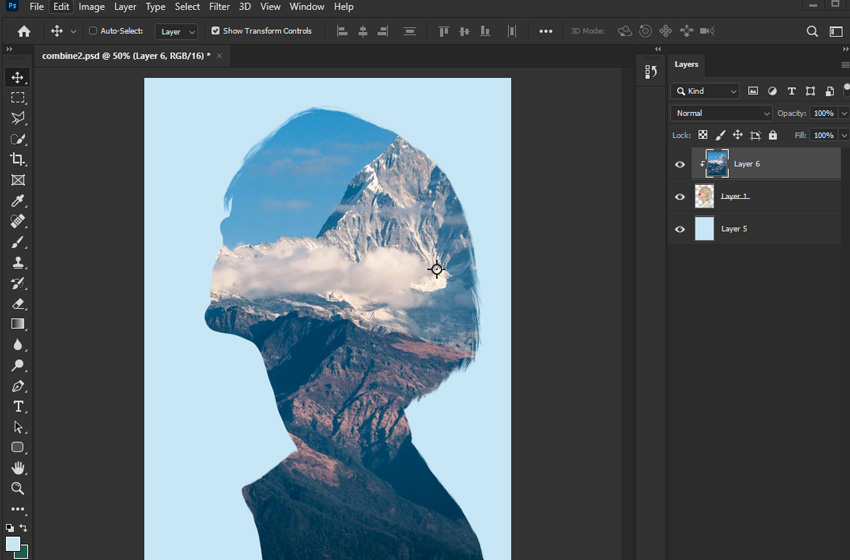
Step 4. Use the Export Shape in Photoshop
Import the PNG file you just saved into your Photoshop document. It will appear as a new layer with the isolated object on a transparent background. Place this layer below the content layer you want to clip, and then apply the clipping mask.
Tips:
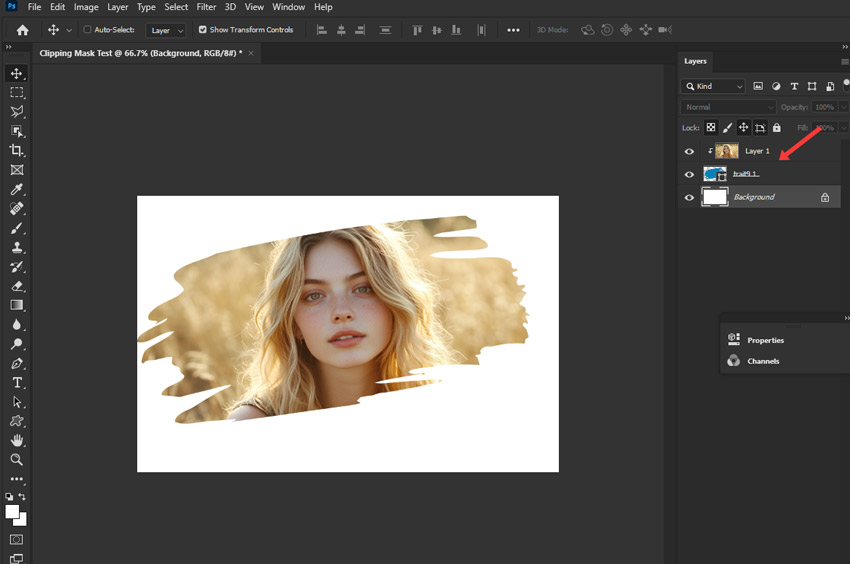
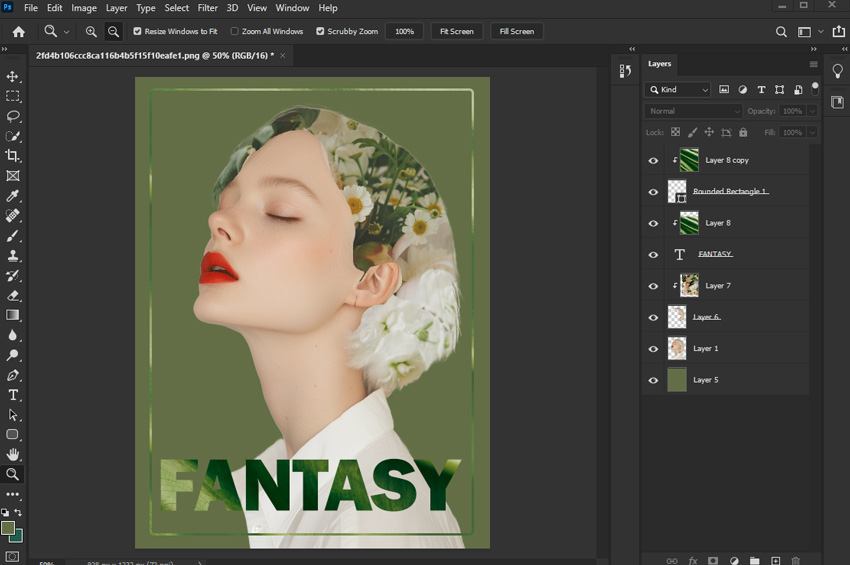
Aiarty shape layers seamlessly integrate with Photoshop, unlocking even greater creative potential. Combine them with Photoshop's familiar tools like the pen tool and shape tools to achieve amazing results.
As you can see in this example, by using Photoshop's selection, text, and shape tools, along with additional clipping masks, I've enhanced the Aiarty shape to create this poster-style image.
 FAQs
FAQs
Aiarty Image Matting streamlines the process by using AI to quickly generate precise cutouts of complex subjects, perfect for use as base shape layers in Photoshop. This saves significant time compared to manually creating intricate shapes for your clipping masks.
Stack all layers you want clipped directly above the single base shape layer, then apply the Create Clipping Mask command to each stacked layer individually. They will all conform to the same underlying base shape.
Yes, clipping masks allow non-destructive editing, meaning you can independently move, resize, or adjust the clipped content layer and the base shape layer even after the mask is active. Changes to either layer will automatically update the final look.
Ensure your content layer is directly above your shape layer in the Layers panel, as incorrect order is the most common issue. Also, confirm the base shape layer contains visible pixels (like text or a filled shape) and isn't hidden (check the eye icon).
You May Also Like
This post was written by Brenda Peng who is a seasoned editor at Digiarty Software who loves turning ordinary photos into extraordinary works of art. With AI assistance for brainstorming and drafting, the post is reviewed for accuracy by our expert Abby Poole for her expertise in this field.