


Quick Answer: How to Make Photos Look Vintage
To make photos look vintage, give them a warm or faded color tone, soften the contrast, lift the blacks, and add subtle film grain or vignetting. You can achieve this in Photoshop or Lightroom using Curves, Color Grading, and Grain controls, or apply ready-made vintage filters with mobile apps and online editors. For blurry or low-resolution images, enhance the source photo with Aiarty Image Enhancer before applying the vintage effect.
Vintage photos have a distinctive look that often brings to mind old film cameras, printed photographs, and analog photography. Their warm color tones, faded blacks, soft contrast, and subtle grain can give even a modern digital image a nostalgic feel.
You don't need an old camera or special film to recreate this style. With the right editing techniques, you can make photos look vintage using Photoshop, Lightroom, mobile apps, and online photo editors. This guide covers five practical methods, along with tips for creating a natural-looking retro film effect.
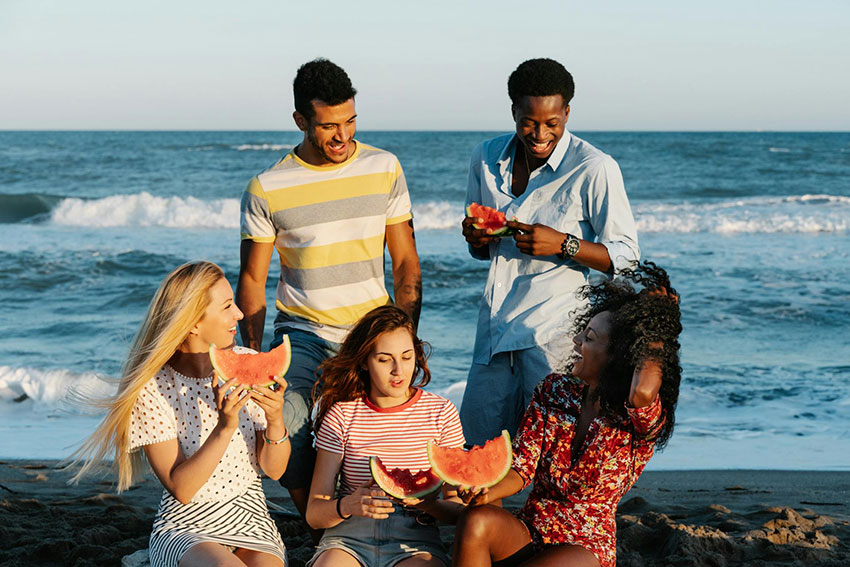
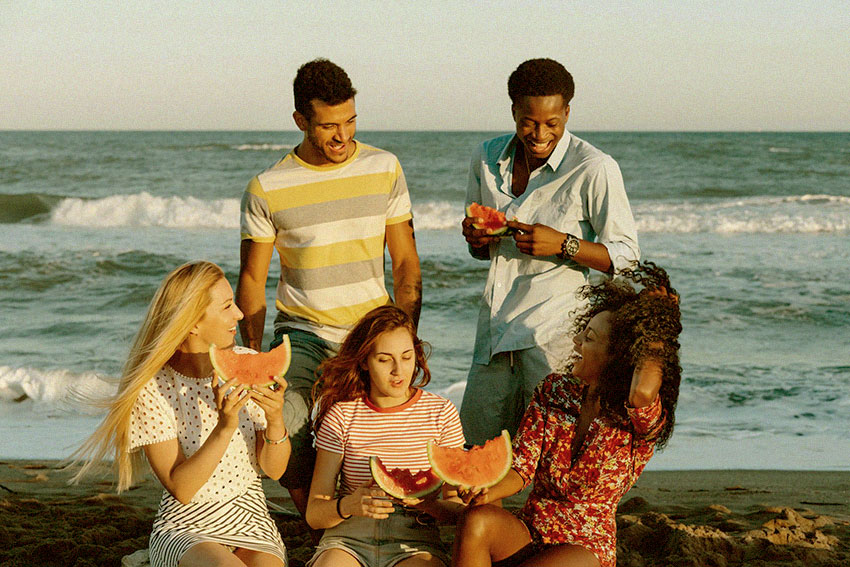

What Makes a Photo Look Vintage?
A vintage photo effect imitates the appearance of photographs taken with older film cameras or printed using traditional photographic processes. Although different film stocks and decades have their own characteristics, several visual elements commonly contribute to a retro look:
- Warm or muted colors: Yellow, orange, brown, and faded green tones can create a nostalgic atmosphere. Some vintage styles also use cooler, desaturated colors.
- Faded blacks and soft contrast: Raised black levels make dark areas look less deep, giving the image a slightly faded appearance.
- Film grain: Fine, irregular grain adds texture and helps recreate the appearance of analog film.
- Soft highlights: Slightly softened or faded highlights can make an image feel less digitally sharp.
- Vignetting and light leaks: Darkened corners or subtle light leaks can add character, depending on the desired film style.
Not every vintage photo needs all these elements. A subtle warm tone and gentle grain may be enough for a classic film look, while a more faded or aged effect may require stronger color shifts and reduced contrast.
Related Reading: What to Do with Old Photos?
5 Ways to Make Photos Look Vintage
There are several ways to create a vintage photo effect, depending on your editing experience and the level of control you want. Desktop software offers more precise adjustments, while mobile apps and online editors make it easier to apply ready-made effects.
1. Create a Vintage Photo Effect in Photoshop
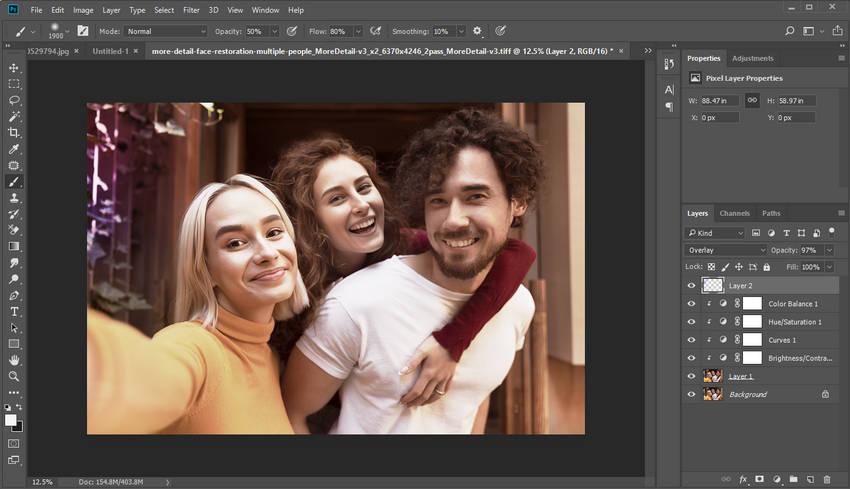
Photoshop gives you precise control over color, contrast, texture, and lighting. You can combine several adjustment layers to create a customized vintage look without permanently changing the original image.
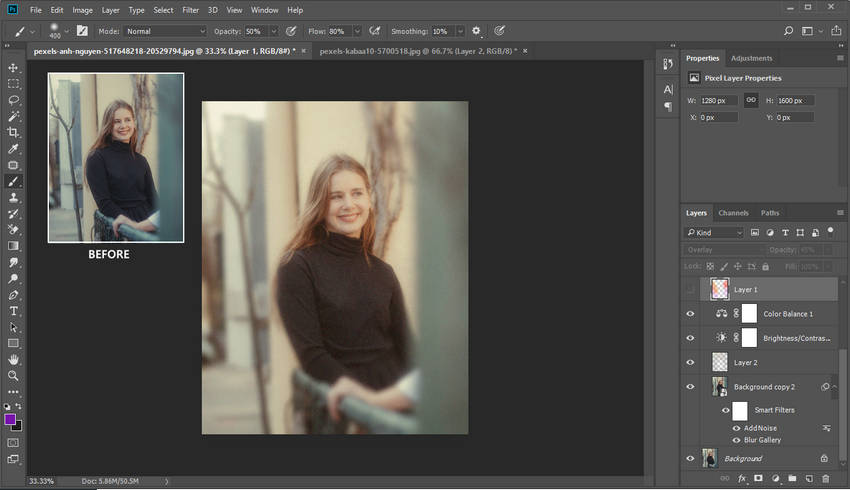
Here's a simple workflow for making a modern photo look like an old film photograph:
- Open your photo and duplicate the background layer. This keeps the original image intact and allows you to adjust the effect later.
- Fade the shadows with Curves. Go to
Layer > New Adjustment Layer > Curves. Select the lower-left point of the RGB curve and move it slightly upward to lift the blacks. You can also gently lower the highlights to soften the overall contrast. - Add a warm color cast. Create a Color Balance adjustment layer and add a little red and yellow to the midtones. You can also adjust the shadows and highlights separately for a more nuanced film-like color palette.
- Reduce color saturation. Add a Hue/Saturation adjustment layer and lower the overall saturation slightly. Avoid removing too much color unless you're aiming for a washed-out look.
- Add film grain. Create a new layer, fill it with 50% gray, and set its blend mode to Overlay or Soft Light. Then apply
Filter > Noise > Add Noise. Use a small amount of monochromatic noise and adjust the layer opacity to keep the texture subtle. - Apply a subtle vignette. Use a Curves adjustment layer with a layer mask, or the Camera Raw Filter's Effects controls, to darken the edges slightly and draw attention toward the subject.
Once these adjustments are in place, fine-tune their opacity and strength. A good vintage effect should feel cohesive rather than looking like several filters stacked together.
Also See: How to Add Film Grain in Premiere Pro for Cinematic Look
2. Apply a Vintage Look in Lightroom
Lightroom is a convenient option for creating vintage-style photos, especially when you want to edit multiple images with a consistent color treatment. Its Tone Curve, Color Grading, and Effects panels provide the main controls needed to recreate a film-inspired look.
Follow these steps in Lightroom Classic:
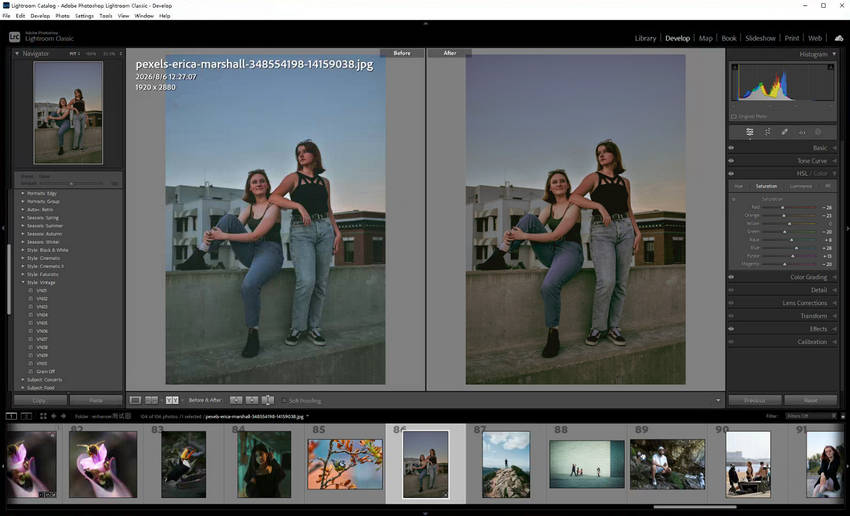
- Open your photo in the Develop module. Start with a well-exposed image and make basic exposure and white balance adjustments if needed.
- Lift the black levels using the Tone Curve. Open the Point Curve and drag the bottom-left point upward slightly. This creates faded blacks instead of deep, pure black shadows.
- Adjust the color with Color Grading. Add a subtle warm tint to the highlights and midtones. You can introduce a slight complementary tint into the shadows for a more film-like color balance. Adjust the Blending and Balance controls to refine the result.
- Reduce saturation with the HSL/Color panel. Adjust individual colors rather than lowering overall saturation too much. For example, you can soften overly bright greens and blues while retaining natural skin tones.
- Add grain and vignette. Under
Effects, increase Grain gradually. Adjust Size and Roughness to control the texture. You can also add a subtle Post-Crop Vignette to darken the corners. - Fine-tune the final look. Revisit exposure, contrast, and white balance to make sure the vintage treatment suits the subject and lighting.
Lightroom also lets you save your adjustments as a preset. Once you've created a look you like, click the + icon in the Presets panel and choose Create Preset. You can then apply the same style to other photos and adjust individual settings as needed.
3. Use Mobile Apps to Add Vintage Filters
If you prefer editing photos on your phone, mobile apps offer a quick way to create a retro film look. Many include ready-made filters inspired by analog cameras, old prints, and different film stocks. You can also fine-tune the colors, grain, and contrast after applying a filter.
Here are three mobile apps worth considering:
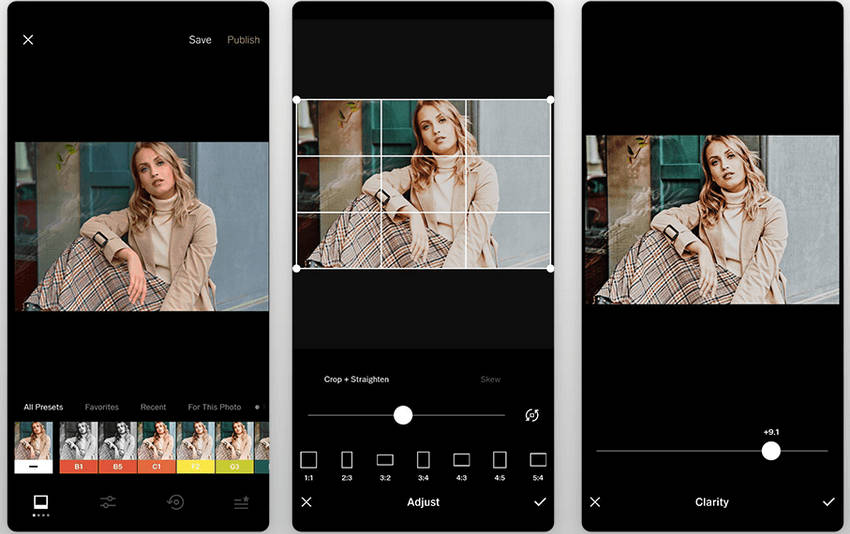
- VSCO: VSCO offers film-inspired presets and manual editing controls for creating warm, muted, or faded photo styles. You can start with a preset and adjust its intensity, then refine contrast, saturation, and grain to make the result more personal. It's a good choice if you want a consistent aesthetic across a series of photos.
- Snapseed: Snapseed provides several tools for creating a vintage look without relying entirely on presets. Its Vintage and Grainy Film filters offer ready-made effects, while Curves, White Balance, and other adjustment tools give you more control over the final image. It's useful if you want to experiment with different retro styles using a free mobile editor.
- Dazz Cam: Dazz Cam focuses on recreating the appearance of analog cameras. Depending on the selected camera style, it can add film-like colors, grain, light leaks, and other retro characteristics. It's particularly convenient when you want a camera-inspired look without adjusting every setting manually.
Tip: Don't rely on filter strength alone. After applying a vintage preset, reduce its intensity if the colors look too strong or the grain becomes distracting. Small adjustments often produce a more natural result.
4. Try Vintage Photo Effects in Other Desktop Photo Editors
Photoshop and Lightroom aren't the only desktop photo editing tools for creating a retro look. Some photo editors offer creative filters, color grading, and preset-based workflows that make vintage editing more accessible.
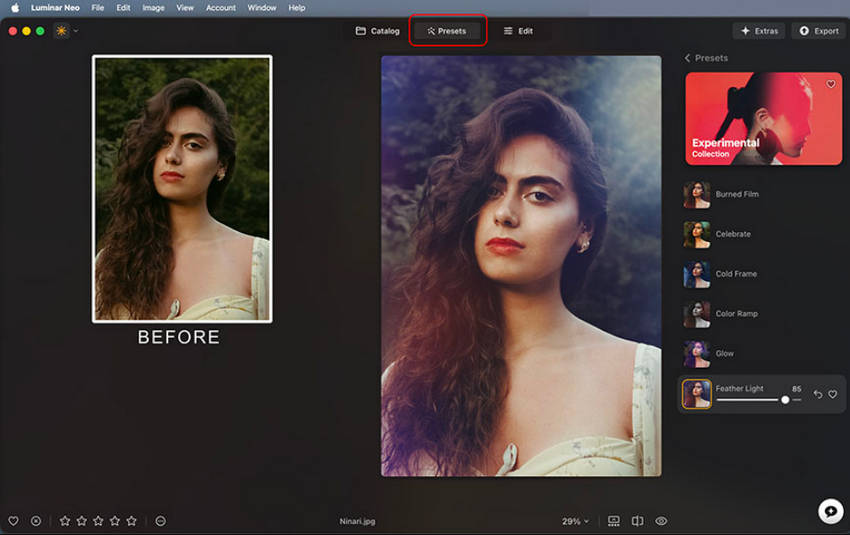
For example, Luminar Neo combines traditional photo editing controls with AI-assisted tools and creative effects. You can experiment with color adjustments, atmospheric effects, and different creative looks to give photos a nostalgic appearance. Its preset-based workflow is useful if you want to try different styles before fine-tuning individual settings.
Other desktop photo editors can also help you create a vintage look. Here are a few options:
- Capture One: Offers color grading and film grain controls for recreating analog tones and textures.
- ON1 Photo RAW: Includes creative filters and presets for adding retro colors and vintage effects.
- DxO PhotoLab: Provides film-inspired rendering and color adjustment tools to give digital photos a more classic appearance.
5. Use Online Vintage Photo Editors and AI Effects
Online photo editors make it easy to create vintage-style photos without installing desktop software. Many offer ready-made filters, color adjustments, and AI-powered effects that can give modern images a retro appearance. Here are a few options:
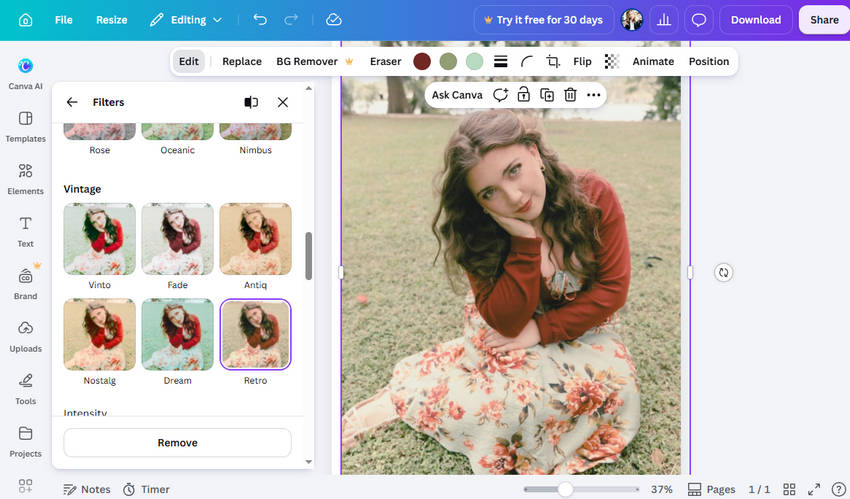
- Canva: Offers vintage photo filters and editing effects that let you add retro tones, faded colors, and other nostalgic touches to your images.
- Fotor: Provides online vintage filters and photo effects for creating aged, film-inspired, and retro-style images with minimal manual adjustments.
- insMind: Offers AI-powered photo effects that can transform images into different artistic styles, including vintage-inspired looks.
These browser-based tools are convenient for quick edits, especially when you don't need detailed control over every adjustment. However, AI-generated effects may change more than just the colors and texture. Check the results carefully if you want to preserve the original composition and subject details.
How to Prepare Photos for Vintage Editing
Before applying a vintage effect, take a moment to check the quality of the original photo. If an image is already blurry, noisy, or low-resolution, adding grain and reducing contrast may make its details even harder to see. This is especially noticeable in portraits, cropped images, and older digital photos.
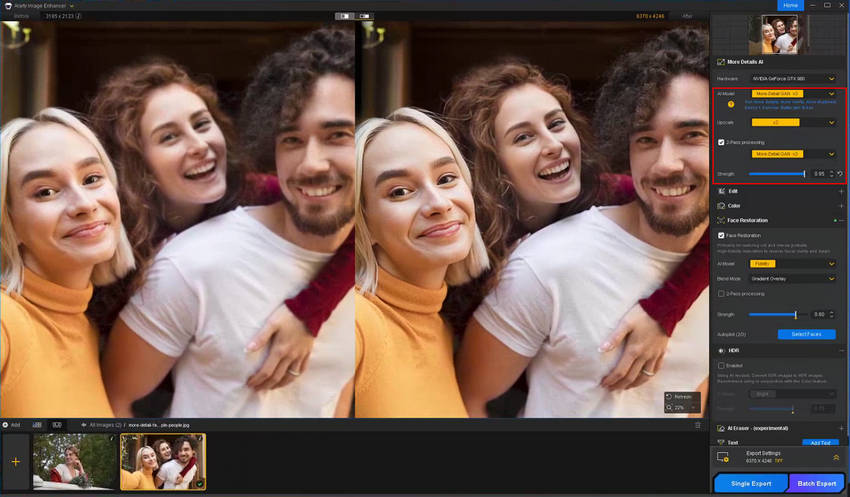
If the source image needs some quality improvement, you can use Aiarty Image Enhancer before moving on to creative editing. It uses AI models to improve image clarity, reduce unwanted noise, and upscale low-resolution photos. Its Face Restoration feature can also help recover facial details in blurry or low-resolution portraits.
A practical workflow looks like this:
- Import the original photo into Aiarty Image Enhancer. Choose an AI model based on the main quality issue, such as blur, noise, or insufficient detail.
- Adjust the enhancement strength. Preview the result and fine-tune the Strength setting to avoid an overly processed appearance. For portraits that need more facial detail, try Face Restoration and compare the available settings.
- Export the enhanced image. Save the result at a suitable resolution for your intended use.
- Continue editing in your preferred photo editor. Open the enhanced image in Photoshop, Lightroom, or another editor to add warm tones, faded blacks, film grain, and other vintage characteristics.
Aiarty Image Enhancer is not a vintage filter tool. Its role is to improve the source image when necessary, while the creative editor handles the retro look. This separation can be helpful when you want to retain recognizable details while giving a photo a different visual style.
Tips for Getting a Natural Vintage Film Look
Applying a vintage filter is only the starting point. The best results usually come from balancing color, contrast, and texture rather than maximizing every effect. Keep these tips in mind when editing:
- Start with the right color palette. Warm yellows, soft browns, muted greens, and faded blues can all create a nostalgic feel. Choose tones that complement the subject instead of applying the same color treatment to every photo.
- Keep film grain subtle. A little grain adds texture, but too much can obscure fine details and make the image look excessively noisy. Adjust grain size and intensity according to the photo's resolution.
- Don't overdo faded blacks. Lifting the shadows creates a classic faded look, but excessive adjustment can make the photo appear flat. Retain enough contrast to keep the subject visually clear.
- Preserve natural skin tones. Warm color grading can easily make faces look too orange or yellow. Check skin tones separately, especially in portrait photography.
- Match the effect to the subject. A soft, faded treatment may suit portraits and lifestyle photos, while stronger grain and muted colors may work better for street photography or landscapes.
- Use light leaks and vignettes selectively. These effects can add an analog feel, but excessive overlays may distract from the main subject.
- Compare the edited photo with the original. Temporarily disable your adjustment layers or filters to check whether the effect improves the overall image without removing too much detail.
 FAQ
You can use Lightroom, mobile apps such as VSCO and Snapseed, or online photo editors such as Canva and Fotor. Start by warming up the colors, reducing contrast, lifting the blacks, and adding subtle grain or vignetting. Many of these tools also offer ready-made vintage filters that you can adjust to suit your photo.
Film-inspired photos often have visible grain, softer contrast, slightly faded blacks, and distinctive color tones. Depending on the film style, they may also feature warm highlights, muted greens, subtle color shifts, or light leaks. Combining a few of these characteristics usually creates a more convincing film look than applying a strong filter alone.
Reduce the contrast, raise the black point with a Tone Curve, and slightly desaturate the colors. You can also add a warm or faded color cast and a small amount of grain. For a more aged appearance, experiment with subtle vignetting and faded highlights.
Yes. You can recreate many characteristics of analog photography with modern editing software. Adjust the color palette, soften contrast, lift shadows, and add film grain to give a digital photo a retro appearance. Photoshop, Lightroom, mobile apps, and online photo editors all offer ways to achieve this effect.
In Lightroom, open the Effects panel and adjust the Grain, Size, and Roughness controls. In Photoshop, create a new layer, fill it with 50% gray, set the blend mode to Overlay, and apply Add Noise from the Filter menu. You can also use mobile apps with built-in grain effects. Start with a low intensity and increase it gradually.
You May Also Like


This post was written by Brenda Peng who is a seasoned editor at Digiarty Software who loves turning ordinary photos into extraordinary works of art. With AI assistance for brainstorming and drafting, the post is reviewed for accuracy by our expert Abby Poole for her expertise in this field.
