
Wildlife Photography Guide: How to Take Sharp & Clear Photos

Updated on
Wildlife photography rarely gives you a second chance. The moment is there for only a few seconds: a bird takes flight, a fox looks toward the light, or a deer suddenly steps into the open. You raise the camera, focus, and press the shutter. But when you review the photos later, the subject looks softer than you expected.
Sharp wildlife photos depend on more than having a high-resolution camera or a long lens. Shutter speed, autofocus, ISO, light, shooting distance, and even your knowledge of the animal can all make the difference between a missed shot and a photo worth keeping.
In this guide, we'll cover practical wildlife photography tips for getting sharper photos in the field, from camera settings and autofocus to lenses, composition, and post-processing.
Practical Tips for Better Wildlife Photography
Compared with fixing problems after a wildlife photo has been taken, it is better to give yourself the best chance of getting a sharp shot in the field. Knowing the common sharpness killers in wildlife photography can help you prepare before the moment arrives.
1. Know Your Subject Before You Shoot
Learn how the animal behaves. Before you head out, research when your subject is most active, where it feeds or rests, and how it typically moves. Knowing these patterns helps you anticipate the action instead of reacting at the last second.
Research the location and conditions. Check the habitat, weather, and expected light. Think about where you can position yourself and whether the animal is likely to appear in open shade, direct light, or a cluttered background. Bring appropriate clothing and camera protection for the conditions.
Prepare before the moment arrives. If you know a bird is likely to take flight from a particular perch, for example, you can choose a faster shutter speed and suitable autofocus mode in advance. The less you need to adjust when the action starts, the more attention you can give to timing and composition.
2. Choose a Camera for Wildlife Photography
You don't need the most expensive camera to get started with wildlife photography. What matters more is whether the camera can keep up with moving subjects and give you enough image quality for cropping and post-processing.
When comparing cameras, pay attention to a few features that can make a practical difference in the field:
- Autofocus and subject tracking: Reliable tracking and animal or eye detection can help maintain focus when wildlife moves unpredictably.
- Continuous shooting: A faster burst rate gives you more chances to capture the right wing position, expression, or moment during fast action.
- High-ISO performance: Wildlife is often photographed in early morning, late afternoon, or shaded environments, so good performance at higher ISO settings can be useful.
- Resolution: Higher resolution gives you more flexibility when cropping a distant subject while retaining useful detail.
- Weather sealing and battery life: These practical features matter when you're spending hours outdoors in changing weather or away from a power source.
Both mirrorless and DSLR cameras can produce excellent wildlife photos. Mirrorless systems offer features such as real-time exposure previews and advanced subject detection, while DSLRs remain capable choices, particularly for photographers who already own compatible lenses and accessories.
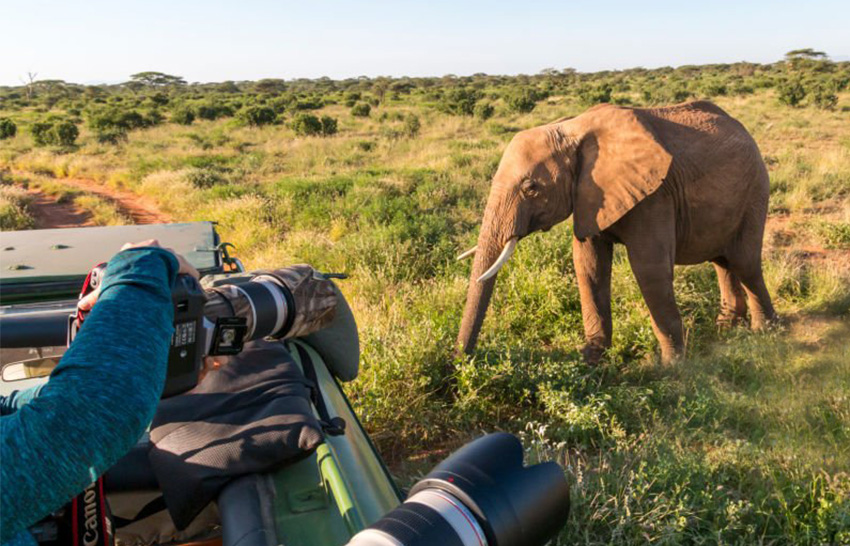
Popular Cameras for Wildlife Photography
- Nikon COOLPIX P950: A bridge camera with an exceptionally long built-in zoom, useful when your subject is far away.
- Canon EOS R10: A relatively compact APS-C mirrorless camera with animal-detection autofocus.
- Canon EOS R5: A high-resolution full-frame option that provides plenty of room for cropping.
- Sony α9 III: Designed for high-speed shooting and fast-moving subjects.
- Nikon Z9: A high-end mirrorless camera with advanced subject detection, fast continuous shooting, and high resolution.
- Canon EOS 90D: An APS-C DSLR with high resolution and fast continuous shooting for wildlife and other action photography.
The camera is only part of the equation, however. Even a capable camera needs the right shutter speed, aperture, ISO, and autofocus settings for the conditions. That's where your shooting setup can make a much bigger difference.
Learn More: How to Clean a Camera Sensor - Remove Dust Spots and Keep Your Photos Sharp
3. Set the Right Camera Settings
There is no single set of camera settings for every wildlife encounter. Start with the animal's movement, available light, and the focal length you're using, then adjust your settings to keep the subject sharp and well exposed.
As a general starting point:
- Birds in flight: 1/1600s–1/3200s
- Fast-moving mammals: 1/1000s–1/2000s
- Relatively still wildlife: 1/500s–1/1000s
- Low light: Use the widest practical aperture and raise ISO as needed to maintain a usable shutter speed.
These are starting points rather than rules. Light, subject movement, focal length, and your shooting position may all require adjustments.
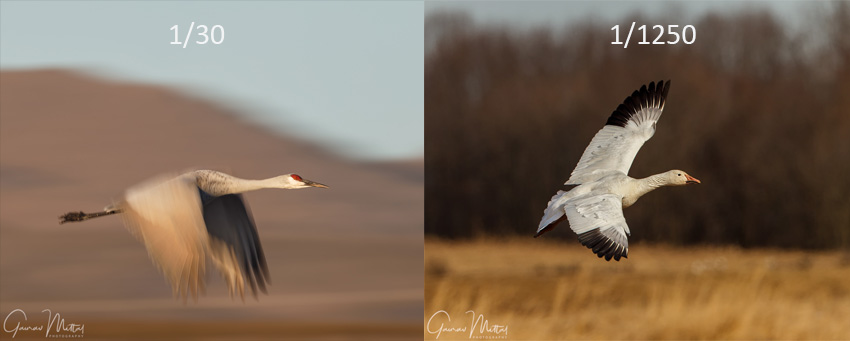
Shutter Speed: Keep Fast-Moving Wildlife Sharp
Shutter speed is usually the first setting to adjust for moving wildlife. A bird sitting on a branch may be sharp at 1/500s, while a bird taking flight may need 1/1600s or faster. If light is limited, raise ISO or open the aperture rather than sacrificing too much shutter speed.
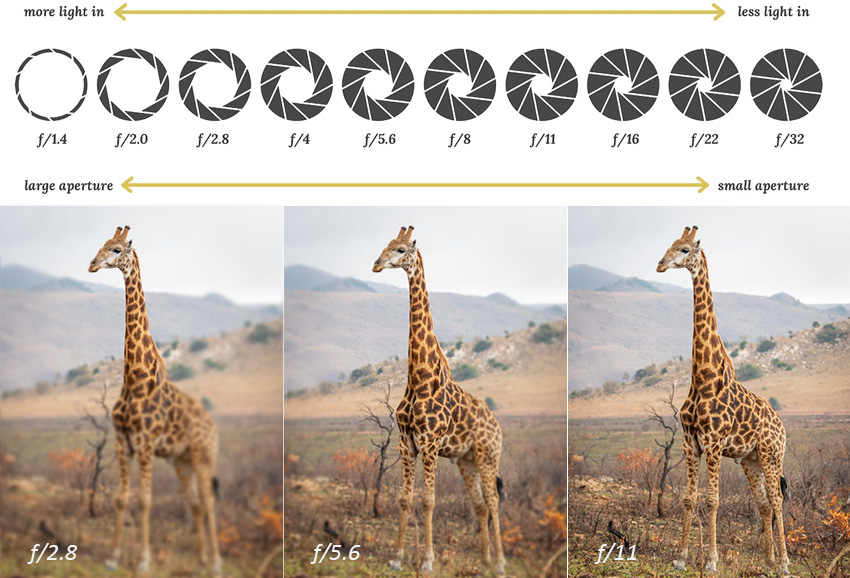
Use Aperture to Balance Light and Depth of Field
A wider aperture lets in more light and can separate the animal from the background, but an extremely shallow depth of field may leave part of the subject soft. When light allows, stopping down slightly can help keep more of the animal within the focus area.
Raise ISO When You Need More Shutter Speed
Higher ISO can introduce more noise and grain, but some noise is often preferable to motion blur. If a high-ISO image needs further cleanup, Aiarty Image Enhancer can reduce noise and refine fine details during post-processing.
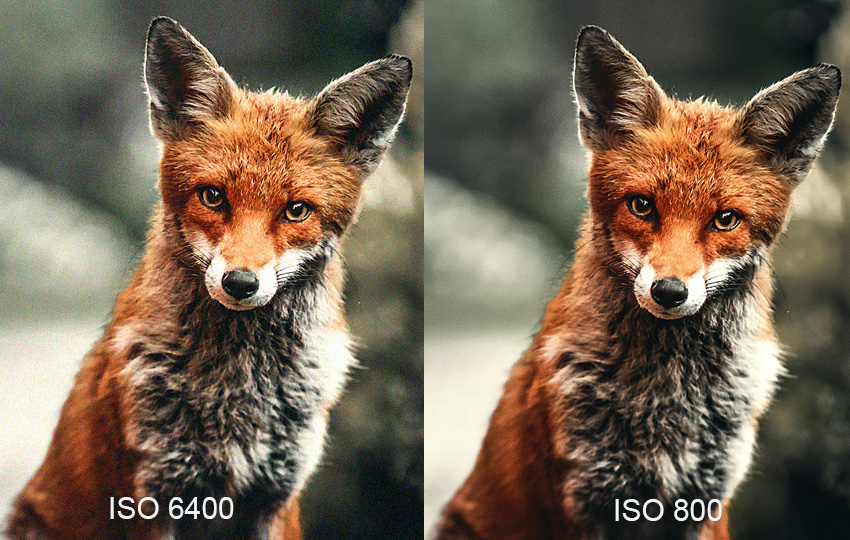
Think of the Exposure Triangle as a Whole
Shutter speed, aperture, and ISO work together. For fast-moving wildlife, protect shutter speed first; in low light, raise ISO when necessary; and use aperture to control light and depth of field. The right balance depends on the scene rather than a fixed combination of settings.
Once exposure is under control, focus becomes the next major factor in getting sharp wildlife photos.
4. Get Focus Where It Matters
A fast shutter speed cannot help if the camera focuses on the wrong part of the scene. Wildlife often moves unpredictably, while branches and grass can easily compete with the subject for focus.
Use continuous autofocus for moving subjects. AF-C and similar tracking modes continuously adjust focus as the animal moves. If your camera supports animal or eye detection, enable it when it works reliably for your subject.
Choose the focus area for the scene. Wide-area tracking can work well with an isolated animal, while a smaller focus area gives you more control when branches, grass, or other objects are competing for focus. For close wildlife portraits, keep the visible eye as your priority when possible.
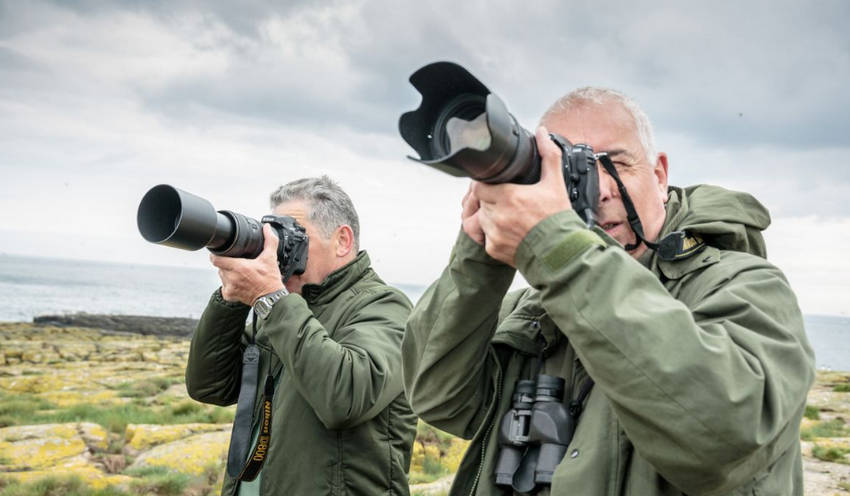
Give autofocus a better chance. Position yourself to reduce foreground clutter, anticipate where the animal will move, and use burst shooting when the action is unpredictable. The goal is not to make every frame perfect, but to increase your chances of getting one with the right focus, pose, and timing.
5. Choose a Focal Length That Fits Your Subject
For wildlife photography, the right focal length depends largely on how far you are from the animal and how much of the frame you want it to fill. Longer focal lengths give you more reach without getting physically closer, which is especially useful for birds and wary animals.
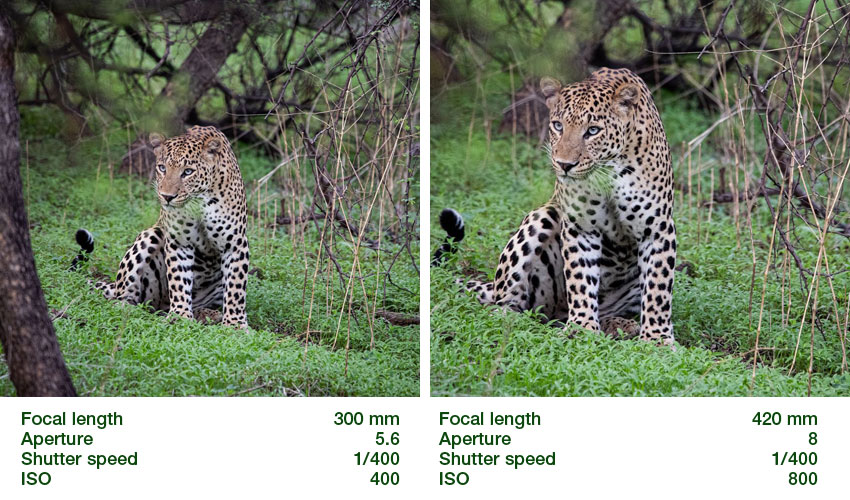
- 100–400mm: A flexible range for wildlife that is relatively close, larger animals, and situations where you may need to quickly adjust your composition.
- 200–600mm: More reach for distant birds and smaller animals, while still giving you some flexibility to reframe as the subject moves.
- 400mm, 500mm, or 600mm primes: Longer prime lenses provide more reach and often a wider maximum aperture, but they are less flexible when the shooting distance changes.
Consider your camera and accessories. An APS-C camera provides a narrower field of view than full frame at the same focal length, which can give you more effective reach. A teleconverter can extend focal length further, although it may reduce the maximum aperture and affect autofocus performance depending on the lens and camera.
Pay attention to minimum focusing distance. A lens with plenty of reach is not always ideal when an animal gets unexpectedly close. Make sure the lens can focus at the distances you are likely to encounter.
If you often find yourself cropping heavily just to make the animal visible, the problem may not be image quality at all. You may simply need more reach. Getting more pixels on the subject in-camera can make a bigger difference than trying to recover detail later.
6. Compose for the Animal and Its Environment
Wildlife composition is often about giving the animal enough room to look or move, while keeping the background from distracting from the subject. Instead of trying to follow a fixed composition rule, pay attention to where the animal is facing, moving, and interacting with its surroundings.
Leave space in the direction of movement. If a bird is flying or an animal is looking toward one side of the frame, leaving some open space in front of it can make the image feel more natural. Avoid placing the subject too close to the edge unless you want a tighter or more tense composition.
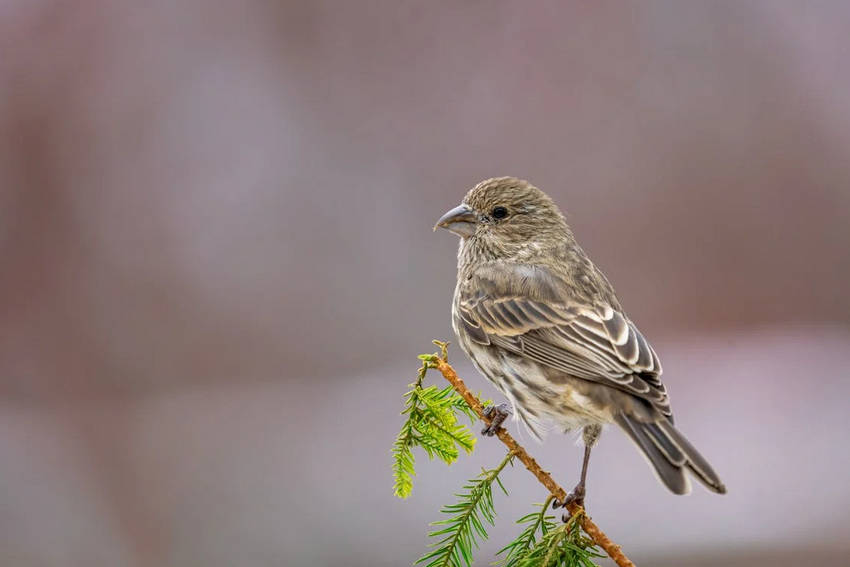
Watch the background. A clean background can make the subject stand out, while branches, bright patches, or other animals can easily pull attention away. Before pressing the shutter, check the edges of the frame as well as the animal itself.
Don't always fill the frame. A tight crop can emphasize details such as feathers, fur, or facial expressions, but stepping back or using a wider focal length can show the animal in its habitat. Including trees, grassland, water, or other elements can add context and make the image tell more of a story.
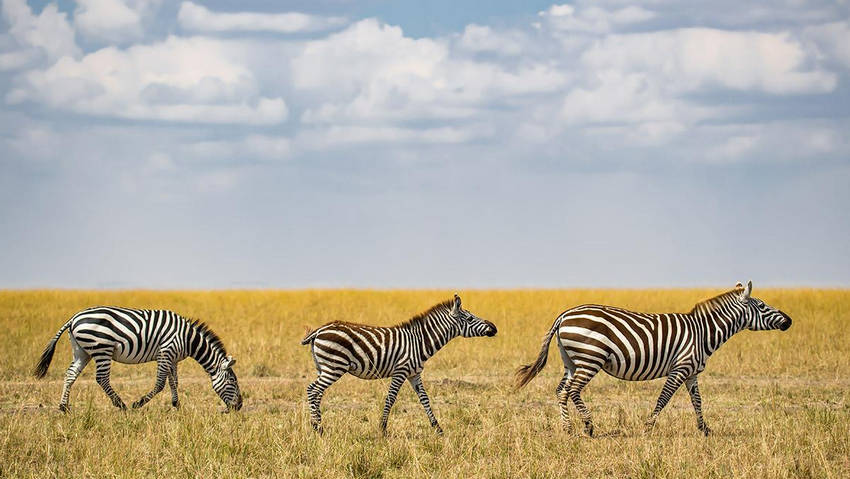
Try a lower perspective when possible. Shooting closer to the animal's eye level can create a stronger sense of connection and reduce distracting foreground elements. When conditions or safety prevent you from getting lower, changing your position slightly can still help you find a cleaner background or a more natural angle.
7. Be Prepared for Field Conditions
Wildlife photography often means waiting outdoors for hours, sometimes in uncomfortable or unpredictable conditions. A few practical choices can make it easier to stay steady, comfortable, and ready when the moment comes.
Use the right support. A tripod can provide excellent stability for long lenses, but a monopod may be more practical when you need to reposition quickly. When shooting from a vehicle or close to the ground, a bean bag can provide simple, stable support without adding much weight.
Prepare for the weather. A rain cover can protect your camera when conditions change unexpectedly. Dress for the environment as well, since staying warm, dry, and comfortable makes it easier to wait patiently and react quickly.
Carry enough power and storage. Wildlife can become active when you least expect it, so bring spare batteries and memory cards. Running out of either at the wrong moment can mean missing a sequence you have been waiting hours to capture.
Work with the environment. When appropriate and permitted, using natural cover or a blind can help you keep your distance and avoid disturbing the animal. A quieter, more patient approach often gives you better opportunities than constantly changing position.
Wildlife Photography Mistakes to Avoid
Even with the right camera and lens, a few common mistakes can make wildlife photos look soft, distracting, or less natural. Watch for these problems when shooting in the field:
- Using a shutter speed that's too slow: A slow shutter speed can introduce motion blur when an animal moves unexpectedly. If the subject is active, increase shutter speed before trying to fix softness later.
- Underexposing too heavily: Lifting a very dark wildlife photo in post-processing can reveal more noise and reduce image quality. When possible, use the available light to get a usable exposure in-camera. >> Underexposed vs Overexposed Photos
- Oversharpening fur and feathers: Too much sharpening can create harsh edges and make fine textures look unnatural. Check details at 100% and aim for definition rather than exaggerated sharpness.
- Cropping too aggressively: Heavy crops leave fewer pixels to represent the animal and can make fine details look soft. If you frequently need extreme crops, consider using a longer focal length or moving to a better shooting position when possible.
- Chasing the animal instead of anticipating movement: Constantly repositioning can make it harder to maintain focus and composition. Watch the animal's behavior and anticipate where it is likely to move next.
- Ignoring the background: Bright patches, branches, and other distracting elements can compete with the subject. A small change in your position can sometimes produce a much cleaner frame.
- Relying too much on post-processing: AI enhancement and sharpening can refine a usable image, but they cannot reliably fix missed focus, severe motion blur, or detail that was never captured. Get as much right as possible in the camera first.
Post-Processing: Refine Detail After the Shoot
Even when the shot is well exposed and in focus, wildlife photos can lose some detail during cropping or when captured at high ISO. Post-processing can help refine the final image, but it works best when you start with as much useful information as possible.
Start With Your RAW Workflow
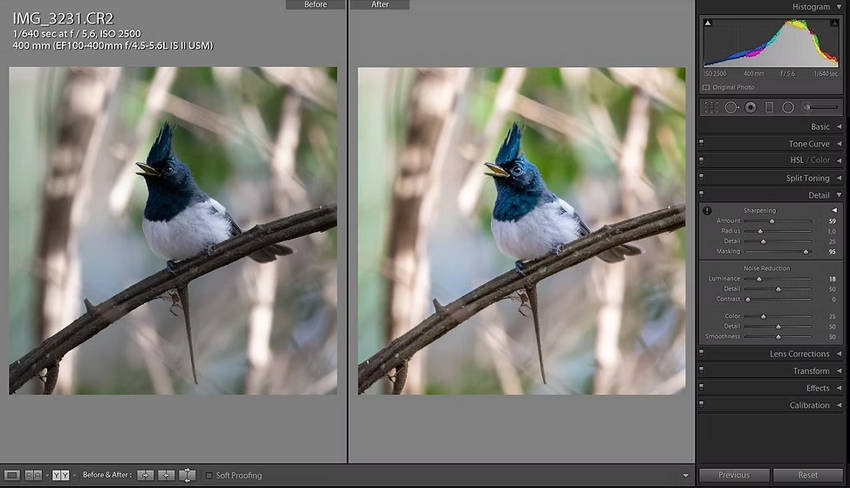
Begin with your usual RAW workflow in Lightroom, Capture One, or your camera software. Correct exposure and color, reduce distracting noise, and make your basic adjustments before moving on to AI enhancement. This gives you a cleaner starting point and makes it easier to judge what the image actually needs.
Crop Before Final Enhancement
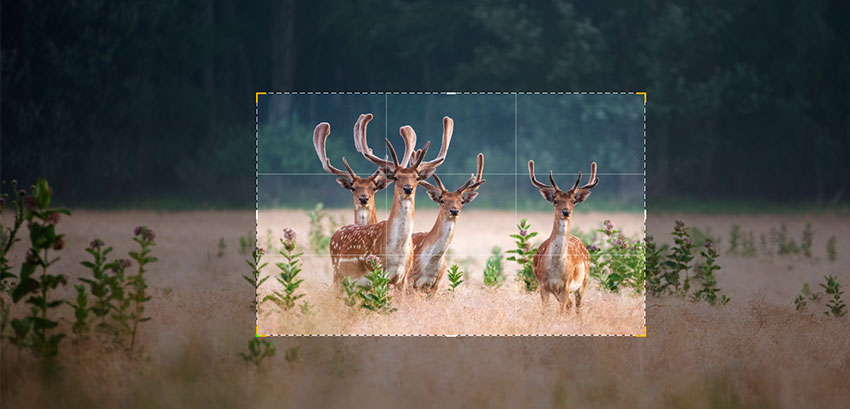
Crop the image to your intended composition before deciding whether additional enhancement is necessary. A distant bird or animal may look fine in the original frame but become noticeably soft once you crop in tightly. Cropping first lets you judge how much detail you actually need to refine.
Enhance Wildlife Photos with Aiarty Image Enhancer
If the cropped image still looks soft or noisy, Aiarty Image Enhancer can be used as a final enhancement step. It runs locally on Windows and Mac and can upscale the image, reduce noise, and refine fine details in areas such as fur, feathers, and facial features.
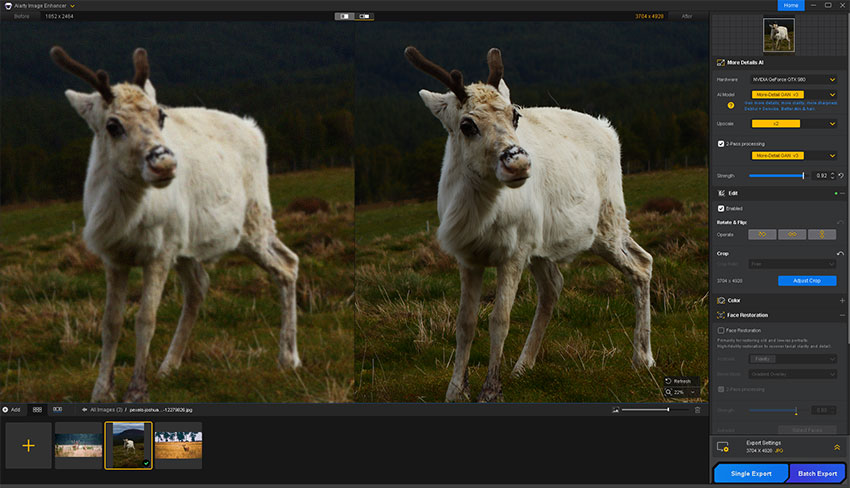
For wildlife photos, the goal is not to make every edge look sharper. Use a moderate strength and compare the result with the original at 100% to make sure the animal still looks natural and recognizable. Aiarty also supports batch processing when you need to refine multiple photos from the same shooting session.
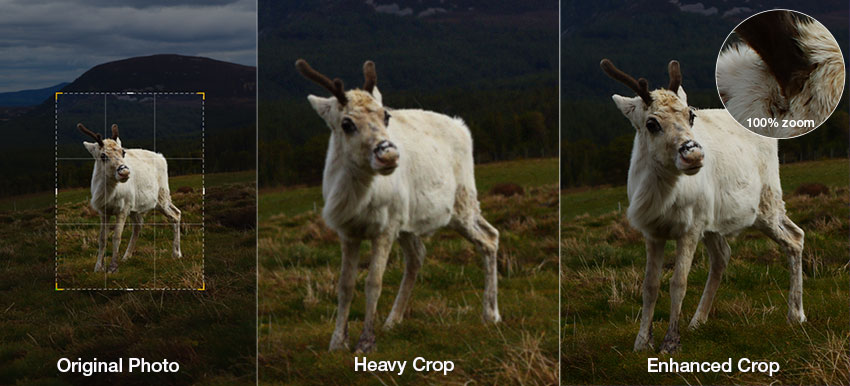
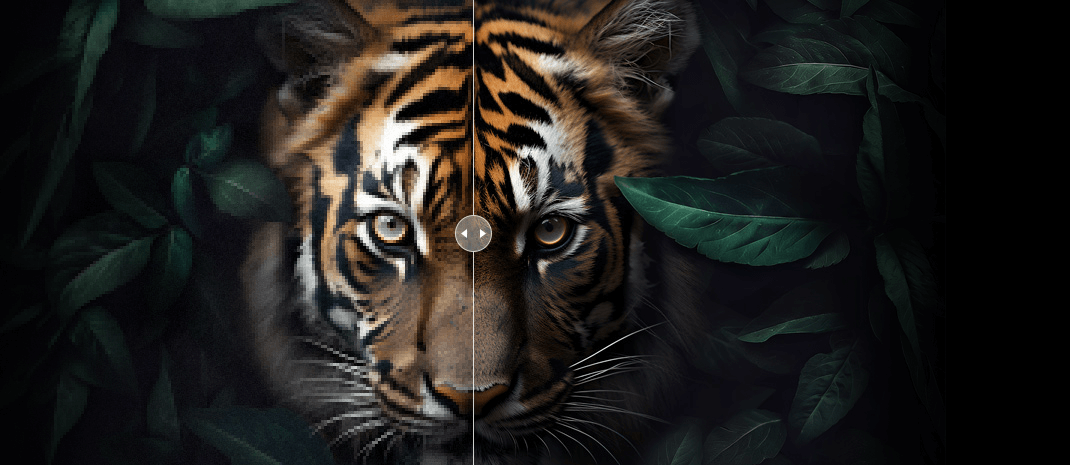
Before: Heavy cropping and high ISO have left the fur and facial details looking soft and noisy.
After: The enhanced image shows more visible texture and definition while keeping the animal's original appearance.
Post-processing cannot fully recover information that was never captured, so it should complement good focus, appropriate shutter speed, and sufficient focal length rather than replace them.
Conclusion
Good wildlife photography comes down to preparation, timing, and knowing how to adapt to the conditions. Research your subject, choose the right camera and focal length, use enough shutter speed to keep moving animals sharp, and adjust focus, exposure, and composition as the scene changes.
Once the shoot is over, careful cropping and post-processing can help refine the image without taking away from the character of the original scene. For high-ISO or heavily cropped wildlife photos, Aiarty Image Enhancer can help reduce noise, refine fine details, and upscale the image while keeping the result natural-looking.
Most importantly, give wildlife enough space and avoid disrupting its behavior. The more comfortably you can work with the animal and its environment, the more natural your photographs are likely to be.
You May Also Like


Brenda Peng is a seasoned editor at Digiarty Software who loves turning ordinary photos into extraordinary works of art. With years of experience behind the lens and in front of the computer, Brenda shares her passion for photography, image enhancement, and editing through easy-to-follow tutorials.
