


Have you ever taken a photo in a dark environment, opened it on a larger screen, and noticed unwanted grain, rough textures, or strange colored dots? This common image quality problem is known as noise in photography. Photo noise can make images look less sharp, reduce fine details, and affect overall image quality. It is especially noticeable in low-light photography, high ISO shots, night scenes, smartphone photos, and heavily edited images.
Understanding what is noise in photography, why it appears, and how to apply effective noise reduction in photography can help photographers capture cleaner and more professional-looking images. In this guide, we will explain what causes noise in photos, different types of image noise, and how modern AI-powered tools can help remove noise while preserving natural details.
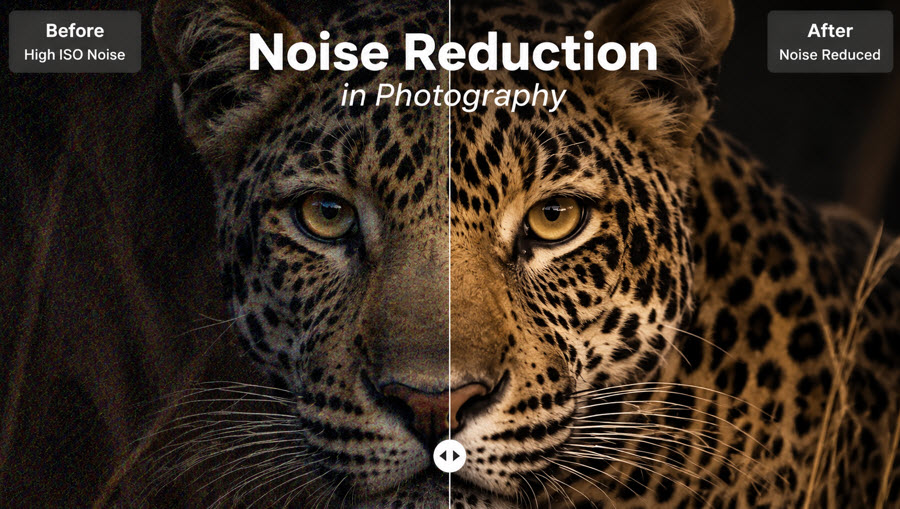
Types of Noise in Photography: Luminance, Chrominance, Fixed Pattern, and Shot Noise
Noise in photography refers to unwanted random variations in brightness and color information that appear in a digital image. These unwanted variations create grainy textures, colored spots, or loss of image clarity.
Digital cameras work by collecting light through an image sensor. When there is not enough light reaching the sensor, the camera increases signal amplification to produce a brighter image. However, this process also amplifies random electronic signals, making noise more visible.
Luminance Noise
Luminance noise is the most common type of digital noise. It appears as random variations in brightness, creating a grainy black-and-white texture. Because it affects brightness rather than color, luminance noise is often visually compared to traditional silver-halide film grain. Many photographers even find a subtle amount of luminance noise aesthetically pleasing because it adds a vintage, organic feel.
For example, a night portrait shot at ISO 6400 may appear bright enough, but zooming into darker areas can reveal rough grain caused by luminance noise.
Luminance noise is commonly caused by:
- High ISO settings
- Underexposed images
- Low-light shooting
- Shadow recovery during editing
Chrominance Noise
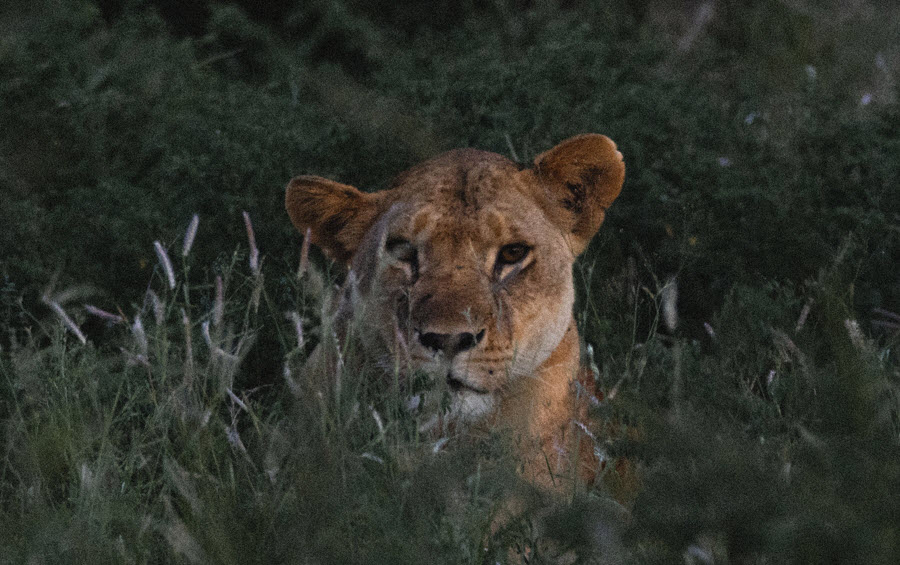
Chrominance noise affects color information and appears as unwanted colored pixels, usually red, green, blue, or purple spots. Chrominance noise is almost universally considered far more distracting and jarring than luminance noise because it introduces unnatural colors that never existed in the real scene.
Modern AI noise reduction tools are particularly useful for chrominance noise because they can recognize whether a color variation is actual image information or unwanted noise.
Chrominance noise is commonly caused by:
- Extended low-light exposures
- Heavy amplification of shadow regions
- Overheating camera sensors
Fixed Pattern Noise
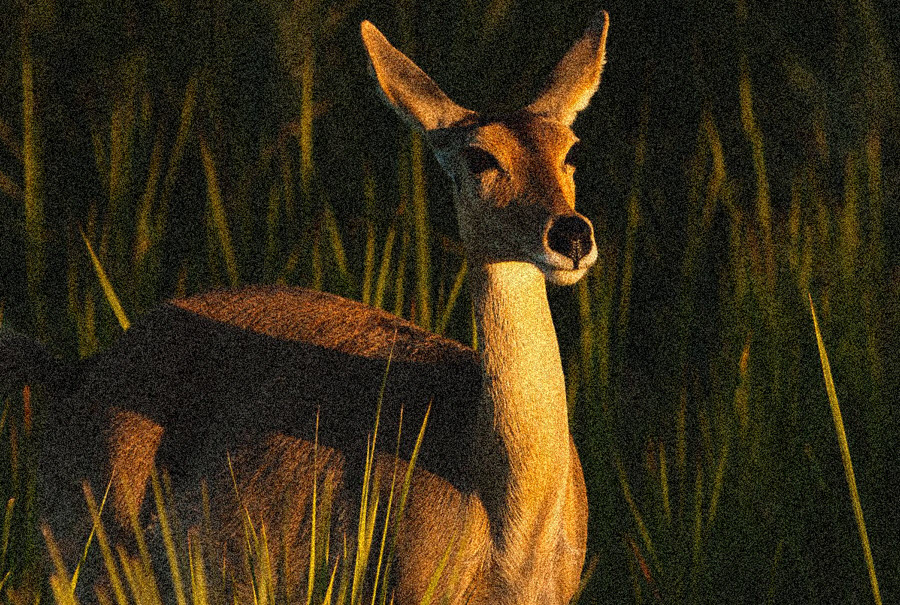
Fixed pattern noise does not appear completely random; instead, it manifests as repeating structural flaws, such as hot pixels (pixels that stay permanently bright), stuck pixels, or subtle vertical and horizontal banding lines across the image frame.
Fixed pattern noise is a primary concern in long exposure photography, astrophotography (where sensors run continuously for minutes at a time), and when using older camera sensors that lack modern on-chip noise suppression architecture.
This type of photography noise is commonly caused by:
- Physical hardware imperfections
- Electrical anomalies on the camera sensor
Shot Noise
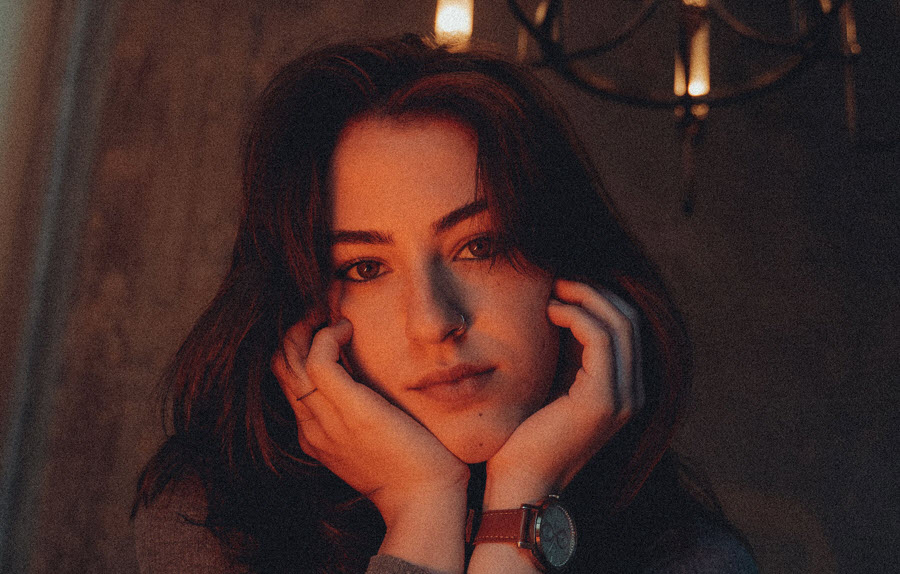
Shot noise is fundamentally different because it is governed by quantum physics rather than camera electronics. Even with a perfect camera sensor, photons do not arrive at exactly the same rate every moment. When light levels are low, these random differences become more visible. It appears as random, speckled grain scattered across the image, independent of how good your camera gear is.
Deep night photography, astrophotography (capturing faint nebulae or distant stars), and extremely dim indoor settings.
This type of photography noise is commonly caused by:
- Light is made of discrete photons arriving randomly.
- Bright daylight masks this randomness with massive photon volume.
- Low-light environments expose these statistical fluctuations as visible speckles.
What Causes Noise in Photography?
Noise does not happen by accident; it is the direct result of physics, optical limitations, and operational settings. Here are the primary drivers:
- High ISO Settings (e.g., ISO 1600, 3200, 6400+): When light is scarce, photographers raise their ISO. Mechanically, this does not make the sensor more sensitive to light; it simply amplifies the electrical signal captured by the sensor. Unfortunately, amplification is blind—it boosts the actual image signal alongside electronic interference, resulting in heavy visible noise.
- Low Light Conditions and Low Signal-to-Noise Ratio (SNR): In dim environments, the camera receives very few photons. This results in a low signal-to-noise ratio, meaning the "noise floor" of the electronic circuitry occupies a much larger percentage of the overall image data.
- Long Exposure Times and Sensor Heat: When a camera shutter remains open for long durations (such as 30 seconds or several minutes), the sensor draws continuous power and heats up. This thermal activity excites electrons inside the silicon wafer, causing thermal noise, hot pixels, and color splotches.
- Physical Sensor Size: The laws of optics dictate that physical size matters. Full-frame cameras have large photosites (pixels) that catch massive amounts of light. Conversely, smaller sensors found in smartphones, action cameras, or micro-four-thirds bodies pack pixels densely into a tiny area, capturing fewer photons per pixel and rendering them significantly more susceptible to noise in low light.
- Aggressive Post-Processing (Shadow Recovery): A common mistake among beginner and intermediate photographers is severely underexposing a RAW file to protect highlights, and then dragging the exposure, brightness, or shadow sliders aggressively upward during editing. This forces the software to stretch dark, signal-starved pixels, dragging hidden noise out into plain view.
How to Reduce Noise in Photography
While understanding the mechanics of grain is essential, the ultimate goal is knowing how to effectively fix it. Traditional post-processing tools often force a frustrating compromise: they smooth out unwanted grain, but they also wipe away authentic textures, leaving your subjects looking flat and artificial.
Aiarty Image Enhancer uses advanced generative AI to provide effective noise reduction in photography:
- Intelligent Noise vs. Detail Recognition: Aiarty’s AI noise reduction accurately distinguish between random noise artifacts and critical high-frequency textures, such as individual hairs, skin pores, fabric weaves, or architectural lines, ensuring your subject stays razor-sharp.
- Original Detail Preservation: By reconstructing authentic textures rather than smearing them, Aiarty reduce noise while preversing the natural look of your photo without creating a "plastic" or over-processed appearance.
- Control denoising strength: Its Strength Slider can control the exact level of denoising, giving you total creative control over the balance between complete grain removal and organic texture retention.
Real-World Photo Noise Reduction Examples with Aiarty Image Enhancer
Different types of photography noise require different approaches. Here are several real-world examples showing how AI noise reduction in photography can improve challenging images while maintaining realistic details.
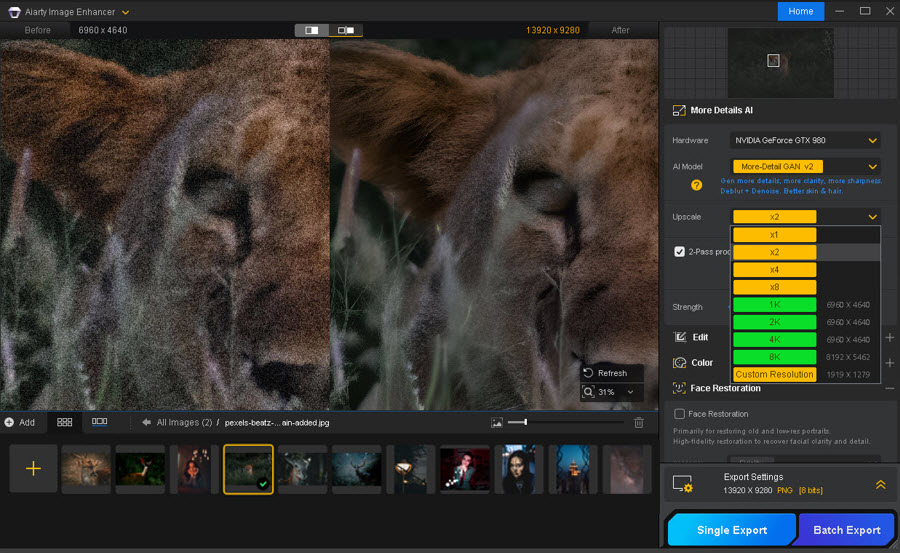
Low-Light Wildlife Photography: Remove Grain While Preserving Fine Fur Details
Wildlife photography often involves high ISO settings, low-light conditions, or heavy cropping, which can introduce visible grain and affect fine details such as fur, feathers, and whiskers.
In this test, Aiarty Image Enhancer will reduce unwanted noise in photography while preserving the delicate details that make wildlife images look realistic. Instead of smoothing away fur textures, its AI models can distinguish between random noise and actual animal details.
For cropped wildlife photos, users can also upscale the image with different resolution options, including 2x, 4x, and 8x upscaling, while maintaining image quality. Photographers can enlarge a cropped subject for printing or detailed viewing without enlarging existing noise.
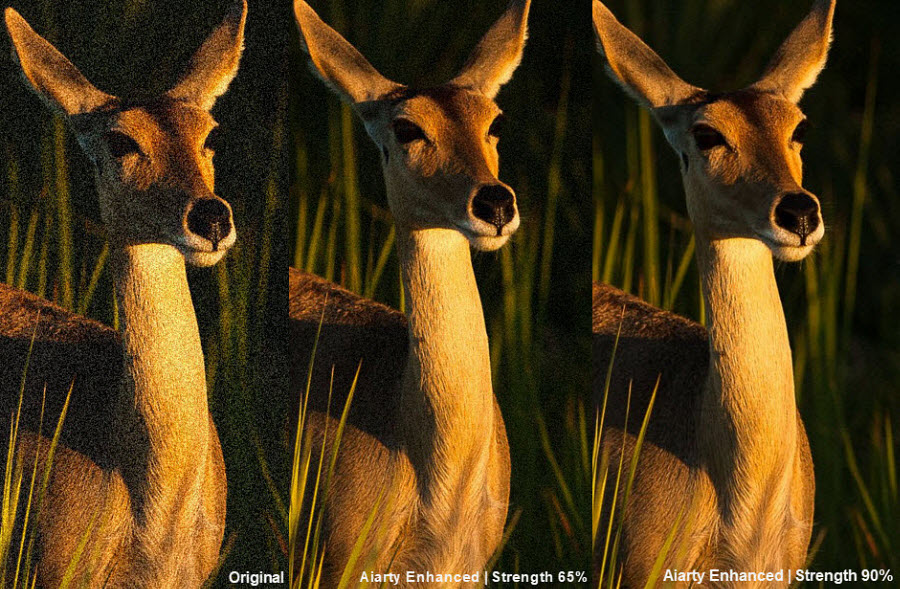
Adjustable Noise Reduction Strength: Keep Natural Grain or Create a Cleaner Look
The Strength Slider provides flexible control over the denoise effect. Lower strength settings help retain natural grain and original texture, while higher settings effectively reduce noise in high ISO and low-light images for a cleaner result. This allows photographers to balance noise removal and detail preservation instead of applying a fixed denoise effect to every image.
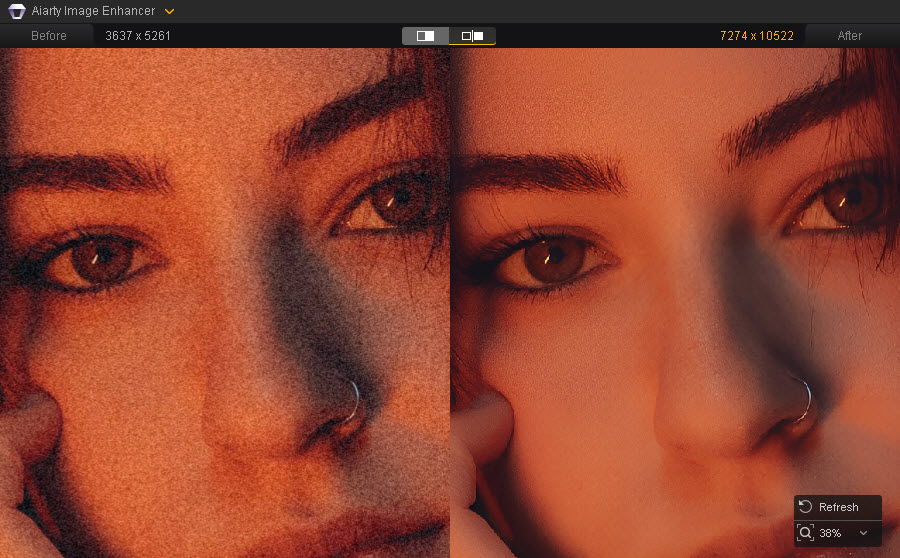
Portrait Photography: Reduce Noise While Preserving Facial Details
Portrait images captured in challenging lighting conditions, such as indoor environments, low-light scenes, or high ISO settings, can often contain visible grain, color noise, and rough skin textures.
In this test, with AI-powered noise reduction, Aiarty Image Enhancer uses can distinguish facial details from unwanted noise. It reduces noise can grain while preserving important portrait features, including skin texture, hair, and eyelashes, without creating an unnatural smooth effect.
For portraits that need additional enhancement, users can enable Face Restoration to improve facial clarity and recover finer details while maintaining a realistic appearance.
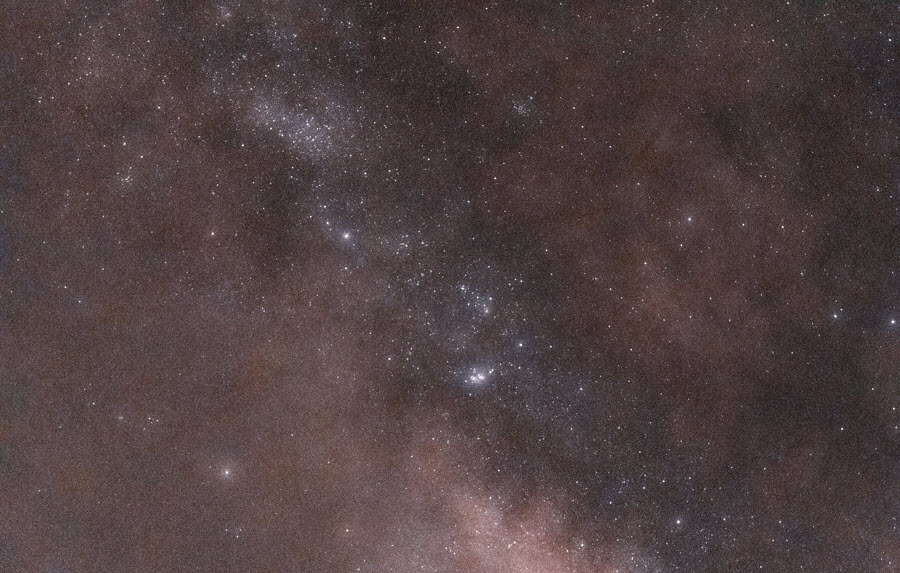
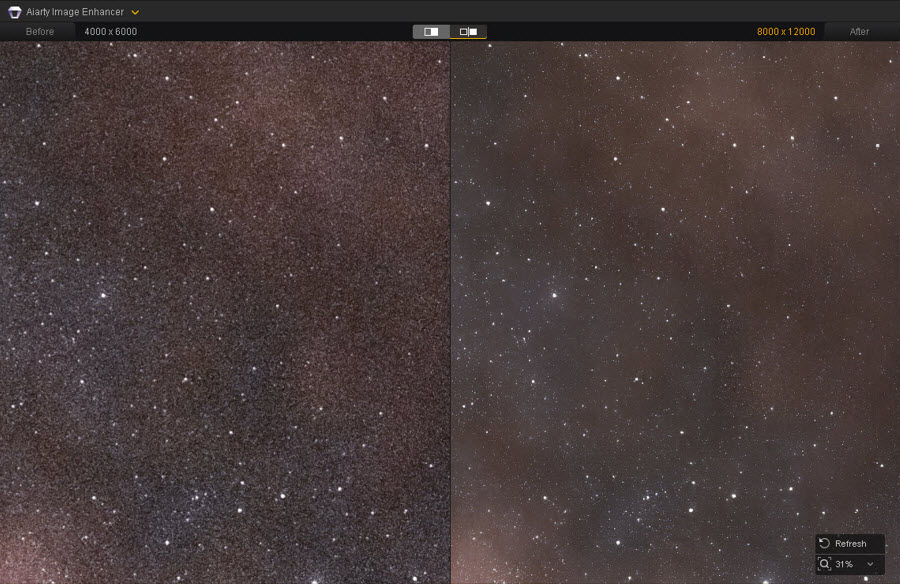
Night Astrophotography: Remove Noise Without Losing Stars
Astrophotography is especially challenging for photography noise reduction because dark skies often contain significant grain, while stars can easily be mistaken for noise by traditional denoise methods.
This noise reduction software intelligently distinguishes between unwanted noise and real astronomical details. It will reduce noise in dark areas without smooth stars and important image structures. The result is a cleaner night sky with reduced noise, improved contrast, and natural-looking star details.
Old Photo Restoration: Remove Grain and Restore Lost Clarity
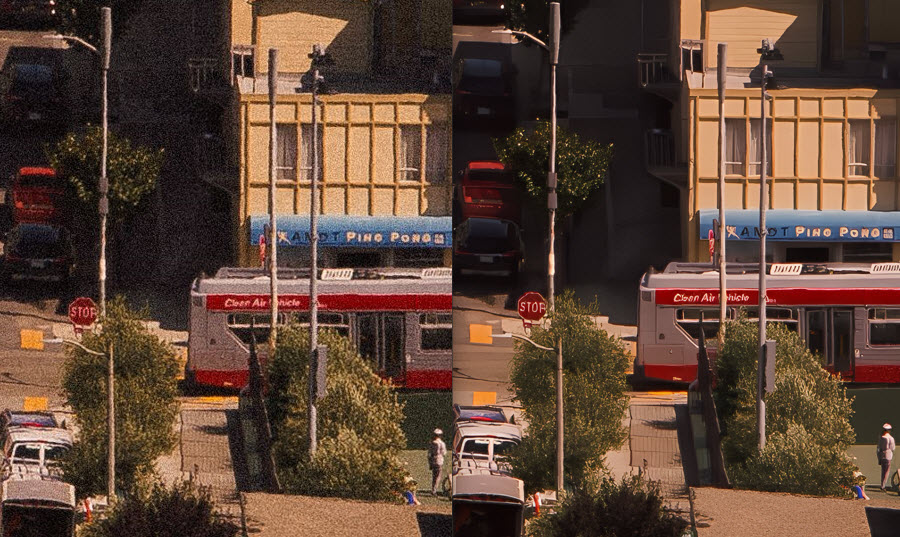
Old scanned photos often suffer from film grain, scanning artifacts, faded details, and uneven textures. Traditional noise reduction methods may remove both unwanted grain and important details, making restored images look blurry.
Aiarty Image Enhancer can reduce noise in old photos while recovering clearer texture. It cleans up noise, improves details, and restores a sharper, more natural appearance. The output is a cleaner restored photo with reduced grain and preserved historical details, making it ideal for family photos, scanned archives, and low-quality images.
How to Prevent Noise in Photography When Shooting
While noise reduction tools can remove unwanted grain, preventing excessive noise in photography starts during the shooting process. By optimizing camera settings, improving lighting, and capturing more image information, photographers can reduce the amount of noise that needs to be corrected later.
However, noise cannot always be avoided, especially in low-light photography, fast-moving subjects, and challenging shooting conditions. The goal is not to eliminate all noise, but to capture the cleanest possible image by balancing ISO, shutter speed, and exposure.
Use a Lower ISO Setting
One of the easiest ways to prevent noise in photos is to keep ISO as low as possible. Higher ISO settings increase sensor amplification, which makes existing image noise more visible. When lighting conditions allow, using a lower ISO helps produce cleaner images with smoother tones and better details.
However, a higher ISO is sometimes necessary. A sharp photo with some noise is usually better than a blurry image caused by a slow shutter speed.
Capture More Light
Low light is one of the biggest causes of noise in photography. When the camera sensor receives less light, the signal-to-noise ratio decreases, making grain and color artifacts easier to notice. Instead of increasing ISO immediately, photographers can capture more light by using a wider aperture, adding external lighting, or using a tripod for static scenes with slower shutter speeds. More light reaching the sensor means more useful image information and less visible noise.
Avoid Underexposing Photos
Underexposed images often contain hidden noise in photos that becomes visible during editing. When photographers brighten shadows or increase exposure afterward, they may reveal grain and color noise in darker areas. Proper exposure at the time of capture helps preserve image quality and reduces the amount of noise correction needed later.
Shoot RAW Instead of JPEG
RAW files store more image data than compressed JPEG files, giving photographers more flexibility when applying noise reduction during post-processing. In RAW image editing, adjustments such as shadow recovery and exposure correction can be performed with less risk of amplifying unwanted noise.
Use Long Exposure Settings Carefully
Long exposure photography, especially night photography and astrophotography, can introduce additional sensor-related noise, including hot pixels and fixed pattern noise. Using a tripod, enabling in-camera long exposure noise reduction when appropriate, and avoiding unnecessary exposure times can help minimize these issues.
Choose the Right Settings for Different Photography Situations
There is no single camera setting that eliminates photo noise in every situation. A landscape photographer may prioritize low ISO and longer exposure, while a wildlife photographer may need a faster shutter speed and accept higher ISO. The best approach is to balance sharpness, exposure, and noise based on the shooting environment.
Final Thoughts
Noise in photography is an unavoidable physical reality whenever you push your camera equipment, lighting, and environmental conditions to their limits. Understanding what causes noise in photography and how different types of noise affect image quality can help photographers make better shooting and editing decisions.
While proper camera settings, better lighting, and RAW workflows can help prevent excessive noise, some level of noise is often unavoidable. This is where modern AI-powered noise reduction solutions can make a difference.
Aiarty Image Enhancer provides efficient noise reduction for photography, preserving important textures, and enhancing image details without making photos look artificial. So you no longer have to compromise between exposure and clarity when dealing with high ISO portraits, wildlife images, old photos, or night photography.
 FAQs
FAQs
Technically, ISO itself does not create noise in photos. Instead, high ISO settings (like ISO 1600, 3200, or 6400) amplify the existing electrical signal from the camera sensor in low-light situations. This amplification boosts the hidden electronic interference right along with your image data, making the underlying noise visible.
If your image was severely underexposed in low light, pulling up the shadows, exposure, or brightness sliders during post-processing forces the software to stretch dark, signal-starved pixels. This common editing mistake drags hidden noise out into plain view. Additionally, smaller sensors (like those in smartphones) capture fewer photons per pixel, leading to natural noise in photography even at base ISOs.
RAW files often appear noisier because they contain minimally processed sensor data. JPEG images usually have already gone through the camera’s internal processing, including sharpening and noise reduction. RAW files may look rougher initially, but they provide more flexibility for applying high-quality noise reduction during editing.
The best way to reduce noise without losing details is to use noise reduction tools that can distinguish between unwanted grain and important image textures.
Traditional noise reduction often relies on smoothing, which may remove fine details. Modern AI noise reduction analyzes image content to preserve edges, textures, and important details while reducing unwanted noise.


This post was written by Brenda Peng who is a seasoned editor at Digiarty Software who loves turning ordinary photos into extraordinary works of art. With AI assistance for brainstorming and drafting, the post is reviewed for accuracy by our expert Abby Poole for her expertise in this field.
