A photo doesn't have to be completely blurry to look out of focus. Sometimes the eyes are slightly soft in a portrait. Sometimes fine details such as hair, fur, or text never appear as crisp as they should. In other cases, the camera focused on the background instead of the subject, leaving the main subject looking less sharp than expected.
Focus issues are among the most common reasons otherwise good photos end up being discarded. The good news is that many of them are preventable, and some can be improved after the photo has already been taken. In this guide, we'll look at the most common causes of soft or out-of-focus images, practical ways to improve focus while shooting, and what can realistically be done when a photo is already blurry.
Why Are Your Photos Not in Focus?
Before trying to fix a soft image, it helps to understand what caused the problem in the first place.

Camera Shake
Camera shake occurs when the camera moves during exposure. Even a slight movement can reduce sharpness, especially when shooting handheld in low light.
This is one of the most common causes of blurry photos taken indoors or at night. If you're dealing with blur caused by camera movement, you may also want to read our guide on how to fix shaky hands photography.
Subject Movement
Sometimes the camera is perfectly steady, but the subject moves before the shutter closes. Children running, pets turning their heads, athletes in motion, or even someone talking during a portrait session can create motion blur that makes the image appear out of focus.
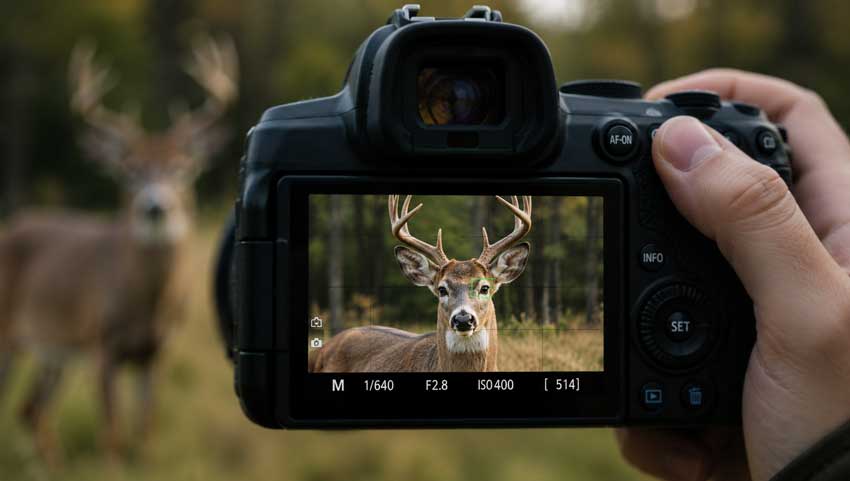
Autofocus Missed the Subject
Modern autofocus systems are impressive, but they are not perfect. A camera may accidentally lock onto a nearby object, the background, or a high-contrast area instead of the intended subject. The result is a technically focused image with the wrong focus point.
Shallow Depth of Field
Wide apertures such as f/1.4 or f/1.8 can produce beautiful background blur, but they also create an extremely narrow plane of focus.
In portraits, it is common to see one eye sharp while the other eye appears soft. This isn't necessarily a focusing error—it is often a depth-of-field limitation.
Low-Light Conditions
Autofocus systems generally perform best in bright, high-contrast scenes. When light levels drop, cameras may struggle to find focus accurately. Noise can also reduce the appearance of sharpness, even when focus is technically correct.
Learn more about reducing image noise in our guide to photo noise reduction.
Can You Fix an Out-of-Focus Photo?
The answer depends on how much focus was missed. Photos that are only slightly soft often respond well to sharpening or AI enhancement.
Moderately blurred photos may show meaningful improvement, especially when the subject contains recognizable structures such as faces, eyes, hair, or text. Severely out-of-focus photos are much more difficult. When detail was never recorded by the camera sensor, no editing technique can perfectly recreate it. The goal in those situations is improvement, not complete restoration.
How to Improve Focus When Taking Photos
Prevention is always easier than correction. The following techniques can dramatically increase your chances of capturing sharp photos straight out of the camera.
Use Single-Point Autofocus
Many cameras allow the autofocus point to be selected manually. Instead of letting the camera decide what should be in focus, place the focus point directly over your intended subject. This simple adjustment often improves focusing accuracy immediately.
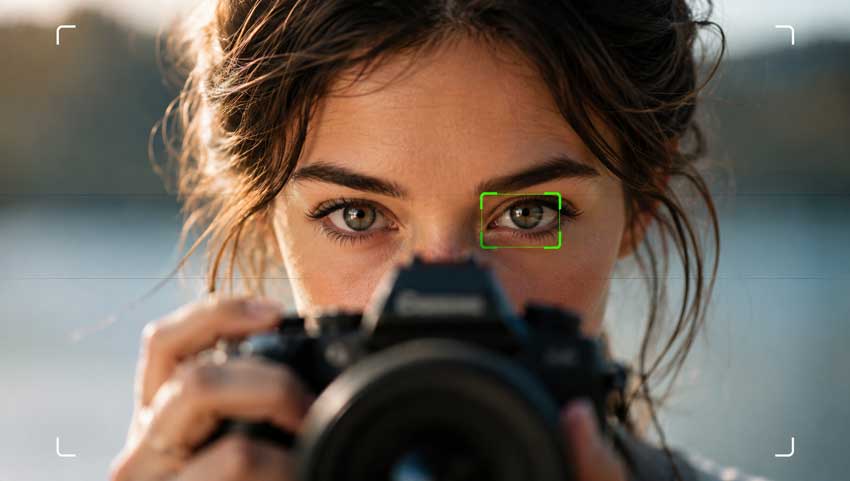
Focus on the Eyes
For portraits, the eyes should almost always be the sharpest part of the image. Even if other parts of the face are slightly soft, viewers naturally judge image sharpness based on the eyes. Eye-detection autofocus has made this much easier, but manually confirming focus is still worthwhile.
Increase Shutter Speed
A shutter speed that is too slow can introduce both camera shake and motion blur.
As a general guideline:
If your images consistently appear soft, shutter speed should be one of the first settings you check.
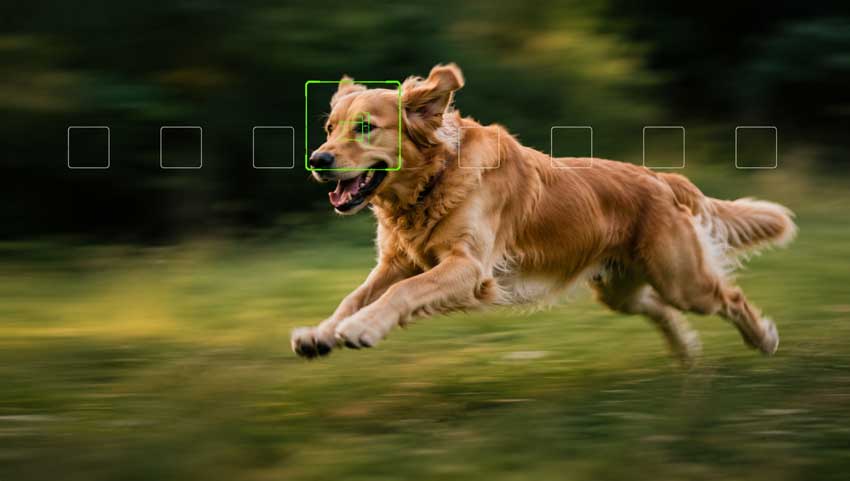
Use Continuous Autofocus for Moving Subjects
When photographing moving subjects, switch from single autofocus to continuous autofocus mode. Different manufacturers use different names:
- AF-C (Sony, Nikon, Fujifilm)
- AI Servo (Canon)
Continuous autofocus tracks subject movement and updates focus as the subject changes position.
Use a Tripod in Low Light
A tripod eliminates one of the biggest causes of blur: camera movement. It becomes particularly important for:
- Night photography
- Landscapes
- Architecture
- Long exposures
Even a lightweight travel tripod can noticeably improve image sharpness.

Increase ISO When Necessary
Many photographers avoid raising ISO because of noise concerns. However, a slightly noisy photo is often preferable to a blurry one. Increasing ISO allows faster shutter speeds, which reduces both camera shake and motion blur.
How to Improve Focus in Photos You've Already Taken
Once a photo is captured, the amount of improvement depends largely on how severe the focus problem is. A slightly soft image can often be improved significantly. A severely blurred image, however, may never become perfectly sharp.
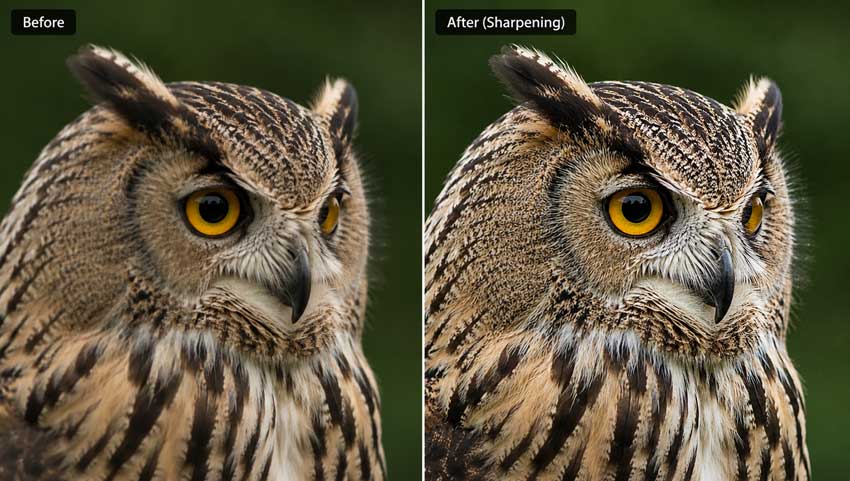
Use AI-Based Detail Recovery
Traditional sharpening tools work by increasing contrast around edges. While this can make an image appear sharper, it does not actually restore missing detail.
Modern AI-based enhancement tools approach the problem differently. Instead of simply boosting edge contrast, they analyze image structures and reconstruct textures that were partially lost due to blur, compression, or low resolution. This approach tends to produce more natural results when working with portraits, wildlife photos, old family photos, and heavily compressed images.
For example, if a portrait suffers from mild focus issues, AI enhancement can often improve the appearance of eyelashes, hair strands, skin texture, and facial features more effectively than conventional sharpening.
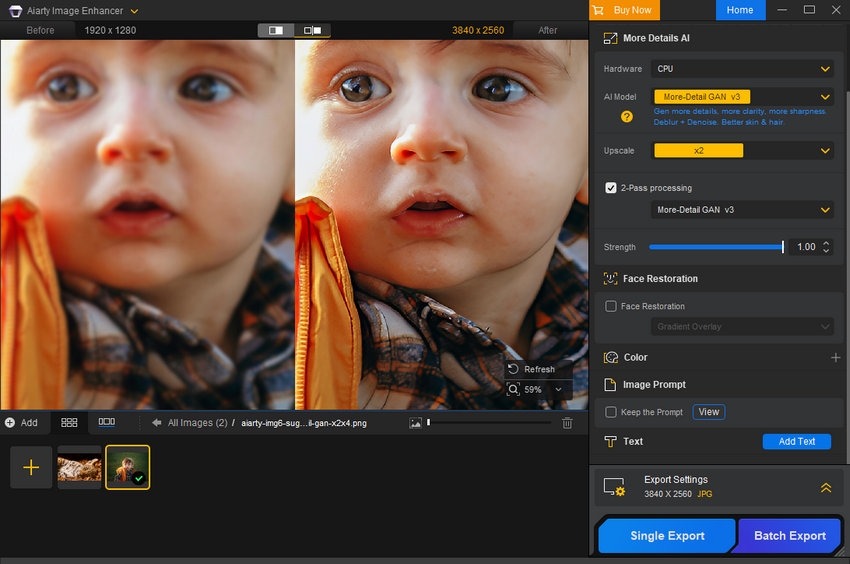
One effective tool is Aiarty Image Enhancer, which uses AI models to enhance image clarity, recover fine textures, and improve perceived sharpness while maintaining a natural look.
In practice, Aiarty Image Enhancer works particularly well for:
- Slightly soft portraits
- Low-resolution images
- Compressed photos with weakened detail
- Old family photos
- Everyday photos with minor softness
Apply Selective Sharpening in Lightroom
Adobe Lightroom remains one of the most effective tools for improving slightly soft images.
The Detail panel provides several controls:
- Sharpening
- Radius
- Detail
- Masking
Instead of increasing sharpening globally, use masking to restrict sharpening to edges and important details. This helps avoid emphasizing noise in smooth areas. Texture and Clarity adjustments can also improve perceived sharpness when used carefully.
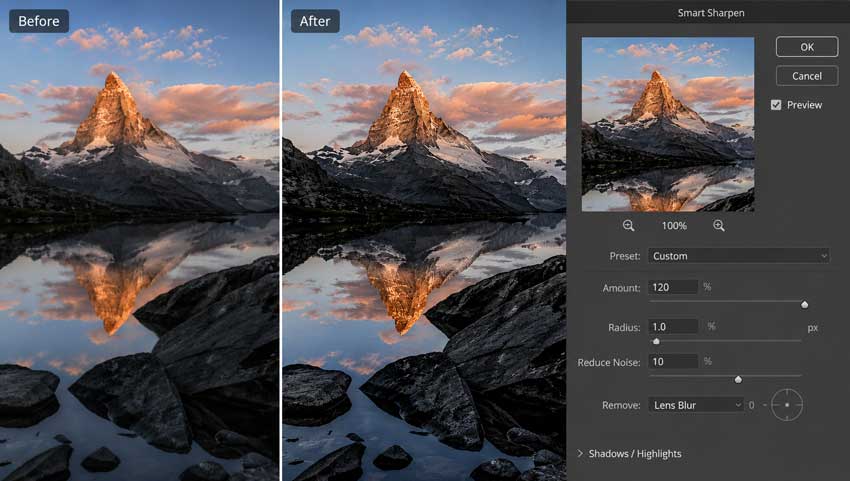
Use Photoshop Smart Sharpen
Photoshop's Smart Sharpen filter offers more control than basic sharpening tools. It works particularly well when the image suffers from mild softness rather than severe blur. Small adjustments usually produce better results than aggressive settings. Oversharpening often creates halos, exaggerated edges, and an unnatural appearance.
Try High-Pass Sharpening
High-pass sharpening remains popular among professional retouchers because it offers precise control. The technique involves applying a High Pass filter on a duplicate layer and blending it using Overlay or Soft Light mode.
While it requires more manual work, it often produces cleaner results than standard sharpening filters.
AI Enhancement vs Traditional Sharpening
Traditional sharpening and AI enhancement are often grouped together, but they work in very different ways.
Sharpening tools in Lightroom and Photoshop increase local contrast around existing edges, making details appear more defined. They work well for images that are only slightly soft, but they cannot recreate information that was never clearly captured by the camera.
AI enhancement takes a different approach. Instead of simply increasing edge contrast, it analyzes image structures, textures, and patterns to recover details that have become difficult to see due to blur, compression, low resolution, or image degradation.
This difference becomes most noticeable in older photos, heavily compressed images, wildlife shots, and portraits where fine details such as hair, eyelashes, fur, or fabric textures appear soft. In these situations, traditional sharpening may make the image look crisper, while AI enhancement can often produce a more natural and detailed result.
Tools such as Aiarty Image Enhancer combine detail recovery, noise reduction, and image enhancement in a single workflow. This can be particularly useful when standard sharpening starts to introduce halos, emphasize noise, or create an overly processed look. That said, AI enhancement is not a magic fix. If a photo is severely out of focus, no software can perfectly restore information that was never recorded. The best results are typically achieved on images with mild blur, slight focus errors, compression artifacts, or low-light softness.
For many photographers, the most effective workflow is to start with good capture techniques, use traditional sharpening for minor adjustments, and apply AI enhancement when additional detail recovery is needed.
 FAQs
FAQs
Start by identifying the cause of softness. If the issue happened during shooting, use a faster shutter speed, more accurate autofocus mode, and better camera support next time. If the photo has already been taken, slight softness can often be improved with sharpening or AI enhancement.
Slightly out-of-focus photos can often be improved. Severe blur is harder to fix because the original detail was not captured clearly by the camera sensor.
Softness can come from slow shutter speed, subject movement, shallow depth of field, high ISO noise, lens limitations, or missed autofocus. A photo can appear focused on the camera screen but still look soft when viewed at full size.
Lightroom can improve slight softness with sharpening, masking, Texture, and Clarity controls. It works best when the image already contains usable detail.
AI tools can improve slightly blurry, compressed, or low-resolution photos by enhancing edges, textures, and perceived detail. However, they cannot perfectly recover detail that was never captured in the original photo.
Final Thoughts
Sharp focus starts in the camera. Using appropriate shutter speeds, accurate autofocus settings, and good shooting technique will always produce better results than trying to fix a blurry image later.
That said, not every photo can be retaken. When a valuable image suffers from mild focus issues, modern editing tools can often recover more detail than was possible just a few years ago. Understanding the cause of the blur is the first step toward choosing the right solution and getting the best possible result from the image you already have.
This post was written by Brenda Peng who is a seasoned editor at Digiarty Software who loves turning ordinary photos into extraordinary works of art. With AI assistance for brainstorming and drafting, the post is reviewed for accuracy by our expert Abby Poole for her expertise in this field.