Upscaling images is no longer just "blow it up and hope for the best." Modern AI tools try to create plausible high-frequency detail when you enlarge photos, and two names dominate the conversation: Topaz Gigapixel AI and Adobe Photoshop (which offers “Preserve Details” resampling and “Super Resolution” in Camera Raw). Which is better in practice?
Short answer: Gigapixel usually produces sharper, more reconstructed detail for heavy upscales; Photoshop is faster and safer (less likely to invent artifacts), and often gives a softer, more neutral result that’s easier to finish manually. Below I’ll explain the technical differences, show what photographers and reviewers have found in tests, and crucially, walk through multiple real-world visual comparisons on upscaling quality so you can judge for yourself.
Quick Takeaways
- Topaz Gigapixel AI delivers the sharpest results in most tests, especially with its Standard model, and noticeably better fine detail compared to Photoshop.
- Photoshop Upscaling is convenient but limited. Super Resolution helps with moderate improvements for 2x upscaling; Preserve Details works for small boosts but struggles at 4×.
- Neither tool can fully fix extremely noisy or low-quality crops, but Gigapixel still retains more usable information.
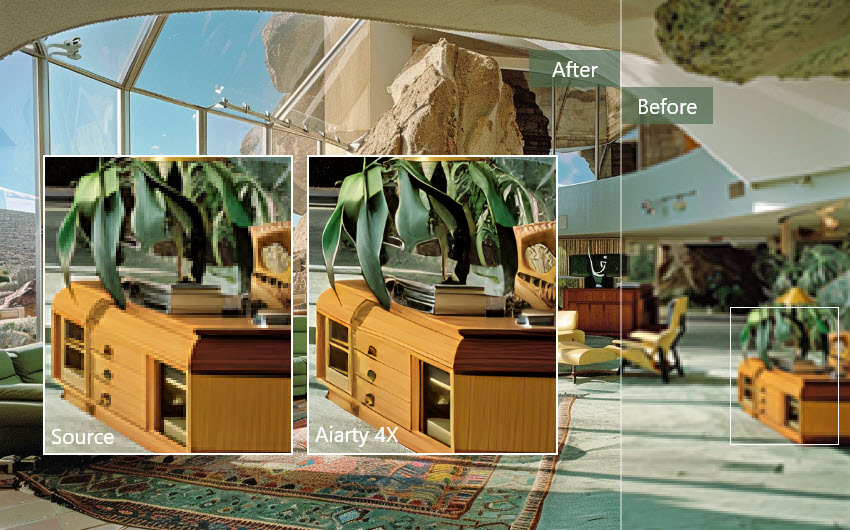
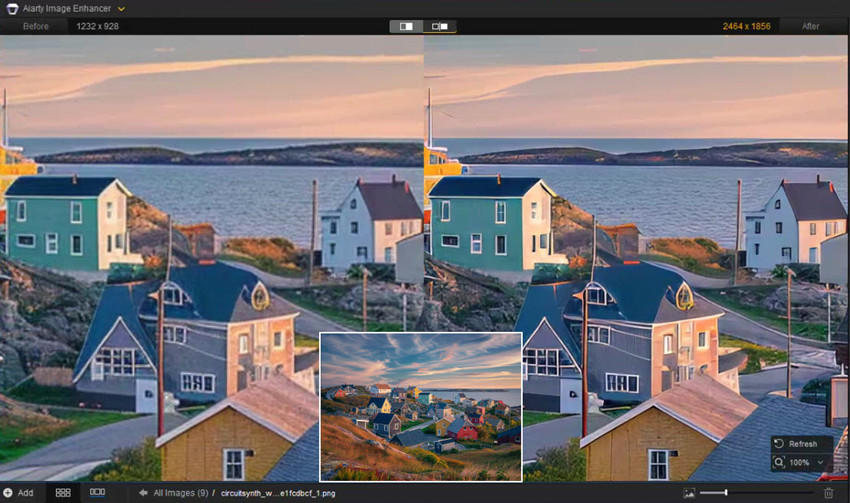
- Looking for a budget alternative? Aiarty Image Enhancer offers strong upscaling and denoising at a much lower cost, making it appealing for everyday creators and e-commerce users.
Topaz Gigapixel AI vs Photoshop Upscaling Methods
Topaz Gigapixel AI is a specialist product: it uses trained neural nets that attempt to reconstruct textures, lines, and facial detail when enlarging. Gigapixel offers multiple models (Standard/HQ/Lines/Art/Low-Res/Very Compressed) and sliders for noise suppression, blur removal, and compression fixes, plus features such as Face Recovery. The app does generative-style reconstruction and it learns typical textures and tries to synthesize plausible new pixels.
Adobe Photoshop Super Resolution & Preserve Details use different upscaling engines: Preserve Details 2.0 is an advanced resampling algorithm (interpolation + sharpening), and Super Resolution is Adobe’s machine-learning enhancement inside Camera Raw that essentially doubles linear resolution (4× pixels). Photoshop tends to emphasize faithful resampling with conservative sharpening rather than aggressive re-writing of texture. It's built to integrate into a broader retouching workflow.
Gigapixel tries to create believable new detail; Photoshop tends to preserve and subtly enhance existing detail without inventing much that’s not already implied by the pixels.
How to Upscale Images in Topaz Gigapixel AI?
- Supported image formats: Gigapixel supports JPEG, PNG, TIFF, DNG, HEIC, and many RAW formats.
- Pricing: Topaz Gigapixel AI is priced at $17/month or $204/year (annual commitment, non-cancellable during the period).
Step 1. Open the software. Drag your image onto the workspace or click “Browse Images”.
Step 2. On the right panel, you will see the Model dropdown. Each model is tuned for different input types like Standard for most well-lit photos, and HQ for clean DSLR/mirrorless photos with minimal noise.
Gigapixel automatically suggests a model, but you should always manually test at least 2 models because different models can produce drastically different detail reconstruction.
Step 3. Select an upscale factor like 2x, 4x, and 6x. You can also customize the size as you need.
Step 4. Preview the upscaled image quality and fine-tune if needed. Gigapixel gives three critical sliders that dramatically remove noise, blur, compression artifacts, etc. Once finished, click Save Image to save the upscaled image to local drive.
How to Upscale in Photoshop (Super Resolution & Preserve Details 2.0)
There are two major methods for high-quality upscaling in Photoshop. Below is a simple guide on how to choose and use each upscaing tool:
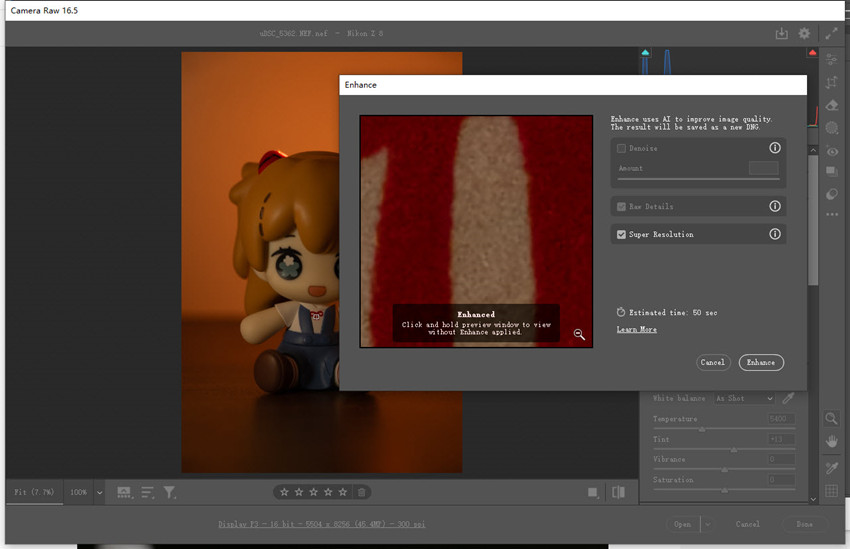
Method 1: Upscale with Adobe Camera Raw Super Resolution
Step 1. Open the image in Adobe Camera Raw. RAW formats (such as CR2, NEF, or ARW) will open in ACR automatically. For JPEG or PNG images, you can right-click the layer in Photoshop and choose Open in Camera Raw, or open the file through Adobe Bridge by right-clicking it and selecting Open in Camera Raw.
Step 2. Once the image appears in ACR, right-click the thumbnail and select Enhance…. In the dialog, enable Super Resolution. A preview will appear, along with the estimated output resolution.
Step 3. Click Enhance to begin the process. Photoshop will create a new DNG file with 4× the pixel count, saved next to your original image unless specified otherwise.
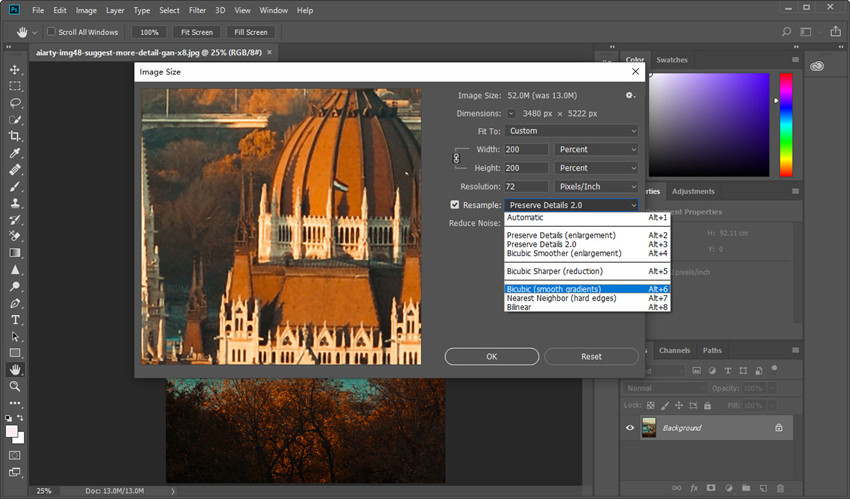
Method 2: Upscale with Preserve Details 2.0
Step 1. Load in the source photo in Photoshop. Then go to Image on the top menu and choose Image Size. In this panel, decide whether you want to upscale by entering specific pixel dimensions or by increasing the scale percentage (for example, 200%, 300%, or 400%). Make sure Resample is enabled.
Step 2. Choose Preserve Details 2.0 from the resampling dropdown.
Step 3. Use the Reduce Noise slider to balance sharpness and smoothness.
Step 4. After confirming the upscale, you can restore clarity using Smart Sharpen if necessary.
Also see: How to use Generative Upscale in Photoshop
Topaz Gigapixel AI vs Photoshop Upscaling Quality Comparison
Now that we’ve walked through how to upscale images in both Photoshop and Topaz Gigapixel AI, it’s time to look at how these methods actually perform in real-world use. Below is a direct quality comparison using the same source image, magnified and evaluated at identical zoom levels.
Related: Topaz vs Photoshop vs ON1 upscaling tests
Test 1. Upscale noisy raw photo
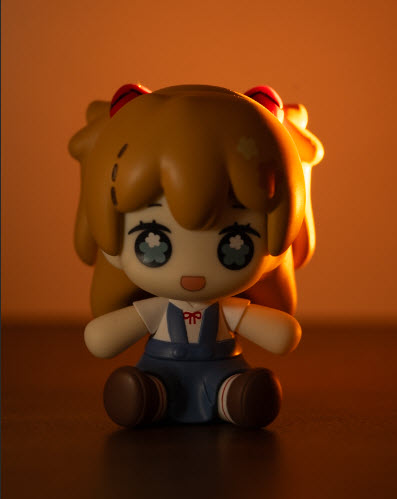
The first test photo is a high-resolution RAW image captured with a Nikon Z7 in a dimly lit indoor environment. The file measures 5504 × 8256 pixels, and because the ambient light was quite low, I shot it at ISO 6400.
The difference is clear. Photoshop’s DNG Super Resolution output looks noticeably worse: the upscaling enlarges every bit of noise and artifact, because SR is designed to increase pixel count, not clean or analyze noise (Adobe Lightroom is better for noise reducion). As a result, the grain becomes harsher and the imperfections are amplified.
Gigapixel AI’s noise reduction handles the noise far better than Photoshop SR. With the HD model, edges look more controlled, the grain isn’t exaggerated as much, and the overall image feels cleaner and more usable compared to Photoshop’s SR result.
Test 2. Upscale low-res image 2x
Here is the source photo at 808 x 1200. Below we will use both Topaz Gigapixel AI and Photoshop Super Resolution to upscale it by 200%.
We upscaled the source image at 808 × 1200 px using Photoshop Super Resolution and Gigapixel AI Low-res model 2×. At a 100% crop, the results look very similar, both deliver excellent detail, with the bird’s fur appearing clearly defined and well-separated.
Test 3. Upscale images to large formats
The original image is 1740 × 2611 px. Due to page layout limitations, the section below shows only a 100% crop from the original photo.
1. Upscale by 200%
We upscaled the image by 200% and examined 100% crops, comparing Topaz Gigapixel AI (Standard model) with Photoshop Super Resolution. The results show that Gigapixel produces slightly cleaner edges and crisper lines, giving the overall image a more polished and defined appearance compared to Photoshop, which remains accurate but a bit softer in detail.
2. Upscale by 400%
We performed a 400% upscale, comparing Photoshop Preserve Details 2.0 with Topaz Gigapixel AI Standard 4×. While Photoshop’s upscale shows noticeable improvement over the original, Gigapixel delivers much sharper results, with many fine details rendered clearly and more distinctly, making the overall image appear significantly crisper.
Test 4. Upscale high-res JPEG photo
The source is a very high resolution at 5427x3618, and we upscale it by 400% using Topaz Gigapixel and Photoshop Preserve Detail.
The images below show a 100% crop after a 4× upscale. As you can see, Photoshop Preserve Details offers only limited improvement, with many areas still looking soft. In contrast, Topaz Gigapixel AI, despite leaving some residual noise, delivers surprisingly strong detail. Even the tiny moss strands and grass fibers become clearly visible.
In areas with heavy noise and more serious image defects, neither tool can work miracles. However, Topaz Gigapixel AI still handles the upscale noticeably better, preserving more structure and producing a cleaner, more coherent result overall.
Note: It’s worth mentioning that Topaz Gigapixel’s Standard model preserves the most detail and generally produces the sharpest results. The HQ model, on the other hand, generates fewer artifacts but tends to look softer overall. The best choice depends on your image and preference, so it’s worth trying both to see which one fits your workflow.
Which Should You Use? Topaz Gigapixel AI vs Photoshop
Choosing between Topaz Gigapixel AI and Photoshop depends largely on your image quality, workflow, and end goal. Both tools can upscale well, but they excel in different situations.
When use Photoshop for upscaling?
if you want a quick, native solution inside an all-Adobe workflow. Whether you use Super Resolution or Preserve Details 2.0, Photoshop generally takes a conservative, faithful approach to upscaling—enhancing what’s already in the pixels without aggressively inventing new texture. This works especially well when:
- your image is already clean and relatively noise-free
- you only need a 2× or moderate 300–400% enlargement
- you prefer predictable, natural, low-risk results
However, on noisy RAW files, Photoshop’s upscale engines can actually amplify noise, since neither method performs true denoising during enlargement. High-ISO shots or compressed JPEGs often look worse before they look better.
When use Topaz Gigapipxel AI for upscaling?
Topaz Gigapixel AI stands at the opposite end: it is designed specifically for detail reconstruction from imperfect sources. If your image has softness, noise, compression blocks, or mild motion blur, Gigapixel can recover more believable texture than Photoshop. It offers multiple AI models—Standard, HQ, Lines, Art, Low-Res, Very Compressed—making it flexible for different subjects and problem types. Gigapixel is the stronger choice when you need:
- 4× or 6× upscaling
- clearer edges and more defined micro-texture
- cleaner results from low-res, noisy, or highly compressed files
While it won’t work miracles on extremely damaged images, Gigapixel consistently produces sharper and more detailed output than Photoshop’s upscaling engines, especially when the original file has visible flaws. Nevertheless, there is a trade-off plan - Topaz Gigapixel can be available as a plugin of Photoshop for image enhancement.
A Budget Alternative to Gigapixel & Photoshop for High-Quality Upscaling
If Topaz Gigapixel AI feels too expensive or Photoshop’s upscaling tools still leave you wanting cleaner detail, Aiarty Image Enhancer is a strong, budget-friendly alternative worth trying.
It can upscale RAW and standard images by 2×, 4×, or even 8× to 4K, 8K, and higher resolutions, while enhancing details without introducing quality loss. During the upscale process, it also removes noise, blur, and compression artifacts such as pixelated blocks
Its low-cost lifetime license makes it far cheaper than both Topaz and Adobe’s subscription, which is ideal for hobbyists, e-commerce sellers, and creators who need reliable upscale quality without high ongoing costs.
![]() Free download Aiarty Image Enhancer for Windows
Free download Aiarty Image Enhancer for Windows
![]() Free download Aiarty Image Enhancer for macOS
Free download Aiarty Image Enhancer for macOS
It upscales images that are noticeably sharper and cleaner than Photoshop’s conservative Super Resolution / Preserve Details results, yet it avoids the overly aggressive, sometimes artificial textures that certain Topaz Gigapixel models can create. .
Verdict
Both Photoshop and Topaz Gigapixel AI have their strengths, but your choice depends on priorities. Photoshop is ideal for quick, conservative upscales within an existing Adobe workflow, especially when your images are already clean and noise-free. Topaz Gigapixel AI, however, shines when you need to recover detail from low-resolution, noisy, or compressed images, its AI models consistently deliver sharper edges, clearer textures, and more visually striking results at higher scaling factors. For users who value maximum detail and high-quality upscaling, Gigapixel AI remains the go-to option, while Photoshop works best for speed, simplicity, and subtle enhancement.
You May Also Like
This post was written by Brenda Peng who is a seasoned editor at Digiarty Software who loves turning ordinary photos into extraordinary works of art. With AI assistance for brainstorming and drafting, the post is reviewed for accuracy by our expert Abby Poole for her expertise in this field.