I've been seeing Radiant Photo pop up a lot lately. After a few people asked me about it, I figured it was time to take a look. I spent the last few days putting it through its paces, and will share with you detailed review of Radiant Photos.
In short words, it analyzes your photo first and builds edits around the entire scene and subject. This first pass often brings out a more balanced exposure, improved color, and clearer detail before any manual work begins.
Let's find out how it works, what features are included, and how it compared with other image editing tools.
What Is Radiant Photo?
Radiant Photo is photo-editing software designed to enhance photos quickly and intuitively. It uses intelligent scene detection to analyze what's in your photo, and then applies automatic adjustments to improve exposure, color, contrast, and detail. For instance, it auto applies different profiles for portrait, wildlife, landscape or pet photos, while still give you options for quick editing or smart editing.
This photo editing software works as both a standalone tool and plug-in for Photoshop CC, CS6, Lightroom and Lightroom classic.
Available on:
-Windows 10, 11 (64-bit), minimum 8GB RAM
-Mac M-series or CPU Intel core, minimum 8GB RAM
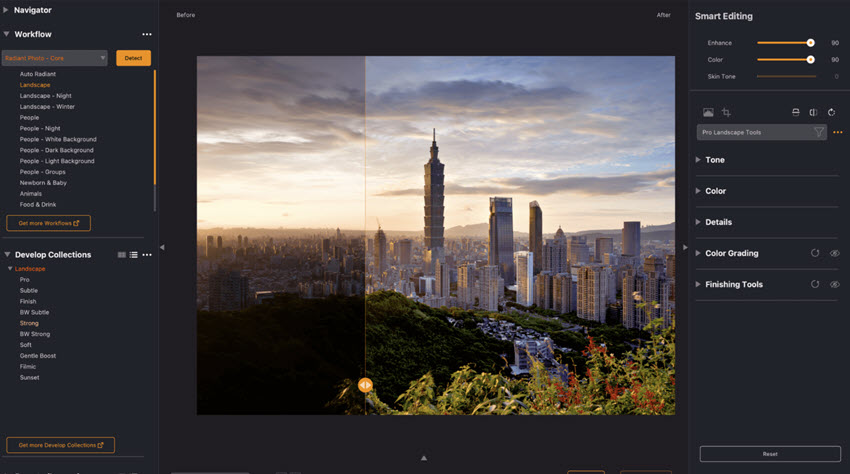
Photo Editing Workflow in Radiant Photos
To give it a fair shot, I started with a completely unedited RAW file from my Canon. I wanted a clean slate. Before you touch a single slider, Radiant Photo gets to work. The software uses its built-in algorithms to analyze the photo and applies its own adjustments.
It doesn't try to finish the photo for you, but instead creates an "optimal baseline." It brings a dull, flat file to a perfect starting point without pushing the colors or contrast too far, which is a problem with many one-click solutions.
Two Editing Modes in Radiant Photos
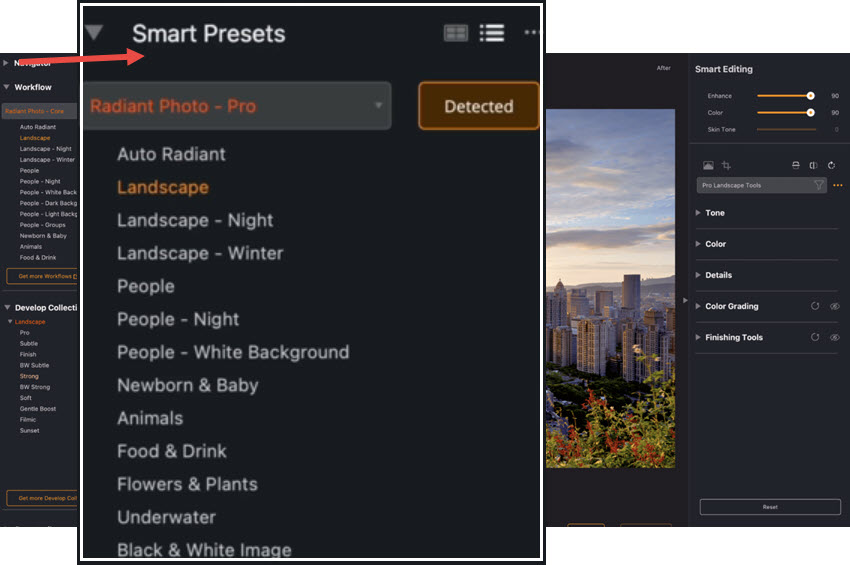
It does this using what it calls "Smart Presets." It looks at the image, decides it's an outdoor scene, and applies a "Landscape" preset. It has other categories for people, animals, food, and more. My photo was instantly brighter and more vibrant than the flat RAW file I started with.

From there, you have two main ways to work. Quick Edit is exactly what it sounds like: fast, minimal, and effective. You get a small set of global sliders like Strength, Color, and Depth. If you don't enjoy tweaking dozens of settings, this mode alone can get you 90% of the way there in seconds. It's a fast way to get a good result without getting lost in manual tweaks.
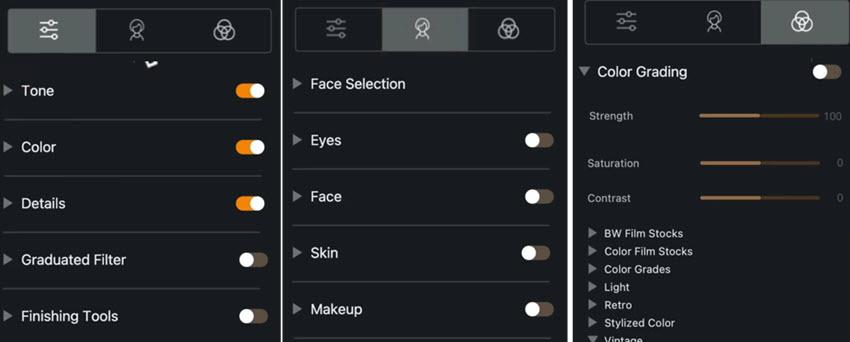
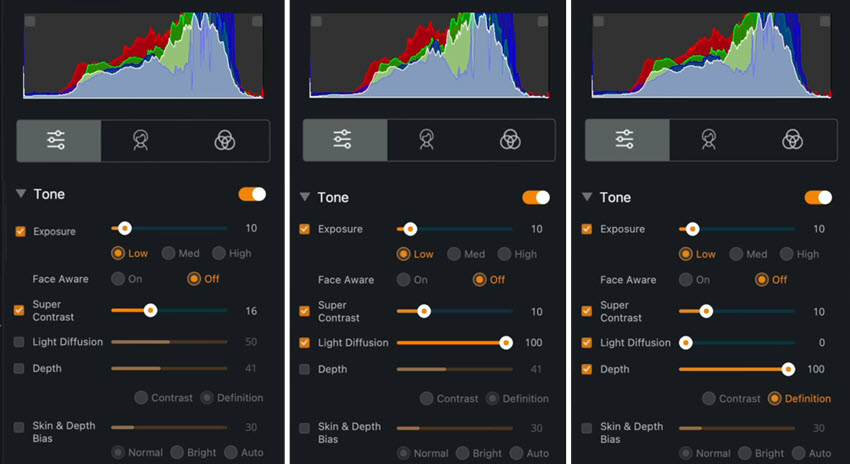
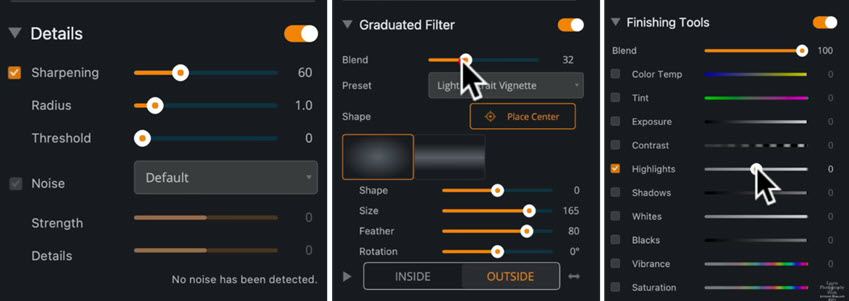
If you want more precision, you switch to Detailed Edit. This is where you'll find the histogram, crop tools, portrait adjustments, and deeper tonal and color controls. Instead of just Highlights and Shadows, you get tools like Super Contrast, Light Diffusion, Depth, Color Contrast, and Fidelity. It takes some experimenting to understand what each one does, so expect a bit of a learning curve if you're coming from Lightroom.
Since you're just refining an already-great image, the process feels less like a rescue mission and more like a final polish. I also learned that the software was developed with a lot of input from photographers, which explains why its automatic adjustments feel so natural.
Portrait Tools
The portrait tools are straightforward. You get eye enhancement, dark circle removal, skin smoothing, and blemish removal arranged so even beginners won't feel lost.
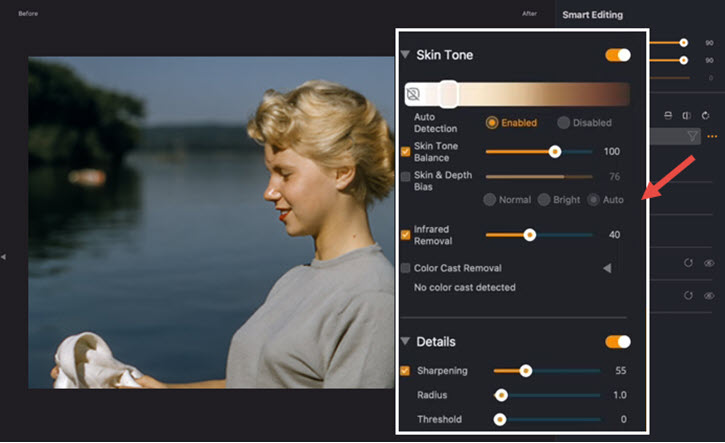
The face area is auto-masked, which is handy, though it's not perfect and sometimes blends a little too much of the eye white or cheek area. In most of my tests the results stayed natural, and skin didn't turn waxy or plastic.
Mixed and Critical Perspectives
While being praised for quick editing workflow, there are some mixed feedback on Radiant, especially in terms of:
- It is not a replacement for professional manual control.
- For certain photography types, the auto detection can be inconsistent.
- The image sharpening and noise reduction features are basic.
While workflows are a promising idea, not every photo gets correctly categorized, and in some tests Radiant didn't recognize pets unless the specific workflow pack was applied. That means results can vary depending on your subjects and chosen workflows.
Based on DPReview discussions, some experienced photographers noted that Radiant's color enhancement can interact in unexpected ways with certain color profiles, with punchier results when starting from images that already have contrast-enhancing profiles applied. This highlights the importance of understanding your color pipeline when integrating AI enhancements.
Many photographers actually use Radiant Photo alongside other tools, either at the start of a workflow to establish a clean base, or at the end to normalize a finished edit. While Radiant includes sharpening and denoising tools, they generally aren't considered as comprehensive or refined as dedicated tools like dedicated AI image enhancers, such as Topaz or Aiarty tools, which are better suited for tasks like resolution upscaling, detailed noise reduction, and texture recovery.
Radiant Photo vs Luminar Neo
Radiant Photo
Pricing: $159.00 for Radiant Photo 2. Individual specialized add-on workflows (Landscapes, Portraiture, Pets, Birds) are available for $79 each.
Radiant Photo feels like the tool you reach for when you want a quick but robust enhancement with minimal fuss. It knows what kind of photo it's looking at and adjusts accordingly without much guesswork. If your priority is portraits that look natural and you want to spend your time shooting, not wrestling with sliders, it's a very compelling option.
Highlighted Features of Radiant Photo
- AI scene recognition to automatically tailor edits to different types of photos.
- Strong at initial automatic adjustments, tuning exposure, contrast, color into a solid base.
- Includes portrait-specific tools for skin tones, face, eye detail, and filters.
- Straight forward UI for fast, quality results with less manual tweaking.
Luminar Neo
Pricing: $119 One-time payment for PCs/Mac, $159 One-time payment for desktop and mobile apps.
Luminar Neo is a larger program with more features and it feels like a more complete editing suite. Besides skin and eye enhancements, it has a wide range of AI tools from sky replacement and atmosphere effects to layers and masking, plus creative editing like re-balance light and depth in a photo, Sunrays for artificial atmospheric sunlight, and color transfer features.
Compared with Radiant Photos, it takes a bit longer to learn Luminar. But that can also be a strength. For instance, Luminar gives you more control over individual parts of the face, and for some users that's worth the extra clicks.
Highlighted Features of Luminar Neo
- AI toolset for sky replacement, relighting, denoising, and skin enhancements.
- Works as both a standalone program and as a plugin for Lightroom and Photoshop.
- Non-destructive editing and modular engine to stack multiple edits.
Overall Impression of Radiant Photos
So, what's my take on it? For someone who isn't deep into photo editing but wants to improve their RAW files, this could be a great tool. The automatic adjustments provide a very strong starting point.
It's particularly good at rescuing photos taken in bad light or even through a window, producing a clean, vibrant image that looks like it was shot outdoors.
But there is a catch. After running several different photos through the software, I noticed it tends to guide every image toward a similar, polished look. It's a very clean and vibrant style, which is nice, but it might not be what you want for every photo. If you want to create a moody, soft image one day and a high-contrast, punchy one the next, you'll have to work a little harder to push the software away from its default direction.
Enhancing Image Quality Before or After Radiant Photo
Radiant Photo 2 focuses primarily on realistic color correction and tonal balance, making it most effective when working with clean, high-quality image files. However, photographers dealing with low-resolution images, visible noise, or heavy crops may benefit from preparing their photos beforehand.
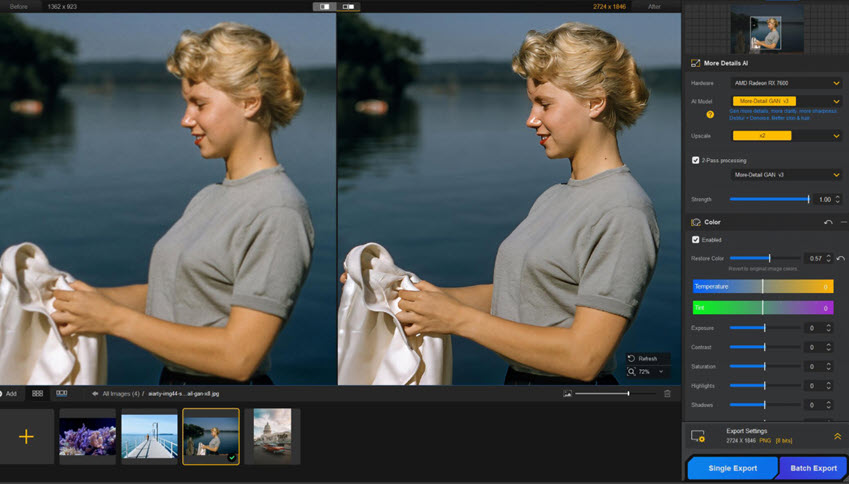
In these cases, Aiarty Image Enhancer works well as a companion tool, for Radiant Photo and general photo editors as well. It is designed for image and photo quality enhancement, such as upscaling, denoising, sharpening, and detail recovery.
By improving image quality naturally with details, it is suitable for preparing images before importing them into Radiant Photo, or refining image quality after a Radiant-based edit.
You can follow these simple steps to integrate Aiarty Image Enhancer into a Photo editing workflow:
Step 1. Launch Aiarty Image Enhancer and add your photos.
Drag and drop the images you plan to edit. Batch processing is supported for better efficiency.
Step 2. Select an AI model and target resolution.
Aiarty provides multiple AI models tailored to different image types and enhancement goals.
For resolution, you can choose upscaling factors such as x2 or x4, or specify target resolutions like 4K or 8K.
Selecting x1 maintains the original resolution, it works to improve clarity and reduce noise.
Step 3. Preview results and apply optional adjustments.
The built-in AI models will auto detect flaws and fix grainy photos, remove unwanted noise while keep the natural grains. You can compare before-and-after results and switch between AI models to find the most natural-looking output.
Optional color adjustments and basic enhancement controls are also available, which can reduce the need for additional preprocessing.
Final Verdict
For a one-time purchase, Radiant Photo is a powerful tool. It's ideal for the working photographer who needs to edit large volumes of photos quickly and consistently. It's also perfect for the enthusiast who wants great results without getting lost in endless menus or paying a monthly fee.
It may not replace a program like Adobe Lightroom for heavy-duty blemish removal or complex composites, or like Aiarty with AI-drive noise reduction and detail restoration. But for the vast majority of photo editing, Radiant Photo does the job incredibly well. It makes you feel like you have an expert assistant handling the tedious work, letting you focus on the final creative touches.
Ultimately, Radiant Photo is an interesting tool with a strong opinion on how a photo should look. It's definitely worth trying the free trial to see if its style matches your own.
You May Also Like
This post was written by Brenda Peng who is a seasoned editor at Digiarty Software who loves turning ordinary photos into extraordinary works of art. With AI assistance for brainstorming and drafting, the post is reviewed for accuracy by our expert Abby Poole for her expertise in this field.