How to Fix Grainy Photos [2026 Professional Workflows]
Updated on
Fix Grainy Photos Best Practices
Restoring grainy or noisy photos requires a systematic approach to noise reduction and detail reconstruction. High-quality results depend on distinguishing between unwanted artifacts and essential textures.
- Primary Solution: Advanced AI reconstruction models offer superior results by regenerating lost details instead of simple blurring.
- Alternative Methods: Manual luminance and color noise adjustments in professional editing software provide granular control for specific lighting conditions.
The goal is to produce clean product concepts with high fidelity and zero artifact interference.
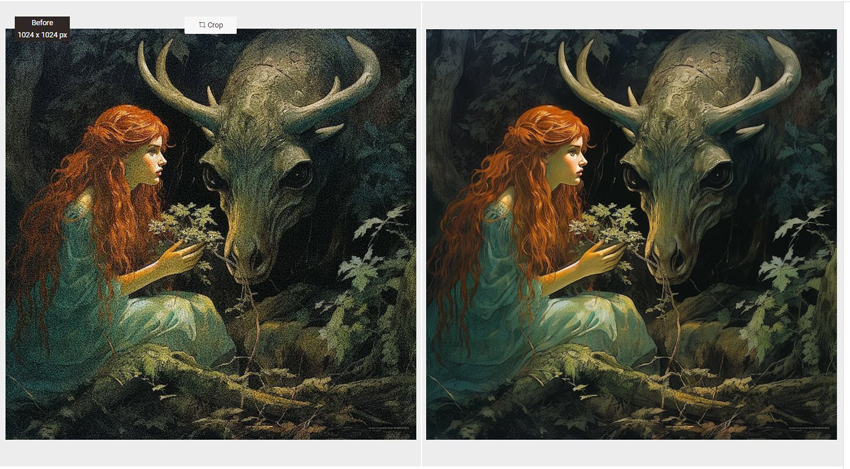
Struggling with grainy photos ruining your perfect shots? You're not alone! Whether you're capturing memories on your smartphone or with a DSLR camera, noise can creep into your images and leave you frustrated. But don't worry, as there are practical solutions to help you fix grainy photos and achieve crystal-clear results. Below we have compiled a detailed tutorial explaining how to fix grainy photos using the best ways. Read on!
Understanding Image Grain: Types and Causes
To effectively restore a photo, identifying the specific noise type is essential. Image grain generally falls into two categories:
- Luminance Noise: Random variations in brightness that create a "sand-like" texture. This often results from high ISO settings or small sensor limitations in low-light environments.
- Color (Chroma) Noise: Unnatural color specks (usually purple or green) visible in shadow areas. This is typically a byproduct of heat during long exposures or heavy image compression.
Common Triggers for Grainy Images:
- ISO Sensitivity: High ISO amplifies the electronic signal, simultaneously increasing background noise.
- Underexposure: Inadequate light forces the sensor to struggle, leading to data loss and "muddy" textures.
- Hardware Constraints: Smartphone sensors capture less light than DSLRs, making them prone to artifacts.
- Digital Compression: High-level JPEG compression creates blocky artifacts often mistaken for natural grain.
Best Way to Fix Grainy Photos
Aiarty Image Enhancer establishes a new standard for generating clean product concepts from degraded originals. Unlike legacy interpolation, this AI-driven workflow integrates denoising, deblurring, and upscaling into a single generative process. It effectively mitigates artifacts caused by high ISO, low-light environments, and heavy JPEG compression while maintaining high-fidelity details.
Key Technical Advantages:
- Semantic Detail Preservation: The engine distinguishes between authentic textures, (such as skin pores or intricate material patterns) and unwanted grain. This ensures product concepts remain natural rather than over-processed.
- Hardware-Native Optimization: Fully optimized for next-generation architectures, including NVIDIA RTX 50 Series GPUs and Apple Silicon M5 chips, ensuring stable throughput for batch processing.
- Dynamic Control: The integrated Strength slider provides precise authority over noise reduction levels, preventing artificial smoothing or ghosting artifacts.
Official Workflow for Grain Removal Aiarty Image Enhancer
Step 1. Free download the software on your computer, install, and launch it.
Step 2. Import the photo or photo folder by dragging or clicking the +/Add Media icon you wish to fix grain from.

Step 3. Once the grainy photo is loaded, we come to the right, and choose the desired AI denoising model to remove the grains from your photos.
After choosing the desired AI model, we find the Upscale section where you can choose from x1, x2, x4, or x8 to enhance your images, or double, quadruple, or octuple your image resolution. Or you can choose from 1K, 2K, 4K, or 8K to convert your images to specific resolution, like 1K (1408 x 1408), 2K (2408 x 2408), 4K (4096 x 4096), or 8K (8192 x 8192). If you don't want to change the image size, simply select 1x.
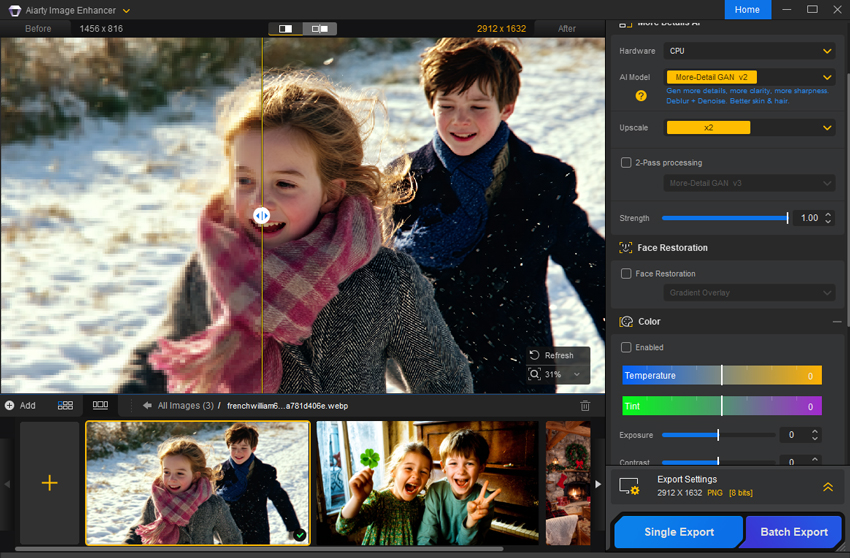
Note: You can also toggle on "2-Pass processing" to restore image quality with or without upscaling. This involves an extra round of x1 image processing under the More-Detail GAN v3 and AIGCsmooth v3 models.
Step 4. Choose your desired format, and output quality, and specify the output folder. Then Click on Run to fix the grainy photos using Aiarty Image Enhancer.
How to Fix Grainy Photos in Lightroom
Adobe Lightroom offers a powerful and intuitive solution for reducing graininess in photos through its noise reduction tools. By separating luminance and color noise controls, it allows users to fine-tune the balance between smoothness and detail retention, effectively minimizing grain without making the image look overly processed. Whether you're working with high ISO shots or low-light conditions, Lightroom’s real-time previews and non-destructive editing make it easy to clean up images while preserving natural textures and sharpness. See below how to fix grainy photos in Lightroom:
Step 1. Launch Lightroom on your computer, and import the grainy photos you wish to fix.
Step 2. Click on the Develop mode at the top of the screen to open the photo editing workspace. On the right hand, find the Detail panel, and click to expand.
Step 3. Adjust the Noise Reduction settings to remove grain from your photo:
- Luminance Noise Reduction:
- Amount: Move this slider to the right to reduce luminance noise. It is suggested to start with a value around 25-30 and adjust gradually.
- Detail: Higher values retain more detail but may leave some grain, while lower values smooth the image but may sacrifice some fine details.
- Contrast: Increase to restore contrast lost during noise reduction.
- Color Noise Reduction:
- Amount: Move this slider to the right to reduce color noise. It is suggested to start with a value around 25 and adjust gradually.
- Detail: Higher values retain more color detail but may leave some color noise, while lower values smooth color noise but may lose fine color details.
- Smoothness: This can adjust the smoothness of color transitions; higher values create smoother color transitions.
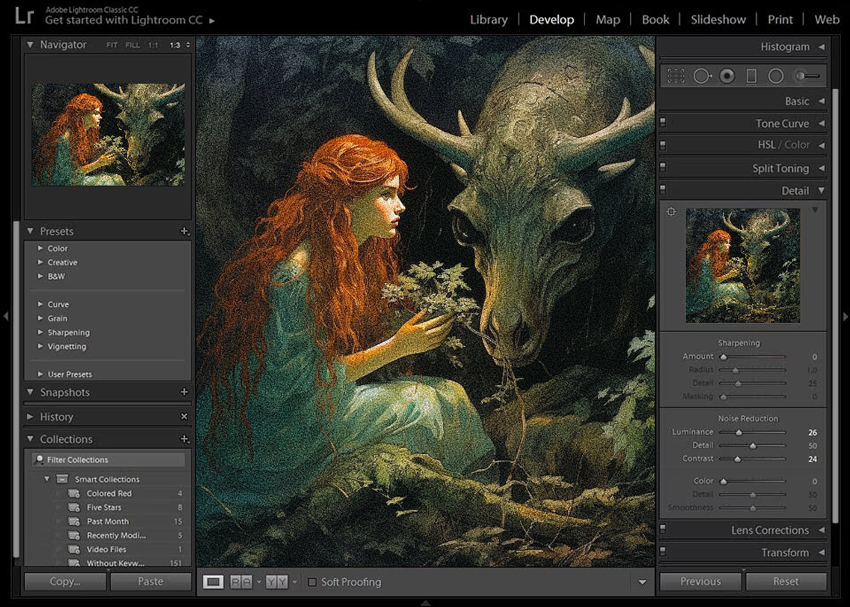
Step 4. Preview the result, and make further adjustments if needed. Once you are satisfied, export your photo.
How to Fix Grainy Photos in Photoshop
Adobe Photoshop provides advanced tools for removing graininess from photos, giving users precise control over noise reduction and detail preservation. Its “Reduce Noise” filter allows for targeted adjustment of luminance and color noise, while more experienced users can apply selective noise reduction using layer masks and smart objects. Combined with features like Camera Raw and AI-powered enhancements in Neural Filters, Photoshop enables both quick fixes and high-end retouching, making it a go-to choice for professionals seeking clean, polished results in grainy or low-light images. See below how to fix grainy photos in Photoshop:
Step 1. Launch Adobe Photoshop, and import the grainy photo you wish to fix.
Step 2. Click on the Filter menu at the top bar, and select Noise > Reduce Noise. And in the Reduce Noise window, you will see three sliders:
- Strength: This slider controls the amount of noise reduction. Move the slider to the right to increase the strength of the noise reduction, but be careful not to overdo it, as this can soften the image.
- Preserve Details: This slider determines how much of the image's details are preserved during the noise reduction process. Move the slider to the right to preserve more details, but this may also preserve some of the noise.
- Reduce Color Noise: This slider specifically targets color noise, which can give your image a grainy or speckled appearance. Move the slider to the right to reduce color noise.

Tweak each of these sliders to find the optimal balance between noise reduction and image detail. You can also click on the Preview checkbox to see the effects of your adjustments in real time.
Step 3. On top of the Reduce Noise filter, you can also use the Shake Reduction from Filter > Sharpen to remove blur caused by the camera shake. In the Shake Reduction window, you'll see a preview of your image with a grid overlay. Use the Blur Trace and Blur Estimation tools to detect the blur caused by camera shake. Then, click OK to apply the shake reduction.
Step 4. Once the grains are removed, go to File > Save as to export your photo.
Technical Comparison: AI Grain Removal vs. Traditional Denoising
Why AI Grain Removel Wins for Product Concepts
- Semantic Awareness: Traditional software treats noise and detail as the same mathematical frequency. AI reconstruction identifies specific objects—such as product labels or textile patterns—and selectively removes noise while sharpening the actual subject.
- Artifact Mitigation: Legacy sharpening tools often introduce "halos" or "ringing" around edges. Aiarty Image Enhnacer utilizes a 2-pass refinement process to ensure smooth gradients and clean outlines.
- Consistency in Batch Processing: Maintaining a uniform look across multiple product concepts is difficult with manual tools. AI models provide a deterministic output, ensuring consistent quality across an entire asset gallery.
How to Fix Grainy Photos Online
For those who are seeking an easy solution to fix their grainy photos without installing any third-party software, the online image denoiser is your optimal choice.
VanceAI Image Denoiser is a web-based grain remover. It can effortlessly remove grain and reduce unwanted background noise to enhance your photos. In just a click, you can transform your grainy, blurred, or low-light photos into stunning, clear images. Follow the steps below to fix your grainy photos online using VanceAI Image Denoiser:
Step 1. Go to the VanceAI Image Denoiser.
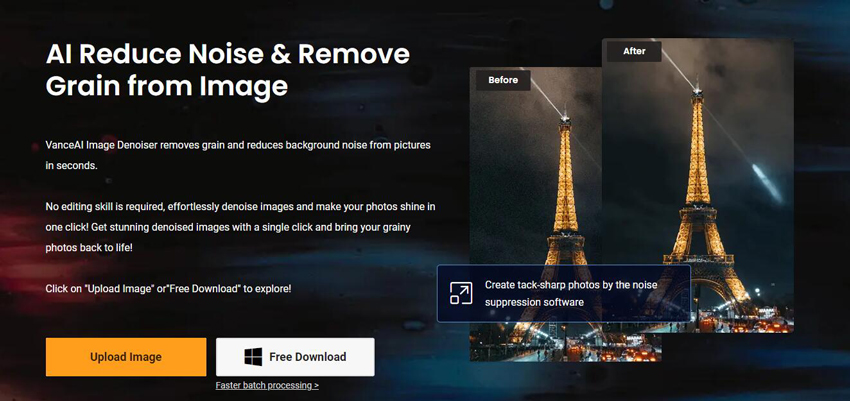
Step 2. Click the Upload Image button to upload your grainy photo. Once uploaded, the program will automatically remove grain from the photo.
Step 3. Once finished, click Download to download the ungrainy photo.
Prevent Image Grain at the Source
High-quality product concepts begin with a clean source file. Minimizing noise during acquisition ensures maximum flexibility during AI reconstruction. Adhering to these professional standards reduces the reliance on heavy post-processing:
- Optimize the Signal-to-Noise Ratio (SNR): The most effective method involves maximizing available light to ensure the camera sensor captures a strong signal. Utilize studio strobes, continuous LED arrays, or natural ambient light to keep ISO at its native base (typically ISO 100 or 200). This prevents the electronic amplification that generates luminance noise.
- Prioritize RAW Data Acquisition: Standard JPEG compression applies irreversible in-camera processing. Capturing in RAW format preserves the unprocessed sensor data, providing a wider dynamic range and greater precision for subsequent noise reduction without sacrificing fidelity.
- Manual ISO Management: Avoid "Auto-ISO" settings in low-light environments. Manually lock the ISO to the lowest possible value to maintain pixel integrity. Higher values (e.g., ISO 1600+) introduce exponential graininess that degrades fine material textures.
- Optical and Sensor Maintenance: Maintain a pristine optical path. Dust or debris on the sensor creates localized artifacts and "hot pixels" that mimic digital grain. Regular professional calibration and sensor cleaning are essential for consistent asset quality.
 FAQs
FAQs
Traditional spatial filtering often blurs edges to hide noise. However, Aiarty Image Enhnacer utilizes generative reconstruction to separate noise from texture. This maintains high-frequency details and enhances micro-contrast, ensuring that the final product concepts remain sharp and professional.
Yes. The generative model specifically targets chroma (color) noise by analyzing surrounding pixel data and restoring natural hues. This process eliminates purple or green specks in shadow areas without causing desaturation or color bleeding.
High-end AI models are optimized for both photographic and synthetic assets. The AIGCsmooth v3 model effectively removes grid-like artifacts and "checkerboard" noise common in AI-generated prototypes, resulting in clean and polished product concepts.
Photoshop primarily uses mathematical averaging to smooth out grain, which often leads to a loss of fine texture. AI reconstruction (Aiarty Image Enhancer) uses deep neural networks to recognize and regenerate missing data, offering superior detail preservation and upscaling capabilities up to 8K resolution.
Hardware acceleration (such as NVIDIA RTX 50 or Apple Silicon M5) primarily influences processing speed and stability. The reconstruction quality remains consistent, but a dedicated GPU ensures efficient batch processing for large galleries of high-resolution product concepts.
You May Also Like
Brenda Peng is a seasoned editor at Digiarty Software who loves turning ordinary photos into extraordinary works of art. With years of experience behind the lens and in front of the computer, Brenda shares her passion for photography, image enhancement, and editing through easy-to-follow tutorials.