
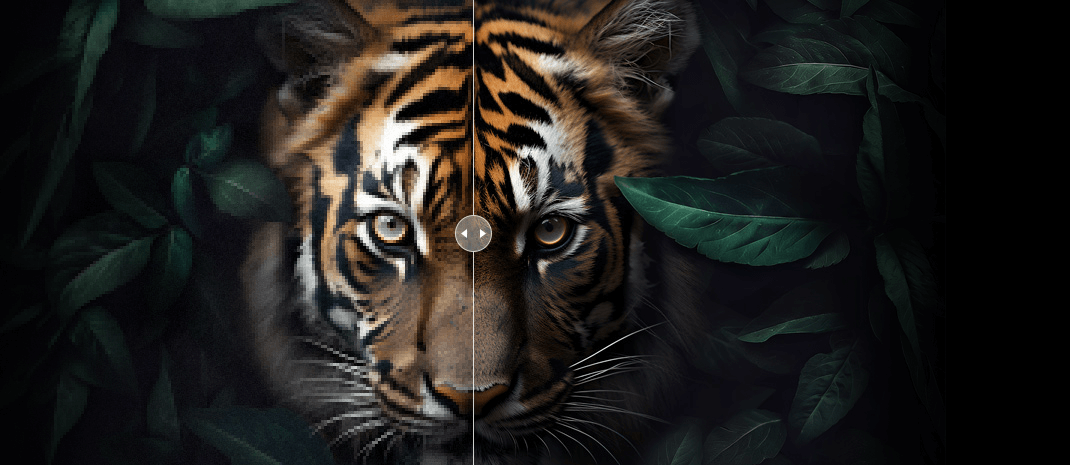
Animal Photography: Tips for Capturing Wildlife, Birds, Insects & More

Updated on
Animal photography covers far more than photographing wildlife in remote places. Birds in flight, insects in the backyard, pets at home, and animals in their natural habitats all present different challenges, from unpredictable movement and changing light to finding the right perspective.
The good news is that you don't need perfect conditions or the most expensive gear to create compelling animal photos. Understanding your subject, choosing the right equipment, and knowing how to adapt your settings and composition can make a bigger difference.
In this guide, we'll cover the essentials of animal photography, from choosing lenses and camera settings to working with different types of animals, composing stronger images, and handling common photo problems. We'll also look at a simple editing workflow for refining detail while keeping the photo natural.
What You Need for Animal Photography
The right gear can make animal photography easier, especially when you're working with distant, fast-moving, or very small subjects. You don't need a specialized setup for every situation, but a few pieces of equipment are particularly useful.
1. Camera
A DSLR or mirrorless camera gives you the flexibility to change lenses and adjust settings as the subject and shooting conditions change. Either can produce high-quality animal photos when paired with the right lens and technique.
>> More for Cleaning Camera Sensor
2. Lenses
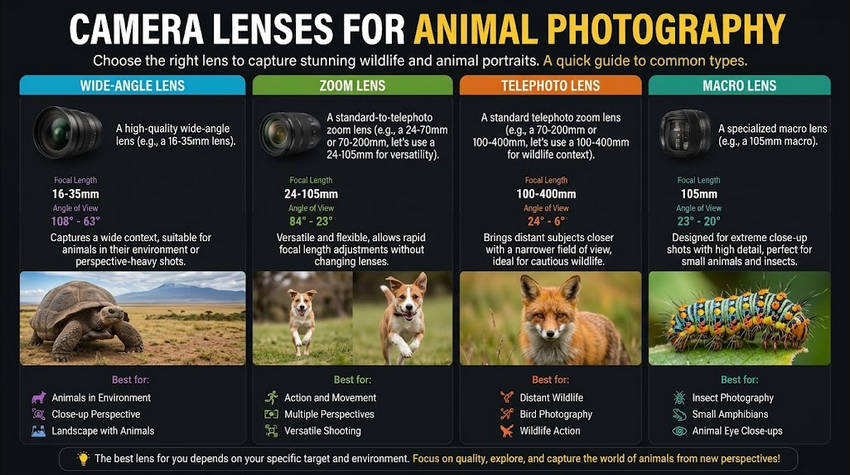
The best lens depends on the animal, your distance from it, and the type of photo you want to create:
- Telephoto Lens: A longer focal length, such as 200mm or more, is useful for photographing distant animals without getting too close. It's particularly useful for wildlife and birds photography.
- Macro Lens: Ideal for close-up photos of insects and other small subjects, revealing fine details that are difficult to see at a normal shooting distance.
- Zoom Lens: A versatile option when the distance to your subject changes or you need to reframe quickly.
- Wide-Angle Lens: Useful when the surrounding environment is an important part of the photo, rather than simply filling the frame with the animal.
3. Tripod or Monopod
A tripod or monopod can help stabilize your camera, particularly when using a telephoto lens or shooting for extended periods. A monopod can be especially practical when you need more freedom to move.
4. Extra Memory Cards and Batteries
Animal photography often involves long waits and short bursts of action. Carrying extra memory cards and batteries means you can keep shooting when the right moment finally comes.
5. Weather Protection
If you're photographing animals outdoors, protect your gear from changing conditions. A weatherproof camera cover or protective bag can help keep rain, dust, and moisture away from your equipment.
Before You Shoot: Know Your Subject and Environment
Before you start shooting, take some time to understand the animal you want to photograph. Learning about its behavior, habitat, and daily routine can help you choose the right time and place and capture more natural moments.
- Research the animal: Learn about its habits, active times, feeding behavior, and preferred habitat. Even basic research can help you know when and where to look.
- Observe before shooting: Watch the animal from a respectful distance and pay attention to how it moves, where it tends to stop, and how it reacts to people. This makes it easier to anticipate interesting moments without disturbing it.
- Choose the right location: Consider where the animal naturally spends time, whether it's a forest, wetland, park, farm, zoo, or your own backyard. Look for places with suitable light and backgrounds that complement the subject.
- Use sounds carefully: Some photographers use calls or familiar sounds to get an animal's attention. If you do, keep them brief and avoid causing stress or disrupting the animal's normal behavior.
Camera Settings for Different Animal Photography Situations
There is no single set of camera settings that works for every animal photo. The right settings depend on how much the subject is moving, how much of the scene you want in focus, and the available light. Use the following as starting points and adjust them as conditions change.
Shutter Speed
Shutter speed mainly depends on how quickly the animal is moving and whether you want to freeze or show movement.
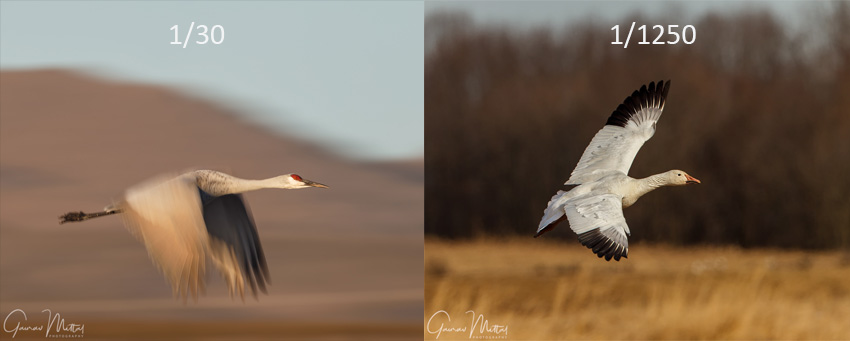
- Fast-moving animals: Start around 1/1000s or faster to freeze birds in flight and running animals.
- Slow or stationary animals: Around 1/500s or slower may be enough when the subject is relatively still.
- Creative motion blur: Try a slower shutter speed, such as 1/30s–1/60s, when you want to emphasize movement.
- Low light: If possible, keep enough shutter speed to prevent subject movement and raise ISO or use a wider aperture to compensate for the loss of light.
Aperture
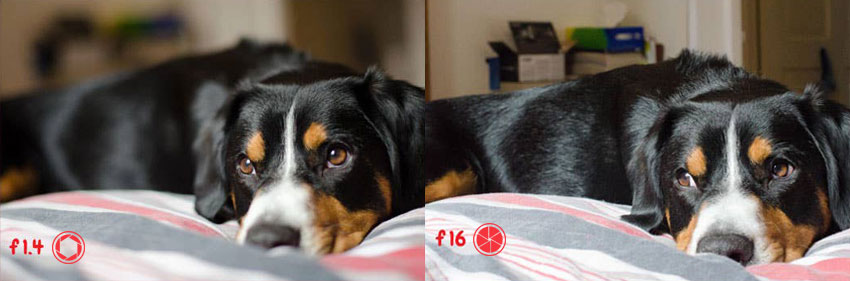
Aperture controls both the amount of light entering the lens and how much of the scene stays in focus. Choose it based on the subject and the look you want:
- Animal portraits: A wider aperture around f/2.8–f/4 can separate the subject from a distracting background.
- Full-body or group shots: Around f/5.6–f/8 provides more depth of field while retaining some background separation.
- Animals in their environment: A narrower aperture such as f/8–f/11 can keep more of the surroundings in focus when the habitat is part of the image.
- Low light: A wider aperture lets in more light, helping you maintain a usable shutter speed without pushing ISO unnecessarily high.
ISO
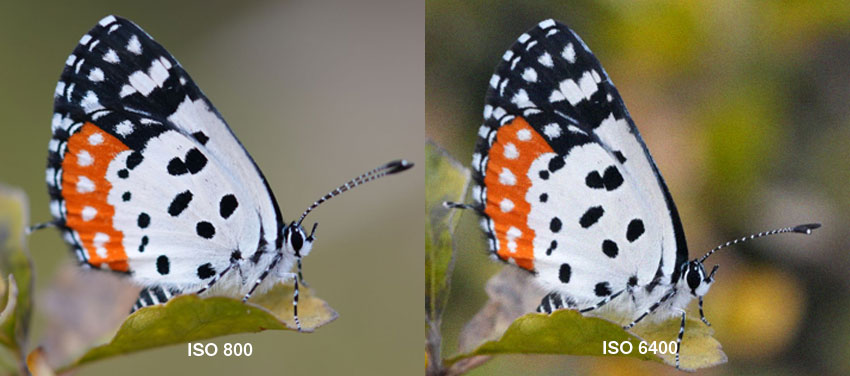
Use the lowest ISO that still allows you to maintain the shutter speed and aperture you need. In bright conditions, ISO 100–400 is often sufficient, while ISO 800–1600 or higher may be necessary in shade, overcast weather, or around dawn and dusk. Higher ISO can introduce noise, so check your camera's performance and adjust as needed.
These settings are starting points rather than fixed rules. Light, subject movement, lens choice, and the look you want can all change the ideal combination. After shooting, post-processing can help refine details, reduce noise, and improve clarity. See our guide on how to enhance wildlife photos for more practical tips.
Animal Photography Techniques That Actually Matter
Good animal photos are not only about having the right gear or settings. Small changes in timing, perspective, and composition can make the image feel more natural and engaging. The following techniques can help you capture animals in a way that shows their character and behavior.
- Focus on the Eyes: The eyes often create the strongest connection between the viewer and the animal. Keeping the eyes sharp is especially important for portraits and close-up shots.
- Anticipate Movement: Animals rarely stay still for long. Watch their behavior and prepare for what may happen next, whether it's a bird taking flight, a predator moving, or a pet changing its expression.
- Use Burst Mode When Needed: For fast or unpredictable moments, continuous shooting can help you capture the right expression, movement, or interaction.
- Change Your Perspective: Shooting from a lower angle or closer to the animal's eye level can create a more immersive image and help viewers see the subject from a different point of view.
- Include the Environment: An animal's surroundings can add context and tell a bigger story. Instead of always filling the frame, consider showing the habitat or elements that reveal where the animal lives.
- Try Different Compositions: Experiment with framing, distance, and subject placement to find a stronger image. Sometimes leaving more space around the animal can create a better sense of movement or atmosphere.
Different Types of Animal Photography, Different Challenge
Different animals require different approaches. Their size, movement, habitat, and behavior all affect your choice of lens, camera settings, and shooting technique. The following tips provide a starting point for photographing common types of animal subjects.
Mammal Photography
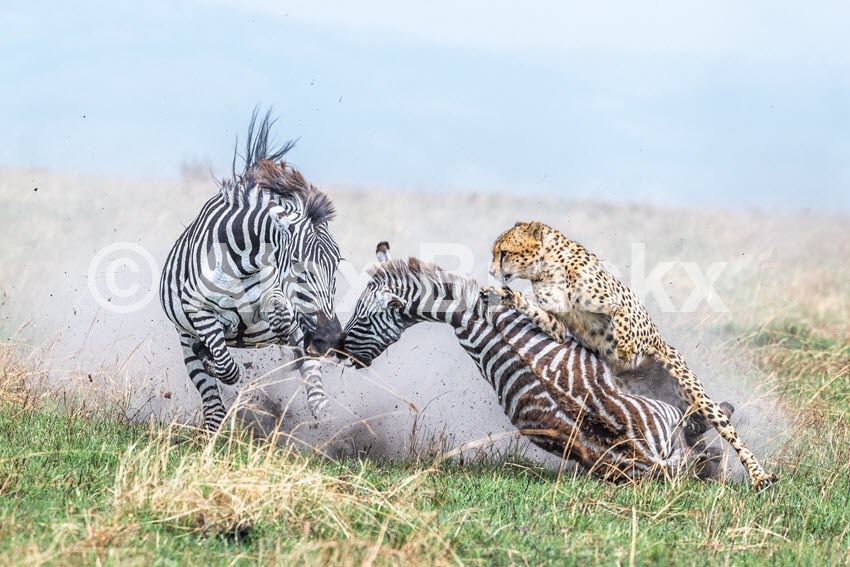
Mammals range from small backyard animals to large wildlife, so the best approach depends on the subject's size, distance, and behavior. A telephoto lens is often useful for distant animals such as the galloping horse or elephants on safari, while including the surrounding environment can help tell a stronger visual story.
- Lens: Use a telephoto lens for distant mammals or a zoom lens when the shooting distance changes frequently.
- Settings: Start with a faster shutter speed for moving animals, and adjust ISO when shooting in changing light conditions.
- Tip: Watch the animal's behavior before shooting. Capturing natural actions, interactions, or the relationship between the animal and its habitat often creates more engaging images.
Bird Photography
Birds are among the most challenging animal subjects because they are small, fast, and often unpredictable. Successful bird photography requires patience, quick reactions, and the ability to capture both movement and interesting poses.
- Lens: A telephoto lens helps you photograph birds without getting too close, especially in natural habitats.
- Settings: Use a fast shutter speed for birds in flight, continuous autofocus to follow movement, and burst mode to increase your chances of capturing the right moment.
- Tip: Leave enough space in front of a flying bird to show its direction of movement and create a more natural composition.
Learn More: A Complete Workflow for Sharper, Cleaner Bird Photography Results
Insect and Macro Animal Photography
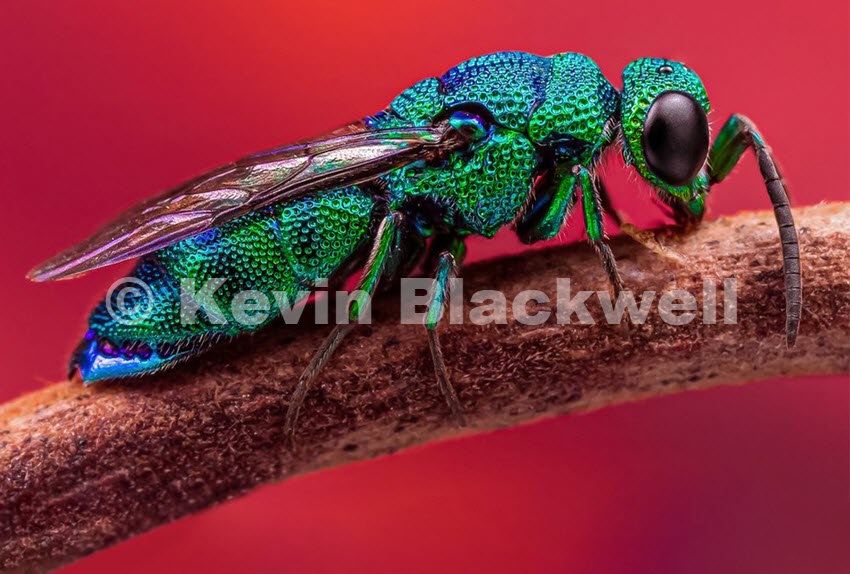
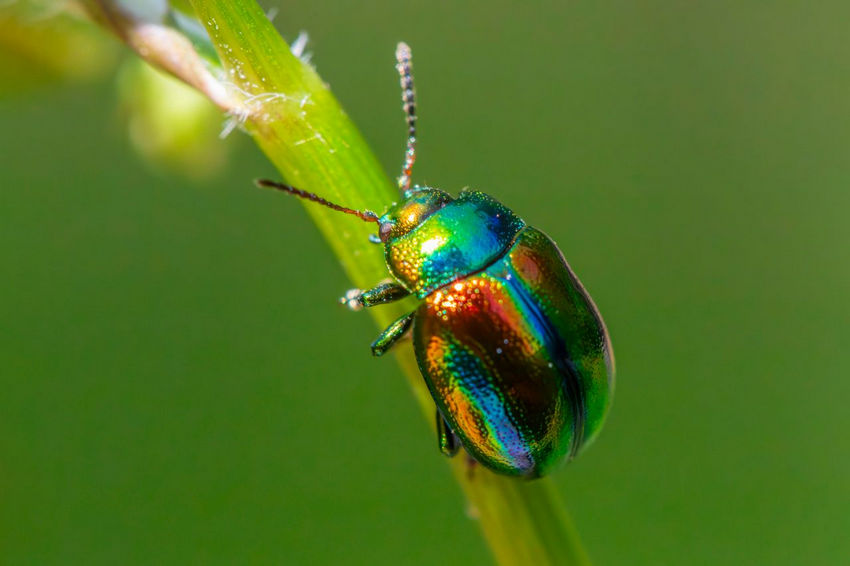
Small subjects such as insects and spiders reveal details that are easy to miss. Macro photography allows you to capture fine textures, patterns, and features that are often invisible from a normal viewing distance.
- Lens: A macro lens is ideal for close-up shots of small creatures and detailed subjects.
- Settings: Use a narrower aperture when you need more of the tiny subject in focus, and pay close attention to focus accuracy.
- Tip: Simplify the background and focus on details such as eyes, wings, patterns, and textures to keep attention on the subject.
Amphibian and Reptile Photography
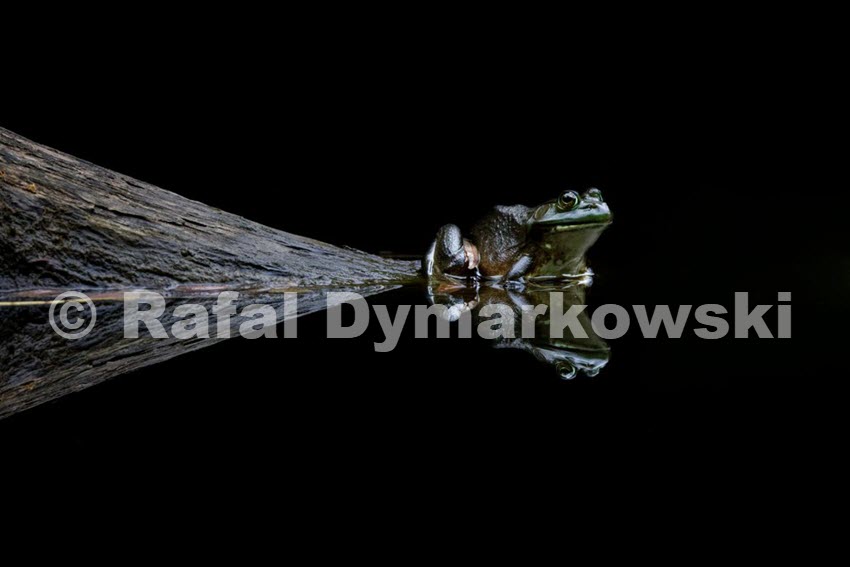
Reptiles and amphibians often move more slowly than birds or mammals, giving photographers more time to compose the image. Their unique textures, colors, and patterns can become the main focus of the photograph.
- Lens: A macro or short telephoto lens can work well depending on the size and distance of the subject.
- Settings: A moderate aperture can help keep important details sharp while maintaining some background separation.
- Tip: Focus on distinctive features such as eyes, skin textures, and natural patterns while using the surrounding environment to add context.
Underwater Animal Photography
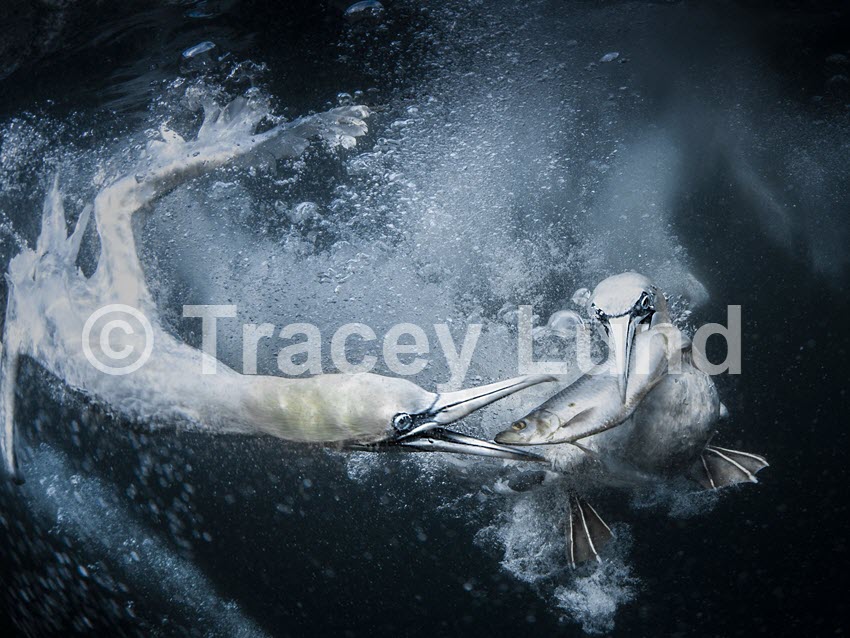
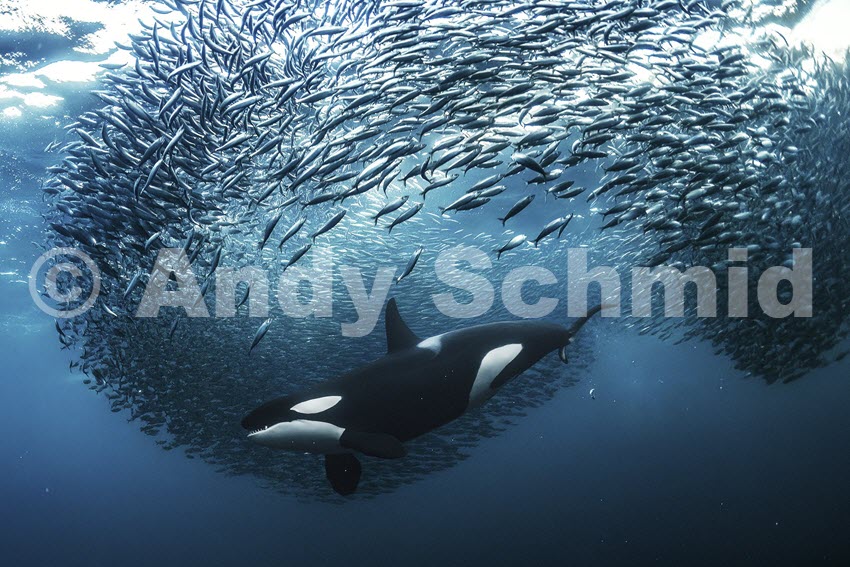
Underwater photography introduces extra challenges, including limited light, reduced visibility, and color changes caused by water. Understanding the environment is just as important as understanding the animal itself.
- Equipment: Underwater housing and suitable lighting equipment are often necessary depending on the diving conditions.
- Settings: Use settings that help maintain sharpness while compensating for limited light underwater.
- Tip: Get close when possible and balance the animal with the surrounding underwater scene to create a stronger sense of place.
Animal Photography Ethics
Respect for animals and their environment is an essential part of responsible animal photography. A great photo should never come at the cost of causing stress, changing natural behavior, or damaging the habitat.
- Maintain distance: Use a telephoto lens when possible to photograph animals from a safe distance. Getting too close can stress the subject and may interrupt its natural behavior, especially during feeding, nesting, or caring for young.
- Follow local guidelines: Always follow regulations in wildlife areas, national parks, and protected locations. Many places have specific rules to protect both animals and photographers.
- Leave no trace: Be mindful of the environment while photographing. Avoid damaging habitats, disturbing plants or nesting areas, and always leave the location as you found it.
- Avoid unnecessary disturbance: Do not chase animals, force interactions, or use methods that may cause stress just to get a better shot. Patience and observation often lead to more natural images.
Editing Animal Photos: A Natural Post-Processing Workflow
Capturing the photo is only the first step. A thoughtful editing workflow can help bring out the animal's details, improve the overall balance, and correct common issues while keeping the image looking natural.
- Adjust exposure and color: Start with basic adjustments such as brightness, contrast, highlights, shadows, and color balance. Enhance the subject while keeping natural tones and avoiding an overly processed look.
- Crop for composition: Adjust framing during editing to strengthen the image. Cropping can help remove distractions, improve subject placement, or bring more attention to important details such as the animal's eyes and textures.
- Reduce blur and noise: Animal photos may suffer from motion blur when capturing fast movement or noise when shooting at high ISO in low light. Use noise reduction and sharpening tools carefully to restore clarity while preserving natural details.
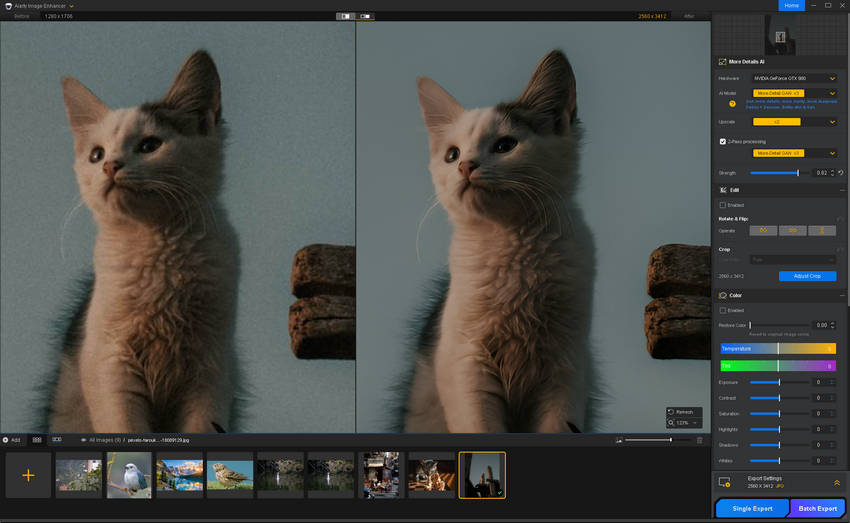
- Enhance details and upscale when needed: Cropping distant animals or small subjects can reduce visible detail. An image enhancement tool can help recover finer textures and enlarge photos while keeping important features clear. Aiarty Image Enhancer can help denoise, deblur, and enhance animal photos locally on Windows and Mac.
How to Improve Common Animal Photo Problems
Even with the right equipment and settings, animal photos can still have common issues such as noise, blur, distracting backgrounds, or lost details. Understanding what caused the problem can help you improve your next shot and make better editing decisions.
| Problem | Possible Causes | What to Try |
|---|---|---|
| Animal is too dark | Night photography, low light, backlighting, or incorrect exposure settings. | Adjust exposure, shadows, and highlights during editing. When shooting, use exposure compensation or adjust ISO to keep important details visible. |
| Photo has too much noise | High ISO settings used in low light conditions. | Use the lowest ISO possible when shooting and apply noise reduction during post-processing while keeping natural textures. |
| Animal looks blurry | Slow shutter speed, camera shake, or subject movement. | Use a faster shutter speed, stabilize your camera, and improve focus accuracy. For slightly soft images, detail enhancement tools can help fix blur and improve clarity. |
| Animal is too small in the frame | The shooting distance is too far or the lens does not provide enough reach. | Move closer when appropriate, use a longer lens, or crop carefully during editing. AI image enhancement can help maintain details when enlarging cropped photos. |
| Background is distracting | Busy surroundings or insufficient subject separation. | Change your shooting angle, use a wider aperture, or crop the image to make the animal stand out more. |
| Photo looks over-processed | Too much sharpening, color adjustment, or aggressive enhancement. | Reduce editing intensity and keep natural colors, textures, and the original character of the animal. |
For animal photos with high ISO noise, slight blur, or lost details after cropping, Aiarty Image Enhancer can help improve clarity while preserving natural-looking details. It works locally on Windows and Mac, making it suitable for photographers who prefer offline processing.
 FAQ about Animal Photography
The best settings depend on the animal, movement, and lighting conditions. For moving animals, start with a faster shutter speed such as 1/1000s or higher to freeze action. A wider aperture can help in low light or create background separation, while ISO should be adjusted to maintain proper exposure without adding too much noise.
The best lens depends on the subject and shooting distance. A telephoto lens is useful for photographing distant animals, birds, and wildlife without getting too close. A macro lens is better for small subjects such as insects, while a zoom lens offers more flexibility when the distance changes quickly.
Keep a respectful distance, avoid sudden movements, and observe the animal's behavior before taking photos. Using a longer lens allows you to capture natural moments without getting too close. Always follow local guidelines and avoid actions that may cause stress or change the animal's normal behavior.
Use a fast shutter speed, continuous autofocus mode, and burst shooting when photographing moving animals. Tracking the subject's movement and anticipating what it will do next can also improve your chances of capturing sharp images.
Macro animal photography requires careful focus and attention to small details. Use a macro lens, choose an aperture that keeps enough of the subject in focus, and pay attention to the background. Details such as eyes, wings, textures, and patterns can make small subjects more visually interesting.
Blurry animal photos are often caused by subject movement, camera shake, or insufficient shutter speed, while noise usually comes from shooting at high ISO in low light. You can improve these issues by adjusting your shooting settings or using post-processing tools to reduce noise, restore details, and enhance overall clarity while keeping the photo natural.


Brenda Peng is a seasoned editor at Digiarty Software who loves turning ordinary photos into extraordinary works of art. With years of experience behind the lens and in front of the computer, Brenda shares her passion for photography, image enhancement, and editing through easy-to-follow tutorials.
