How to Improve Video Quality Practical Tips & Steps
How to enhance my video quality? I edit clips from movies or tv shows. I see a lot of people do the same thing but their videos have much better quality. I’m just wondering how to make video better quality? --Reddit
You may hit record, capture a great moment, but when you play it back, it turns out to be blurry or bad quality. We've all been there, right? Maybe you shot it in tricky low light, or the conditions just weren't ideal, making the quality even worse. And let's not mention those precious old family videos, often a blurry, grainy mess that barely captures the memory.
In any case, you may like one of those users on Reddit threads, asking: "Is there any way to actually improve the quality of these videos (after recording)?" Of course! In fact, now you don't need a Hollywood budget or a fancy film school degree to improve your video quality. It's not just about expensive cameras; it's about a few key tricks and a proper video enhancer. In this article, I will show you how to increase video quality step by step.
To improve video quality after recording, you can upscale resolution, reduce noise and blur, enhance colors, smooth motion, and optimize export settings.
Aiarty Video Enhancer the best solution to this. It uses AI to increase video quality to HD and 4K with natural details. It can fix common issues like noise, blur, low resolution, and choppy motion in just a few clicks. It analyzes each frame to reconstruct lost details like faces, textures, and motion, making videos clear, smooth, and watchable again.
Download Aiarty Video Enhancerto to improve your video quality instantly:
How to Improve Video Quality after Recording?
Let's face it, we can't always capture perfectly good footage every single time. It happens to all of us! But here's the great news: you can almost always fix bad video quality in post-production. It’s not about magic, it’s about knowing which tricks to use. You simply need to figure out how to enhance video quality with the right tips.
1. Upscale low-res videos to HD/4K
Everyone may have some old videos lurking around – maybe it’s a family gathering from the early 2000s shot on a camcorder, some phone footage from an older device, or even a classic movie or anime series you downloaded ages ago in standard definition. Upscaling can help increase video quality for playback on model screens. Now there are two upscaling methods:
- Traditional Upscaling: Simply stretching pixels, often resulting in a blurry or blocky image.
- AI Upscaling: AI tools use machine learning to intelligently "create" new pixels and details, increase video resolution to higher resolutions (e.g., turning 720p into 4K).
2. Noise reduction and deblur
Ever shot a video in low light or high ISO, or maybe grabbed some old security camera footage? Those videos are often grainy, noisy, and slightly fuzzy. In many cases, the footage may also look soft or out of focus, making it difficult to clearly see details. This kind of noise or blur can significantly degrade video quality and make it hard to watch. So, how do you improve noisy or blurry videos?
Most professional video editors and specialized AI tools come equipped with noise reduction features that enhance video quality. These tools work by analyzing random pixel variations (the “grain”) across frames and smoothing them out while preserving important details. At the same time, sharpening and deblurring tools help restore clarity by enhancing edges, textures, and fine structures lost due to focus issues or compression.
Traditional sharpening only boosts contrast along edges, which can sometimes create artifacts. However, some AI video sharpeners can "reconstruct" details rather than just enhancing existing pixels, especially useful for enhancing blurry video quality.
3. Color correction & grading
You may record a footage that looks a bit flat, have a faded old video, or perhaps the colors are just off –– maybe a yellow tint from indoor lighting, or a bluish cast from a cloudy day that just doesn't feel natural? Adjusting the color can significantly improve the video visual quality.
- Color Correction: Adjust white balance, exposure, contrast, and saturation, etc. to make your video color vivid and natural.
- Color Grading: You can further enhance the mood by applying a specific aesthetic, e.g., warm, cool, cinematic, vintage.

4. Fix Shaky & Choppy Videos
Sometimes footage looks shaky because it was shot handheld, without a gimbal, or during fast movement. Shaky video can feel unstable and distracting for viewers. Another common issue is choppy or jerky motion, usually caused by low frame rates (e.g., 24fps) or fast action scenes that don’t have enough frames.
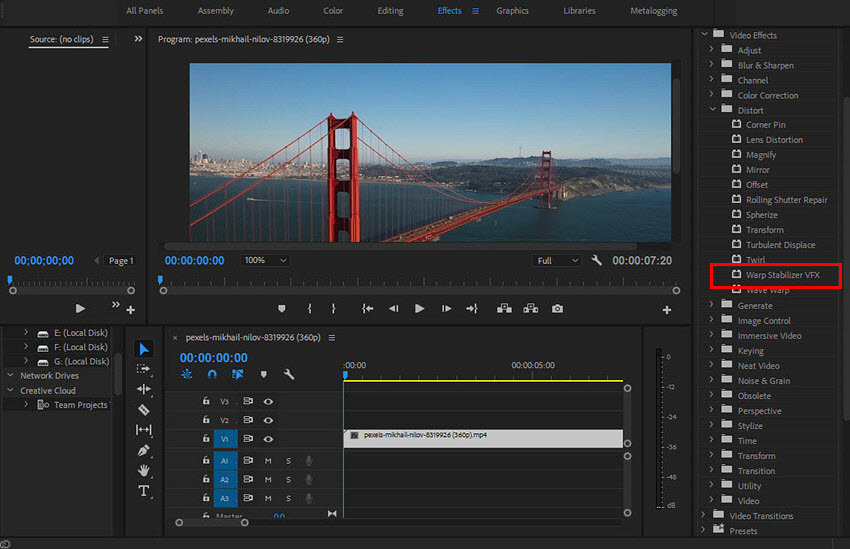
Stabilization tools analyze camera movement frame by frame and digitally reduce unwanted shake. For example, tools like Warp Stabilizer in Premiere Pro can smooth handheld footage and make it more stable.
Basic frame rate conversion only duplicates frames and does not improve smoothness. AI frame interpolation is more advanced, it generates new in-between frames by analyzing motion, making playback smoother and more natural.
5. Optimize Export Settings
Finally, don’t forget to export the enhanced video in the proper video format and settings. Incorrect settings can also lead to bad video quality:
- Format: Choose H.264 (MP4) if you’re going to play or share it online. If you improve video quality to future proof the video, you may consider ProRes or DNxHR (larger files).
- Resolution & Frame Rate: Unless there is a specific requirement, always choose the largest resolution if possible.
- Bitrate: A higher bitrate will make video better quality but larger file sizes.
- 1080p@ 30fps: Aim for 8-12 Mbps (VBR)
- 4K@ 30fps: Aim for 35-45 Mbps (VBR)
- Always check platform-specific recommendations (YouTube, Vimeo, etc.).
- Render at Maximum Render Quality: Render the enhance videos at the best quality, though this may take longer time.
Best Way to Improve Video Quality (AI-Powered Solution)
If you want the fastest and most effective way to improve video quality without learning complex editing tools, AI enhancement is the best solution.
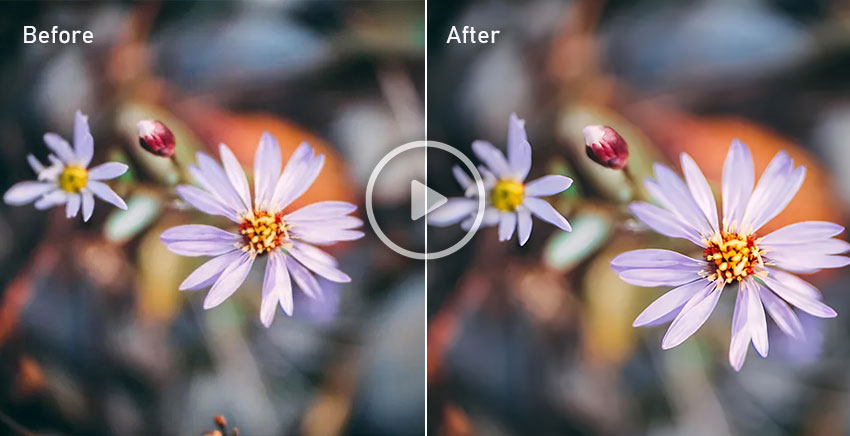
Aiarty Video Enhancer is a powerful AI video enhancement tool designed to improve video quality effortlessly. It can effectively improve the quality of noisy, blurry, low-quality, and old videos into HD and 4K high quality with natural details and vivid colors, all in just a few clicks.
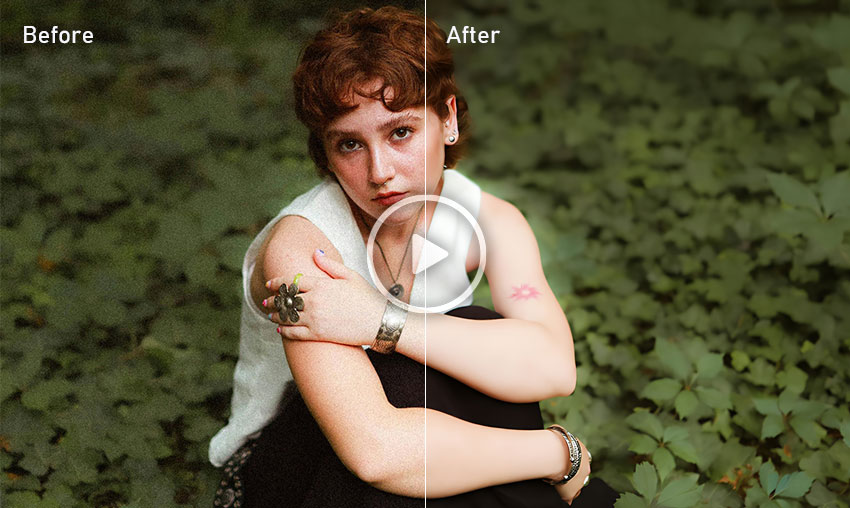
With advanced AI algorithms, this tool not only sharpens and denoises your footage but also restores fine textures like hair, leaves, flowers, and outdoor details. Even videos recorded under challenging conditions, such as low light or high ISO, can be enhanced to look clear, smooth, and professional. It also adjusts white balance, exposure, contrast, and saturation, restoring natural, vivid colors to your videos.
The software processes videos quickly with GPU optimization, delivering footage with noticeably improved video quality, sharp details, reduced noise, and vivid colors at lightning-fast speeds.
How to enhance video quality using Aiarty Video Enhancer?
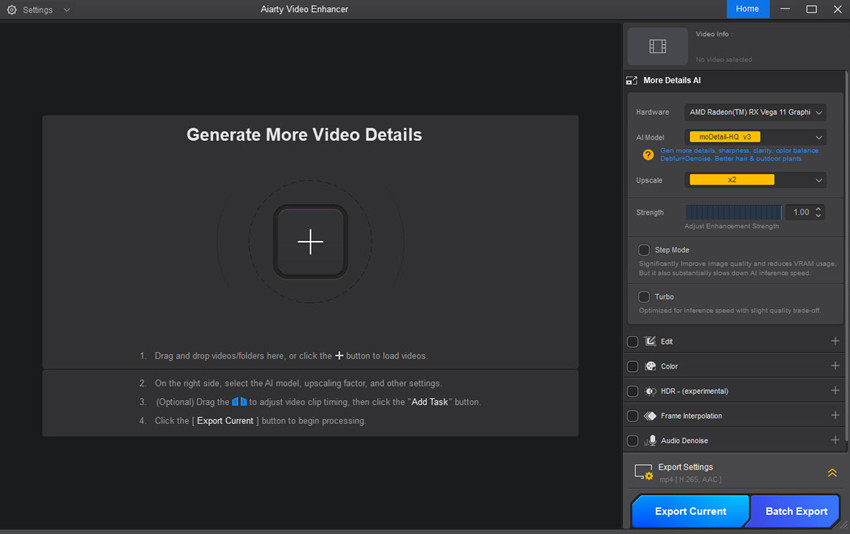
Step 1. Download Aiarty Video Enhancer and install it. Then drag and drop the videos that you want to improve into it.
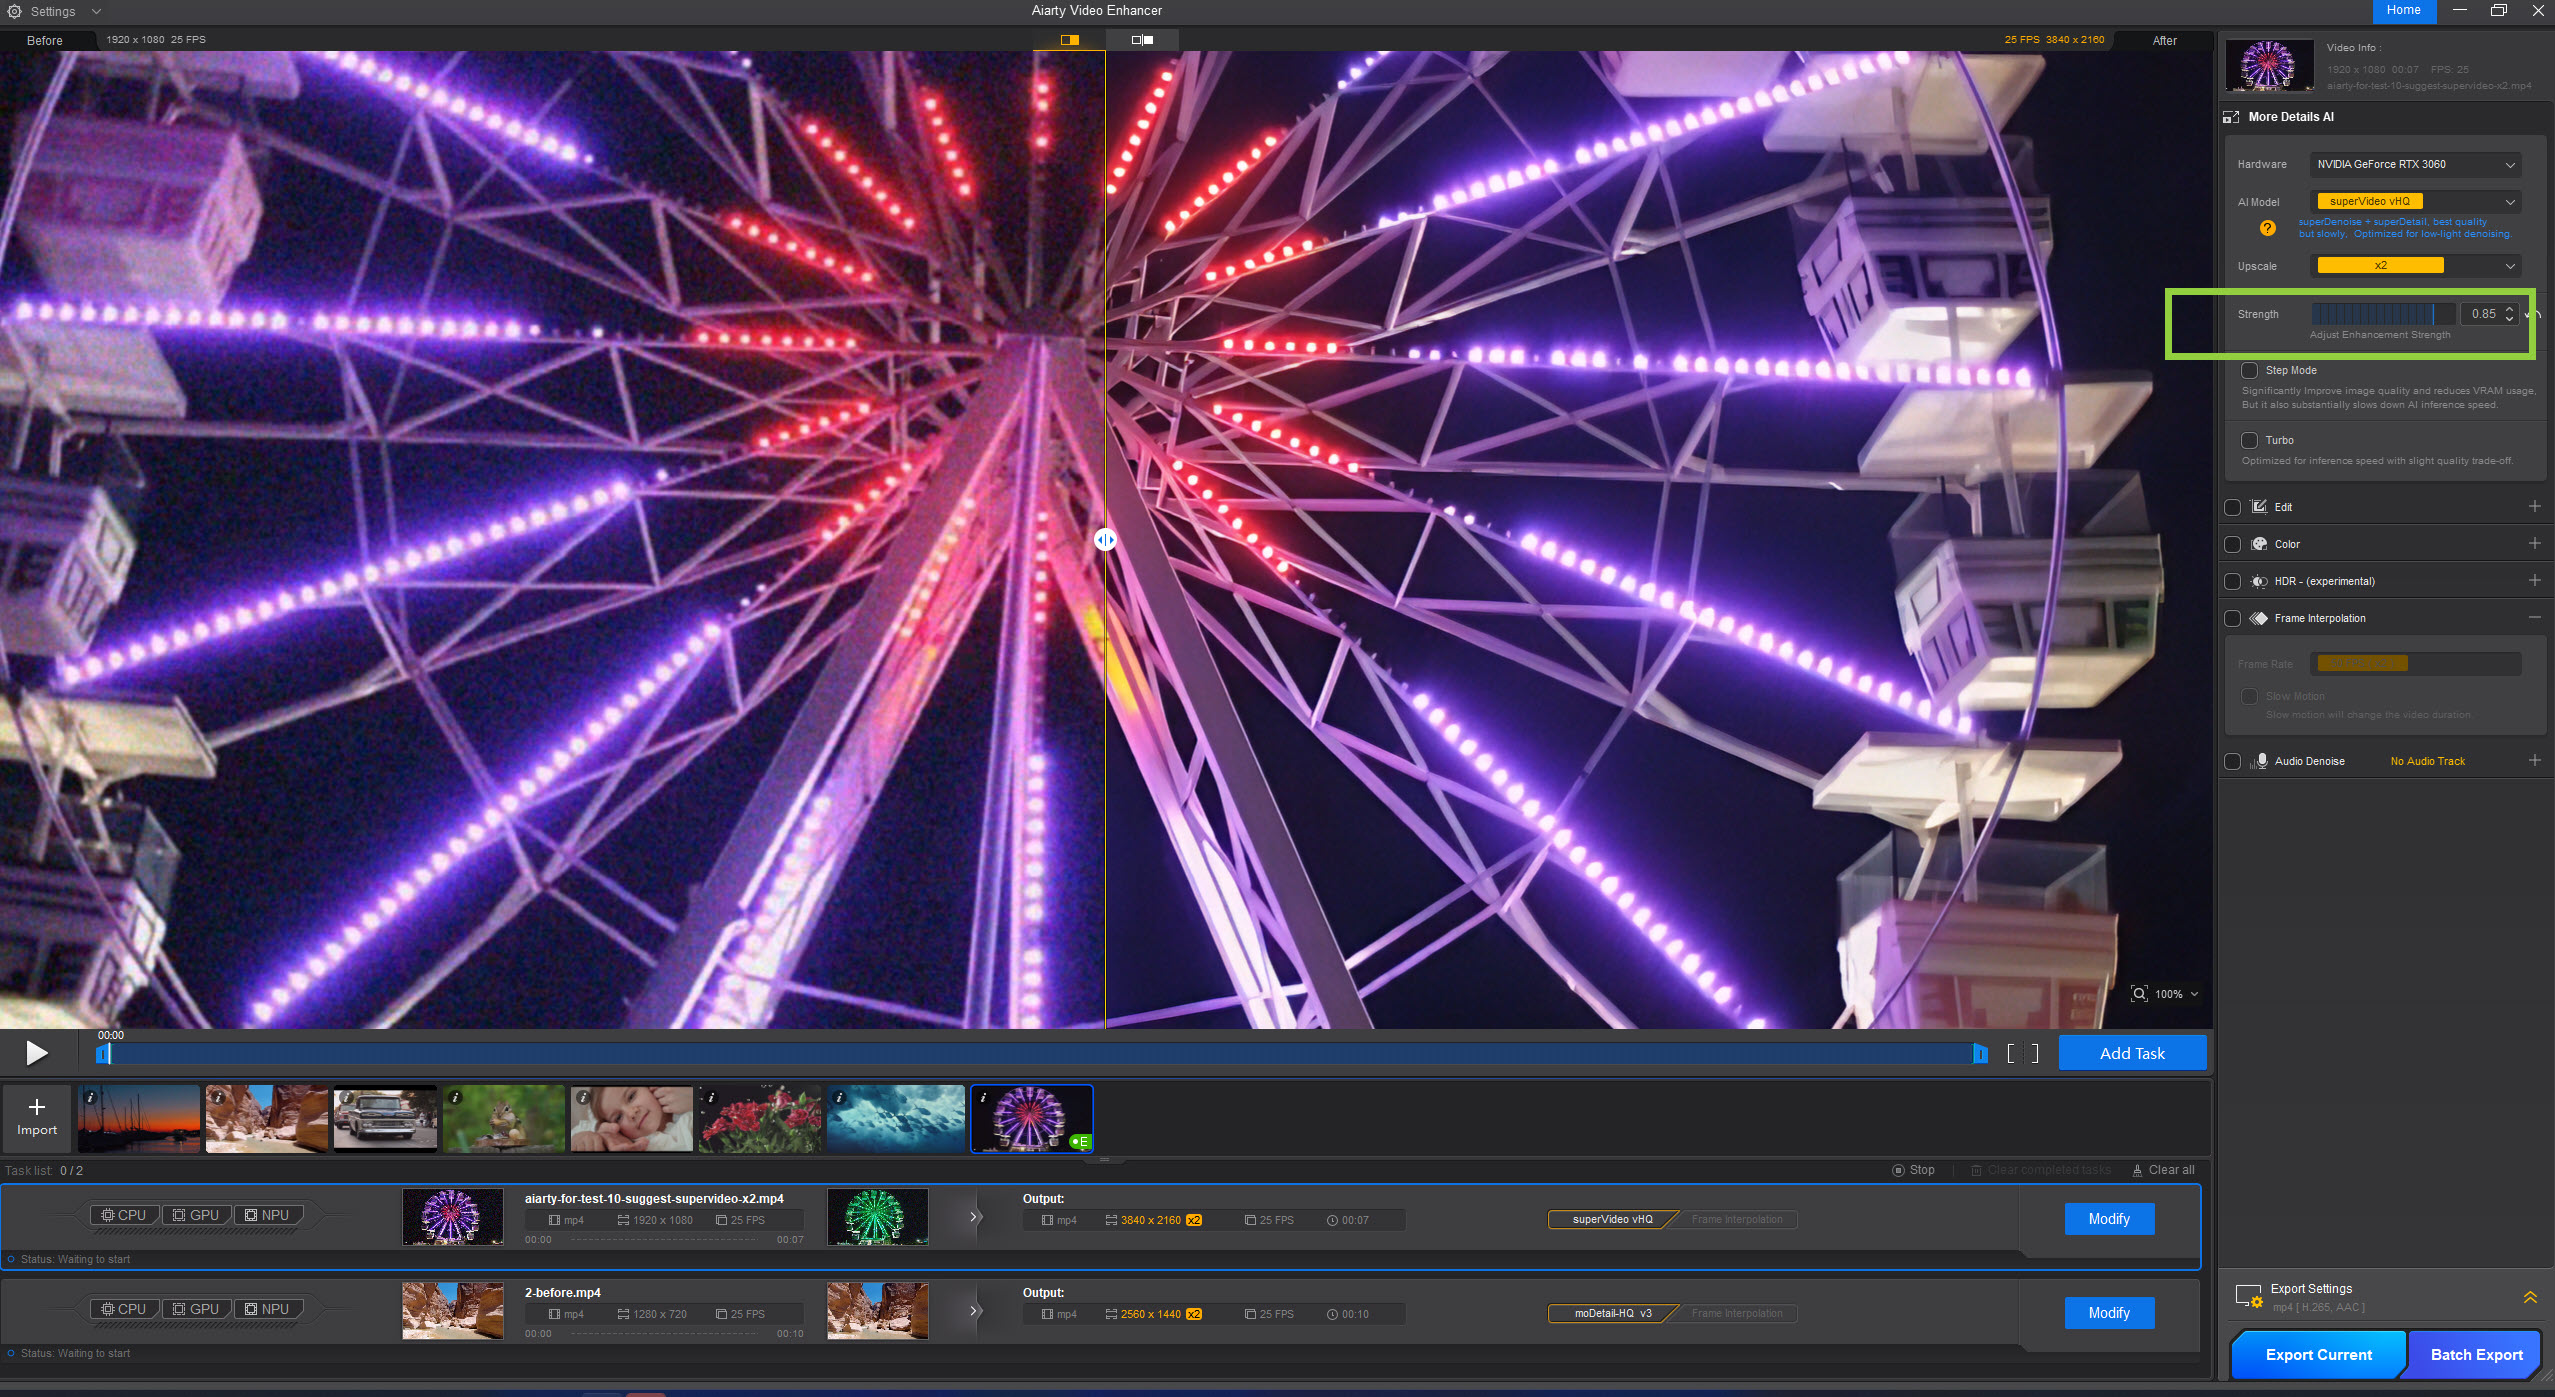
Step 2. On the right of the panel, there are a few settings to tweak. Go to the AI Model, you can select from 3 AI models based on your video:
- moDetail-HQ for improving videos with rich texture and details, such as nature or detailed scenes.
- Smooth-HQ for general video quality enhancement with balanced denoising and sharpness.
- superVideo for improving noisy footage recorded under extreme low-light conditions.
Step 3. Next, choose if you need to increase the video resolution by x2 or x4. If you just want to improve the video quality without increasing resolution or size, choose x1.
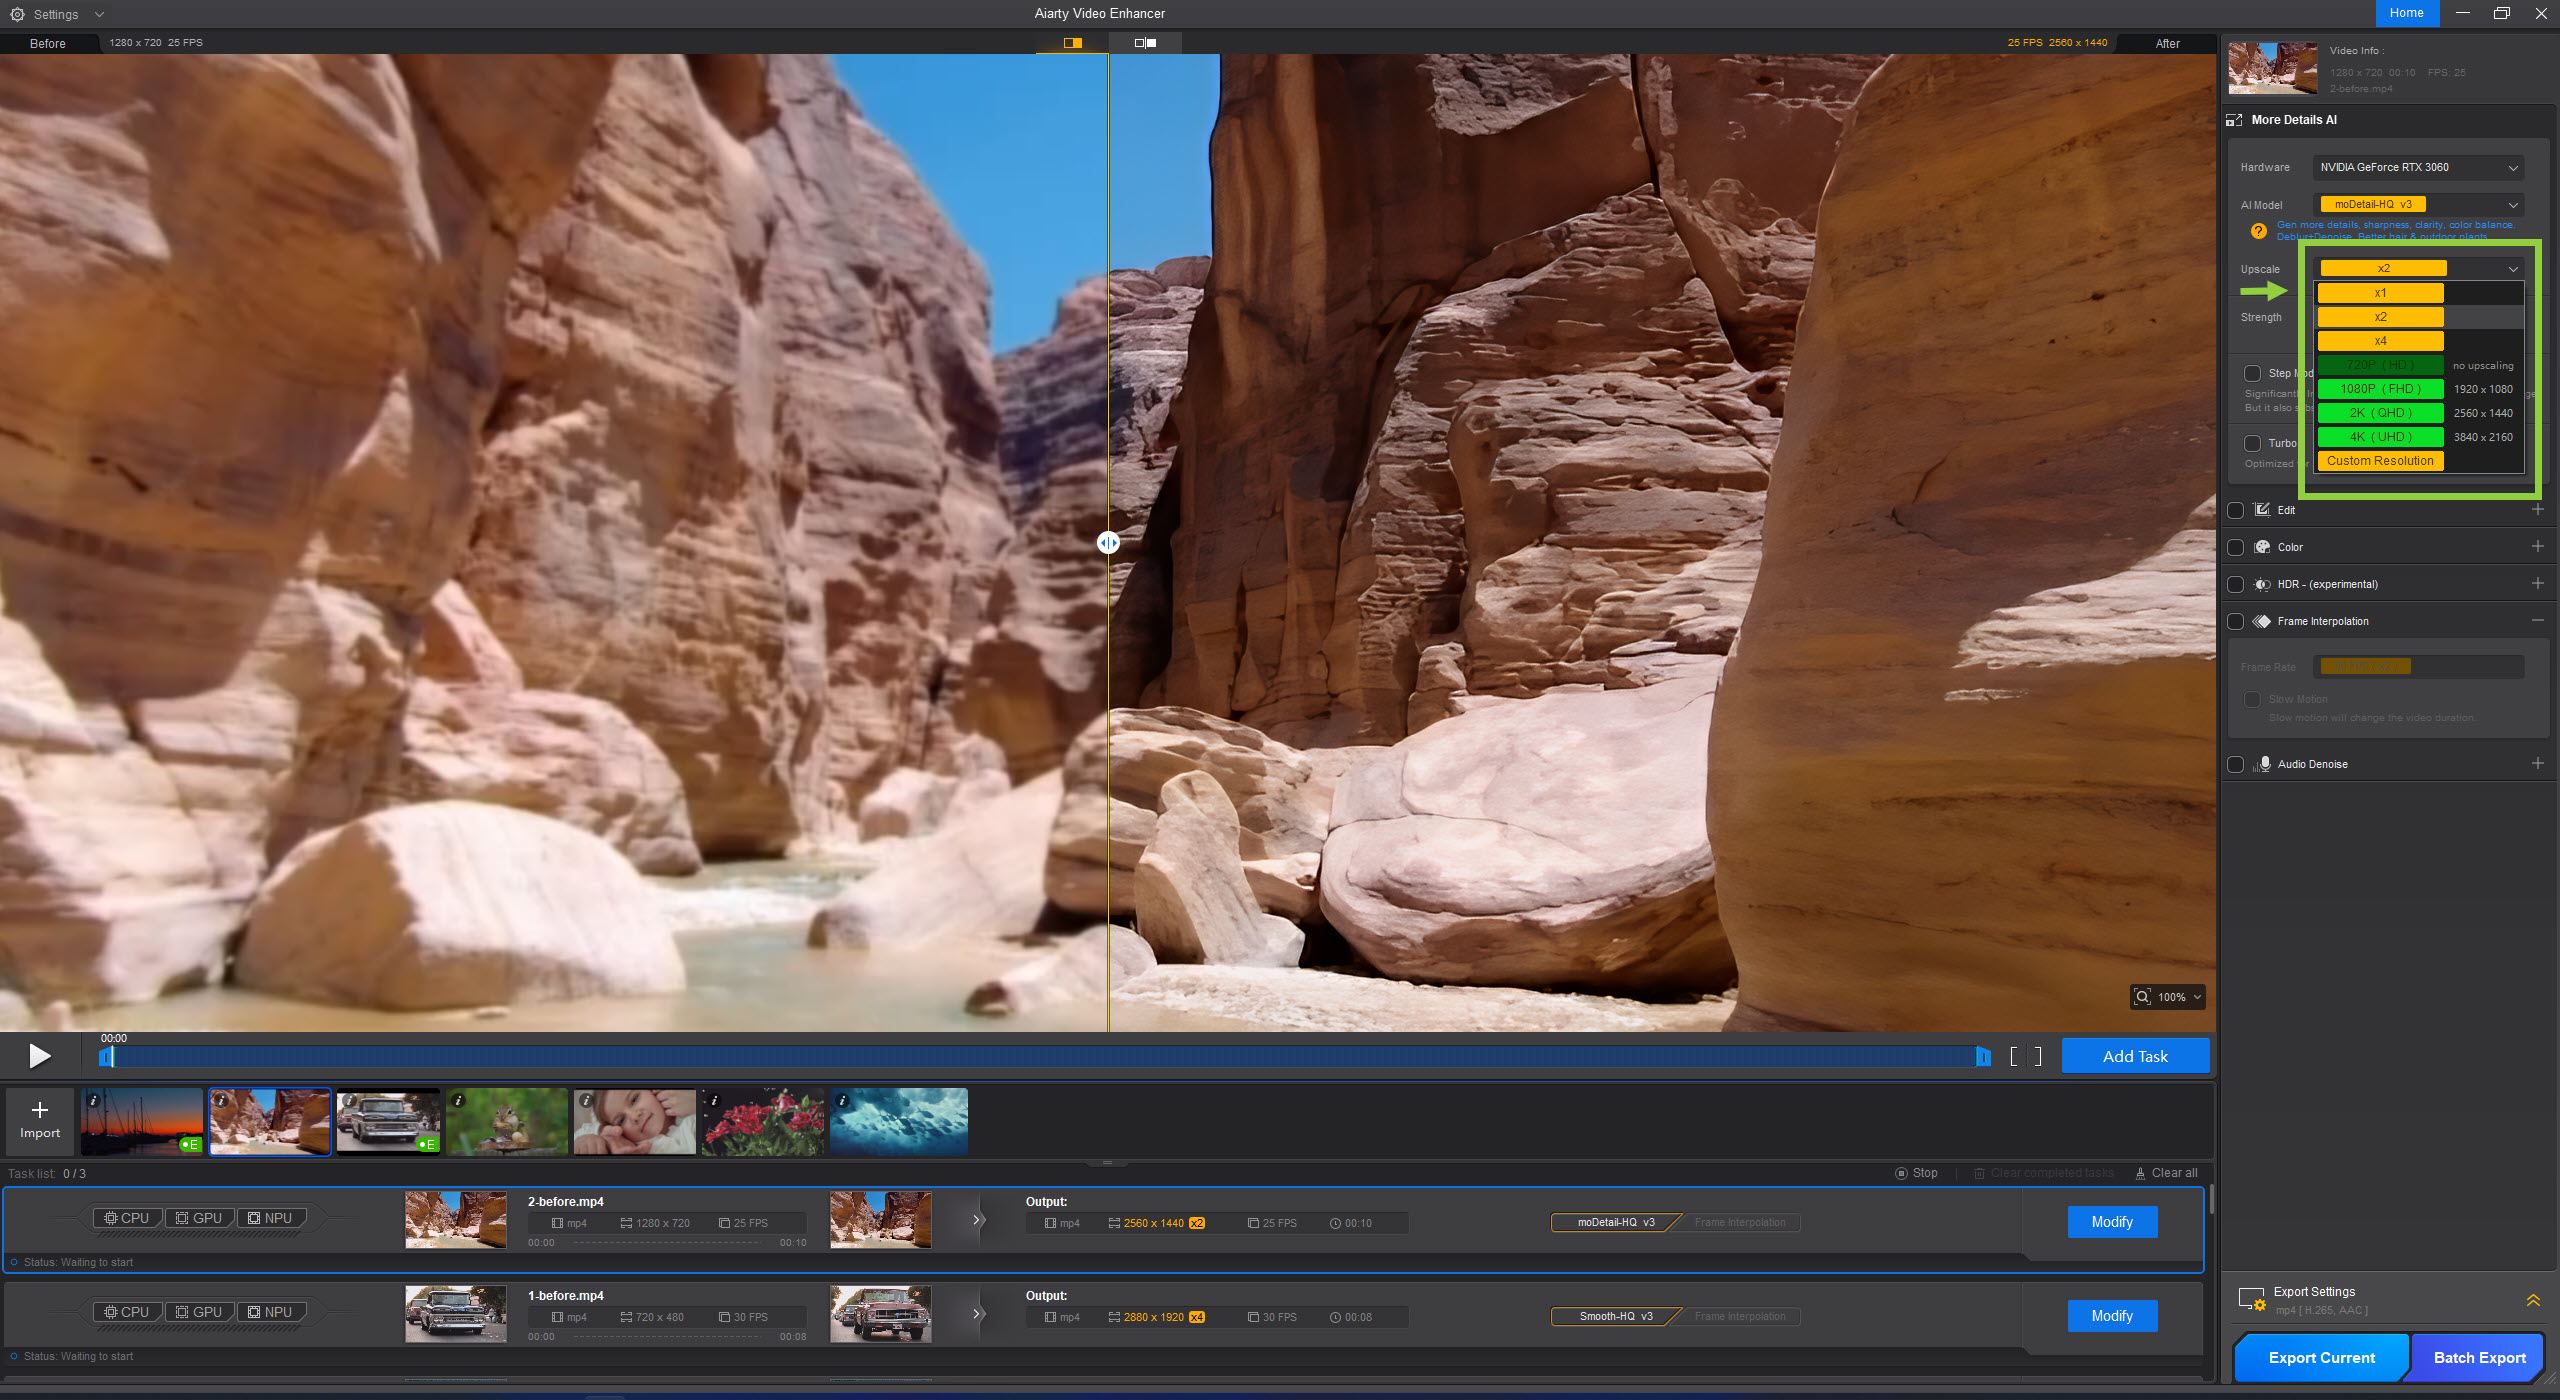
If the video also contains background noise, you can also enable the Auto Denoise to remove the background noise with AI.
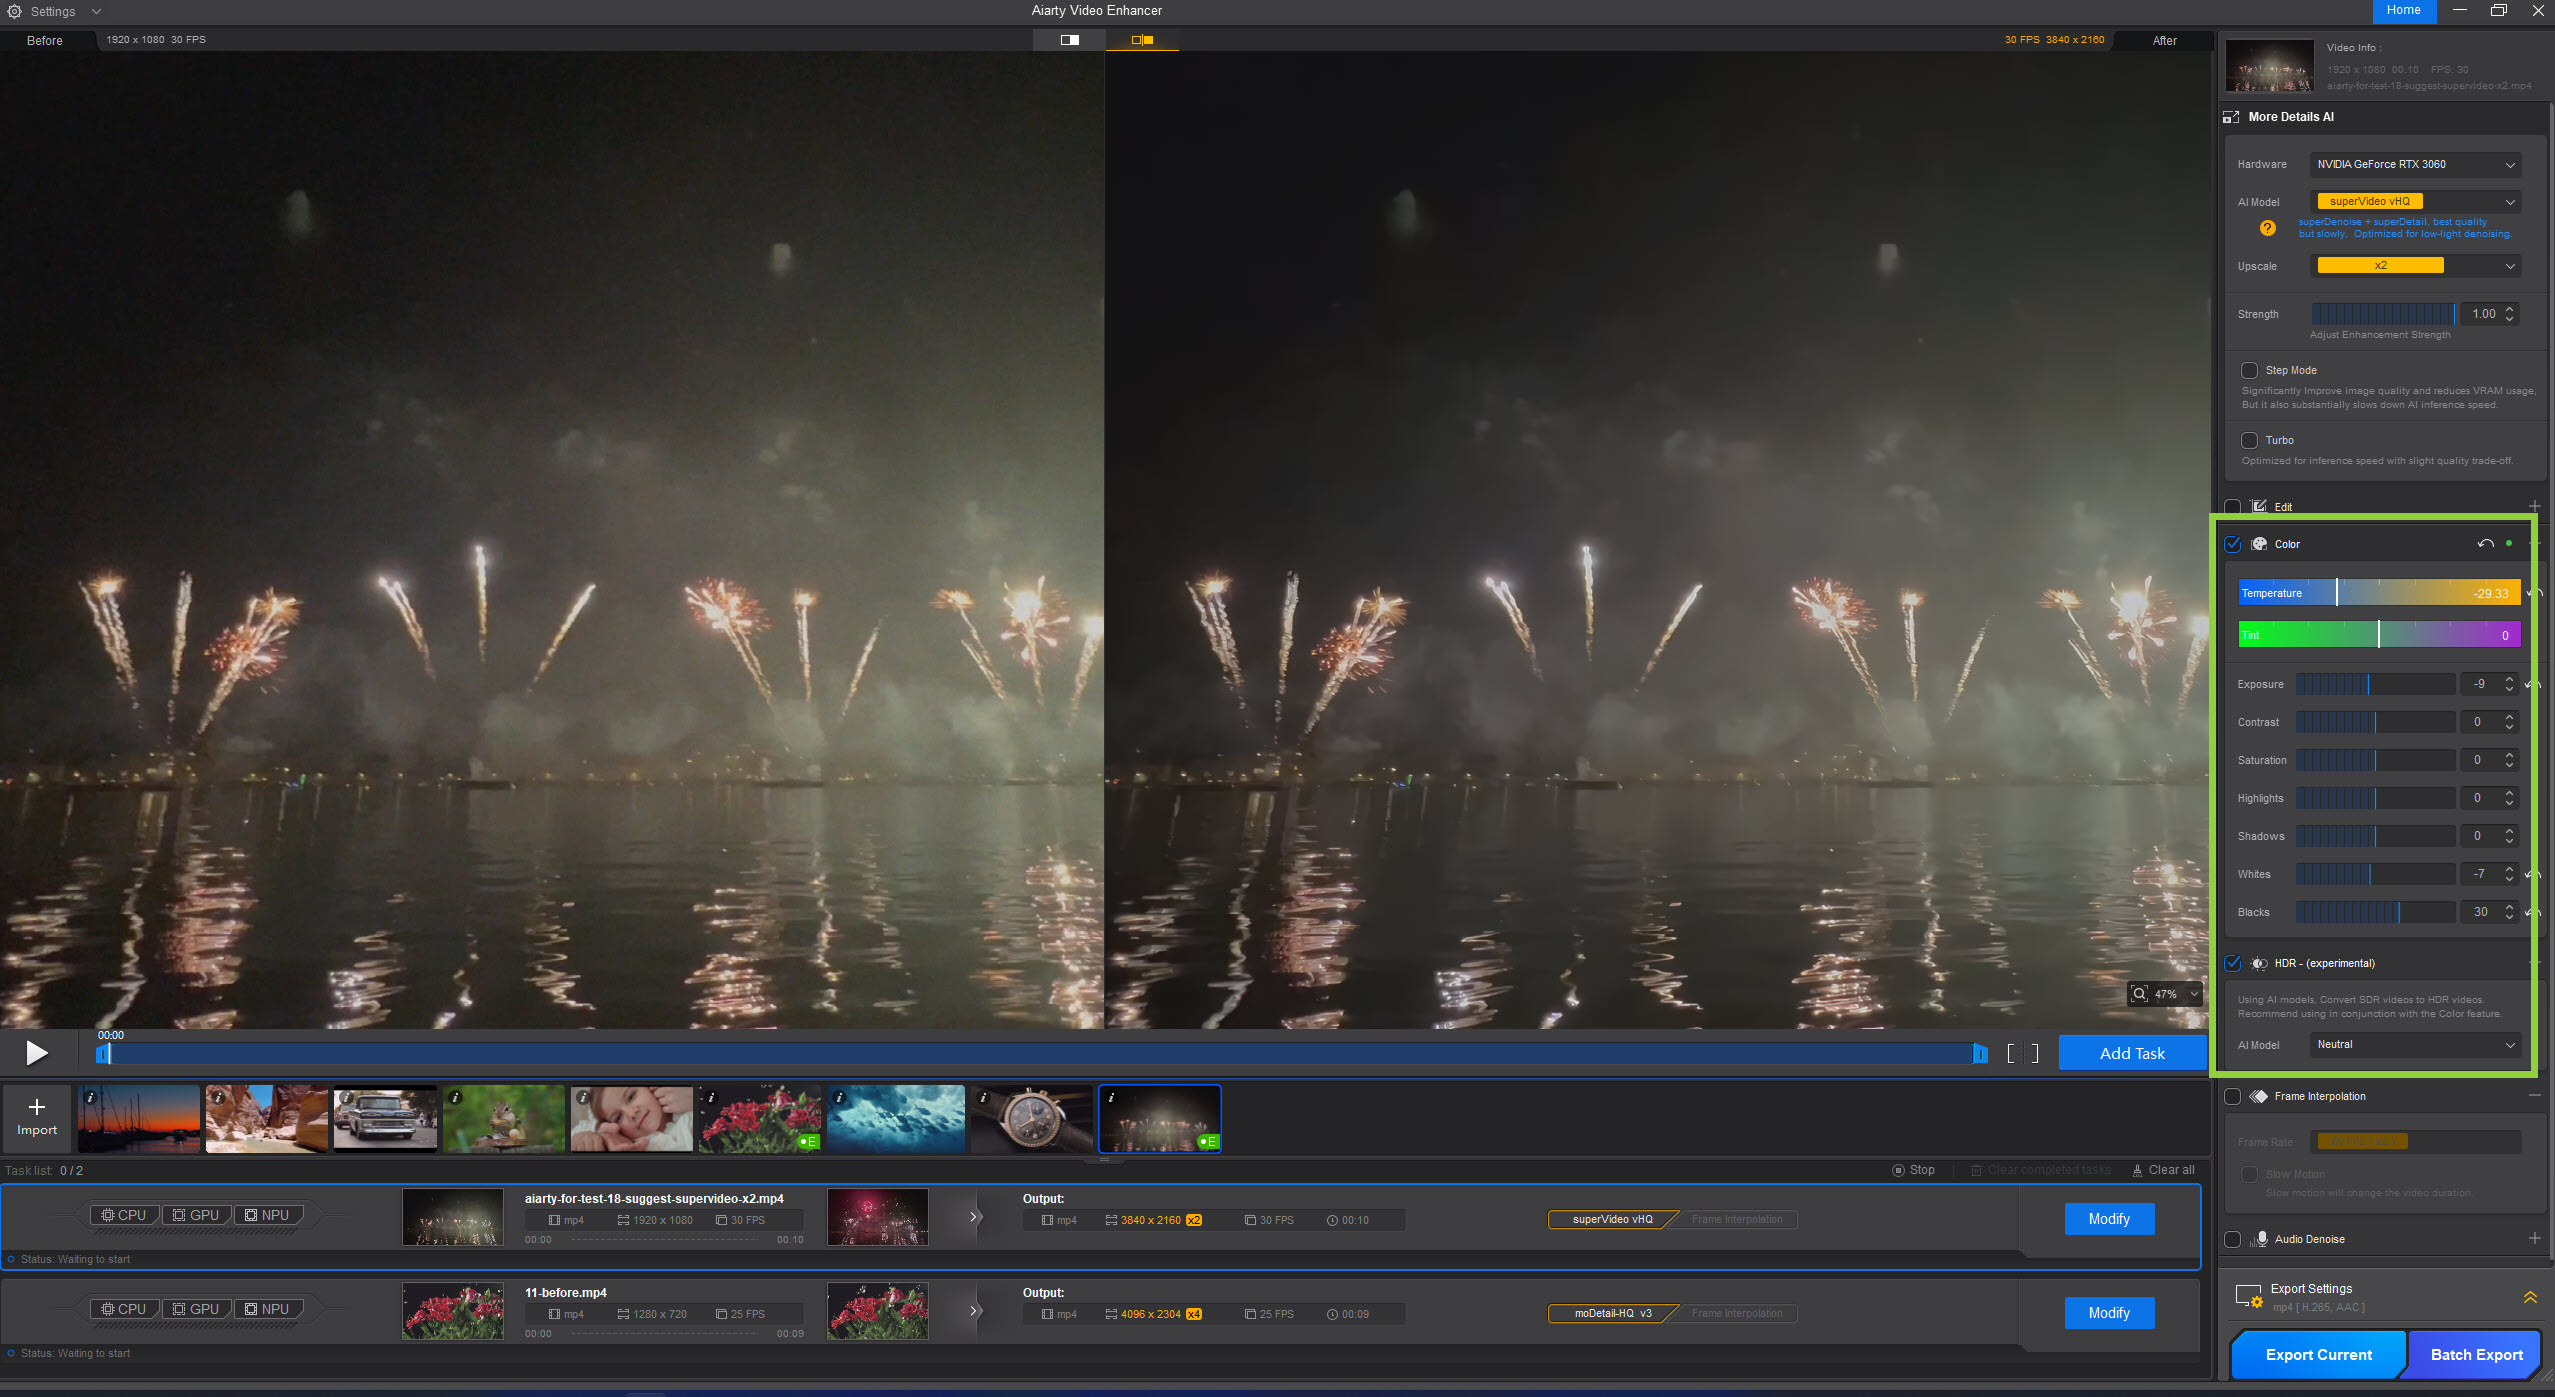
Step 4. To improve the color of the source video, enable the Color box, and then adjust white balance, exposure, saturation, etc. You can check the applied color change in realtime to make necessary changes.
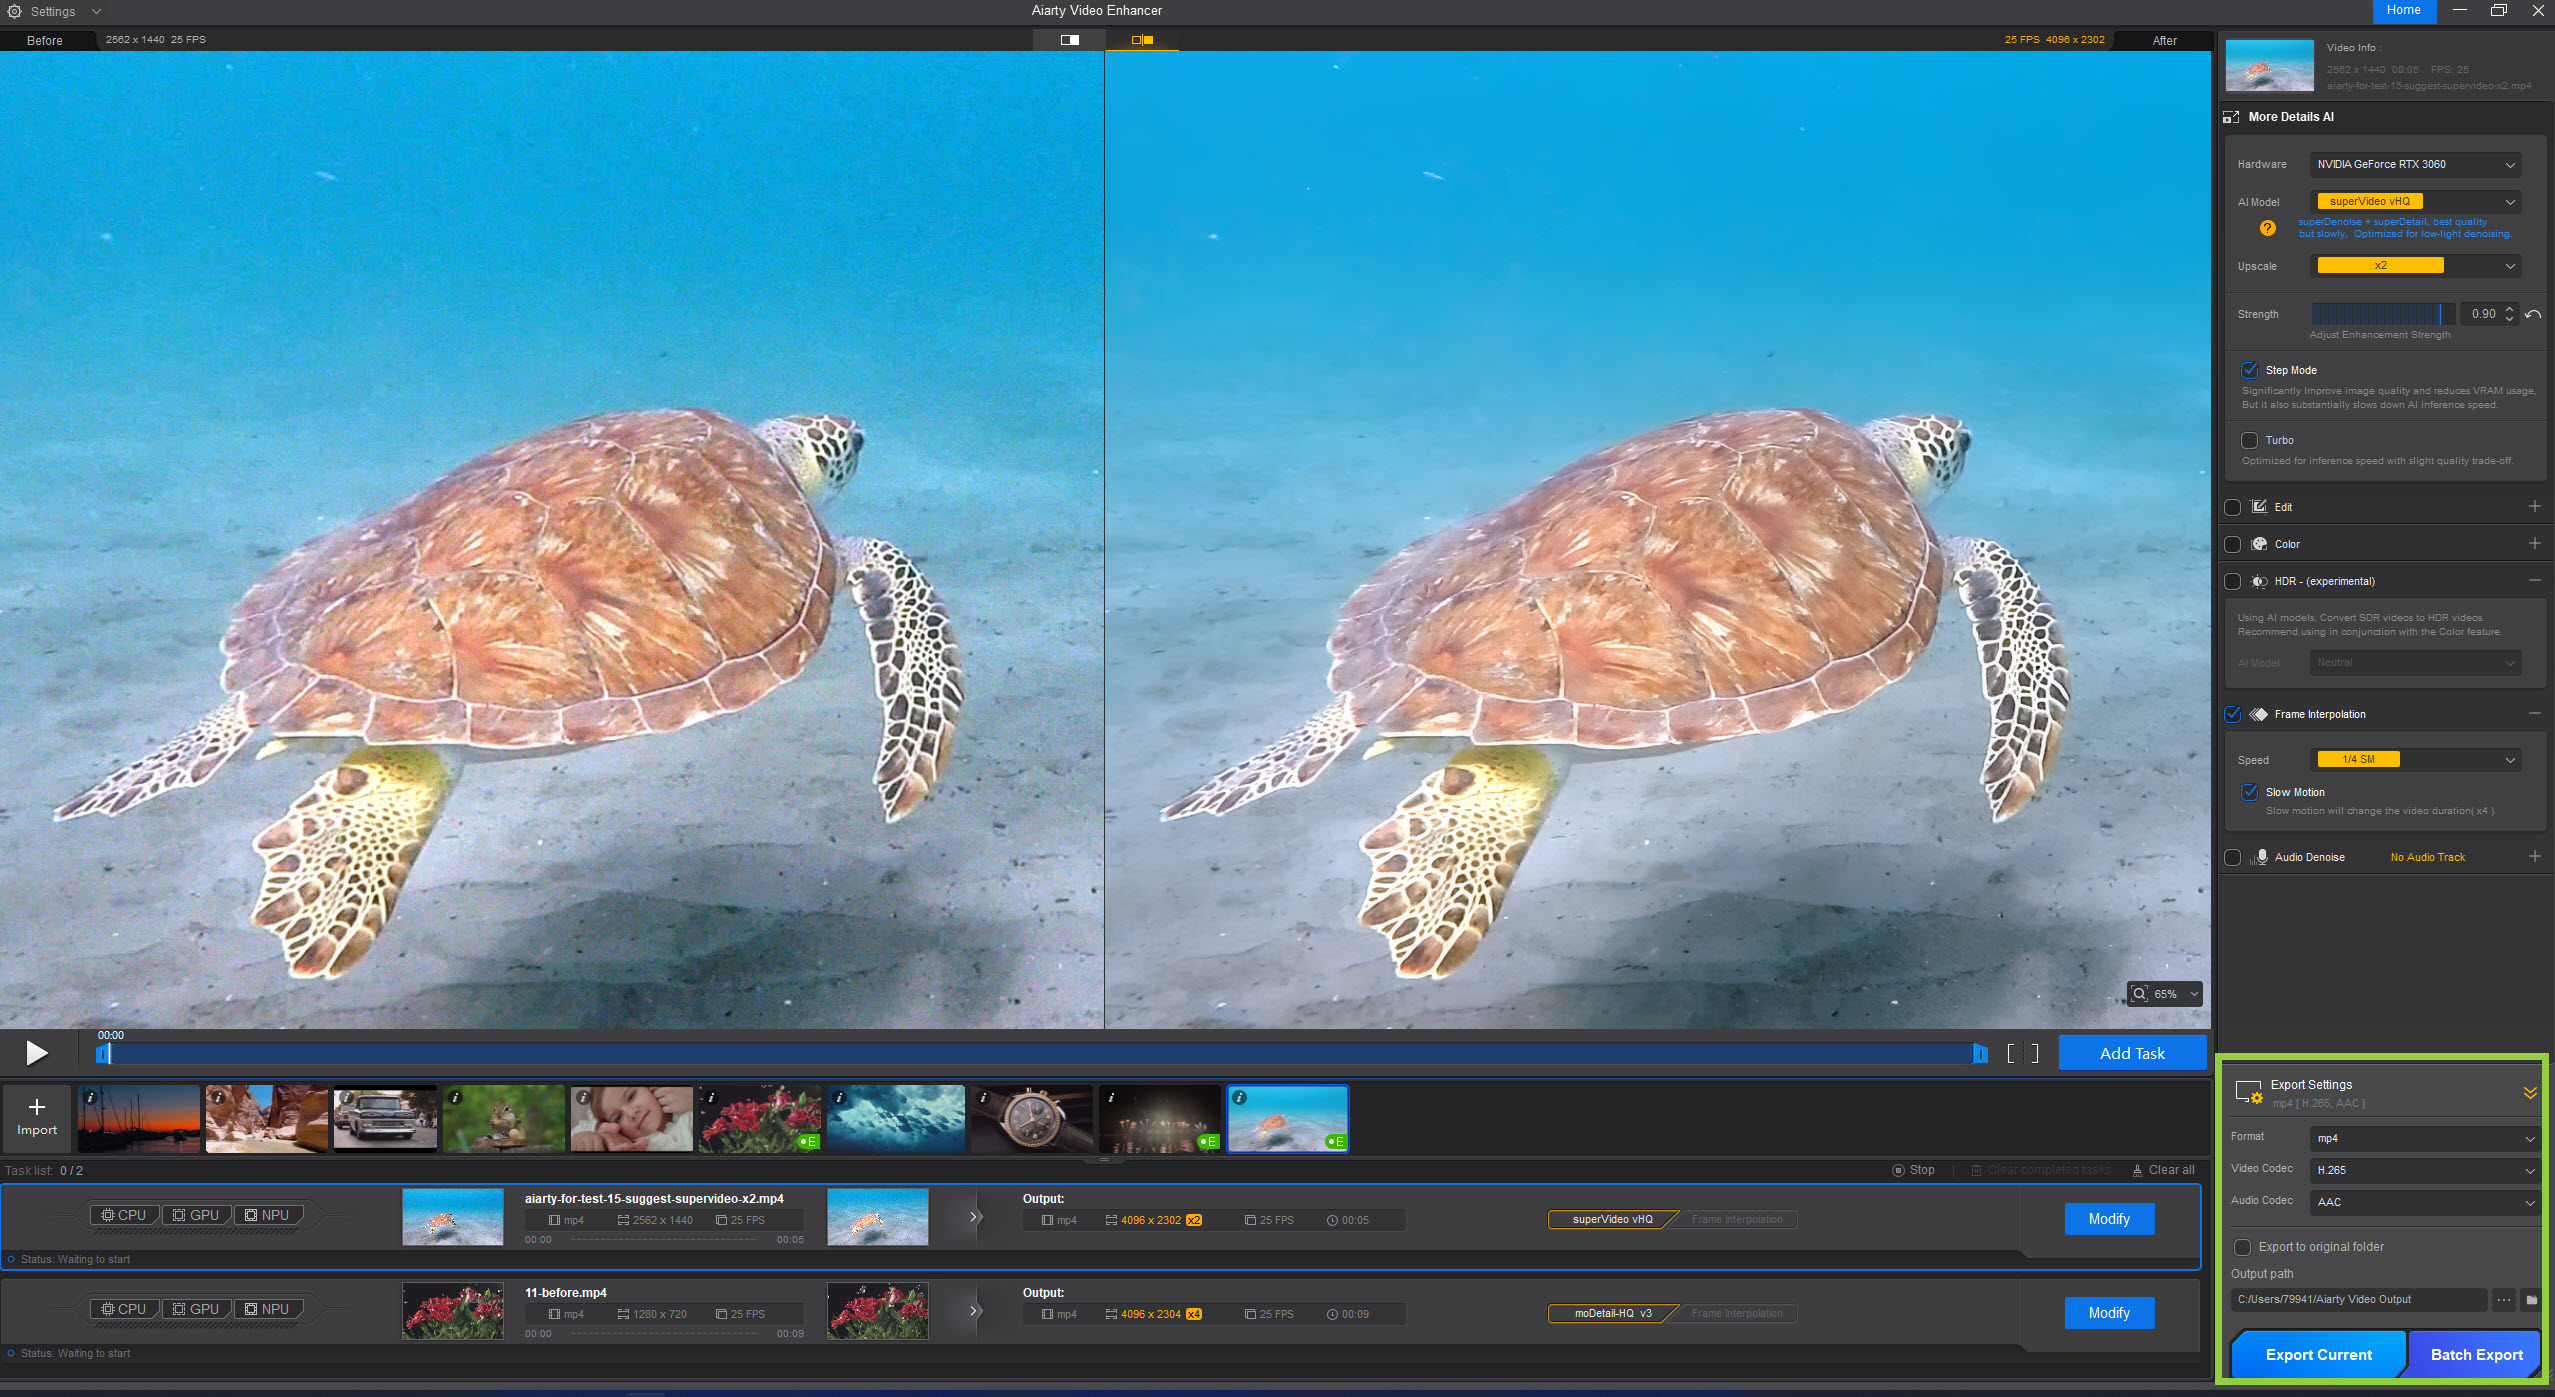
Step 5. After all the settings, click Export Current or Batch Export. It will start to process and export the enhanced video.
Other Methods to Enhance Video Quality
While Aiarty Video Enhancer offers the fastest and most automated way to improve video quality, they are not the only option available. If you prefer more manual control or want to explore traditional editing techniques, there are still several effective methods you can use.
1. Improve Video Quality with Premiere Pro
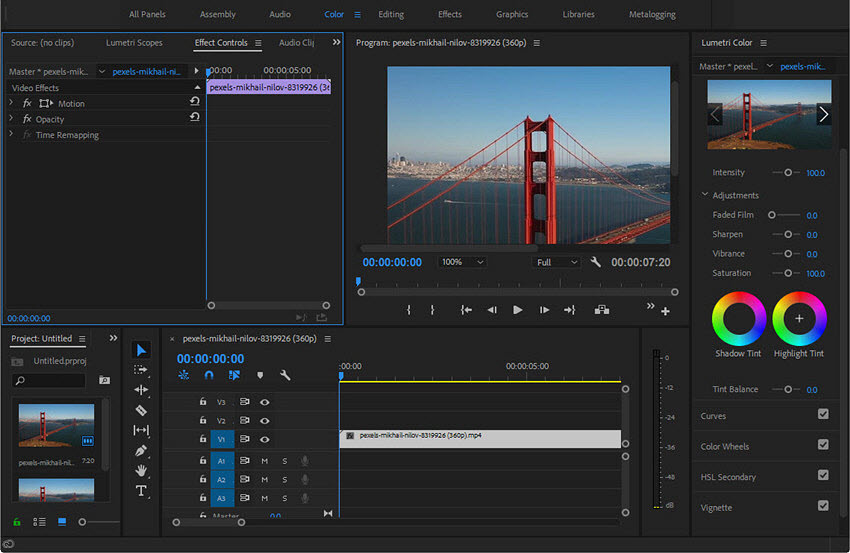
Adobe Premiere Pro has a comprehensive video quality enhancement suite that offers a wide range of tools to enhance over every aspect of your video, including highly precise sharpening, robust stabilization, and the most advanced color correction and grading capabilities.
How to Enhance Video Quality using Premiere Pro?
Step 1. Open Premiere Pro and import the bad-quality video into it. Then drag it to the timeline.
Step 2. Based on the quality problem of the source video, you can choose to apply the following effects and filters:
1. Unsharp Mask: go to Effects and find Unsharp Mask. Drag it to the timeline. Then in the Effect Controls, you may need to adjust the amount (20-50), radius (1-2), and threshold.

2. Noise reduction: go to Effects and find Noise & Grain. Apply a denoise filter like Median to the timeline, or if you have Neat Video plugin, apply the Neat Video Reduce Noise effect to your clip.

3. Color correction: Use the Lumetri Color panel's Basic Correction (White Balance, Exposure, Contrast) and Curves to adjust White Balance (to remove color casts), Exposure (Lift, Gamma, Gain), and Contrast.
4. Stabilization: go to Effects and find Warp Stabilizer. Then in the Effect Controls, adjust Smoothness and Method (e.g., "No Motion" for a locked-down look, "Smooth Motion" for a more natural feel).
Step 3. Go to "Export" mode (File > Export > Media) to export the video. Premiere Pro supports ProRes and DNxHR to get the best quality.
2. Enhance Video Quality with Topaz Video
Topaz Video is a dedicated AI video enhancement tool that uses a range of advanced machine learning models to improve video quality. Instead of relying on a single algorithm, it offers multiple specialized models designed for different tasks such as upscaling, denoising, deblurring, and motion interpolation.
These models can intelligently reconstruct missing details, making low-resolution footage appear sharper and more natural at higher resolutions. It also performs well in reducing noise, restoring fine textures, and generating smoother motion through AI-based frame interpolation.
How to improve video quality with Topaz?
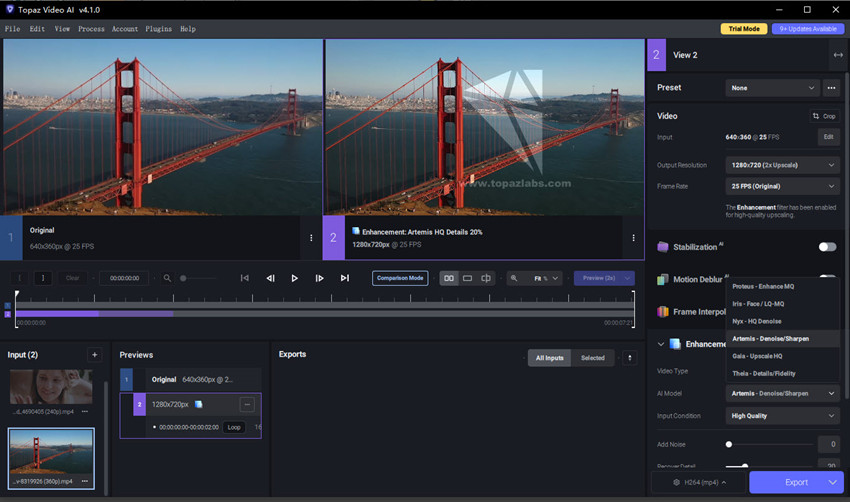
Step 1. Topaz Video and simply drag your video file into software.
Step 2. Choose if you need to upscale the video to a higher resolution. Then you need to choose an AI model. There are various AI models (e.g., Nyx XL, Starlight, Proteus, Iris, Gaia, Apollo, Chronos), each optimized for enhancing quality of different videos.
- To improve most videos (denoise, sharpen, upscale), I usually start with Proteus or Iris, as they offer a good balance between detail enhancement and natural results.
- For more demanding restoration work, Nyx XL and Starlight are newer advanced models designed to deliver better detail reconstruction and more natural textures in complex scenes.
- To fix choppy videos, Apollo or Chronos are ideal for frame interpolation, creating smoother motion by generating realistic in-between frames.
Step 3. Preview the enhance video to check the result. You can try different models and settings to get the best quality. Once you're satisfied with the results, click Export.
Be prepared for longer processing times, especially for high resolutions or lengthy videos – a powerful GPU makes a huge difference here!
3. Enhance Video Quality with CapCut
CapCut is a popular video editing tool that also includes built-in AI features to help improve video quality, especially for mobile and social media creators. It offers practical tools for enhancing clarity, adjusting color, stabilizing footage, and improving overall visual appearance with simple controls.
While CapCut is not as advanced as dedicated AI video upscalers, and it does not offer deep AI-based restoration such as removing noise, reducing blur, or reconstructing fine details, it is still highly accessible and widely used for fast, basic video quality improvements like color adjustment, sharpening, and stabilization.
How to improve video quality with CapCut?
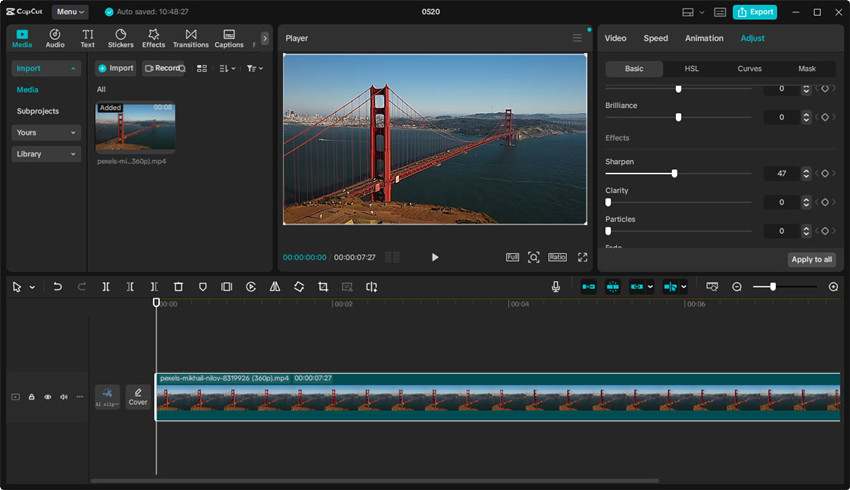
Step 1. Open CapCut and import your video into the timeline.
Step 2. CapCut offers diferrent tools to enhance the video quality. You can sharpen, adjust brightness, contrast, and saturation, apply noise reduction filters, and stabilize shaky footage if needed.
Step 3. Preview the edited video and fine-tune settings if necessary.
Step 4. Export the final video in high resolution (1080p or 4K if available).
4. Improve Video Quality with Vmake AI
Vmake.ai is an online AI video enhancer designed for quick and automatic video quality improvement without requiring complex editing skills. It focuses on enhancing low-quality videos by using AI models that can upscale resolution, reduce noise, and improve overall visual clarity directly in the browser. This makes it especially useful for users who want fast results without downloading heavy software.
How to improve video quality with Vmake AI?
Step 1. Open Vmake.ai in your browser and upload your video file.
Step 2. Choose the enhancement option based on your needs (e.g., upscale, denoise, or general enhancement).
Step 3. Let the AI process the video automatically.
Step 4. Preview the result and download the enhanced video.
5. Improve Video Quality with VideoProc
VideoProc Converter AI is an AI video enhancer that can easily increase your video quality by 400% to HD and 4K. It integrates AI features for upscaling, denoising, deblurring, frame interpolation, stabilization, and audio denoising. It uses advanced AI algorithms to analyze videos frame by frame, reconstruct missing details and deliver natural enhanced video quality. This is particularly evident in fine details like facial features, hair, and delicate textures.
In addition to the AI video enhancement, it also provides comprehensive tools to adjust color, apply creative effects, and fully customize video settings. Whether you're dealing with a grainy low-light video, restoring cherished old VHS footage, or just seeking to perfect your latest shoot, VideoProc Converter AI offers the robust features needed to significantly improve your video quality.
How to increase video quality using VideoProc?
Step 1. Download VideoProc Converter AI and install it. Then open the AI video enhancer.
Step 2. In the main interface, there are different AI tools to enhance video quality.
- Super Resolution: Improve low-res video quality to 1080p, 4K and remove noise, blur, and pixelated artifacts from the video.
- Frame Interpolation: To fix choppy videos by increasing frame rate.
- Stabilization: Smooth out shaky camera movements.
- Audio AI: Remove noise and restore audio to clear quality.
Here we get stared with the Super Resolution to make a blurry video better quality.
Step 3. Drag and drop the low-quality video into it. On the right-hand panel, click on AI model and there are 4 models available. To improve video to best quality, choose Gen Detail. Then enable the High Quality Mode and select an upscaling option.

Step 4. Then click Run and it will automatically upscale, denoise, and deblur the video. The steps to improve the quality of a choppy and shaky video are similiar.
How to Improve Video Quality before/in Recording?
You can’t fix everything in post—so if you want a high-quality video, it all starts before you even hit record. The better your raw footage, the less you’ll need to fix later—and the more professional your final video will feel. After countless shoots, I’ve learned that a few key habits make a massive difference.
1. Lighting is everything. Seriously, if there's one thing to get right, it’s this. Natural light—especially during golden hour—is still my go-to whenever possible. Indoors, I rely on a basic three-point lighting setup or a soft ring light, depending on the scene. Mixed lighting (like daylight + ceiling lights) can mess up your colors fast, so I try to stick to one type.
2. Resolution and frame rate. If I’m filming for YouTube or a client, I shoot in 4K—even if I plan to export at 1080p—because it gives me more room to crop or stabilize later. For smooth motion, I usually go with 30fps, or 60fps if I know I’ll want to slow it down later.
3. Stability matters. Shaky footage instantly looks cheap. I usually use a tripod for static shots, or a gimbal if I’m moving around. Phones with optical stabilization help, but they’re no match for real gear.
4. Clean your lens. I’ve lost good shots to a greasy fingerprint more times than I care to admit.
5. Proper camera settings. First of all, use manual mode instead of automatic. I keep ISO as low as I can to avoid grain, adjust aperture depending on how much background blur I want, and stick to the 180-degree shutter rule to keep motion looking natural. I also always set white balance manually—auto can be unpredictable, especially under weird lighting.
6. Don’t neglect audio. Even crisp 4K video feels amateur with bad sound. I usually use a lav mic for talking-head clips or a shotgun mic on a boom when I need cleaner dialogue. I also wear headphones while recording—background hums or mic scratches are easier to catch that way.
7. Nail your focus. I still prefer manual for static scenes because it’s more reliable. But some newer autofocus systems are excellent—just make sure they’re locking onto the right subject, especially if you're moving.
8. Monitor your exposure. I use my camera’s histogram and zebra warnings religiously—they help me avoid overblown highlights and crushed shadows that are tough to fix later.
9. Good composition. I keep the rule of thirds in mind, use leading lines when I can, and switch up my angles—wide shots, close-ups, high and low perspectives—to keep things visually engaging.
 FAQs about improving video quality
1. Why is my video quality so bad?
Here are the most common reasons that can contribute to bad video quality:
- Bad lighting – Easily the #1 reason. Dark or mixed lighting makes everything look grainy or dull.
- Wrong resolution or bitrate – Shooting in low resolution or exporting with low bitrate kills sharpness.
- Shaky footage –Recording with handheld phones or lacking of a tripod or gimbal will result in shaky videos.
- Dirty lens – It sounds silly, but a smudge or fingerprint can make your video look hazy or blurry.
- Auto camera settings – Auto ISO or white balance often gets it wrong, especially in tricky lighting.
- Over-compression – Export or upload videos with the wrong export settings can ruin quality.
- Poor focus – If the subject isn’t sharp, the whole video feels off—especially with shallow depth of field.
- Low-quality audio – Not visual, but bad sound makes the entire video feel less professional.
2. Can you increase the quality of a video?
Yes, you can improve video quality via methods below:
- Sharpening details with AI video enhancers
- Upscaling resolution from 720p to 1080p or 4K
- Improving brightness, contrast, and color in editing software
- Stabilizing shaky footage
- Cleaning up audio to make the whole video feel more polished
3. How can I improve the quality of a blurry video?
The most important step to enhance the quality of a blurry video is to sharp the details. For this purpose, AI tools like VideoProc Converter AI and Topaz Video AI do a great job in sharpen edges and restore clarity. Editors like Premiere Pro also offers an unsharp mask filter to effectively fix blurry videos.
4. Can a bad quality video be fixed?
Yes, follow the tips above, you can improve a bad-quality video to better visual. However, if the original video is very low quality (e.g. pixelated, overcompressed, or extremely blurry), even AI tools can’t do magic.
You May Also Like
This post was written by Brenda Peng who is a seasoned editor at Digiarty Software who loves turning ordinary photos into extraordinary works of art. With AI assistance for brainstorming and drafting, the post is reviewed for accuracy by our expert Abby Poole for her expertise in this field.