Lightroom Super Resolution Review (2026): Does It Actually Improve Image Quality?
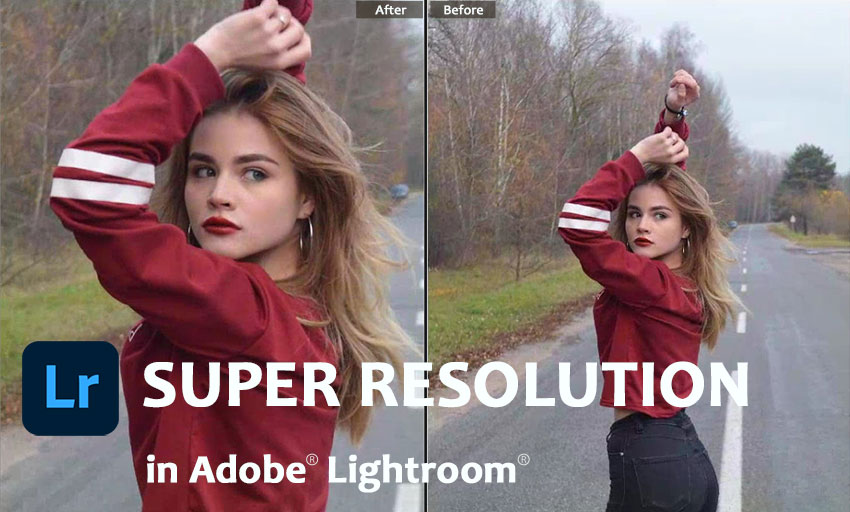
You’ve probably tried Lightroom’s Super Resolution expecting sharper, clearer images, while only to find that the result looks… almost the same, just bigger.
So what’s really going on?
In this guide, we’ll break down how Lightroom Super Resolution works, test its real-world results, and explain why enlarging an image doesn’t always mean improving it. We’ll also cover the latest Generative Upscale update and when a different AI approach delivers better results.
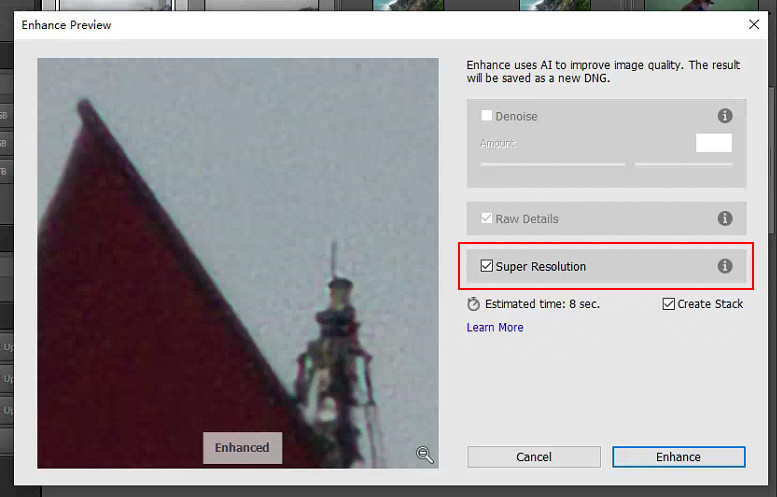
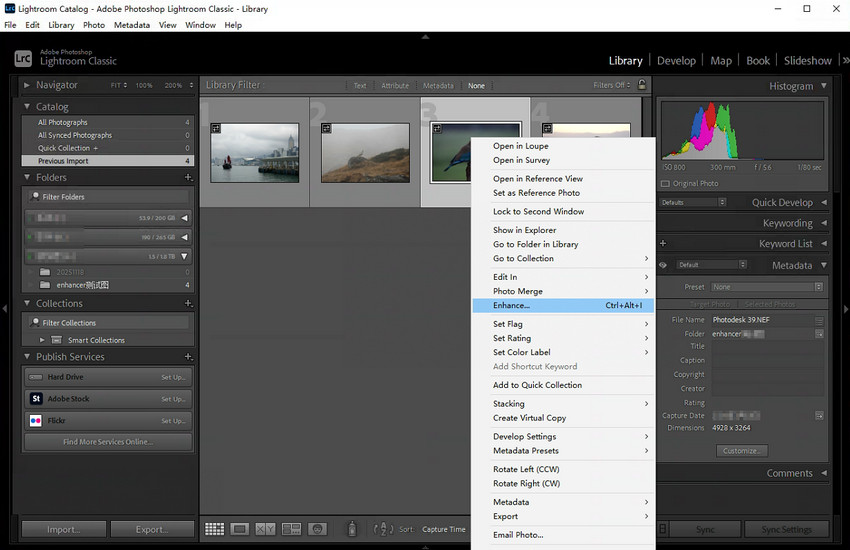
Lightroom Super Resolution quickly doubles image resolution by creating a new DNG file, but it does not truly enhance image quality. To use it, the workflow is simple:
- Import your image into Lightroom
- Right-click → Enhance
- Enable Super Resolution
- Click Enhance to generate a new DNG file
However, the result depends heavily on image quality. It only allows 2x upscaling and works best on clean, high-quality RAW files with low noise and good sharpness.
If your goal is not just enlargement but visible quality improvement, AI image enhancement tools are more effective. They combine upscaling with noise reduction and detail reconstruction.
- Use Lightroom Super Resolution when you only need a larger version of a high-quality photo.
- Choose AI enhancement tools like Aiarty Image Enhancer when working with low-resolution, compressed, or imperfect images.
What Is Super Resolution in Adobe Lightroom?
Lightroom Super Resolution is an AI-powered feature that increases image resolution by doubling the width and height, resulting in four times the total pixel count. It generates a new DNG file while preserving the original.
It’s mainly used for:
- Enlarging photos for printing
- Cropping without losing resolution
- Maintaining edge structure in clean images
Super Resolution is not intended to repair or restore image quality. Its effectiveness depends heavily on the original photo.
Related Search: How to Use Super Resolution in Photoshop to Upscale Images?
How Does Adobe Lightroom Super Resolution Work?
Super Resolution uses Adobe Sensei AI models to analyze edges, contours, and texture patterns in an image. During upscaling, the system predicts missing pixels based on surrounding visual information.
Lightroom Super Resolution performs well at increasing image size while maintaining smooth edges and preserving the overall structure of a photo. However, it does not recover lost details, reduce noise, correct blur or missed focus, or improve issues caused by poor lighting or compression. As a result, the sharpness and clarity of the upscaled image still largely depend on the quality of the original file.
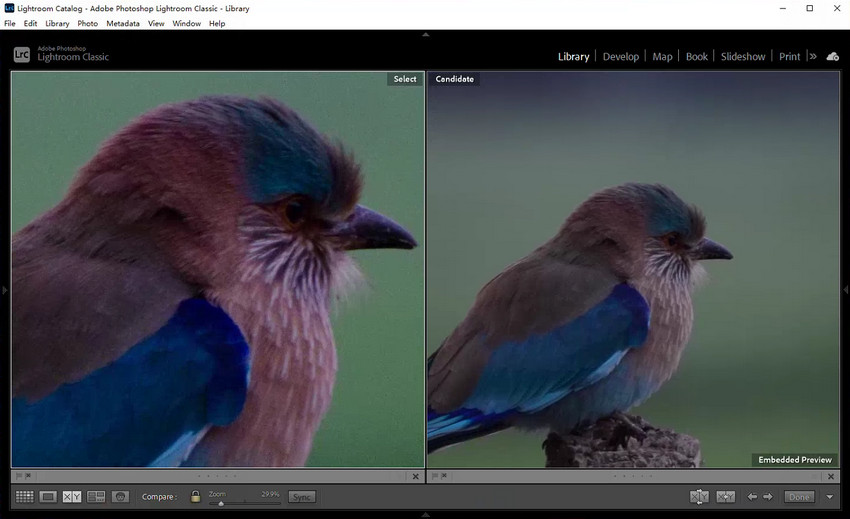
Can Lightroom Mobile Use Super Resolution?
Short answer: No. Super Resolution is only available in Lightroom desktop and Adobe Camera Raw. It is not supported on Lightroom Mobile or web versions.
This is why many users searching for “lightroom mobile super resolution” don’t find a solution inside the app. If you're working with mobile photos, you’ll need an alternative method for upscaling and enhancing image quality.
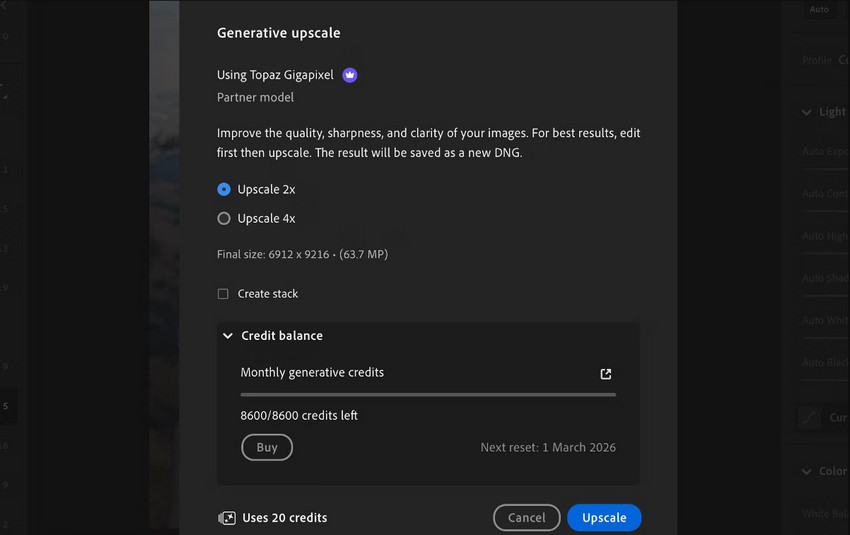
Generative Upscale in Lightroom (2026 Update)
In Feburary 2026, Adobe introduced Generative Upscale in Lightroom, a newer AI-based approach that goes beyond traditional upscaling.
Unlike Super Resolution, Generative Upscale uses Topaz Gigapixel AI models to predict and reconstruct missing details, enabling 2× or 4× enlargement with improved visual quality instead of just scaling existing pixels.
Both Super Resolution and Generative Upscale are designed to increase resolution and recover detail, giving users multiple options depending on their workflow and image quality.
However, even with this upgrade, Lightroom still has several practical limitations:
- Limited control over enhancement strength.
- Results may vary on complex textures.
- Upscaling is restricted to fixed factors (2× or 4×), which may not be flexible enough for all scenarios.
- Maximum output resolution is capped (up to 65,000 pixels on the long edge).
- Generative Upscale consumes credits based on output size, adding cost for higher-resolution processing.
- Still not designed for full image restoration (e.g., blur correction or heavy noise removal).
In practice, Generative Upscale is a meaningful upgrade over Super Resolution, offering more flexibility and better detail reconstruction. However, both tools still focus primarily on enlargement rather than full image enhancement. If you need stronger detail recovery, more flexible scaling ratios, or consistent results across different image types, dedicated AI enhancement tools often provide a more complete solution.
How to Use Super Resolution in Lightroom (Step-by-Step Guide)
Lightroom Super Resolution is applied through the Enhance panel and creates a new high-resolution DNG file. The process is quick, but following the correct order helps ensure the best results.
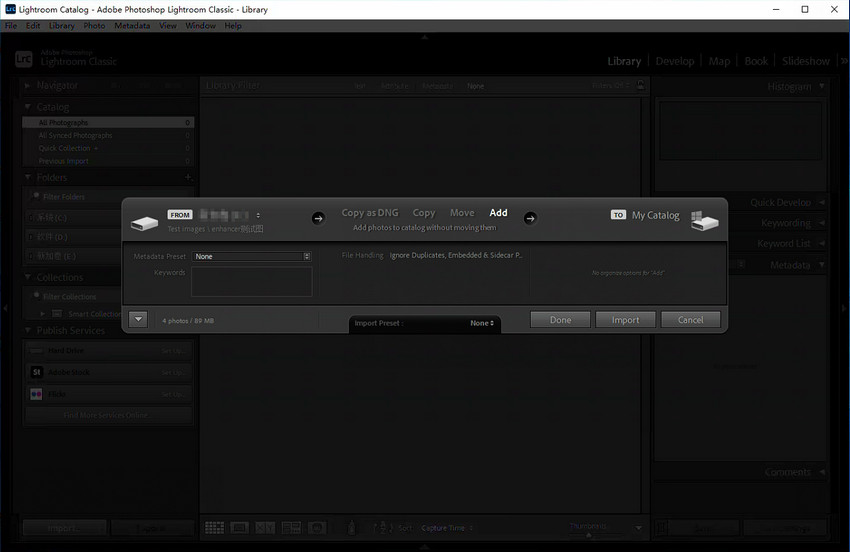
Step 1: Import your image
Open Lightroom Classic or Lightroom (desktop) and import the photo you want to upscale. For best results, use the original file rather than a smart preview.
Step 2: Right-click the photo
In the Library or Develop module, right-click the image (or Control-click on Mac) to open the context menu.
Step 3: Select “Enhance”
From the menu, choose Enhance. This opens Adobe’s AI Enhance dialog, where Super Resolution and other AI options are available.
Step 4: Enable Super Resolution
Check the Super Resolution option. Lightroom will display a preview and indicate the new image dimensions, showing how the resolution will be doubled on each side.

Step 5: Click “Enhance” to generate a new DNG file
Click Enhance to start the process. Lightroom creates a new DNG file alongside the original, leaving the source image unchanged.
Lightroom Super Resolution supports RAW and DNG files with the best results, as these formats retain the most image data for AI upscaling. TIFF files are also supported, while JPEG images typically show more limited improvement due to compression and reduced detail. For optimal results, Super Resolution should be applied early in the workflow, before heavy sharpening or noise reduction, to avoid amplifying artifacts.
Real Test Results: Does Super Resolution Actually Improve Quality?
In real-world use, Lightroom Super Resolution delivers consistent results, but only within a narrow scope. It reliably increases image size and preserves overall structure, yet its impact on visible image quality remains limited. The following before-and-after examples show how Super Resolution performs on different types of images, highlighting both its strengths and its boundaries.
Example 1: Clean RAW Landscape Photo
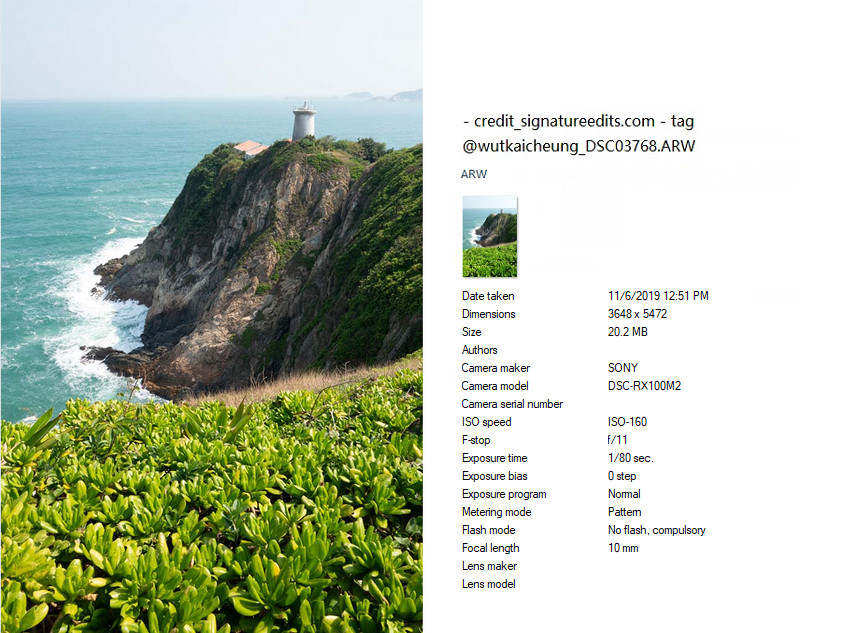
Before: This is a well-exposed RAW landscape image with low noise and good overall sharpness, but limited resolution for large prints.
After (Super Resolution applied): The image dimensions increase significantly, making it more suitable for large-format printing or cropping. Edge transitions, such as mountains and building outlines, appear slightly smoother, while overall structure remains intact. However, fine textures like foliage or distant details look largely the same as before—just larger.
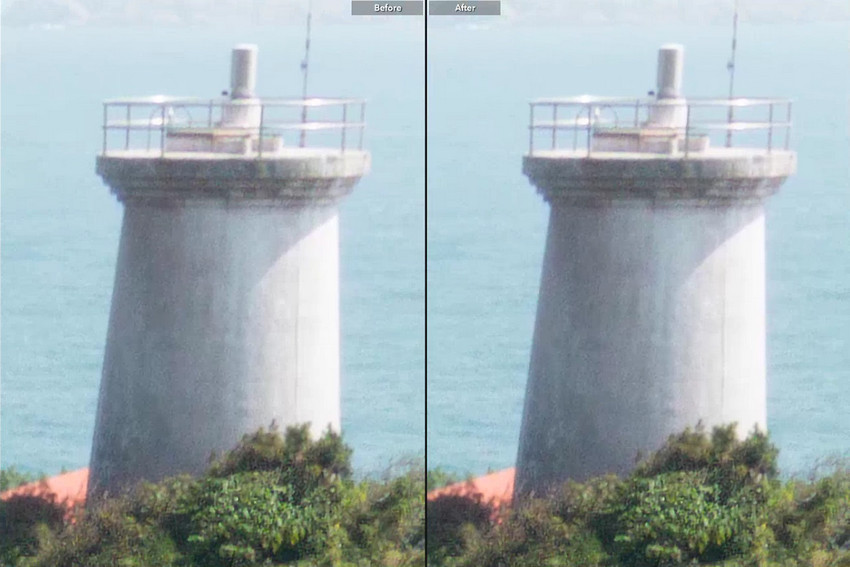
Key takeaway: Super Resolution works well when the original image quality is already high.
Example 2: Soft or Noisy Image (Mobile or Low-Light Shot)
Before: This image appears slightly blurry with visible noise, likely shot at a high ISO in low-light conditions. At 100% magnification, fine details already look soft, indicating limited native sharpness in the original file.

After (Super Resolution applied): The image becomes larger, but noise remains visible and blur is still present. Fine details do not improve, and in some cases artifacts become more noticeable due to the increased resolution.
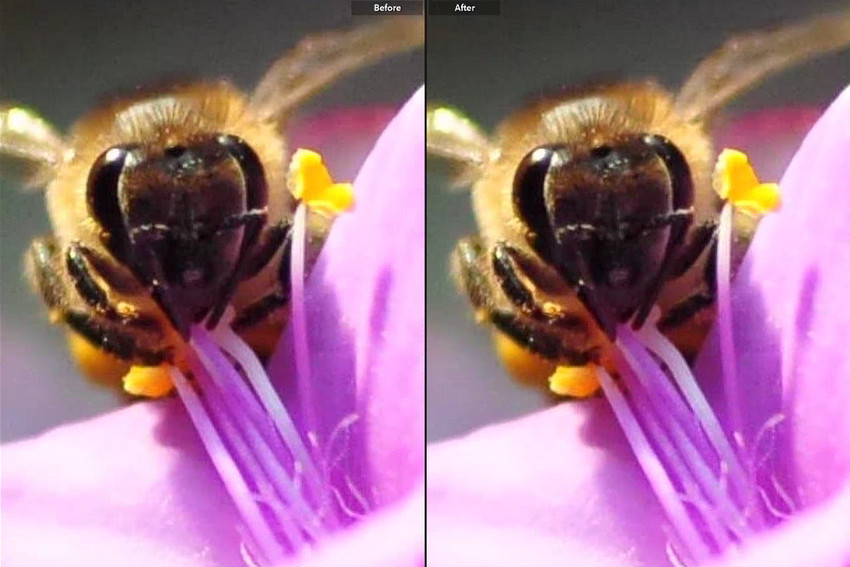
Key takeaway: Super Resolution improves resolution only. Noise reduction, blur correction, and focus recovery require separate processing beyond upscaling.
When Lightroom Super Resolution Fails
Lightroom Super Resolution works well for enlarging clean, high-quality images—but in many real-world scenarios, its limitations quickly become apparent.
Common situations where Super Resolution falls short:
- Blurry photos: It does not improve sharpness or fix missed focus.
- Noisy images: Noise is preserved—and often becomes more noticeable after upscaling.
- Compressed JPEGs: Compression artifacts are enlarged instead of corrected.
- Mobile photos: Limited visible improvement due to lower original data quality.
These limitations come from how Lightroom’s enhancement tools are designed. Each feature works independently rather than as a complete image restoration system:
- Super Resolution increases image size (2× upscale only) and generates a new DNG file.
- Raw Details improves texture rendering without changing resolution.
- Denoise (AI Denoise) reduces noise, primarily for RAW images.
Even with newer options like Generative Upscale (2× or 4×), which can improve detail reconstruction, Lightroom’s enhancement tools remain modular rather than unified. In practice, factors such as fixed scaling ratios, output limits, and credit-based processing may still limit flexibility.
Bottom line: Lightroom can make your images bigger, but it doesn’t truly fix them.
If your photo is blurry, noisy, or low-quality, simply enlarging it will not improve the result. What you need is a solution that enhances detail, reduces noise, and restores clarity as part of the upscaling process.
A Better Way to Enhance and Upscale Images: Aiarty Image Enhancer
This is where dedicated AI image enhancement tools make a real difference. Aiarty Image Enhancer is designed to improve image quality while upscaling, combining multiple AI-powered enhancements in a single workflow:
- High-Resolution Upscaling: Increase image size up to 32K while preserving clarity, texture, and fine details.
- Noise Reduction & Detail Refinement: Remove noise, sharpen edges, and recover subtle details for cleaner, more realistic images.
- Color Correction: Manually enhance and balance colors for more natural and vibrant results, while preserving texture and tonal accuracy.
- AI Object Removal: Erase unwanted objects or distractions seamlessly without damaging surrounding areas.
- RAW Format Support & Batch Processing: Work with RAW files and process hundreds or thousands of images efficiently in a single workflow.
Unlike Lightroom Super Resolution, Aiarty Image Enhancer performs well on low-resolution or heavily compressed images, mobile photos, old or scanned pictures, and large image batches. It is often used in conjunction with Lightroom rather than as a direct replacement, complementing existing workflows with advanced AI-powered upscaling and enhancement.
How to Upscale Photos Using Aiarty Image Enhancer
Step 1: Install and Load Images
Free download Aiarty Image Enhancer, install it, and drag-and-drop your low-resolution or grainy images into the software.
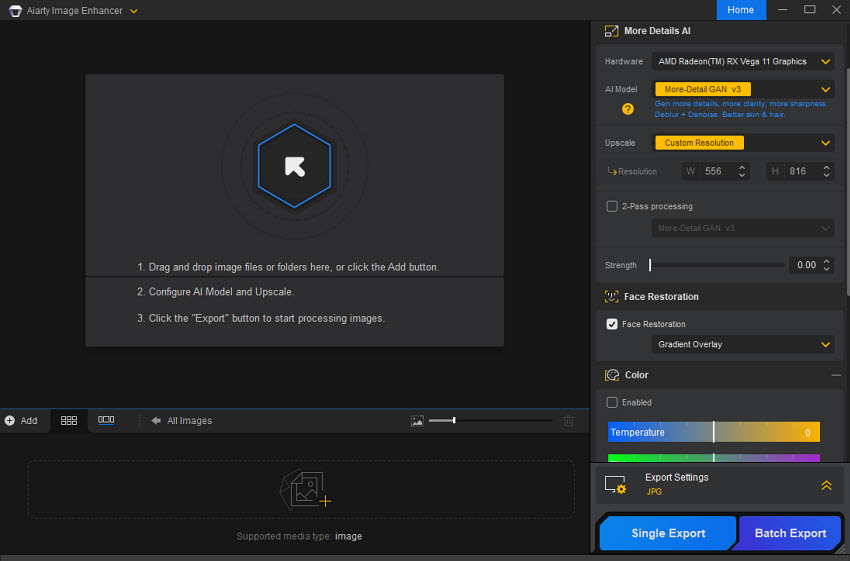
Step 2: Choose AI Model and Upscale Factor
Select the appropriate AI model and set your target resolution, up to 32K if needed.
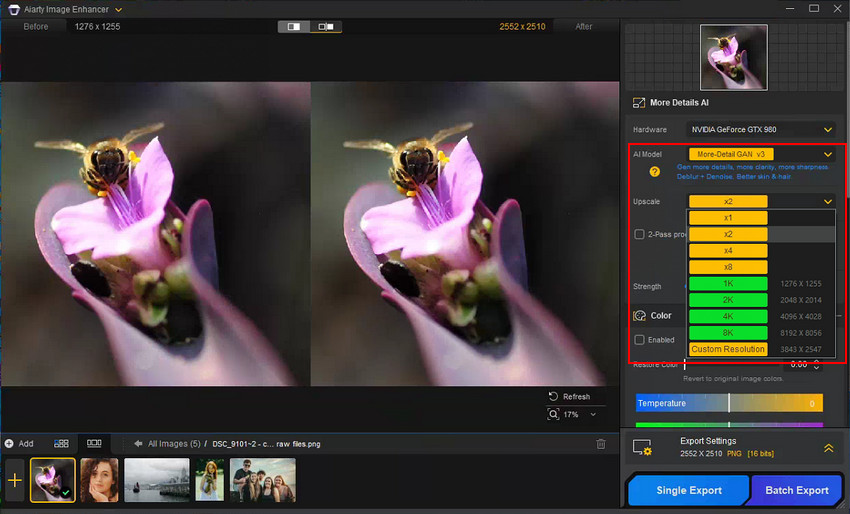
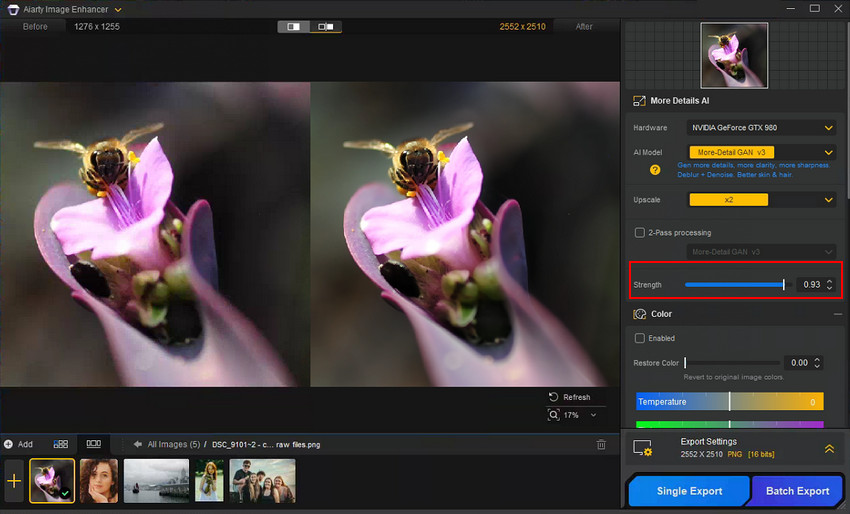
Step 3: Adjust Strength of Enhancement
Use the Strength slider to fine-tune the balance between AI enhancement and realism. Higher values improve sharpness but may introduce slight artifacts.
Step 4: Optional Color Adjustment
Slide the Restore Color slider to recover the original color. Or manually tweak color or brightness if the image shows minor tint shifts or appears too dark after processing.
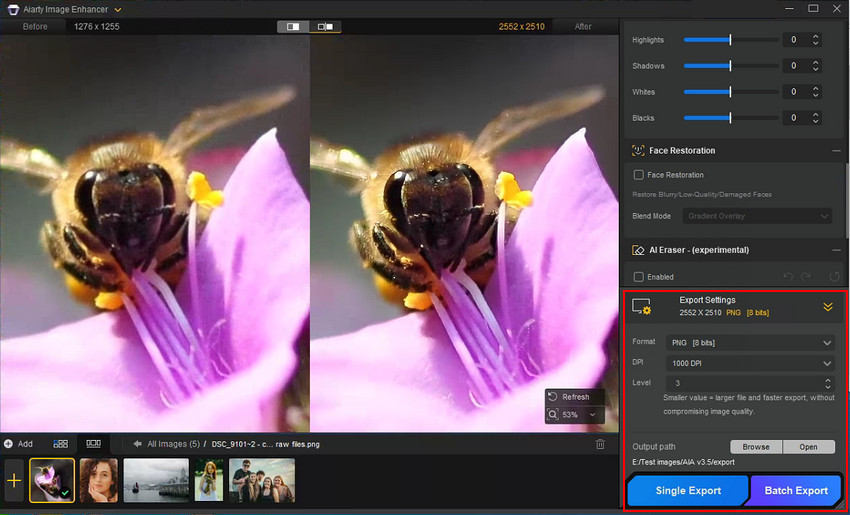
Step 5: Preview & Export
At the left Preview window, you can see the before and after result at zoom. When you're done, choose Single Export for one image or Batch Export to process multiple images at once efficiently.
See the Difference: Lightroom Super Resolution vs AI Upscaling
To better understand how Lightroom Super Resolution compares with a dedicated AI enhancer, we tested both methods on the same image. The example below shows a 200% zoom crop of the original photo, alongside results from Lightroom Super Resolution and Aiarty 2× Upscaling.
- Original: Limited detail, visible noise, and artifacts at high zoom
- Lightroom Super Resolution: Larger image, but quality closely mirrors the original
- Aiarty Upscaling: Noticeable improvement in clarity, texture, and noise control
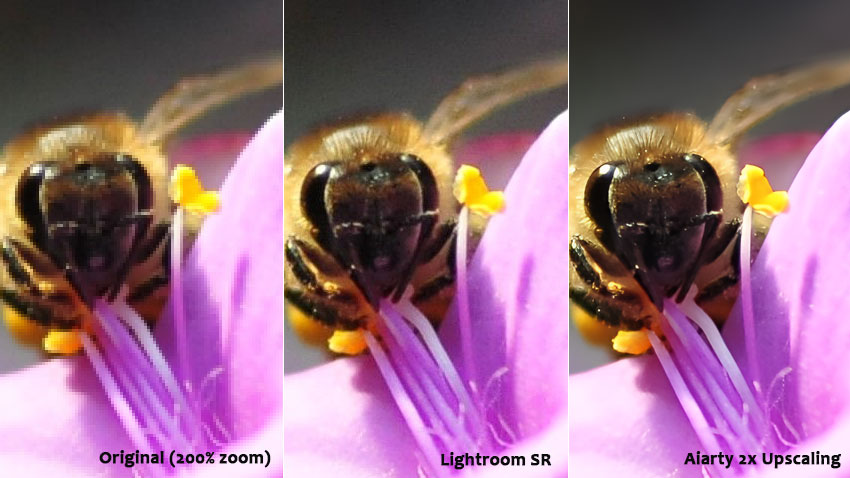
This comparison highlights the core difference: Lightroom Super Resolution focuses on size, while Aiarty Image Enhancer enhances image quality during upscaling, making it more effective for images that are soft, noisy, or captured under challenging conditions.
Recommended Workflow: Lightroom + AI Enhancement
Given the limitations of Lightroom Super Resolution for noise, blur, and detail recovery, a practical hybrid workflow combines creative editing in Lightroom with technical enhancement via AI tools:
- Perform color and exposure adjustments in Lightroom to fine-tune the visual mood and composition.
- Export the image in a high-quality format for further processing.
- Enhance resolution and details using Aiarty Image Enhancer, applying upscaling, denoising, and detail refinement.
- Deliver the final output ready for printing, web, or stock platforms.
This approach separates creative editing from technical enhancement, producing cleaner, more consistent, and higher-quality results than relying on Super Resolution alone.
Final Verdict
Lightroom Super Resolution is a useful built-in tool for enlarging high-quality images, especially clean RAW files. However, it does not improve image quality beyond resizing and has clear technical limits. For users who need more than simple enlargement such as noise reduction, detail enhancement, or restoration of low-quality images, AI image enhancement tools like Aiarty Image Enhancer provide a more complete and flexible solution.
Enhance, upscale, and perfect your photos today with Aiarty Image Enhancer!
 FAQs
FAQs
Lightroom Super Resolution performs best on RAW and DNG files, followed by TIFF. JPEG images see more limited improvement due to compression and reduced detail. For optimal results, always apply Super Resolution to the original high-resolution image before heavy sharpening or noise reduction.
Super Resolution may be unavailable if the image is using a Smart Preview instead of the original file, the file format is unsupported, a GPU is not supported or disabled, or the image has already been enhanced. It is also not available on Lightroom Mobile or browser-based versions.
Super Resolution increases image dimensions and outputs a new DNG, making photos suitable for large prints or cropping. Raw Details (Enhance Details) improves fine texture clarity without changing resolution. Neither tool reduces noise, fixes blur, or recovers lost detail—they address only specific enhancement needs.
If the output DNG appears smaller than the original, it is usually because a Smart Preview or lower-resolution source was used instead of the original high-resolution file. Super Resolution only enlarges images when applied to the full original image, so always ensure the original file is available on desktop before processing.
Lightroom Super Resolution: 2x upscale, RAW-friendly, no generative credits required.
Generative Upscale (Topaz Gigapixel): 2x or 4x upscale, generates a new DNG file, and uses generative credits.
Use Super Resolution for fast 2x enlargement in a RAW workflow. Use Generative Upscale when you need stronger upscaling up to 4x.
No. It is currently not planned for Lightroom Classic. Adobe is focusing instead on AI culling, Firefly integrations, performance improvements, and other workflow enhancements.
Yes. Generative Upscale applies denoising and sharpening based on Topaz Gigapixel’s image analysis. For best results, it is recommended to run Lightroom Denoise first before upscaling.
You May Also Like
This post was written by Brenda Peng who is a seasoned editor at Digiarty Software who loves turning ordinary photos into extraordinary works of art. With AI assistance for brainstorming and drafting, the post is reviewed for accuracy by our expert Abby Poole for her expertise in this field.