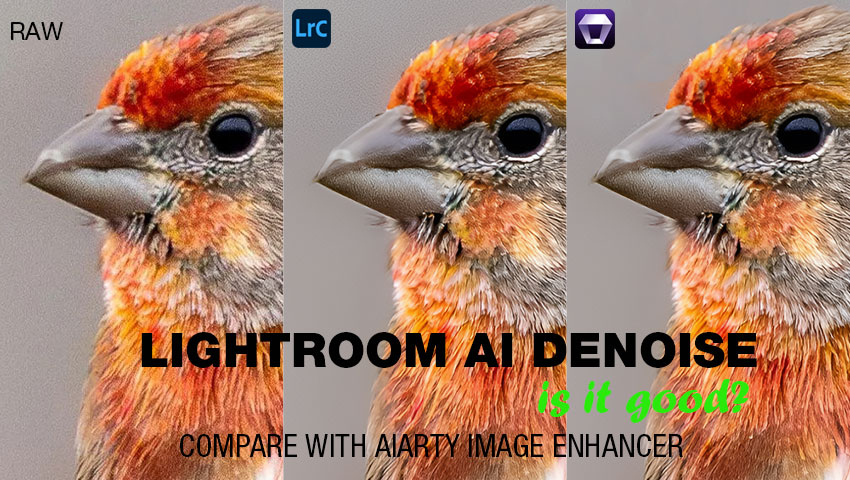
Low-light photography often results in noisy images. While Lightroom's AI Denoise can significantly improve photo quality, is it the best option for all cases? If you're dealing with large batches of photos or need faster processing, Aiarty Image Enhancer may be the smarter choice.
In this article, we'll explore:
- What noise is and why it affects your photos
- How to use the Lightroom AI Denoise feature
- A glance at Lightroom Denoise before and after examples
- A faster, smarter alternative: Aiarty Image Enhancer
Ready to experience hassle-free, high-quality denoising? Try Aiarty Image Enhancer and and see how easily you can restore clarity, remove noise, and upscale your images up to 32K, whether they’re RAW, JPEG, or other formats, no complex setup or high-end hardware needed.
What Is Image Noise and Why It Matters
Image noise is the visual distortion—grainy or colored speckles—that appears when shooting in low light or using high ISO settings. While a touch of noise can add character, too much of it masks fine details and reduces image clarity.
Common causes of noise:
- Shooting in low-light conditions
- Using high ISO values (ISO 1600+)
- Underexposed photos that are later brightened in post
Modern digital sensors and AI tools like Lightroom Denoise aim to fix this by removing noise while preserving important textures and edges.
What Is Lightroom Denoise and How It Works?
Lightroom Denoise is an AI-based noise reduction tool introduced in Lightroom Classic 12.3 and Camera Raw 15.3. It's powered by Adobe Sensei and represents a significant leap forward from the traditional luminance and color noise sliders.
Core strengths of AI Denoise Lightroom:
- Smart noise detection and detail preservation.
- Lightroom AI Denoise works best with RAW files and high ISO images.(ISO 12800, 25600, 51200, or even 64000).
- One-click enhancement for professional-level noise reduction.
- Especially useful for night photos, mobile low-light shots, and old photo restoration.
Unlike traditional noise reduction tools, Lightroom new AI Denoise generates a separate DNG file, preserving your original photo. The output is natural and avoids the overly smoothed "plastic" look.
How to Use AI Denoise in Lightroom Classic
Now that you know where to find the AI Denoise feature in Lightroom Classic, let’s explore a step-by-step workflow to apply it effectively. We’ll cover tips for achieving the best results and show you how to denoise multiple photos at once for a faster, more efficient editing process.
Step-by-Step Workflow to Denoise RAW Photos in Lightroom
Wondering how to denoise in Lightroom with the latest Denoise AI feature? Follow these step-by-step instructions:
Step 1. Import your RAW photo into Lightroom Classic. This feature specifically targets RAW files, so make sure your image is in the correct format.
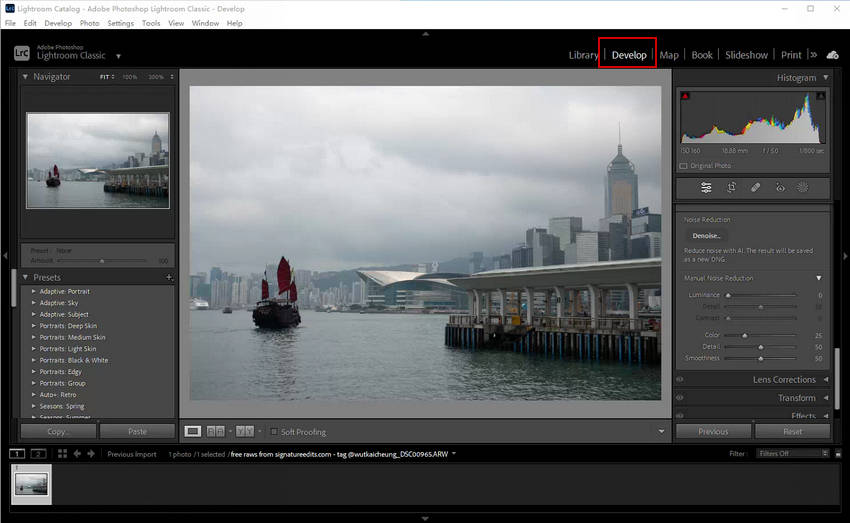
Step 2. Navigate to the Develop module. This is where you’ll find all your editing tools.
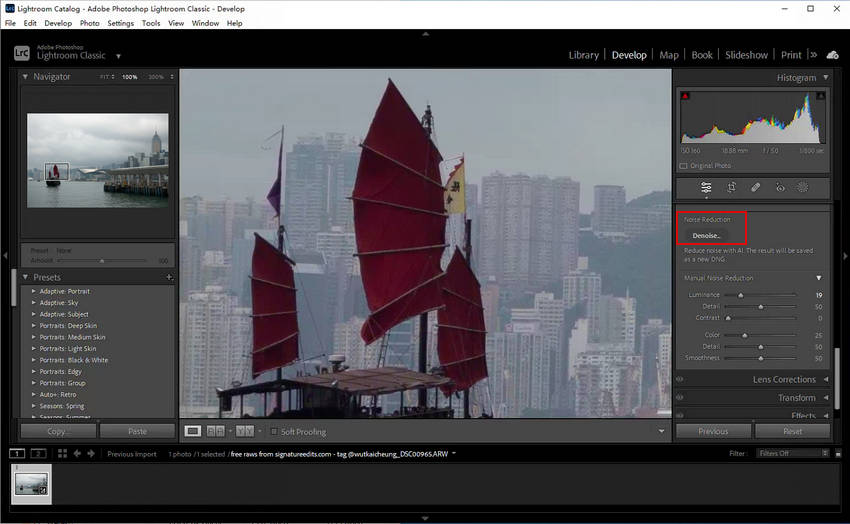
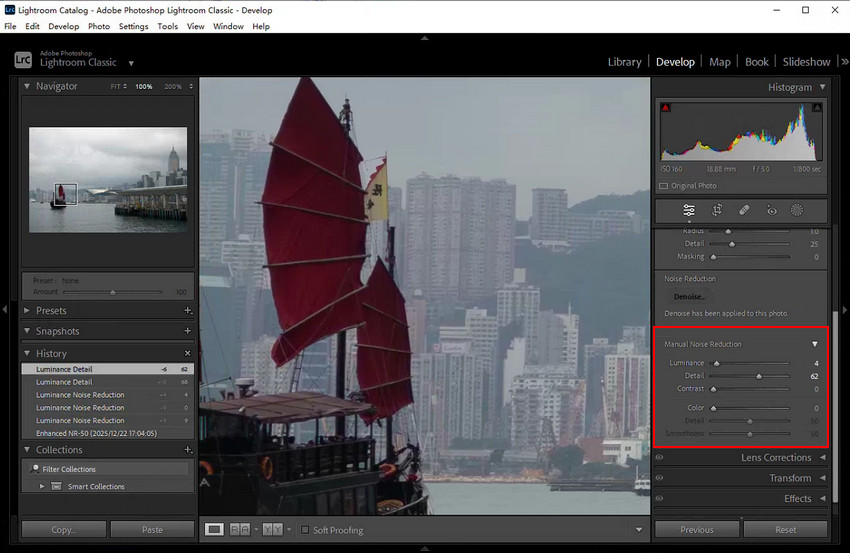
Step 3. In the Detail panel, locate and click the Denoise button. You'll find it right next to the familiar manual noise reduction sliders. Clicking this button will open a new dialog box dedicated to the AI Denoise process.
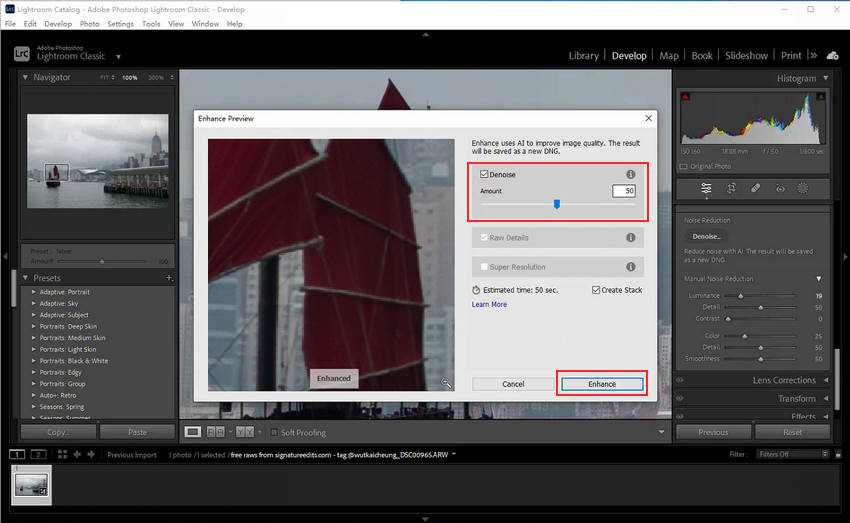
Step 4. Within the AI Denoise interface, you'll see a Strength slider (ranging from 0 to 100). This controls how aggressively the AI removes noise from your image. Adobe typically suggests starting around 50 for a balanced result, but feel free to experiment to find what works best for your specific photo.
Step 5. Optionally, you can toggle Enhance Details and Raw Details. These options can help preserve finer textures and sharpen overall image quality after denoising, preventing a overly smooth or plastic look.
Step 6. Once you’re satisfied with the preview, click Enhance. Lightroom will then work its magic.
Step 7. By the way, if you're not satisfied with the AI result, you can also manually reduce the noise using Manual Noise Reduction.
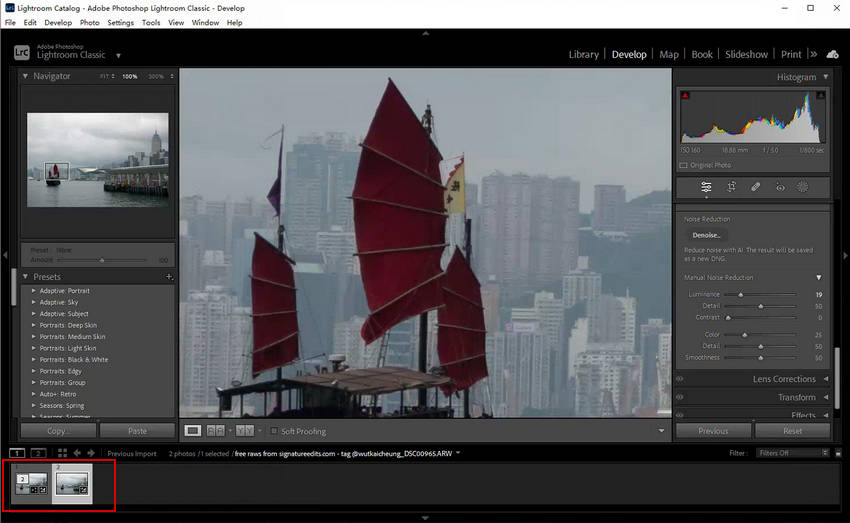
Step 8. After processing, Lightroom will generate a new DNG file with the AI Denoise applied. Importantly, your original RAW file remains untouched, preserving your initial capture. This new DNG file will appear next to your original in the filmstrip, clearly marked with "Enhanced-NR" in its filename.
Read More: Lightroom Super Resolution Explained: Is It Enough for Image Quality?
- Use
\to compare the before/after view. - Use 100% zoom to judge noise levels and detail retention.
- For high ISO shots (above ISO 6400), you may want to increase the slider to 70–80%.
- AI Denoise may take 20–60 seconds per photo, depending on your hardware.
How to Denoise Multiple Photos in Lightroom
Many users often ask: Can you denoise multiple photos in Lightroom at once?
Yes and no. You can batch denoise Lightroom photos using the Sync feature—but there’s a big caveat: Adobe’s AI Denoise Lightroom tool only processes one image at a time.
Workaround of Batch Denoise in Lightroom:
- In the Library module, select all the images you want to denoise
- Hit Sync to apply the same noise reduction settings to all these images. You can go Sync Settings first to make sure you've selected to sync all matter noise reductions under Detail.
- Open one in the Develop module
- Click the Denoise button and set your desired strength

However, each image still needs to be enhanced manually. You’ll need to click “Enhance” individually on each photo. This makes Lightroom batch denoise less efficient for high-volume workflows.
Lightroom Denoise: Before and After Examples
Now that you understand how Lightroom denoise photos with AI, the real question is: how effective is it in practice? To truly appreciate its capabilities, nothing beats seeing the results firsthand. Below, we've compiled a series of before-and-after examples so you can judge for yourself the impact this tool can have on noisy images.
You may be interested: How is Lightroom denoise compared with Topaz Denoise AI?
Showcases of Photos Denoised by Lightroom
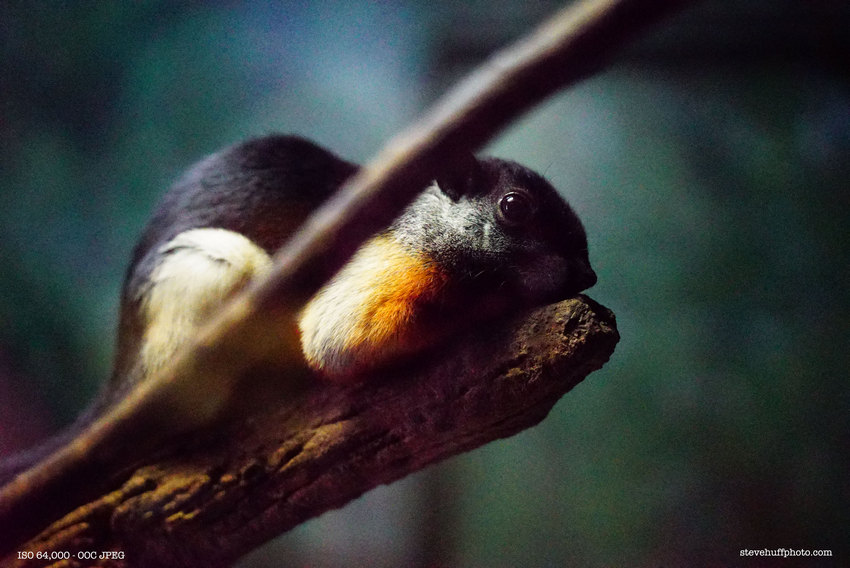
A High ISO setting photo captured by Sony A7s
This shot was taken in a really dark spot at the zoo, using Leica 50 APO lens, mounted on a Sony A7s with a Voigtlander adapter. These are actually straight-out-of-camera JPEGs, and as you can see, even with the in-camera noise reduction set to low, there's quite a bit of noise from that ISO 64,000 setting.
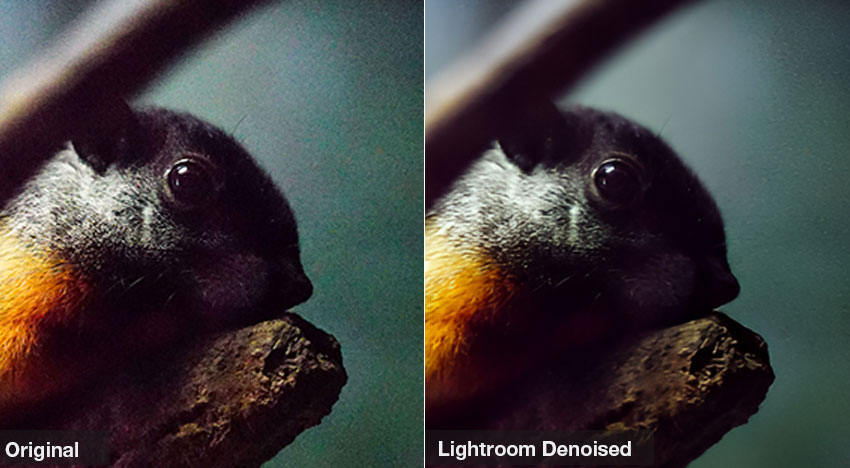
After applying Lightroom's denoise process, the transformation was instantly apparent. The distracting background luminance noise was significantly reduced, giving the image a noticeably cleaner, more refined appearance without flattening textures or making the scene look overly smoothed. Crucially, the intelligent processing also helped restore intricate fur details on the squirrel, bringing back natural clarity. Individual hairs and subtle features appeared more refined and distinct, recovering details previously obscured by heavy noise.
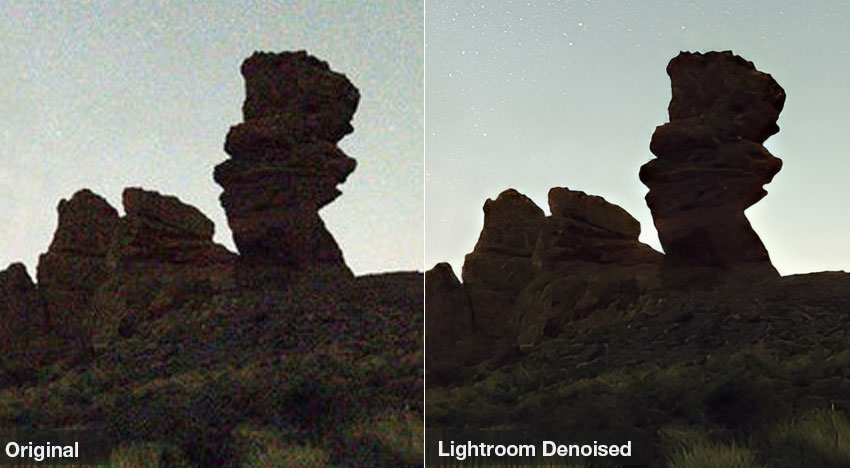
A noisy photo shot in low-light
This captivating night landscape was captured using a Canon EOS R6, with settings dialed in for the challenging low-light conditions: an ISO of 12800, a wide-open aperture of f/2.8, and a 30-second shutter speed to gather ample light from the faint stars and illuminate the scene.

Lightroom's denoise significantly reduced both chromatic and luminance noise, crucially without smearing the stars or sacrificing their sharpness. It restored smoother tonal transitions in the expansive night sky for a more natural look. The only minor drawback observed was slight processing artifacts where the mountains meet the sky, subtly impacting that transition.
While Lightroom's AI Denoise is undeniably powerful, our tests reveal it's not without its imperfections, particularly with subtle processing artifacts sometimes appearing at high-contrast edges. Beyond this, the feature comes with several other limitations:
- No real batch denoise Lightroom solution.
- Sluggish on older computers or low RAM setups
- Not supported in Lightroom versions before 12.3
- Not ideal for images with intricate textures (e.g., fur or feathers)
A Smarter Alternative to Lightroom Denoise - Aiarty Image Enhancer
If you're seeking faster processing, true batch capability, and easier access without the need for complex setup, Aiarty Image Enhancer offers a compelling alternative. It’s designed to handle up to 3,000 images simultaneously with speed and precision, making it ideal for users who need to enhance large volumes of photos efficiently.
Aiarty Image Enhancer is a powerful AI-driven tool designed to remove noise, blur, pixelation, and compression artifacts from images, restoring clarity and enhancing resolution up to 32K. Using advanced algorithms, it accurately distinguishes fine details from visual distortions, intelligently reconstructing lost textures and features to deliver sharp, high-quality results. It also supports a wide range of formats, including RAW, JPEG, and PNG etc, making it a versatile choice for photographers, designers, and anyone working with image enhancement at a professional level.
Better yet, it doesn’t require high-end hardware, and the steps are simple to follow.
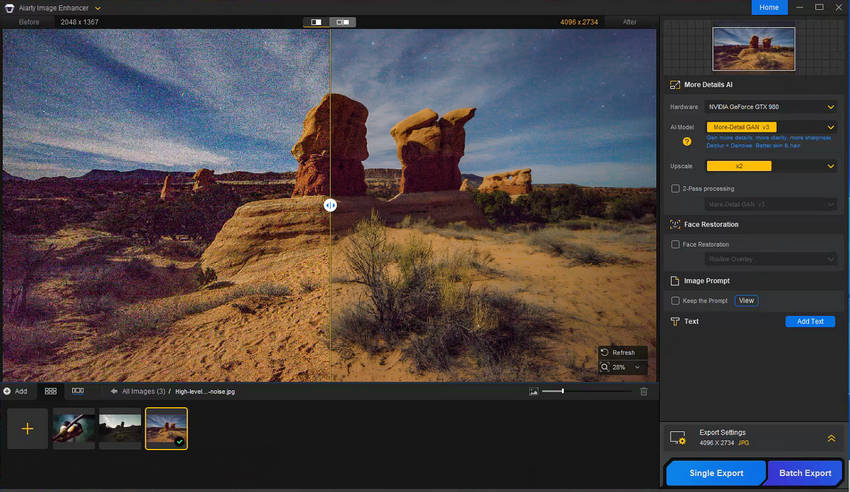
Step 1. Free download Aiarty Image Enhancer and install it. Drag and drop to load your grainy images to be denoised.
Step 2. Choose a proper AI model and your target upscale factor.
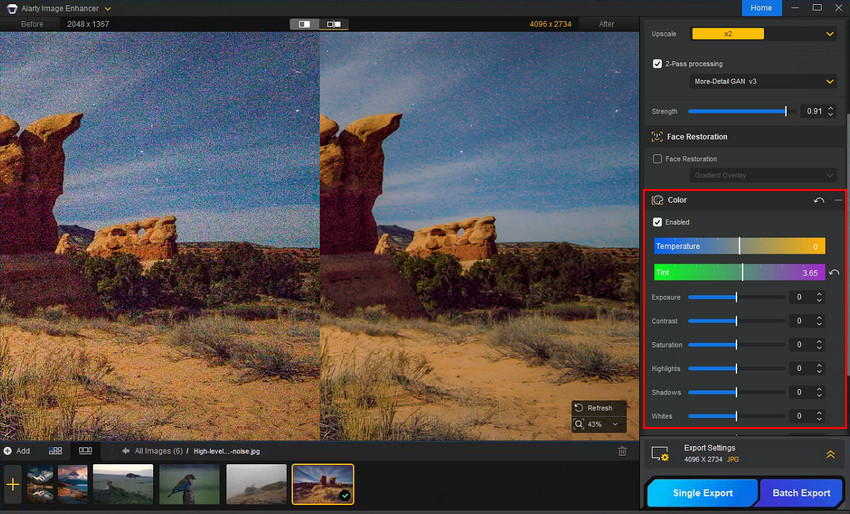
Step 3. Adjust the Strength slider to fine-tune the denoise level for a balance of realism and clarity. The higher value the setting, the greater the clarity, but it also increases the likelihood of artifacts.

Step 4. Optionally, manually adjust the color if necessary. For example, if there is a slight tint after denoising or if the original image appears a bit too dark.
Step 5. Tap Single Export or Batch Export to export your denoised image individually or in bulk.
Before & After: Lightroom Denoise vs Aiarty Image Enhancer
To determine which performs better between Lightroom and Aiarty Image Enhancer, we conducted a head-to-head comparison of their denoise results and overall performance.
Please note: Given the numerous adjustable settings within Lightroom Denoise AI, the results presented here represent the optimal output I could achieve within my specific workflow. They are not intended as a definitive statement on the tool's absolute capabilities. Your own experimentation with the settings may yield different, or potentially even superior, outcomes tailored to your images.
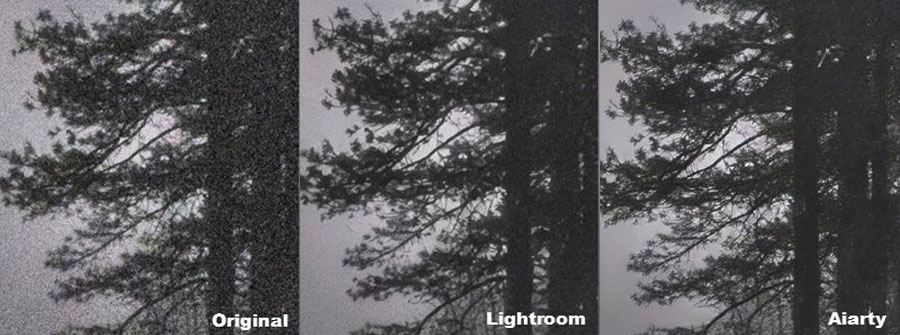
Test 1: A landscape photography

Test Result: Based on our comparison, while Lightroom Denoise AI delivered solid performance, it often left behind more noticeable grain. What's truly impressive, however, is Aiarty Image Enhancer's output, consistently producing remarkably clean images with crisp, well-preserved details. This difference is likely influenced by their workflows: Aiarty offers efficient one-click processing, whereas Lightroom requires more hands-on adjustments for optimal results.
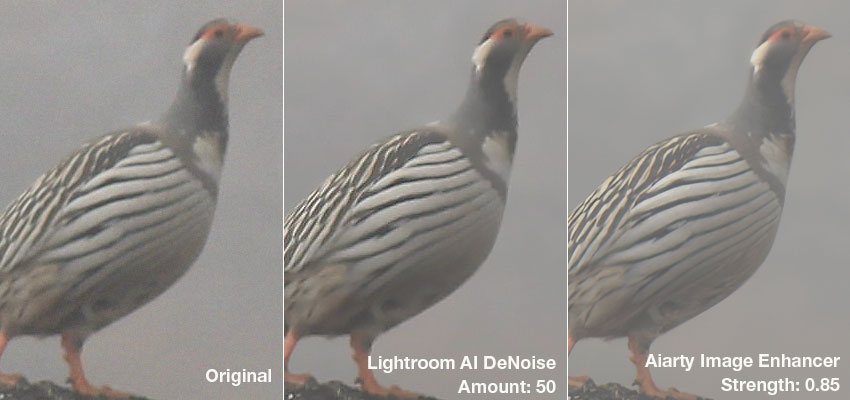
Test 2: A photo of a Tibetan Snowcock taken in the wild.
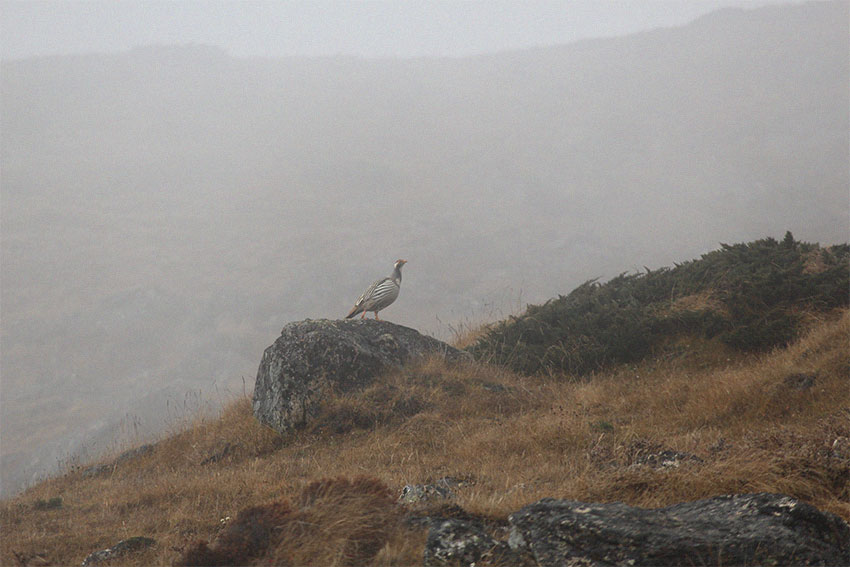
Test Result: The Lightroom AI DeNoise provides a natural result by cleaning up grain while preserving the original photographic texture. Conversely, the Aiarty Image Enhancer delivers a much sharper, high-contrast image by reconstructing details like the bird's eye and stripes, though it looks more digitally processed.Slightly lower the Strength value could fix this. Ultimately, Lightroom excels at maintaining realism, whereas Aiarty is superior for maximizing clarity and "pop".
Conclusion: Which Image Denoiser Is Right for You?
Table Comparison Between Lightroom and Aiarty Image Enhancer
Lightroom Denoise delivers solid performance for everyday RAW noise reduction. To complement this capability, Aiarty Image Enhancer offers a broader toolset for more diverse needs. Whether you're working with compressed formats (JPEG/PNG), tackling mildly to heavily grainy images, or looking for a faster batch-processing solution, Aiarty acts as a powerful secondary engine to ensure no photo is left behind due to technical limitations. So when should you use Lightroom, and when is Aiarty the better choice? Here's how to choose the right one for you:
- Choose Lightroom Denoise if:
- You prioritize maximum image quality, particularly with RAW photos.
- You're experienced in manual post-processing and fine-tuning sliders.
- You have a high-performance computer and an active Adobe subscription.
- Opt for Aiarty Image Enhancer if:
- You need fast and automated enhancement, especially for multiple images.
- You work with various formats like JPEG, PNG, and even RAW.
- You prefer a fully automatic, easy-to-use interface.
- You’re on a low to mid-range system or looking for a budget-friendly solution.
In short, Lightroom is ideal for perfectionists with the tools and time to refine every detail, while Aiarty is the smarter pick for creators who value speed, simplicity, and wider compatibility without compromising quality.
 FAQ
FAQ
When used correctly, Lightroom denoise maintains image quality while removing noise. However, excessive use may result in a plastic-like look. It's best to adjust the strength carefully and preview changes at 100% magnification.
Not entirely. You can sync denoise settings across images, but each photo still requires individual AI processing.
Lightroom may prevent denoising if you’re using an unsupported file type (such as JPEG or a reduced-size RAW), don’t have enough disk space or write permissions, have outdated GPU drivers, or are encountering a software bug. To resolve this, make sure you’re working with a full-resolution RAW file, confirm sufficient disk space and proper permissions, update your GPU drivers, and check Lightroom’s performance settings.
Yes. Aiarty supports both RAW, PNG and JPEG formats and uses AI to enhance multiple image aspects, including noise reduction.
Images shot at ISO 1600 or above generally benefit from noise reduction, especially in low-light or night photography.
You May Also Like
This post was written by Brenda Peng who is a seasoned editor at Digiarty Software who loves turning ordinary photos into extraordinary works of art. With AI assistance for brainstorming and drafting, the post is reviewed for accuracy by our expert Abby Poole for her expertise in this field.