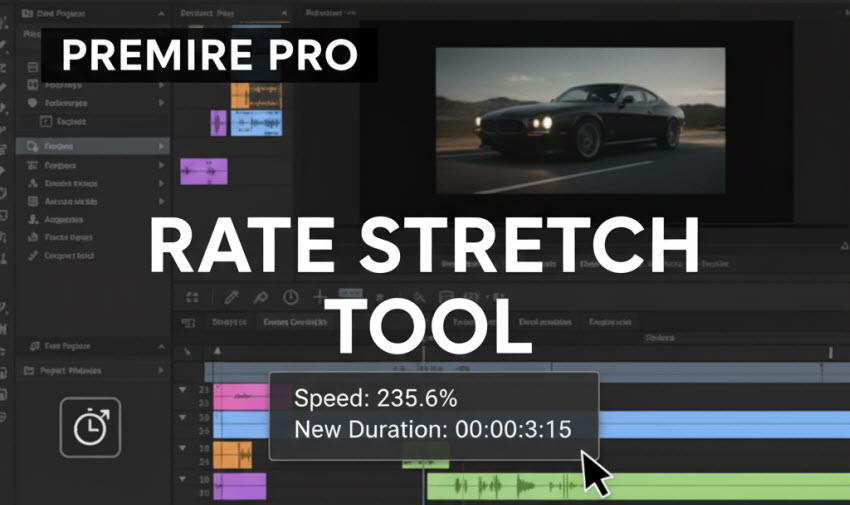
When you shot beautiful footage, but a sequence needs to be exactly 3 seconds long, not 3.2, and definitely not 2.8, then Premiere Pro’s Rate Stretch tool comes to help. The Rate Stretch tool of Premiere Pro is a fast, practical way to change a clip’s duration in the Timeline by automatically changing that clip’s playback speed so it will exactly fill (or fit into) a new length. In short: you don’t trim the media’s in/out points, you compress or expand the clip’s speed so its content still plays from the same in to out but in a different amount of time.
So where is Rate Stretch Tool in Premiere Pro and how to use it? Just follow the guide below.
What is the Premiere Pro Rate Stretch Tool?
The Rate Stretch Tool (often accessed by pressing R) is designed to change the duration of a clip in the timeline by altering its playback speed, all while keeping the clip anchored in place.
- Speed Up: If you drag the edge of a clip inward (making it shorter), the Premiere Pro Rate Stretch Tool will automatically speed up the footage to fill the new, shorter duration.
- Slow Down: If you drag the edge outward (making it longer), the tool will slow down the footage, stretching the content over the extended time slot.
It’s fundamentally a faster, visual alternative to manually setting the clip's speed percentage via the Speed/Duration dialog box.
When use the Rate Stretch tool?
In short, you can use Premiere Pro’s Rate Stretch tool when you need to:
- Fill a fixed gap in your sequence quickly (e.g., make a clip exactly 3 seconds long).
- Speed up or slow down a clip without opening dialogs or typing percentages.
- Rapid rough edits when exact speed percentages aren’t needed.
Note:
- The Rate Stretch tool changes playback speed but doesn’t alter In/Out points — you won’t accidentally re-trim content, only change how fast it plays between existing In and Out.
- If you need frame-blended or optical-flow smoothing for slow motion after stretching, enable appropriate Time Interpolation options in Clip Speed/Duration or the Interpret Footage options. Stretching the video will not always produce ideal audio; unlink or replace audio or use resampling algorithms if you need pitch-corrected slow/fast audio.
How to Use Rate Stretch Tool in Premiere Pro?
Below is a step-by-step guide on using Premiere Pro Rate Stretch tool to adjust a video speed.
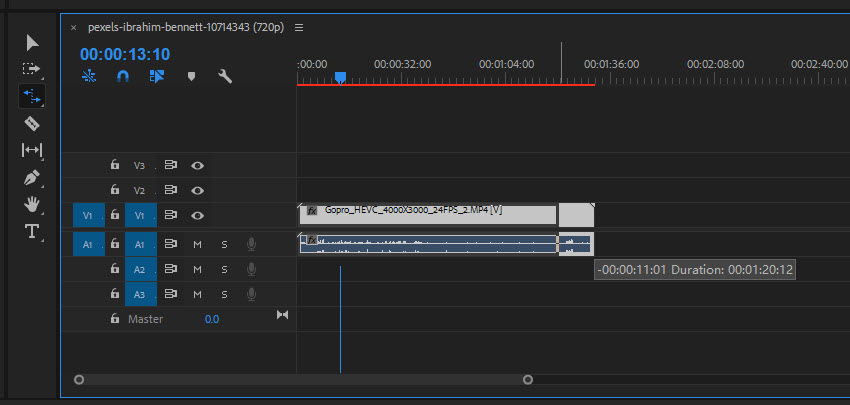
Step 1. Add your clip to the Timeline. Then you need to locate the Rate Stretch Tool.
Where is the rate stretch tool? It’s in the Tools panel (it’s grouped with trim/ripple tools). Or use the keyboard shortcut R to activate the rate stretch tool immediately.

Step 2. Once the Rate Stretch tool is activiated in Premiere Pro, locate the start or end point of the clip you wish to adjust on your sequence timeline. Then click and drag the edge of the clip to adjust the video speed. To shorten the video duration with faster speed, just drag inward, and drag outward for longer duration and slower playback speed.
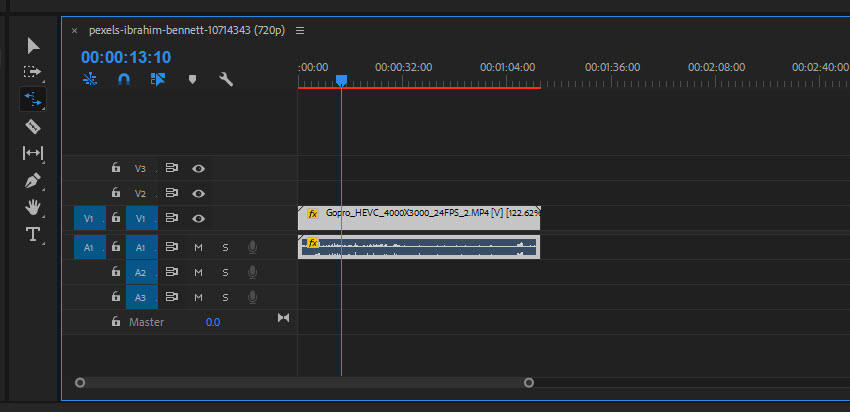
Step 3. Release to apply. You can see a small data box showing the new percentage speed (e.g., 150% or 66%). This is your real-time feedback.
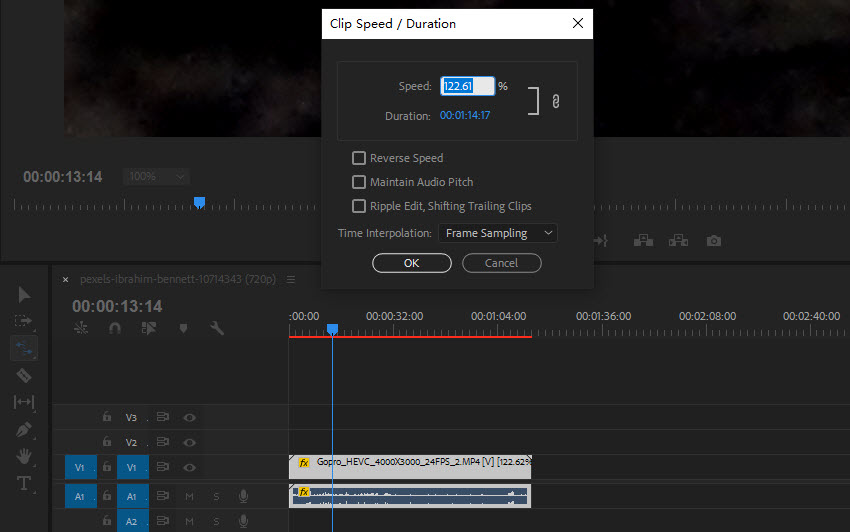
Step 4. If you want precise numeric control instead of the Rate Stretch tool, select the clip and use Clip > Speed/Duration (Ctrl/Cmd+R). Then type a specific percentage or duration.
Here is a sample workflow of Premiere Pro Rate Stretch:
- Fill a 5-second gap: Drop a 10s clip into the gap, press R, drag the clip edge to 5s — clip playback speeds to 200% to fit.
- Create uniform slow motion for several clips: Instead of Rate Stretch on each clip, batch-adjust Clip Speed/Duration percentages to keep consistent slowmo across clips.
Premiere Pro Rate Stretch Tool Not Working Issues Troubleshooting Checklist
If the Rate Stretch tool in Premiere Pro is not showing or behaving oddly, try these fixes (these are the most common causes and community-proven fixes):
1. Tool is stacked under another tool.
Long-click the Ripple Edit or a nearby tool in the Tools panel; the Rate Stretch tool may be nested there. Click-and-hold to reveal it, or customize your toolbar to pin it permanently. (Very common.) Keyboard shortcut not working — make sure your keyboard shortcuts haven’t been remapped. R is the default for Rate Stretch; Clip Speed/Duration is Ctrl/Cmd+R.
2. Clip has transitions or is nested/locked.
Clips with certain transitions or nested sequences may not respond to Rate Stretch; try removing transitions or working inside the nested sequence. Some effects or locked tracks block the stretch.
3. Composite preview / timeline settings interfering
Rare, but timeline trim/preview settings can affect trimming tools. Try toggling timeline wrench options or resetting workspace.
4. Restart / reset workspace
If the tool cursor appears but dragging does nothing, save your project, restart Premiere Pro, or reset the workspace (Window → Workspace → Reset to Saved Layout). Community threads report that restarting or toggling effects sometimes fixes unresponsive Rate Stretch behavior.
5. Check track targeting and clip selection
Ensure the correct track is targeted and the clip is selected/unlocked.
6. If all else fails. Use Clip > Speed/Duration as a reliable fallback to change speed numerically.
Enhance the Rate Stretch Choppiness with AI
While the Premiere Pro Rate Stretch Tool is fantastic for quick timing adjustments, drastically slowing down footage (stretching it outward) can introduce a major problem: choppy or stuttery playback. This happens because the Rate Stretch Tool forces Premiere Pro to duplicate or sample existing frames (Frame Sampling) to fill the new duration, rather than inventing new, unique frames. When you slow a clip down below 100%, you lose smoothness and motion fluidity.
To truly master slow-motion effects created with the Premiere Pro Rate Stretch Tool, you need to use AI Interpolation to analyze the movement between two real frames and intelligently generate hyper-realistic in-between frames. Just try Aiarty Video Enhancer:
- Smooth Slow Motion: By using its AI interpolation feature before bringing the clip into Premiere Pro, you can convert your source footage (e.g., 30fps) to a much higher frame rate (e.g., 60fps or 120fps).
- Seamless Rate Stretch: When you then use the Premiere Pro Rate Stretch Tool to slow the high-FPS clip down, the result is buttery smooth. Because you have many more real frames to work with, Premiere doesn't have to guess or duplicate frames, eliminating stuttering entirely.
Use the Aiarty Video Enhancer to create smooth, high-frame-rate source footage, and then use the Premiere Pro Rate Stretch Tool to effortlessly dial in the perfect slow-motion duration in your timeline. This combination ensures maximum creative control with maximum visual quality.
Premiere Pro Rate Stretch vs Other Time Manipulation Tools
Adobe Premiere Pro offers several ways to control how time and motion behave within your footage. While tools like the Rate Stretch Tool, Speed/Duration, and Time Remapping may seem similar, each serves a different purpose depending on how much precision or creativity you need.
1. Rate Stretch Tool
The Rate Stretch Tool is the fastest way to change clip speed without opening any menus. When you drag the edge of a clip using this tool, Premiere automatically adjusts the playback speed so the clip perfectly fits the new duration: shorter = faster, longer = slower. It's best for quick duration adjustments directly in the timeline like matching a clip to a specific gap on the timeline, fast, intuitive edits during rough cuts and simple slow-motion or time compression without precise percentage input.
However, there is no control over motion interpolation or gradual speed changes. So it can produce choppy motion when stretched too much.
2. Speed/Duration Command
This command opens a dialog box where you can set an exact speed percentage, reverse playback, or maintain audio pitch. It’s the most precise method for editors who need specific speed values rather than drag-to-fit adjustments. It's best for exact control over speed, duration, and direction. You can use it to apply consistent speed changes across multiple clips, set exact duration or speed percentages (e.g., 50%, 125%), and adjust speed and direction simultaneously.
This requires manual entry and previewing, not as visual or intuitive as Rate Stretch. In addition, it doesn’t create variable speed effects (uniform speed only).
3. Time Remapping
Time Remapping gives you keyframe-based control over playback speed within a single clip. You can start a clip in slow motion, accelerate to normal speed, or create a smooth cinematic “speed ramp.” It's best for creative variable speed effects (ramp-ups, ramp-downs) so editors can use it for professional slow motion or speed ramp transitions, music videos, cinematic edits, sports highlights, and smooth acceleration and deceleration effects.
That said, this is more complex to control (requires keyframing) and may need optical flow or third-party AI interpolation for smoother results.
In Summary
The Premiere Pro Rate Stretch Tool is one of the simplest yet most effective ways to adjust clip duration without manually calculating speed percentages. It’s perfect for quick edits, matching clips to beats, or fitting footage into a specific timeline space.
However, when slowing footage down significantly, the results may appear choppy due to limited frame data. That’s where tools like Aiarty Video Enhancer can make a real difference. Its AI interpolation feature intelligently generates extra frames for smoother, more natural slow motion. By combining Premiere Pro’s Rate Stretch Tool for timing precision with AI-powered interpolation for motion quality, you get the best of both worlds: professional-looking results with efficient editing speed.
 FAQs
FAQs
The Rate Stretch Tool is located in Premiere Pro’s toolbar, usually grouped with the Ripple Edit Tool. If you don’t see it right away, click and hold on the Ripple Edit icon to open the hidden tool group, then select Rate Stretch Tool. You can also activate it instantly by pressing the R key on your keyboard.
The default keyboard shortcut for the Rate Stretch Tool is R. Pressing R on your keyboard switches your cursor to the Rate Stretch Tool, allowing you to quickly adjust the playback speed of clips directly in the timeline without opening any menus.
The Rate Stretch Tool can do both. When you drag the edge of a clip inward, it shortens the duration and speeds up playback. When you drag it outward, it lengthens the clip and slows it down. This way, you can make footage fit a specific time frame while maintaining the same in and out points.
The Rate Stretch Tool in Premiere Pro changes a clip’s speed and duration simultaneously. Instead of trimming or cutting frames, it stretches or compresses the entire clip so it plays faster or slower. It’s especially useful when you need a clip to fit a certain gap in your timeline or sync with music or dialogue timing.
You May Also Like
This post was written by Ashley Brown, a videographer turned AI explorer. As an associate writer at Digiarty Software, she dives into the latest AI-powered tools for video enhancement and content creation, offering practical insights and unbiased commentary. Accuracy confirmed by Abby Poole.