Want to make faces look cleaner, sharper, and more professional in DaVinci Resolve—without spending hours on manual masking?
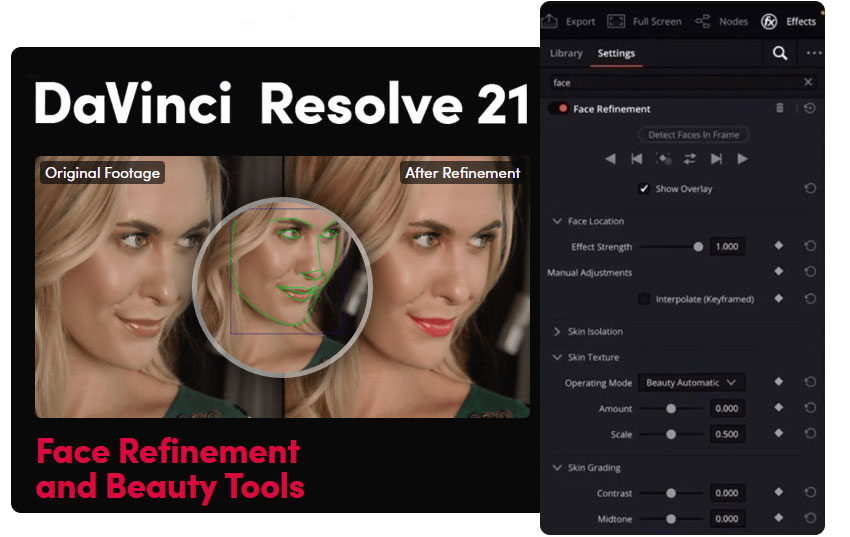
With the official full release of DaVinci Resolve 21, the software is finally out of beta, bringing unprecedented stability and real-time speeds to your facial enhancement workflow. Traditional tools like Face Refinement are now paired with next-generation AI features, making it easier than ever to smooth skin, sharpen eyes, and retouch details.
However, now that these tools are prime-time ready, knowing how to use them correctly is key. While some new AI modules offer flawless portrait enhancements, overdoing them can easily lead to an unnatural, plastic look.
In this guide, you’ll learn:
- How to quickly enhance faces using Face Refinement in DaVinci Resolve.
- What the new AI-powered face tools in DaVinci Resolve 21 actually do.
- What face enhancement can and cannot fix in real editing scenarios.
- When standard tools are not enough, and why AI restoration tools like Aiarty Image Enhancer may be needed for blurry or low-resolution faces.
What Does Face Enhancement in DaVinci Resolve 21 Include?
In DaVinci Resolve 21, “face enhancement” refers to a set of built-in tools, AI features, and beauty filters designed to improve facial appearance while maintaining a natural look. These include:
- Face Refinement: Face detection and automatic masking for localized facial adjustments, including skin smoothing and texture control, eye sharpening with dark circle reduction, and lip color enhancement for a more balanced and natural look.
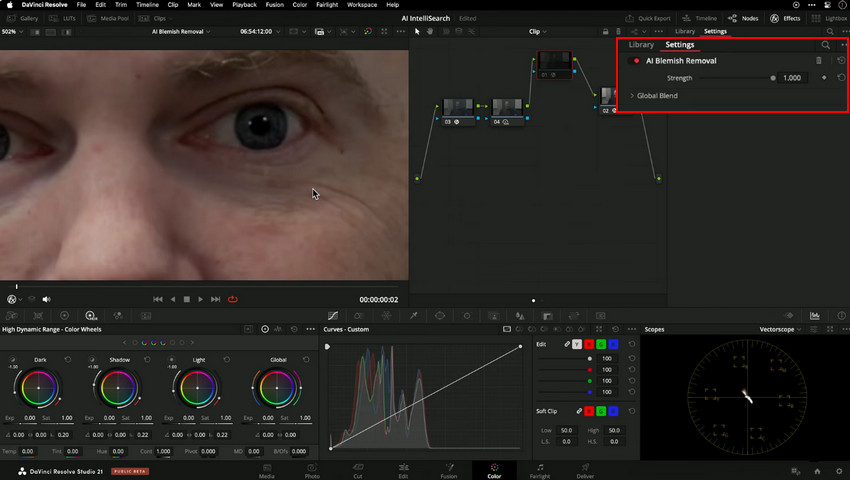
- AI Blemish Removal: Removes blemish, acne, spots, and minor skin imperfections quickly.
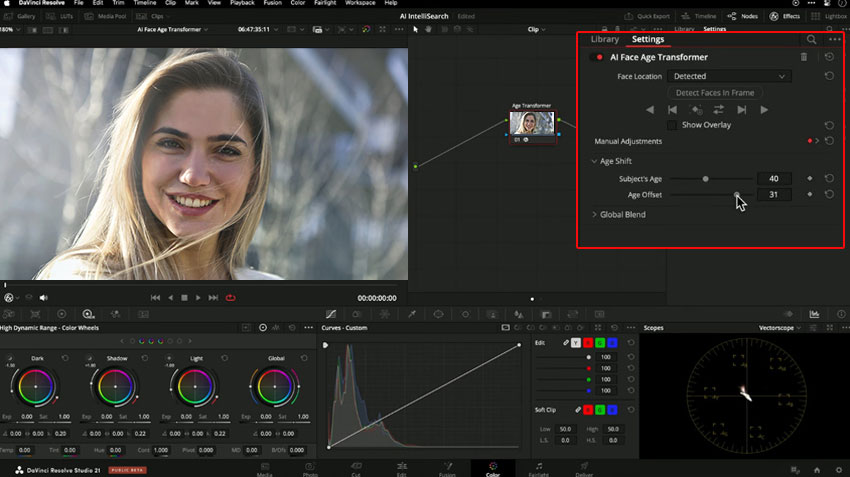
- AI Face Age Transformer: Adjusts age-related features such as wrinkles and facial fullness, useful for stylized or time-shifted scenes.
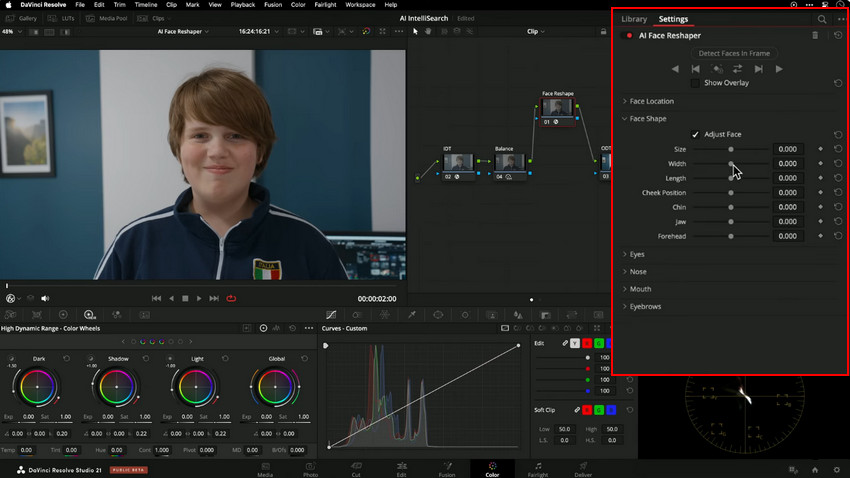
- AI Face Reshaper: Changes facial feature shape and position, including subtle facial proportion adjustments.
One of the key features is its ability to automatically detect and isolate different areas of the face, making it easier to apply targeted adjustments to skin, eyes, and lips.
Hot Search: Upscale Image in DaVinci Resolve 21 >>
How to Enhance Face in DaVinci Resolve 21 (Step-by-Step)
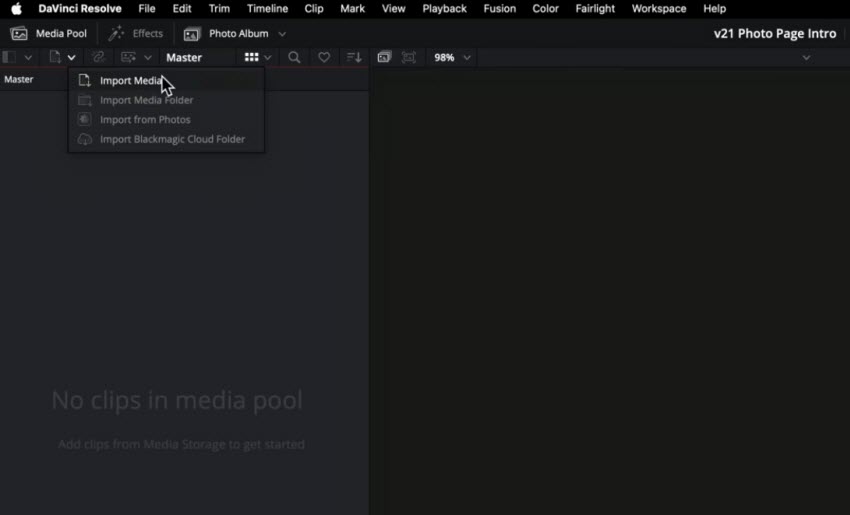
Step 1: Import Your Footage or Image
Start by opening DaVinci Resolve and creating a new project. Then import your video or image into the Media Pool and drag it onto the timeline. Make sure the subject’s face is clearly visible for accurate detection.
Step 2: Refine Facial Structure with Face Refinement
In the node editor, Right-click → Add Node → Add Serial Node for face refinement. Open the OpenFX panel and search for "Face Refinement", then drag it onto the new node. Please note that Face Refinement is a Studio-only feature available in DaVinci Resolve.
Once applied, DaVinci Resolve will automatically scan the frame, and it detects facial landmarks (eyes, skin region, mouth). For video clips, the system creates a motion-consistent tracking model to ensure that all facial adjustments stay seamlessly locked to the subject in motion.
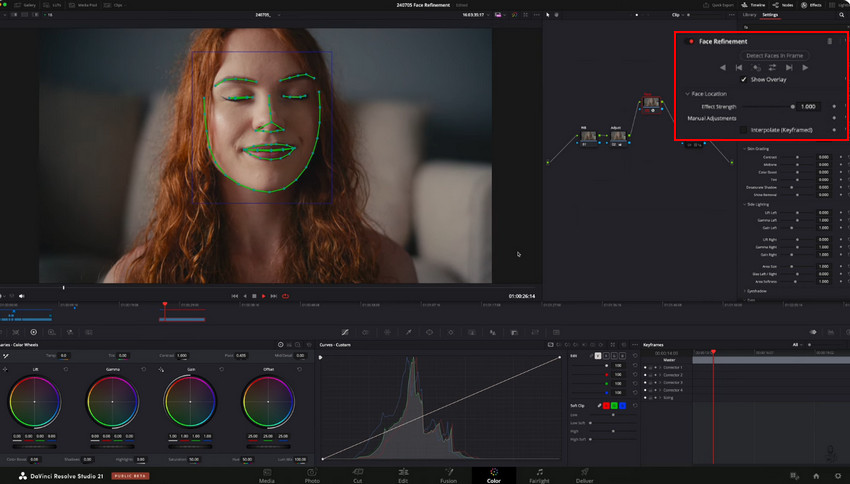
After then, wait for the face detection process to complete. Once it's complete, you can start adjusting specific areas.
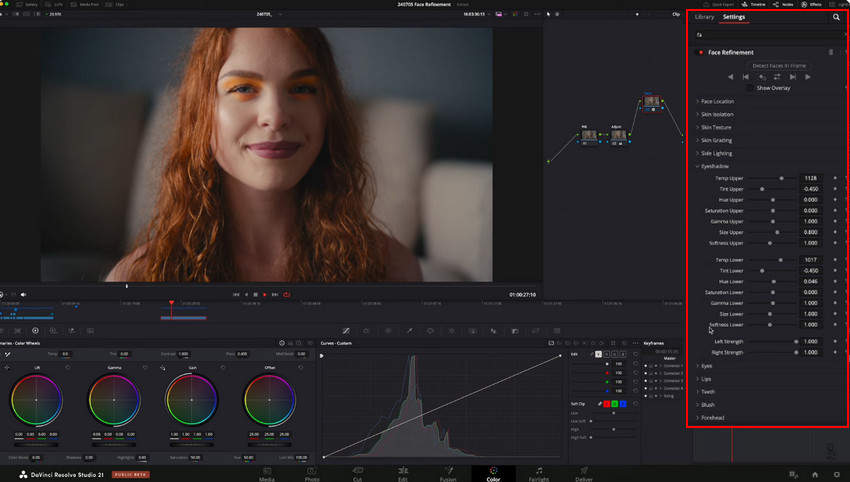
- Eyes: Increase sharpness and contrast for clearer definition and focus; optional catchlight enhancement.
- Skin: Reduce texture for smoother appearance while preserving detail; balance luminance for even tones.
- Dark Circles / Under Eyes: Gently reduce shadow depth and adjust midtones to avoid a flat or unnatural look.
- Lips: Slightly boost saturation and warmth for a healthier, more natural color.
Step 3. Clean Up Skin Imperfections Through AI Blemish Removal
Once the overall look is established, use AI Blemish Removal to address minor imperfections such as acne and spots. Ensure these adjustments remain subtle to preserve a natural texture and avoid an over-processed appearance.
Step 4. Adjust Age or Facial Characteristics (Optional)
For more specific creative needs, you can apply stylistic changes via the AI Face Age Transformer. This allows you to subtly add or reduce wrinkles and adjust facial fullness—an optional step ideal for storytelling or character-driven projects.
Step 5. Fine-Tune Facial Shape and Balance
As an optional final touch, you can use the AI Face Reshaper to fine-tune facial proportions and feature positioning. This tool is perfect for subtly enhancing symmetry or structure, but should be applied sparingly—minor adjustments typically yield the most natural results.
Step 6: Review and Export
Review your work by toggling the adjustments to ensure a consistent, natural look across all frames. Perform any final intensity tweaks to maintain visual balance throughout the clip.
Once finalized, head to the Deliver page to select your export format (e.g., H.264 or ProRes). Add the project to the render queue and export your final result.
Before & After: What Face Enhancement Actually Changes
Not sure what difference face enhancement really makes? This is exactly what you can expect when using these professional tools in DaVinci Resolve to achieve a polished, high-end finish before rendering your final output. Keep in mind that results may vary depending on your adjustment settings, original image quality, and creative intent.
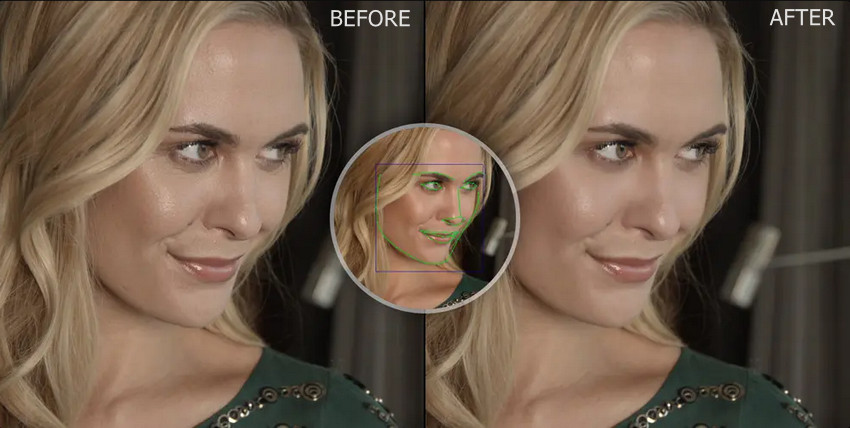
Before: Skin texture may appear uneven with visible pores, minor blemishes, and slight discoloration. The overall tone is flatter, and the facial structure lacks defined depth.
After: Following a natural AI face refinement in DaVinci, the skin is smoothed while explicitly retaining natural pores and texture. Facial contours are subtly lifted and defined, producing a balanced, realistic, and polished finish.
Still Blurry Faces? The Missing Step to Restore Real Detail
Face enhancement should improve clarity and balance without overdoing it. Otherwise, it can easily result in plastic-looking skin, lost texture, or overly harsh contrast. Tools like Face Refinement in DaVinci Resolve are designed to preserve a natural look by separating skin texture from color.
But here’s the key limitation: when your source images suffer from real detail loss—such as blur, low resolution, or compression artifacts—DaVinci Resolve's enhancement tools can only enhance what’s already there, not recreate what’s missing.
On top of that, advanced features like Face Refinement are only available in the paid DaVinci Resolve (priced at $295), which may not be ideal if your main goal is simply to restore facial detail.
This is where AI-powered solutions like Aiarty Image Enhancer become a smarter next step. Instead of just adjusting pixels, it reconstructs facial details, restores clarity, and brings back natural textures—making it an efficient complement before or after your editing workflow.
When Face Tools Aren’t Enough: Try Aiarty Image Enhancer
For cases where standard face enhancement reaches its limits such as blurry or low-resolution images, tools like Aiarty Image Enhancer can serve as a complementary solution. Instead of focusing only on adjustment, it helps improve underlying image quality, making facial details clearer before or after editing in DaVinci Resolve..
Where Aiarty Image Enhancer Works Best for Face Enhancement
- Restoring blurry or soft facial details with improved clarity and definition.
- Enhancing low-resolution portraits while preserving natural texture.
- Improving overall image quality before applying further color or beauty adjustments in post-processing.
- Automatically enhancing images in batch with minimal manual input and no learning curve.
How to Enhance Faces with Aiarty Image Enhancer
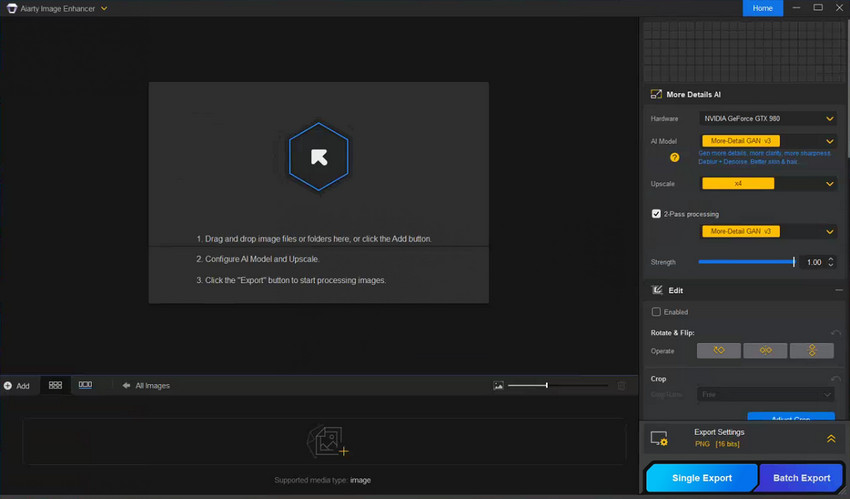
Step 1: Import Your Image
Import your portrait or face image into the software. It works best with images that need clarity improvement or detail recovery.
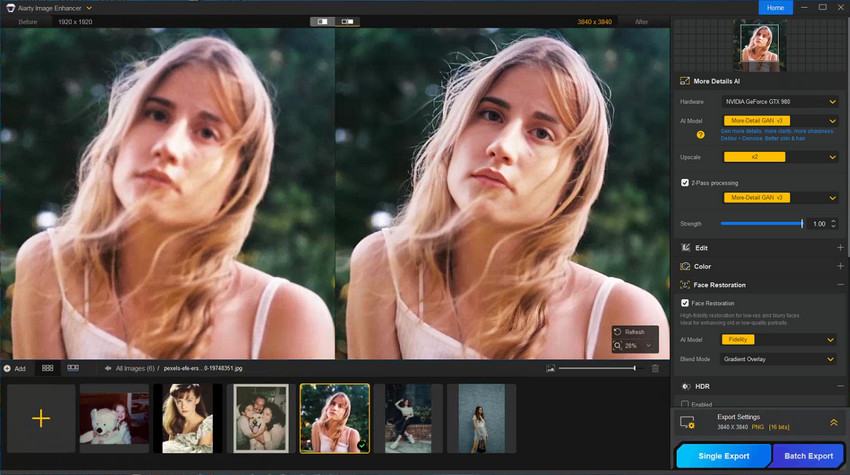
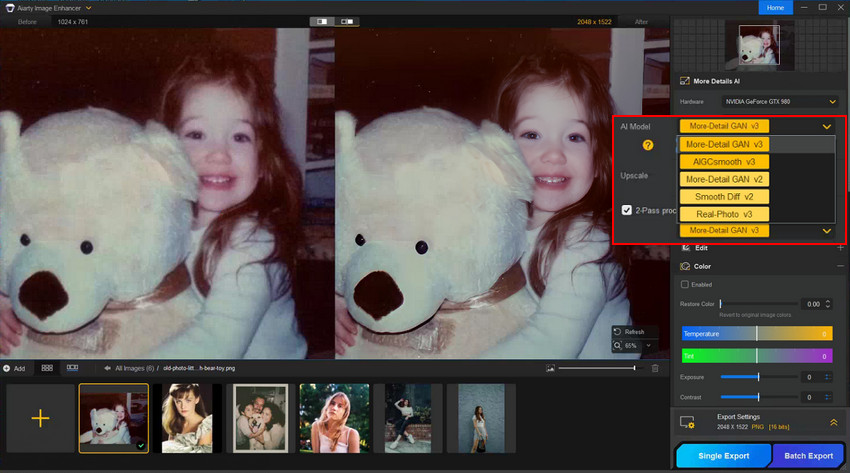
Step 2: Choose an AI Enhancement Model
Select an AI model designed for sharpening and detail enhancement. More-Deatil GAN v3 is suggested to recover facial features such as eyes, skin texture, and edges.
Step 3: Decide the Upscale Level
Drop down the Upscale list to decide what high resolution you want to convert your low-res image to, from x1 to x8, standard resolution up to 32K.
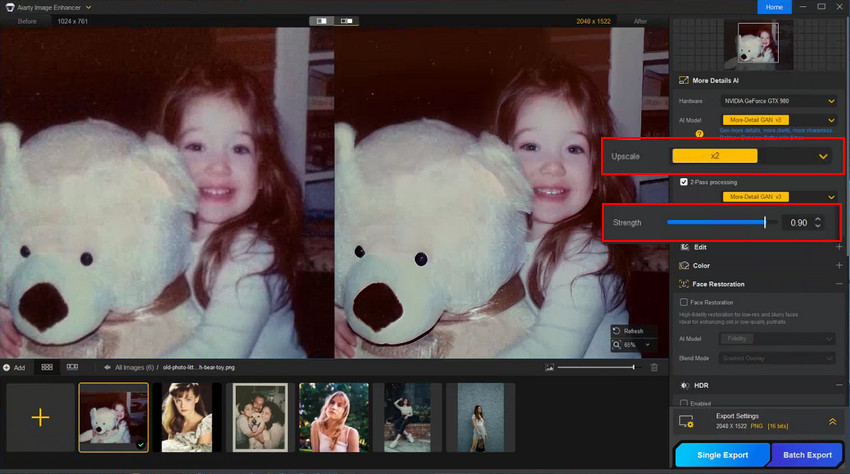
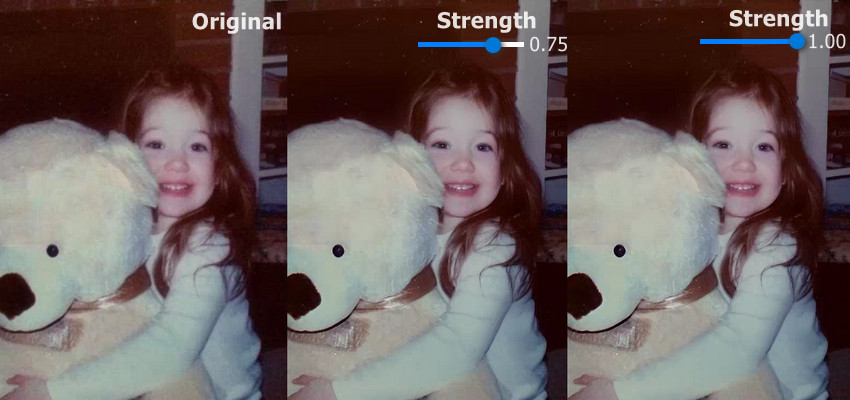
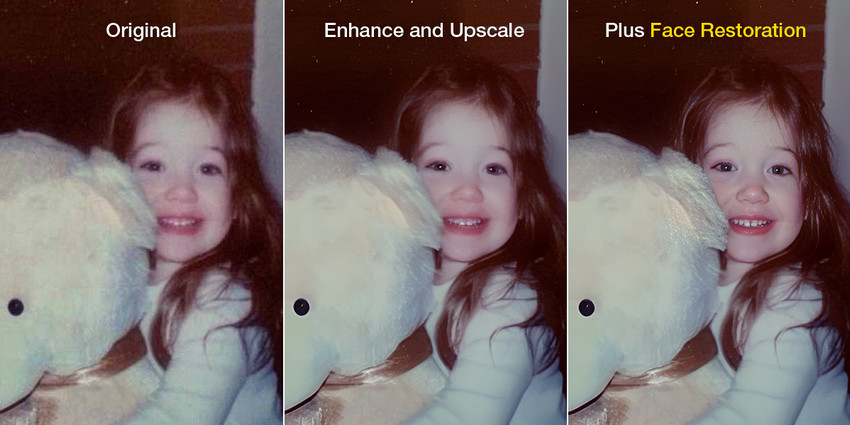
Once complete, the AI face enhancer automatically upscales the image while stripping away background blur and noise. To prevent a 'waxy' AI appearance, simply adjust the Strength slider until you achieve a perfectly natural and realistic finish.
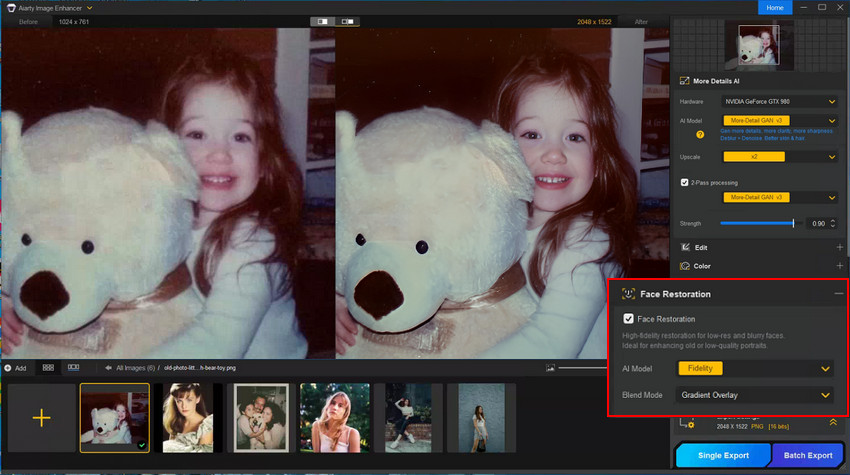
Step 4: Enable Face Restoration
For best practice, always compare the toggle between 'Face Restoration' on and off. If you need a more refined look, enabling 'Face Restoration' with the 'Fidelity' module is the ideal choice. This combination ensures the highest level of detail while maintaining a realistic, high-fidelity finish.
Step 5: Fine-tune the Color (Optional)
Enable the 'Color' option, then you're able to adjust contrast, saturation, highlight, shadow, tint, temperature and more in Aiarty Image Enhancer. Of course, you can refine the color grading in Davinci Resolve as well.
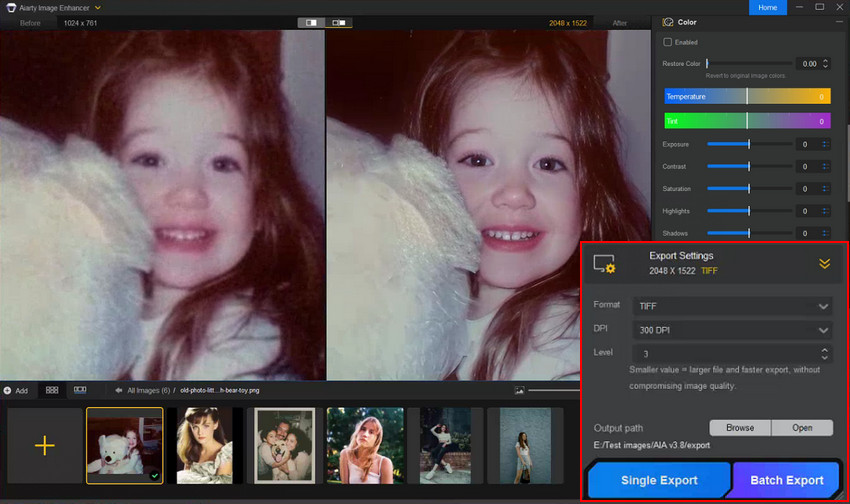
Step 5: Export
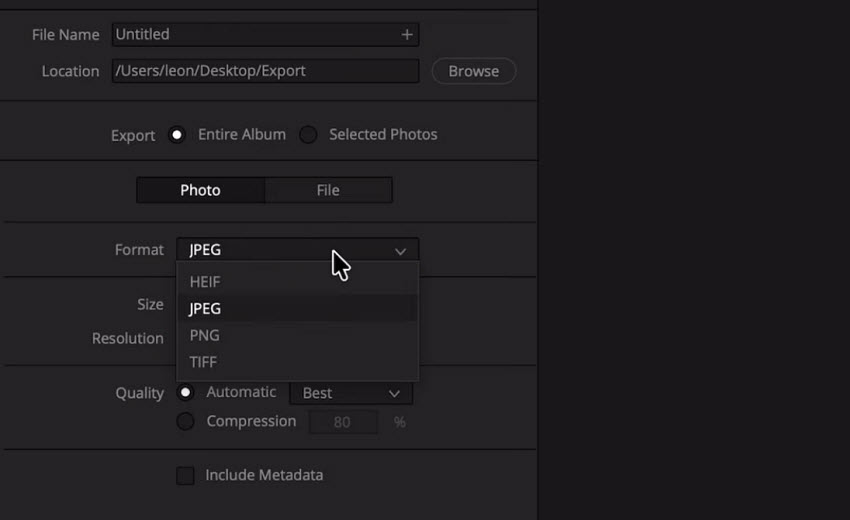
Expand the 'Export Settings' panel, choose the output format (PNG, JPG, TIFF, DNG), DPI, quality etc. Then click 'Single Export' or 'Batch Export' to save the enhanced image.
Check Aiarty Image Enhancer vs Davinci Resolve Photo in face enhancerment
Unlike traditional face enhancement tools that adjust appearance, Aiarty Image Enhancer helps improve image quality at the detail level, making it particularly useful when the original footage or image lacks clarity.
When combined with DaVinci Resolve, this approach allows you to restore detail first, then refine and enhance for a more polished result.
Need better face detail? Try Aiarty Image Enhancer for quick, AI-powered face enhancement.
 DaVinci Resolve Face Enhancement FAQs
Yes. DaVinci Resolve includes tools like Face Refinement, beauty adjustments, and AI-powered features that help improve facial appearance and detail.
Yes. You can use manual tools such as Power Windows, Qualifier, and color adjustments to enhance faces, although it requires more time and precision.
DaVinci Resolve can improve the appearance of faces, but it cannot fully restore lost detail in blurry or low-resolution images.
For more advanced results, AI-powered tools like Aiarty Image Enhancer can reconstruct facial details, reduce blur, and enhance clarity more effectively, especially when working with low-quality or compressed images.
For restoring low-quality or blurry faces, AI-based tools are often more effective than traditional editing software, as they can reconstruct missing details rather than only adjust appearance.
DaVinci Resolve does not have a one-click beauty filter, but tools like Face Refinement and skin adjustments can achieve similar results with more control and natural-looking output.
You can smooth skin using Face Refinement or manually by adjusting Midtone Detail, blur, or noise reduction. The key is to keep adjustments subtle to preserve natural skin texture.
You May Also Like
This post was written by Brenda Peng who is a seasoned editor at Digiarty Software who loves turning ordinary photos into extraordinary works of art. With AI assistance for brainstorming and drafting, the post is reviewed for accuracy by our expert Abby Poole for her expertise in this field.