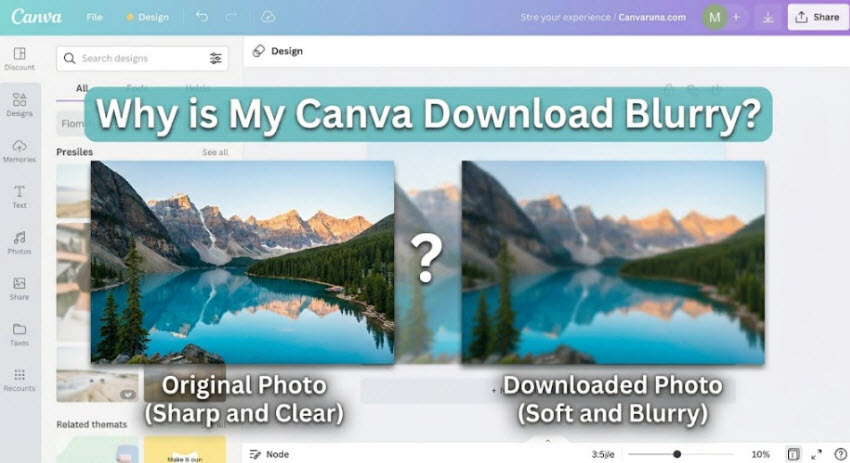
Why Is My Canva Download Blurry? 6 Fixes for Sharp, High-Quality Exports
You've spent hours perfecting your design in Canva. Everything looks crisp and professional inside the editor. But the moment you download it, the image suddenly appears pixelated, fuzzy, or low quality. This is one frustrating roadblock that many creators face at the very last step of their design process: Why is my Canva download blurry? 、
The good news is that blurry Canva downloads usually have a specific cause, and in most cases, they're easy to fix. In this guide, we'll explain why Canva savings become blurry, how to fix blurry Canva images, and what to do when Canva's export settings aren't enough.
Quick Takeaways
- Small canvas sizes often cause blurry Canva downloads. Always design at the correct final dimensions.
- Low-resolution source images remain low quality and look pixelated when enlarged in Canva.
- Export Canva images in PNG and PDF Print preserve more detail, while JPG compression can reduce sharpness.
- Social media platforms may compress images, making a sharp download appear blurry online.
- Canva’s built-in upscaler may not fully restore detail from very small or heavily compressed images.
- Browser or rendering issues can sometimes impact exports; clearing cache or switching browsers may fix unexpected blur.
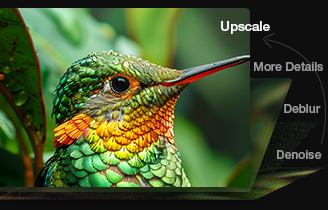
- AI upscaling tools like Aiarty Image Enhancer can recover blurry Canva downloaded images.
Why is Canva Download Blurry and How to Fix?
Seeing a blurry export after spending hours designing can be frustrating. When you’re wondering "why is my Canva download blurry," several factors can affect the final quality of your design, from low-resolution source files and small canvas sizes to export compression and social media recompression. Let's look at the most common reasons Canva downloads appear blurry and the best ways to restore sharp, professional-looking results.
1. Your Canva Design Is Too Small
One of the most common reasons people search for "why are my Canva downloads blurry" is that the original design wasn't created at a large enough size.
Canva can make a small design look sharp inside the editor because it automatically adjusts the preview. However, the downloaded file still contains a fixed number of pixels. If a 500 × 500 px design is later displayed on a large monitor, used in a presentation, or printed, those pixels must stretch to fill a larger area, resulting in a blurry or pixelated Canva image.
This often happens when users create a quick social media graphic and later repurpose it for a different platform or a larger format. What looks fine as a small web graphic may not have enough resolution for a YouTube thumbnail, LinkedIn banner, or poster.
To fix blurry Canva images, always design with the final output size in mind. Canva Pro users can enlarge existing projects with Magic Switch, while free users may need to recreate the design on a larger canvas. Starting larger is almost always safer than trying to enlarge a finished design later.
2. Your Source Images Are Low Quality
If your canvas size is correct but the downloaded Canva image still looks fuzzy, the problem may be the assets you've uploaded.
Canva cannot create detail that doesn't exist in the original image. Screenshots, WhatsApp photos, social media downloads, website thumbnails, and heavily compressed pictures often contain far fewer pixels than users realize. Once those images are enlarged inside a Canva project, the lack of detail becomes much more obvious.
For example, placing a small Facebook image into a large poster design may look acceptable during editing, but after export the image can appear soft, pixelated, or lacking texture. This is why many users asking "why are my Canva images downloading blurry" are actually dealing with low-resolution source materials rather than a Canva export problem.
The best solution is to start with high-resolution images whenever possible and avoid stretching uploaded photos far beyond their original size.
Pro Tip: Before adding low-resolution photos to Canva, enhance them with Aiarty Image Enhancer. Improving image quality at the source can help reduce pixelation and prevent blurry Canva downloads later in the design process.
3. Your Export Settings Are Reducing Image Quality
Sometimes the design itself is fine, but the export settings are causing quality loss.
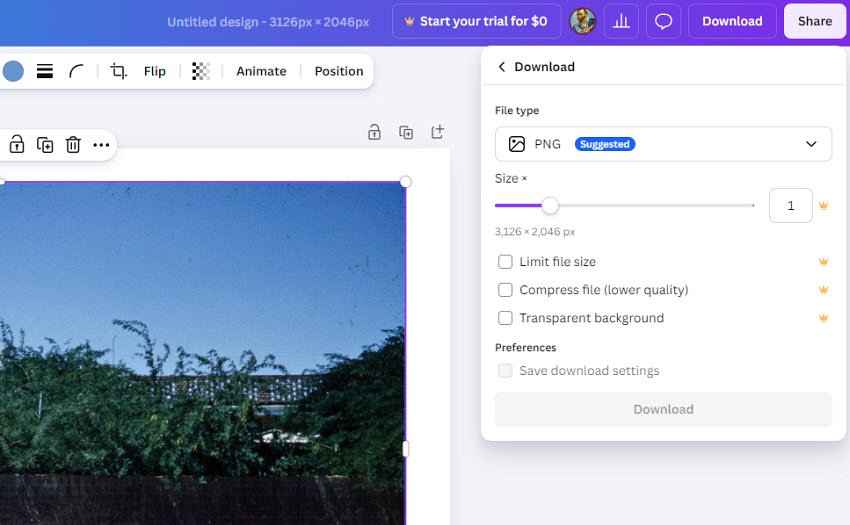
Many users automatically download designs as JPG because the file size is smaller. However, JPG uses lossy compression, which removes image data during export. This can lead to blurry Canva downloads, especially in text-heavy or logo-based designs.
Even PNG exports aren't immune. Canva applies compression to keep files manageable, and some users have reported that transparent PNG exports can produce slightly softer edges around shadows, gradients, or glowing effects. The issue becomes more noticeable in designs with multiple layers, effects, and fine details.
If image quality is important, export as PNG instead of JPG whenever possible. For printed materials, PDF Print usually produces the sharpest results. If you're exporting a transparent logo or graphic, testing both transparent and non-transparent versions can also help identify whether transparency processing is affecting quality.
4. Social Media Platforms May Be Compressing Your Image
An image can look sharp on Canva but blurry after being uploaded to Instagram, Facebook, LinkedIn, Pinterest, or X. That's because most social media platforms automatically compress uploaded images to reduce storage and improve loading speeds.
This often leads users to believe Canva exported a low-quality file when the real culprit is platform compression. In fact, many searches for "why is Canva saving blurry" originate from users noticing quality loss after posting rather than after downloading.
To minimize compression, upload images at the recommended dimensions for each platform and avoid repeatedly downloading, editing, and re-uploading the same file. Exporting at a slightly larger size can also give social platforms more image data to work with, helping preserve detail after compression.
5. Canva's Built-In Upscaler Has Limitations
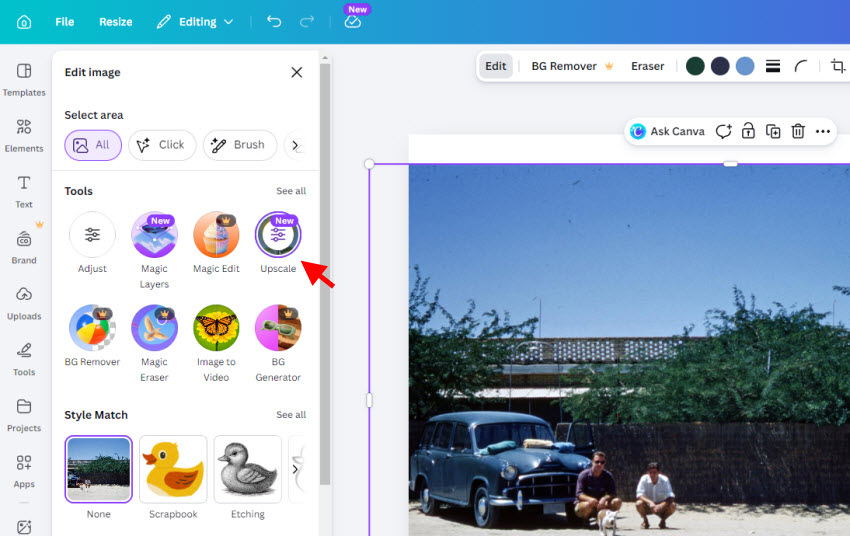
Canva’s newer image upscaler, now integrated into its Magic Studio tools, replaces the older standalone “Image Upscaler” app. This change has led to mixed results. Some users feel that the new Canva upscale image results are less sharp than the older version, especially when working with low-quality inputs. Instead of restoring genuine detail, the upscaler may produce over-smoothed or slightly artificial-looking results, which leads users to wonder why their Canva image is blurry even after enhancement.
This doesn't necessarily mean the tool is ineffective, it simply has limitations when the original image lacks enough information to reconstruct realistic details. If the enhancement actually makes an image look worse, the issue is usually the quality of the source file rather than the Canva design itself.
In other words, to upscale images in Canva without blurriness, try dedicated AI enhancement tools, especially when significant enlargement is required.
6. Browser or Rendering Issues Can Affect Downloads
Because Canva runs largely inside your browser, occasional rendering issues can sometimes affect exports.
A corrupted cache, hardware acceleration conflict, temporary server issue, or browser extension can occasionally cause Canva to display or export a lower-quality version of a design. While this isn't a frequent issue, it appears regularly in Canva Community discussions and Reddit troubleshooting threads.
If your Canva image starts downloading blurry despite using the same settings as before, try clearing your browser cache, disabling hardware acceleration, switching browsers, or downloading the file from Canva's desktop application instead. In many cases, users find the problem disappears immediately after changing browsers or restarting Canva.
What to Do When Canva Download Still Looks Blurry?
If you've already tried adjusting canvas size, switching export formats, and checking compression settings, but the result still doesn’t look sharp, what can you do?
You can fix blurry Canva images using AI image enhancer like Aiarty Image Enhancer. Instead of simply enlarging an image, it uses AI to reconstruct missing details, improve texture clarity, and reduce pixelation caused by low-resolution sources or heavy compression.
This makes it particularly useful for Canva workflows where designs need to be exported and then scaled up further for print or marketing use. After downloading from Canva in high quality (PNG or PDF), Aiarty can be used to upscale the final image while preserving edges, sharpening details, and improving overall visual clarity.
For users who frequently run into issues like Canva download blurry or notice that exported designs lose sharpness at larger sizes, AI upscaling provides a practical last step to restore quality when Canva’s built-in tools are no longer enough.
How to Fix Blurry Canva Images Using Aiarty Image Enhancer (Step-by-Step)
Step 1. First, download your design from Canva using the best possible settings. Then launch Aiarty Image Enhancer and import the blurry Canva downloads into it.
Step 2. Choose an AI model (for most images, just stay with the More-Detail mode). Then select an appropriate scale (for example 2× or 4× depending on your use case). If you don’t want to increase resolution but only to fix the blurry Canva images, just choose 1x.

Step 3. Compare the original and enhanced versions. Try different models to see which fix blurry Canva downloaded images with best result. Then click Export to save.
Final Words
Blurry Canva exports are usually not caused by a single issue, but by a combination of factors such as canvas size, source image quality, export settings, compression, and post-upload processing on social media platforms. Once you understand where the quality loss happens, it becomes much easier to fix.
In most cases, following the correct workflow, like using the right canvas dimensions, exporting in PNG or PDF, and avoiding low-resolution assets, will already solve the majority of cases where users ask why is my Canva download blurry or why does Canva save blurry after export.
However, when the design still loses clarity due to limited source resolution or heavy scaling needs, AI-based tools like Aiarty Image Enhancer can provide an extra layer of quality recovery. It’s not a replacement for good design practice, but a practical final step when you need sharper results for print, marketing, or large-format use.
 FAQ
FAQ
To avoid blurriness and get the best possible quality from Canva, choose the appropriate export format for your project. For digital graphics, download as PNG instead of JPG, as PNG preserves more detail and avoids lossy compression. For print materials, PDF Print usually delivers the sharpest results. It's also important to create your design at the correct dimensions from the start, since exporting a small canvas at high quality cannot add missing pixels.
Start by exporting the image as PNG rather than JPG and using the highest available resolution. You can also try the built-in upscaler in Canva and it may help increase resolution and improve clarity after export.
Images typically lose quality and become blurry in Canva when low-resolution files are enlarged beyond their original size. Compression during export, JPG file formats, transparent effects, and multiple design edits can also contribute to quality loss. In many cases, the issue starts with the source image rather than the Canva design process itself.
Canva's editor displays a preview that may not perfectly match the final exported file. Differences can occur due to compression, font rendering, transparency effects, color profiles, or export settings. Social media platforms may also apply additional compression after upload, making the final image appear different from both the editor and the downloaded version.
Canva offers built-in image editing tools that can slightly improve sharpness, but they work best on moderately soft images. For heavily pixelated or low-resolution photos, increasing the sharpness slider alone usually won't recover lost detail. A better approach is to start with higher-quality source images or use an AI image enhancer to restore detail before or after editing in Canva.
You May Also Like
This post was written by Brenda Peng who is a seasoned editor at Digiarty Software who loves turning ordinary photos into extraordinary works of art. With AI assistance for brainstorming and drafting, the post is reviewed for accuracy by our expert Abby Poole for her expertise in this field.