Why is My YouTube Video Blurry? Fixed
Having spent hours filming and editing a crisp 1080p or even 4K video, only to get a blurry video on YouTube that ruins everything? In fact, "Why is my YouTube video blurry?" is a common issue that frustrates a great number of creators, from beginners to seasoned YouTubers. If you go to Reddit, you can easily find posts asking "why is every youtube video and short blurry", "why is YouTube blury on my TV", and the like.
The good news? In most cases, the blurry YouTube video can be fixed with the right tweaks. In this guide, we will break down the main reasons and solutions, covering the obvious fixes and the specific settings and strategies that pro creators use to upload high quality videos on YouTube.
Why is My YouTube Video Blurry? [6 Reasons]
YouTube videos become blurry due to a number of factors, occurring at three different stages: when you record and render the video, during YouTube's internal processing, or on the viewer's end. Understanding each of these stages is the key to preventing it.
1. Low Source Video Quality
If the source video is recorded in low resolution (e.g., 720p) or with a low bitrate, or under poor conditions, like low lighting and shaky movements, it look in low quality at the start. YouTube won’t magically make it sharper or add details. So the upload videos may look blurry on YouTube or the YouTube video may look blurry on TV or large screens.
2. Improper Rendering Settings
Even a HD 1080P video can look blurry on YouTube if you use the wrong bitrate. A common mistake is exporting a high-quality video with a low bitrate. The bitrate dictates how much data is used per second of video; a low bitrate results in a blurry, blocky image, especially during scenes with a lot of movement.
Encode videos using the best YouTube video quality settings, like use a bitrate of 8-12 Mbps for 1080P videos and 35-50 Mbps for 4K videos.
3. Wrong Aspect Ratios
If your video is in the incorrect aspect ratio, YouTube may add black bars to it, stretch, or scale it. That will result in blurry video on YouTube or Shorts. Make sure your video is edited to fit the correct YouTube video size, namely, use a standard aspect ratio 16:9 for most videos or 9:16 for YouTube Shorts.
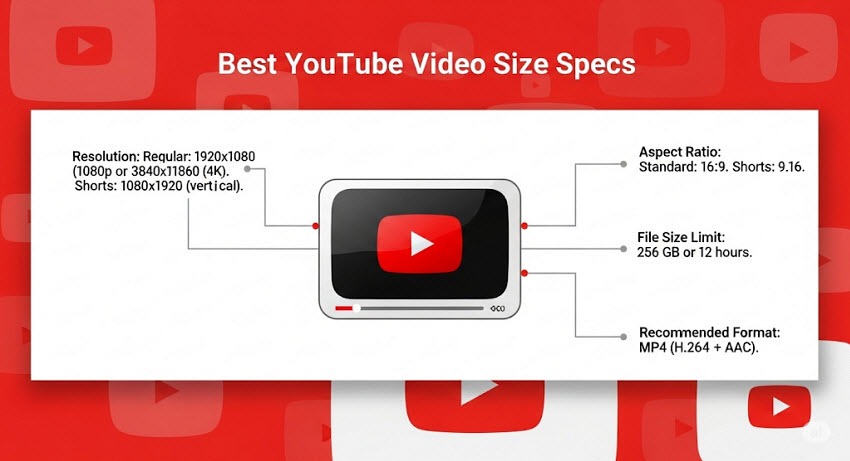
FYI: To upload HD videos to YouTube, here we recommend the best YouTube video settings (check detailed YouTube video sizes here):
- Use 1920x1080 (1080p) 8-12 Mbps or 3840x2160 (4K) 35-50 Mbps for the best quality.
- 16:9 aspect ratio for widescreen upload and vertical videos (for Shorts) use 9:16.
- Use MP4 (H.264 + AAC) or H.265.
- No less than 8 minutes.
4. YouTube is Still Processing
Your YouTube video may look blurry and low quality as in 360p or 480p once you check if immediately after uploading, this is because YouTube haven’t finishing processing it. When you upload a video to YouTube, it first processes a low-resolution version so it can be viewed quickly. The HD or 4K versions are processed later, which can take minutes—or even hours—depending on video length and resolution.
5. YouTube's Aggressive Compression
This is the biggest reason that causes blurry videos on YouTube/Shorts. Every video you upload to YouTube will be re-encoded to save storage and ensure smooth playback. Sometimes, YouTube applies heavy compression to all uploads to save bandwidth. This re-encoding process, particularly with the AVC1 codec, can introduce noticeable blur. This compression is most noticeable on videos uploaded at 1080p and lower, making the YouTube video even more blurry.
6. Slow Internet Connection
YouTube's player is designed to automatically adjust video quality based on the viewer's internet speed. If their connection is slow or unstable, the player will automatically switch to a lower resolution (e.g., 360p or 480p) to prevent buffering. So your video on YouTube looks blurry.
How to Fix Blurry YouTube Videos?
Based on the above reasons to “why is my youtube video blurry”, below we have the most effective fixes to improve blurry YouTube videos.
1. Enhance the Original Video Quality Before Uploading
YouTube provides better compression to higher-resolution videos. Before you even hit the upload button, start with the highest-quality source possible can give YouTube more detail to work with and avoid blurry YouTube. That’s where Aiarty Video Enhancer comes in. This AI video enhancer is designed to improve YouTube video quality to match YouTube’s best resolution, aspect ratio, and quality standards so your content looks razor-sharp on any device.
With Aiarty Video Enhancer, you can:
- Upscale low-resolution footage (e.g., 480p → 1080p or even 4K) to match YouTube’s recommended quality.
- Remove video noise from low-light or high ISO shots so your visuals stay clean and professional.
- Correct colors and contrast for richer, more vibrant playback.
- Adjust aspect ratio to fit 16:9 widescreen or vertical formats without awkward black bars.
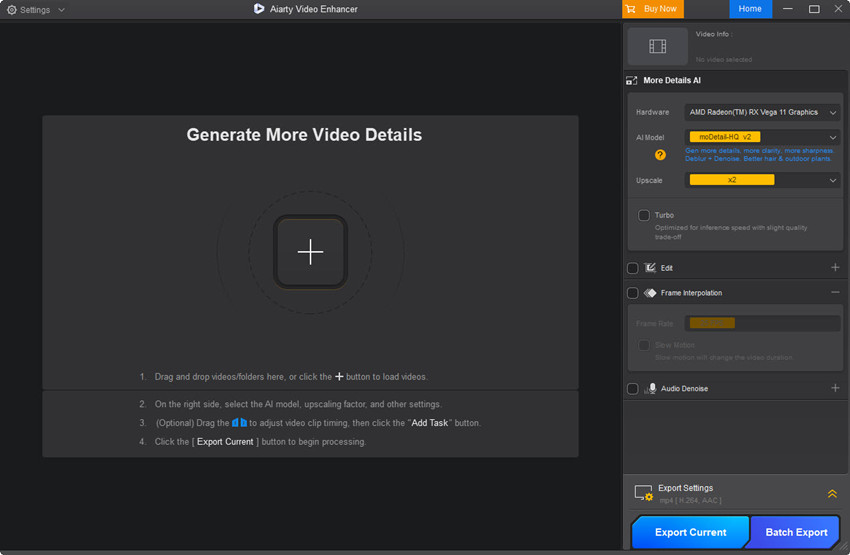
How to Use Aiarty Video Enhancer to Fix Blurry YouTube Videos
Here are the steps to use Aiarty to optimize your video for a sharp, clear YouTube upload without blur:
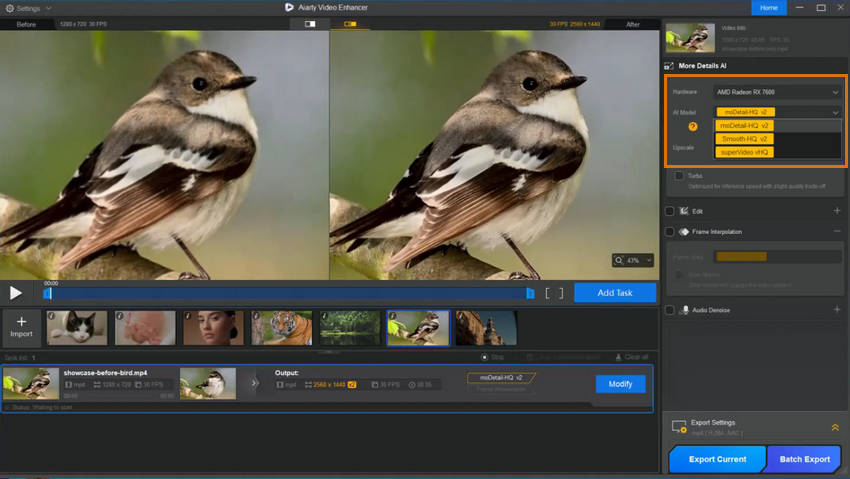
Step 1. Import Your Video: Open Aiarty and import your low-quality video file.
Step 2. Choose an AI Model: Select an AI model like moDetail-HQ v2 for fine details or Smooth-HQ v2 for general footage to intelligently remove video blur and noise.
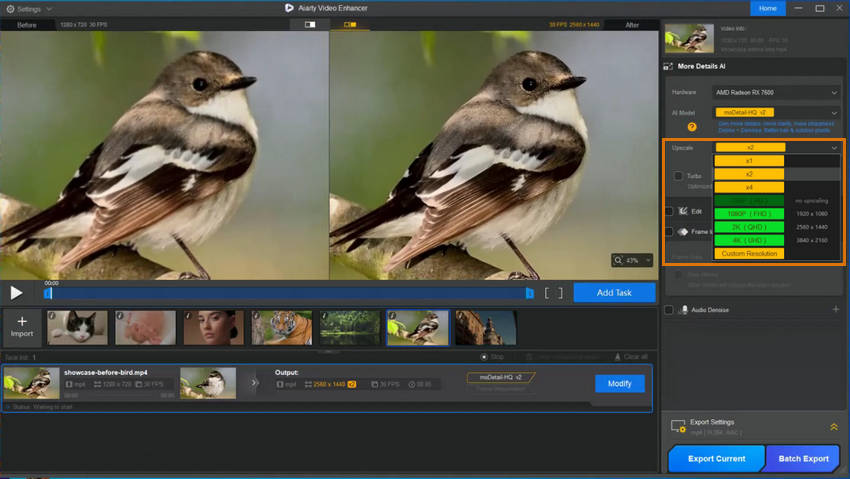
Step 3. Upscale to 4K: Set the output resolution to 3840x2160 (4K). This is a critical step, as it forces YouTube to use the superior VP9 codec, which results in a much sharper video.
Step 4. Adjust Color: Use the built-in color correction controls to fine-tune the contrast, exposure, and saturation to ensure your video's colors are vibrant and consistent.
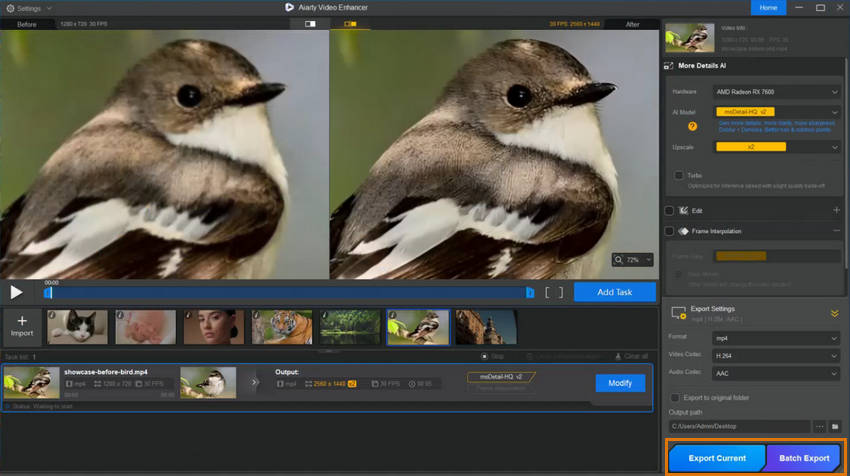
Step 5. Export: Export the video in YouTube-preferred formats (MP4 with H.264 or H.265 encoding), and you'll have a high-quality 4K file ready for upload that will retain its clarity on YouTube.
Export videos in HD, 2K, or 4K and upload to YouTube in desktop mode can help maintain video quality. You ensure that YouTube’s compression won’t ruin your hard work — your audience will see your YouTube videos on TVs, mobiles without blur.
2. Manually Change the Video Quality
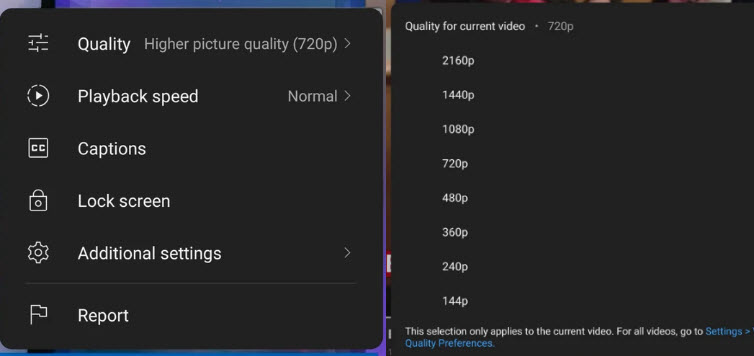
The YouTube player's default "Auto" setting can sometimes default to a low resolution to prevent buffering, even on a fast internet connection. Tell your viewers to click the gear icon in the video player and manually select 1080p or 4K to get the best picture. For youtube click the gear icon for settings and make sure playback is set to the best quality possible
Note: With YouTube Premium, you can watch videos in 1080p Premium on Apple phones and tablets.
Also learn: how to change video quality on iPhone
3. Check Your Internet Speed
A viewer's slow or unstable internet connection will cause the video to automatically drop to a lower resolution. This is not a problem with your video, but with their bandwidth
4. Wait for Processing to Finish
After uploading, your video will be available to watch, but often only in lower resolutions like 360p or 480p. The higher-quality versions (720p, 1080p, and 4K) take time to process. Be patient and wait a few hours before you share your video and check its final quality.
5. Try a Different Browser or Device
Some browsers handle video codecs differently (e.g., VP9, AV1, H.264). On PC, try Chrome, Edge, or Firefox.On Mac, Safari is often better optimized. Make sure your browser is updated to the latest version.
Corrupted or outdated cache can cause playback glitches. Clear cache in your browser/app settings, then reload the video.
Conclusion
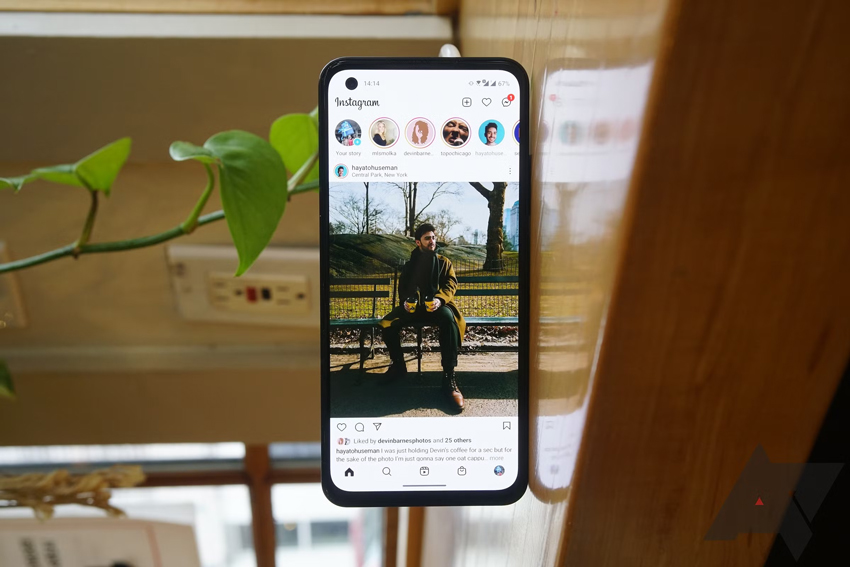
Although Instagram provides tools like filters, stickers, and text overlays, doing too much editing inside the app can reduce final quality. Instagram may reprocess or re-encode the video after adding multiple effects, which can soften sharpness or distort colors. It's better to complete all your edits in your video editor before uploading the final version.
 FAQs
FAQs
A video can appear blurry on YouTube for several reasons, often related to your internet connection or the viewer's settings. YouTube automatically adjusts video quality to prevent buffering, so if your internet speed is slow or unstable, the player will default to a lower, blurrier resolution. It's also possible that the video was uploaded with a low resolution to begin with, or that the viewer has manually set the quality to a low-resolution option in the video player's settings.
When you upload a 1080p video, it may initially only be available in 360p because YouTube processes videos in stages. The platform makes lower resolutions available first to allow for quick playback. High-definition (HD) and higher-quality versions (720p, 1080p, 4K) take significantly more time to process. The final, high-quality version of your video might not be ready for a few hours after the upload is complete, especially for longer videos or during peak upload times.
Video distortion on YouTube often occurs during the upload and processing phase due to compression. To handle the massive amount of video on its servers, YouTube compresses every video file. If the original video file has a low bitrate or an unusual aspect ratio, the compression process can introduce unwanted artifacts, such as blockiness or color banding, which make the video look distorted. In some cases, a corrupted browser cache or outdated video drivers on the viewer's device can also cause temporary playback glitches.
You May Also Like
- Neat Video Denoiser - How This $250 Plugin Saves Noisy Footage

- Best Video Restoration Software to Restore VHS/Old Videos to HD
- Where and How to Download Topaz Video AI Crack
- How to Fix Grainy Video: Eliminate Noise
- Video Script Timer - Calculate Video Duration
- Portrait Retouch – Free Face Enhancer Online
This post was written by Brenda Peng who is a seasoned editor at Digiarty Software who loves turning ordinary photos into extraordinary works of art. With AI assistance for brainstorming and drafting, the post is reviewed for accuracy by our expert Abby Poole for her expertise in this field.