Why Is My Video Quality So Bad & Fix It from Recording to Post
Quick Answer: Low video quality is usually caused by low resolution, compression, poor lighting, or incorrect export settings. The most effective way to fix blurry or pixelated videos is to use an AI video enhancer like Aiarty Video Enhancer, which can upscale resolution, remove noise, and restore detail automatically.
Your video looks blurry, washed-out, or stuck at low resolution after uploading to YouTube, sending it by phone, or editing on your computer? You’re not alone. From poor lighting and unstable recording to platform compression, several factors can ruin video quality.
In this guide, you’ll learn why your video looks bad and how to fix it — using practical filming tips, export settings, and AI-powered enhancement tools like Aiarty Video Enhancer to bring out sharp 4K clarity without reshooting.
If your video looks blurry, pixelated, or low quality, try these quick fixes before diving into deeper troubleshooting.
- Check playback resolution first. Platforms like YouTube may default to 480p or lower even if higher quality is available.
- Re-export the video with higher bitrate. Low bitrate is one of the most common reasons for blurry or pixelated footage.
- Avoid excessive upscaling. Enlarging a small video can make details look softer instead of sharper.
- Reduce noise and compression artifacts. AI video enhancers can help restore detail and improve clarity in low-quality footage.
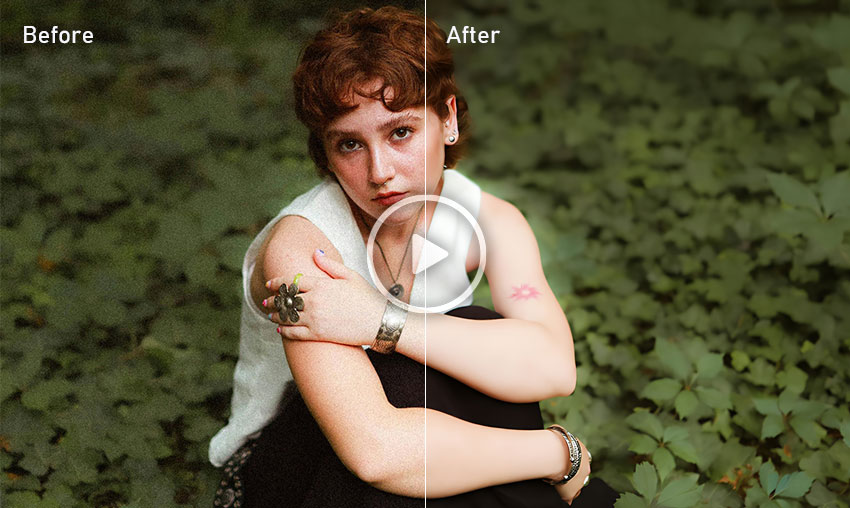
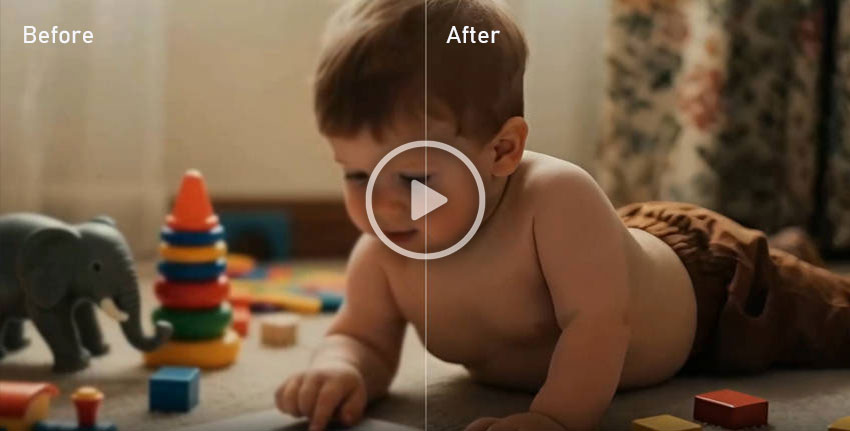
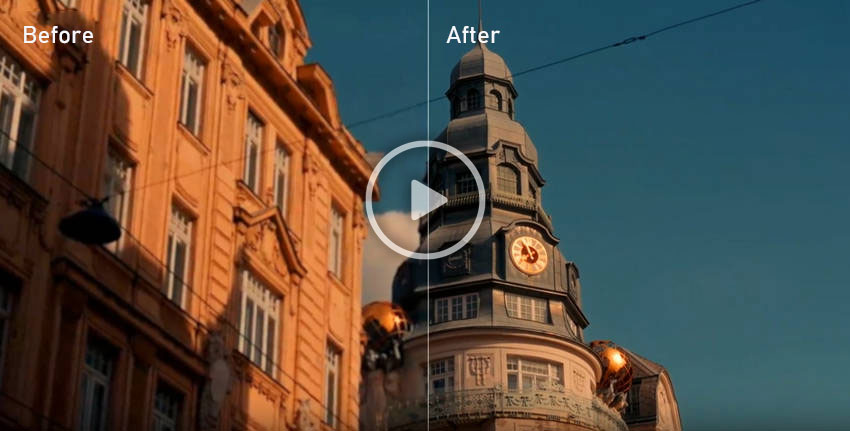
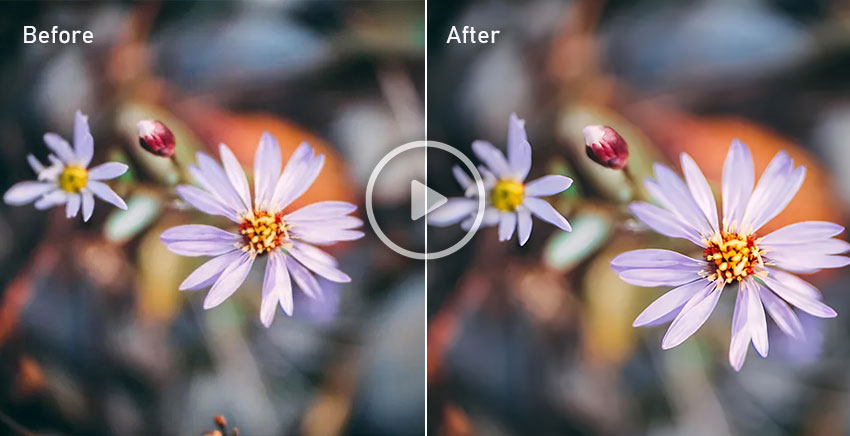
See how AI restoration can improve poor video quality:
Tools like Aiarty Video Enhancers can upscale resolution, reduce noise, and recover detail from heavily compressed footage. Download Aiarty to test how AI can restore blurry or low-quality videos.
Why Is My Video Quality So Bad?
Video quality issues typically stem from low resolution, excessive compression, inadequate lighting, or incorrect export configurations, even when the footage is recorded in HD. These issues can significantly reduce clarity, introduce noise, or make videos appear blurry and pixelated. To fix them efficiently, many users turn to AI tools like Aiarty Video Enhancer, which can automatically enhance clarity, reduce noise, and upscale videos to 4K.
Before choosing a solution, it’s important to understand how low-quality video actually appears. We’ll break down the most common visible symptoms of poor video quality and what they typically indicate.
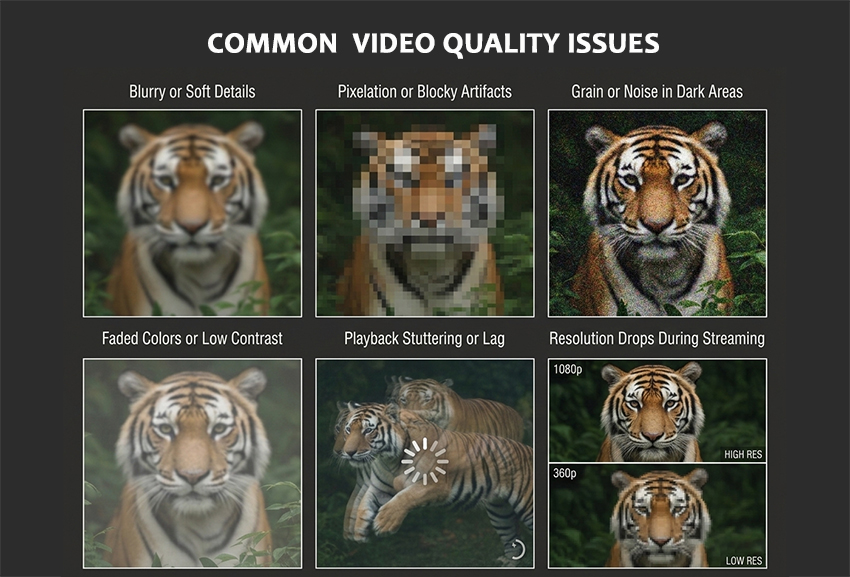
⚠️ Common Signs of Poor Video Quality
If you're not sure whether your footage has a quality problem, look for these common signs:
- Blurry or soft details: The image lacks sharpness even when the subject is in focus.
- Pixelation or blocky artifacts: Large squares or blocks appear in the image, especially during motion.
- Grain or noise in dark areas: Low-light scenes show visible speckles or digital noise.
- Faded colors or low contrast: The video looks washed out and lacks vibrant tones.
- Playback stuttering or lag: The video may freeze or skip frames during playback.
- Resolution drops during streaming: Platforms may automatically lower the playback quality to 360p or 480p.
If you notice one or more of these issues, your video likely suffers from poor quality. Several technical factors can cause these problems. In most cases, bad video quality results from a combination of recording limitations and processing decisions.
✅ Quick Summary: Why Your Video Quality Looks Bad
- Low resolution (480p / 720p)
- Heavy compression from platforms
- Poor lighting or camera settings
- Incorrect export bitrate
- Playback at low streaming quality
The fastest way to fix these issues is to use an AI enhancer like Aiarty Video Enhancer to improve video quality.
How to Fix Poor Quality Video in Recording
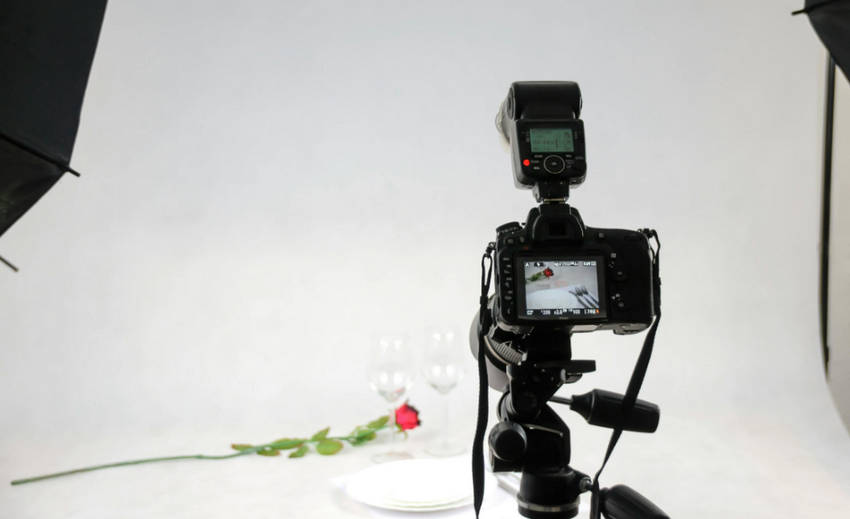
Improving video quality doesn’t always require post-production. Many issues can be avoided with better planning during filming. To capture clean, high-quality footage:
- Use natural daylight or softbox/LED lights to ensure your subject is well-lit, minimizing grain.
- Adjust your camera settings to record at the maximum resolution (1080p or higher) and appropriate frame rate (30fps or 60fps).
- Stabilize your shots using tripods, gimbals, or even phone mounts to reduce motion blur.
- Check your camera lens for smudges or dust before recording, as these can degrade clarity.
Even if your recording looks perfect, your video may still lose quality after uploading to YouTube. Let’s see why that happens—and how to fix it.
Why YouTube Videos Look Blurry (and How to Fix It)
One of the most common complaints is: “Why do my YouTube videos look bad after uploading?” Even high-resolution footage can appear blurry, soft, or washed-out after upload because YouTube applies heavy compression and processes videos with different codecs.
As a result, you may notice soft details, pixelation during motion, faded colors, or compression artifacts. In some cases, playback may also default to 480p or lower, especially before higher-quality versions finish processing or on slower connections.
1. Export and Upload in Higher Resolution
Always export your video at 1440p or 4K, even if your original footage is 1080p. This triggers YouTube’s VP9 codec, which offers much higher quality compared to the default AVC1 codec used for 1080p videos.
2. Increase Bitrate Before Upload
YouTube recommends at least 15 Mbps for 1080p and 35 Mbps for 4K. A higher bitrate reduces compression artifacts and keeps color detail intact after YouTube’s encoding.
3. Check Playback Resolution
When viewers complain your video looks blurry, it might be streaming in 360p or 480p by default. Remind them to switch to the highest available quality via the settings icon in the player.

4. Avoid Over-Editing and Color Mismatch
Over-saturation, low-contrast LUTs, or incorrect color profiles can make your footage appear washed-out online. Try uploading a short test clip to confirm how YouTube renders your colors before posting the full video.
How to Fix Bad Video Quality in Post Production with Aiarty
Even after optimizing lighting, bitrate, and recording settings, videos can still appear soft, noisy, or washed out—especially after compression or uploading. Compared to traditional editing tools that require manual adjustments, AI video enhancers offer a faster and more effective solution. Tools like Aiarty Video Enhancer can automatically restore clarity, reduce noise, sharpen details, and enhance color in one click, helping turn low-quality footage into clean, high-resolution video with minimal effort.
Key Features of Aiarty Video Enhancer:
- Effortless Resolution Upscaling: Transform 480p, 720p, or 1080p footage into stunning 4K automatically, with Step Mode for enhanced quality and reduced VRAM usage.
- Crystal-Clear Clarity: Eliminate noise, grain, and compression artifacts, especially in older or low-light videos.
- Unblur Video and Sharpen Every Detail: Correct motion blur and focus imperfections for sharper visuals.
- Optimized AI Models for Any Video: Choose from specialized AI models (moDetail-HQ v2, Smooth-HQ v2, superVideo vHQ) for diverse scenes like landscapes, human faces, dark scenes, and more, and optionally fine-tune colors for the best result.
- HDR & Color Adjustment: Convert SDR to HDR and adjust temperature, tint, contrast, saturation, shadows, highlights, and more for polished, vibrant footage.
- Blazing-Fast Performance: Utilize GPU acceleration for up to 3x faster rendering and instant results with Turbo Mode.
In-Depth Look at How Aiarty Enhances Video Quality
Denoising Grainy Videos
Low-light or underexposed clips often suffer from visible noise or grain. In Aiarty Video Enhancer, choose the superVideo vHQ model to automatically denoise and brighten dark areas while preserving natural textures. Compared to manual noise reduction in tools like DaVinci Resolve or Neat Video plugin, Aiarty does this in one click — no fine-tuning needed.
Learn More: How to Denoise Video in Premiere Pro >>
Sharpening Soft or Blurry Footage
If your footage looks soft or slightly out of focus, apply Aiarty’s moDetail-HQ v2 model. This model intelligently restores edge clarity and fine details, fixing motion blur or defocus without introducing halo artifacts. It’s ideal for outdoor footage, landscapes, and action scenes where clarity matters.
One-Click 4K Upscaling
Choose your target resolution — 1080p, 2K, or 4K — and let Aiarty handle denoising, sharpening, and upscaling all in a single export process. Powered by GPU acceleration and Turbo Mode, rendering can be up to three times faster. You can compare the before-and-after results in the Preview window, then export your enhanced video with clean, cinematic detail.

Restore Washed-Out or Dull Colors
Color fading and poor contrast are common after compression or editing. Aiarty’s Smooth-HQ v2 model enhances color vibrancy and tonal balance automatically, giving skin tones a more natural look and improving saturation without overdoing it. For creators used to manual color correction in Premiere Pro or DaVinci Resolve, this AI model saves hours of grading work. Additionally, Aiarty allows manual color adjustment, so you can fine-tune hue, saturation, and contrast exactly how you want, combining AI efficiency with full creative control.

Mask Compression Artifacts with Smart Enhancement
Compression from editing or social platforms often creates blocky or pixelated spots. Instead of applying heavy blur, Aiarty’s enhancement models automatically smooth compression noise while preserving edges — a huge advantage over traditional filters. You can preview side-by-side results instantly to ensure the balance looks natural.
Reframe and Crop Imperfect Areas (Optional)
Sometimes only part of the frame appears sharp or properly exposed. Before exporting, you can use Aiarty’s built-in preview and cropping tools to isolate and focus on the most detailed section of your video. Because Aiarty processes videos at 2× or 4× resolution, cropping or zooming in won’t result in noticeable quality loss, allowing you to highlight key areas while maintaining crisp, professional-looking visuals throughout the frame.
Step-by-Step Tutorial to Enhance Video Quality with Aiarty Video Enhancer
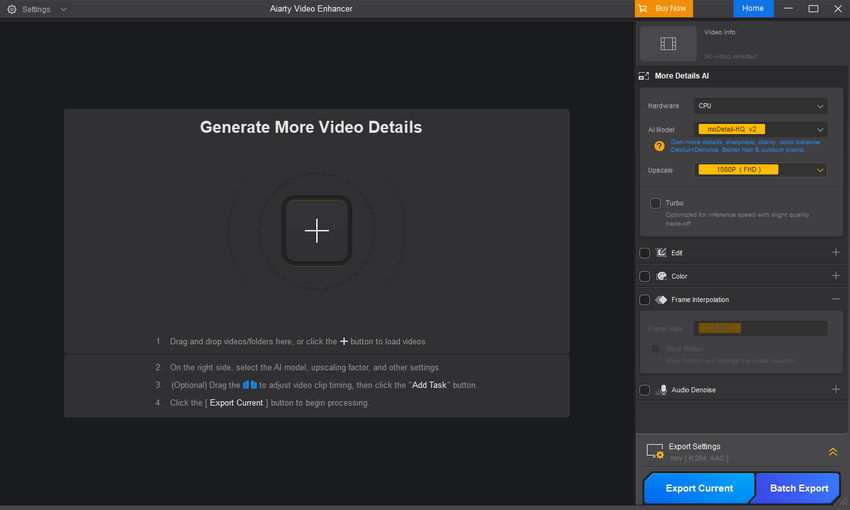
Step 1. Install Aiarty Video Enhancer
Download and launch the AI video enhancer. Drag your low-quality or blurry video file(s) into the main interface.
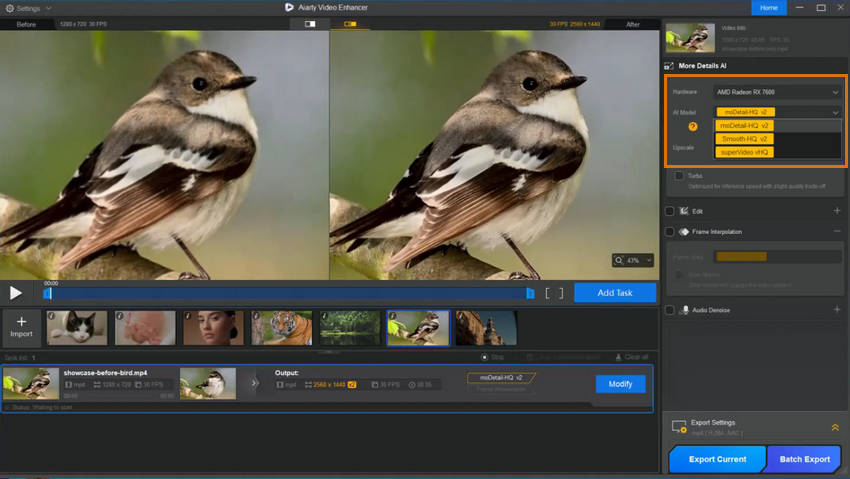
Step 2: Choose the right AI model to restore and enhance your footage
- moDetail-HQ v2: Ideal for sharpening blurry and grainy outdoor footage. This model uses advanced AI to restore lost details and textures—perfect for trees, grass, and well-lit environments. Supports 1×, 2×, and 4× enhancement, as well as standard resolution like 720p, 1080p, 2K, and 4K.
- Smooth-HQ v2: Best for facial close-ups, home scenes, or social content. It softens compression artifacts and enhances skin tone clarity while maintaining a natural look.
- superVideo vHQ: Designed for low-light or noisy clips. This model is your go-to when fixing night scenes, indoor shadows, or underexposed video. Supports up to 2× upscale with elite denoising.
You can experiment with different AI model to find the best result of your footage.
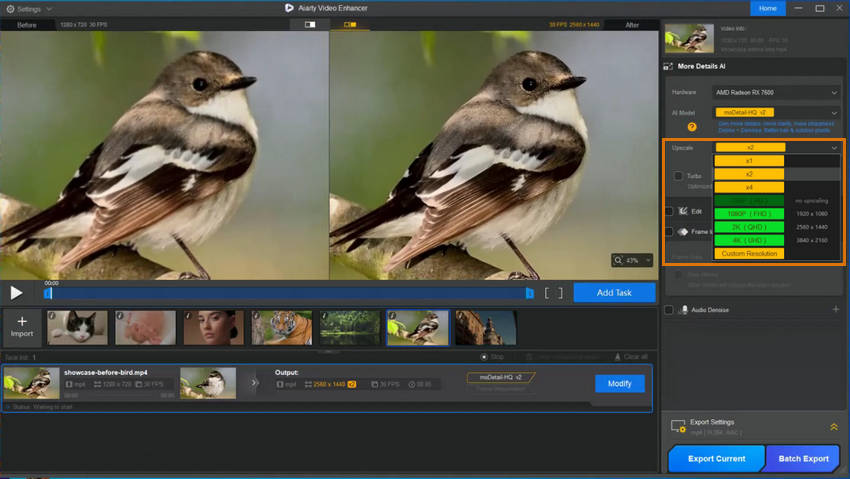
Step 3. Decide the Upscale factor
Select your target resolution from the Upscale menu. Choose 3840×2160 for full 4K output, or go with 2×/4× upscaling based on your original resolution.
Step 4. Preview the result and fine-tune the color if needed.
Click Preview to instantly compare your original and enhanced video. Aiarty applies AI processing in real time, allowing you to evaluate which model best improves your footage. You can also adjust color settings, such as temperature, tint, contrast, and saturation—for a more polished look. If you're not satisfied, simply switch models and preview again.

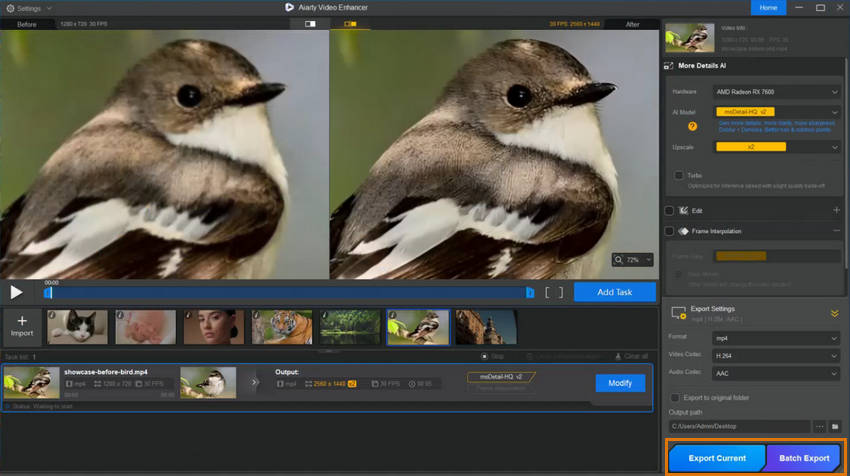
Step 5. Export the enhanced video.
When the result looks sharp and clean, click Add Task to queue the video. Then choose how you want to export:
- Export Current to render just the selected clip.
- Batch Export if you’re fixing multiple low-quality videos at once.
Conclusion
If you've been wondering "why is my video quality so bad" or searching for ways to fix bad quality video, the solution is now within reach. Whether you're dealing with blurry visuals, pixelation, or noise, combining manual editing techniques with smart tools like Aiarty Video Enhancer can transform your footage. Start by identifying the source of your quality issues, apply the best-fit fixes, and don't hesitate to leverage AI for maximum clarity. Try Aiarty today to turn frustrating, low-quality video into professional-looking content that stands out.
 FAQs
FAQs
Most platforms compress videos after upload to reduce file size and streaming bandwidth. This compression can lower bitrate, change codecs, and soften fine details, which may cause blurriness, pixelation, or washed-out colors. To minimize quality loss, export your video at a higher bitrate and upload in a higher resolution such as 1080p or 4K.
Blurry video after exporting is usually caused by low bitrate settings, incorrect resolution, or heavy compression. If the export resolution is higher than the source footage, the video may also appear softer due to upscaling. To improve results, match the export resolution to your original footage and increase the bitrate during export.
YouTube re-encodes videos and may apply compression that reduces contrast and color. Export at a higher resolution (2K/4K) and bitrate so YouTube serves the VP9 stream for better color and detail.
The best way to fix blurry or low-quality videos is to use an AI video enhancer. Tools like Aiarty Video Enhancer can automatically upscale resolution, remove noise, and sharpen details, producing much better results than traditional editing.
AI video enhancers like Aiarty Video Enhancer are widely considered the best solution, as they can restore detail, reduce compression artifacts, and upscale videos to 4K automatically.
This usually happens when sharing via MMS or standard texting apps, which heavily compress videos. To preserve full quality, use AirDrop, iCloud links, or third-party apps like Google Drive or WeTransfer.
Absolutely! AI upscaling can recover perceptual detail and reduce artifacts, making upscaling worthwhile for archival or repurposing content—but results vary depending on source quality.
You May Also Like
This post was written by Brenda Peng who is a seasoned editor at Digiarty Software who loves turning ordinary photos into extraordinary works of art. With AI assistance for brainstorming and drafting, the post is reviewed for accuracy by our expert Abby Poole for her expertise in this field.