How to Upscale Video: Best AI, Online & Free Tools (2026)
Key Takeaways
- What is Video Upscaling: The process of increasing video resolution (e.g., from 480p to 1080p or from 1080p to 4K) while preserving or enhancing visual details.
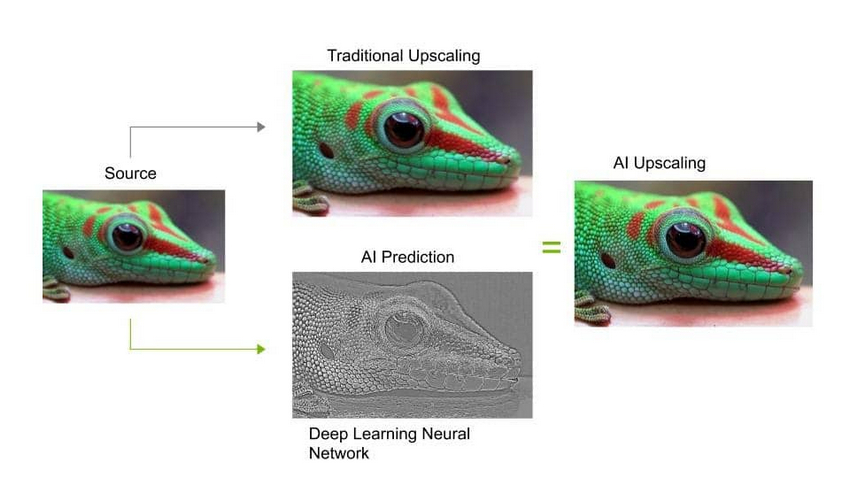
- AI vs. Traditional: Unlike traditional bicubic scaling that simply stretches pixels, AI video upscaling uses deep learning to generate new pixels, fixing blur and noise for a clearer image.
- Best Method: Balancing quality, speed, price, and ease of use, Aiarty Video Enhancer stands out as the top choice for both beginners and pros.
- Quick Steps: Download the video upscaler –> Import your footage –> Select an AI Model –> Choose upscale factor (e.g., 2x, 4x) or output resolution –> Export.
You can download Aiarty Video Enhancer for free to test its AI video upscaling capabilities and see if it’s the right fit for your 4K workflow.
Ever tried watching an old video clip from the 2000s or a VHS rip and thought, "This would look so much better if the resolution were higher"? You're definitely not alone.
On Reddit and other forums, people often ask how to upscale old videos — whether it's home movie, anime video, low-quality YouTube upload from the 2010s, vintage documentary, or digitized DVD or VHS footage. A lot of users want to bring these videos back to life by upscaling them to 1080p, 2K, or even 4K so they look crisp on today’s screens.
Video upscaling isn’t just for old footage, though. Gamers often want to upscale gameplay recordings to higher resolutions, while social media creators may need to improve smartphone or action-cam videos. Whatever the type of footage, the goal is the same: clearer, sharper, and more professional-looking results.
These days, there are tons of video upscaler tools available. In this guide, we’ll take a closer look at some popular options, ranging from one-click AI video upscalers and browser-based online tools to pro-level editing software and free open-source pipelines.
Alright, let’s get started.
What Is Video Upscaling
Video upscaling is the process of increasing the resolution of a video by adding additional pixels to each frame.
For example:
Upscaling is commonly used when older or low-resolution videos are played on modern high-resolution displays. Without upscaling, the video may appear blurry or pixelated because the screen contains far more pixels than the video itself.
By increasing the resolution, upscaling allows the video to better fill the screen and appear sharper.
Does Upscaling Actually Improve Video Quality?
Upscaling increases resolution, but it does not magically restore details that were never captured in the original footage.
Traditional upscaling methods simply stretch pixels using interpolation algorithms. This can make the image larger, but it may also make the video look soft or blurry.
AI upscaling, however, works differently. Instead of only enlarging pixels, AI models analyze patterns in the image and attempt to reconstruct details such as textures, edges, and facial features.
Because of this, AI video upscalers often produce noticeably better results compared with traditional scaling methods.
Still, the final quality depends on factors such as:
- the resolution of the original video
- compression artifacts
- camera focus and lighting
- the upscaling algorithm used
In general, upscaling works best when the original video is reasonably clear.
Upscale Video with AI Tool
AI video upscalers have become the preferred choice for improving low-resolution footage. These tools analyze frames using machine learning models trained on large datasets of images and videos.
Below are some popular AI video upscaling tools available today.
- Topaz Video AI: A well-established industry-grade tool known for delivering highly detailed results and advanced AI models. It is best suited for professional users with high-performance hardware and a larger budget who prioritize maximum output quality and fine-grained control.
- Aiarty Video Enhancer: A next-generation AI enhancer that strikes a strong balance between visual quality and processing efficiency. It is designed for users who want high-quality results with a more accessible price point, offering a cost-effective alternative without sacrificing core enhancement capabilities.
- AVCLabs Video Enhancer AI: A dedicated AI video enhancement tool focused on improving video quality through upscaling, denoising, and face enhancement. It supports resolution upscaling up to 4K and includes features like frame interpolation and SDR to HDR conversion, making it suitable for users who want straightforward AI enhancement with solid output quality.

Which AI Video Upscaler Should You Use?
Not sure which tool to pick for your video upscaling needs? Here’s a quick side-by-side comparison of three popular options. We’ve looked at their pros and cons, pricing, supported platforms, speed, quality, and more, so you can easily decide which one fits your workflow and budget.
Most AI video upscalers follow a similar workflow: import the video, select an AI model, choose the target resolution, preview the result, and export the enhanced video.
Below we’ll take a closer look at these tools and show how to upscale videos using each one.
Option 1: Upscale Video with Topaz Video AI
Topaz Video AI is one of the most well-known names in the AI upscaling world, especially popular among video editors and restoration hobbyists. It uses advanced machine learning models to sharpen, denoise, and upscale footage with impressive precision.
That said, it's not the most beginner-friendly tool out there, and it definitely demands a powerful GPU setup to run smoothly. If your hardware is up to the task, here is how to use it:
Step 1. Download and install the software
You can grab the installer from the official Topaz website. Just make sure to check the system requirements — a high-performance GPU is strongly recommended, or you might run into slowdowns.
Step 2. Launch the App
Open Topaz Video AI and sign in to your account.
Step 3. Import Your Video
Create a new project and drag your video into the workspace. Then, select a preset, such as "Upscale to 4K".
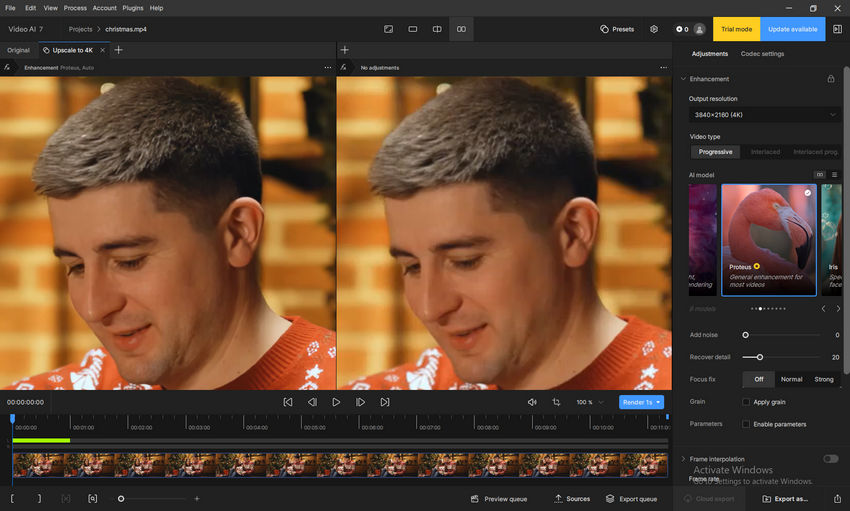
Step 4. Adjust Settings
On the right-hand panel, you can specify:
- Output Resolution: Choose a scale factor (e.g., 2X or 4X Upscale), a predefined resolution like 4K, or manually enter a custom resolution.
- Video Type: Select Progressive, Interlaced, or Interlaced Prog.
- AI Model: For general video enhancement, the Proteus model is recommended.
- Parameters: Enable and fine-tune parameters according to your specific needs.
Step 5. Preview the Result
Click Render to generate a preview. You can choose how much of the video to render (e.g., 5 frames, 1s, 2s, or 5s).
Keep in mind, this step can be time-consuming. For example, rendering a 5-second video took approximately 11 minutes and 21 seconds during testing.
Step 6. Export the Upscaled Video
Once you’re happy with the preview, click Export as or Quick export to finalize and save your video.
Comparing Video Quality: Before and After AI Upscaling
For this test, I used Topaz Video AI with the widely recommended Proteus model on its default settings. The result is undeniably solid—the software successfully removed compression artifacts and there is absolutely no loss of baseline quality.
However, when viewed at a 100% crop, the clarity of the upscaled result feels slightly softer compared to the generative crispness we see in Aiarty Video Enhancer. It becomes apparent that to get the absolute best out of Topaz, you cannot just rely on the default clicks; you need the expertise and time to manually dial in the fine-tuning sliders.

Option 2: Upscale Video with Aiarty Video Enhancer
While Topaz Video AI sets a high bar for video upscaling, its high price tag and extreme hardware demands are often dealbreakers for independent creators, vloggers, and everyday users. What if you want Topaz-level cinematic clarity, but at a much more accessible price point?
Enter Aiarty Video Enhancer. It is strategically designed to be the ultimate sweet spot, delivering pro-grade, generative AI upscaling without draining your wallet or requiring a $2,000 graphics card.
Before diving into the steps, here is why Aiarty stands out as the best high-quality alternative:
- Topaz-level quality, fraction of the cost: Aiarty utilizes advanced generative AI models (like moDetail-HQ) to reconstruct realistic textures, such as skin pores, hair, and fabric, matching the sharpness of industry-leading tools but for a much lower annual or lifetime cost.
- Fast processing: Aiarty is deeply optimized for modern hardware (NVIDIA, AMD, Apple M-series). It utilizes up to 95% of your GPU, processing 4K upscales up to 3x faster than its heavier competitors.
- Zero learning curve: You don't need to be a video engineer to get perfect results. Aiarty replaces complex sliders with intelligent, one-click models.
If you want stunning 4K results quickly and affordably, here is how to use it:
Step 1. Download and install
Download and install Aiarty Video Enhancer by clicking the download button below.
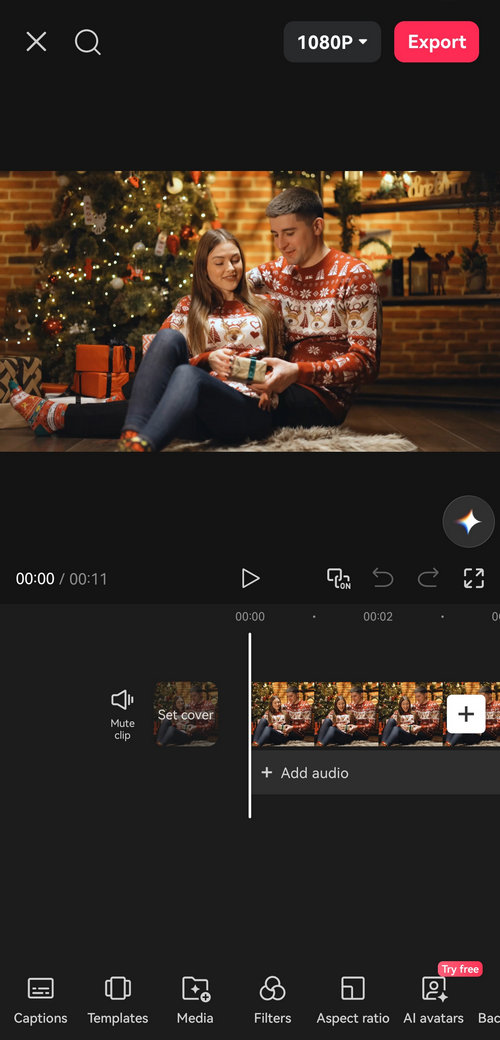
Open the software and click the + button to import your video. You can also drag and drop multiple files for batch processing.
Step 2. Choose an AI model
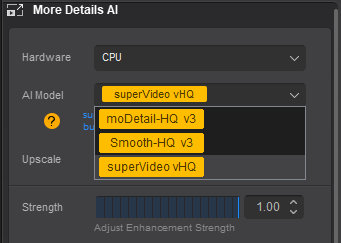
Aiarty offers several models optimized for different scenes:
- moDetail-HQ v3: Combines Diffusion and GAN for high-precision deblurring and denoising. It’s ideal for hair, plants, and daylight nature scenes. Supports 1×, 2×, and 4× upscaling.
- Smooth-HQ v3: Uses Diffusion for smooth and natural results. Best for indoor lighting, faces, and general footage with moderate flaws.
- superVideo vHQ: Designed for extremely dark footage like night skies and cityscapes. Offers top-level denoising and quality (2× only).
Pick the model that best suits your source material. You can always switch later if needed.
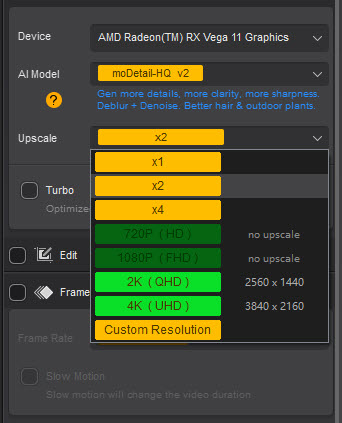
Step 3. Set your upscale resolution
Click the Upscale menu and select 2× or 4×. You can also select a target resolution (e.g. 3840×2160 for 4K).
Tips: For very low-resolution sources (e.g., 480p), sometimes scaling step-by-step (e.g., 2× then another 2×) can yield better final quality than a direct 4× upscale.
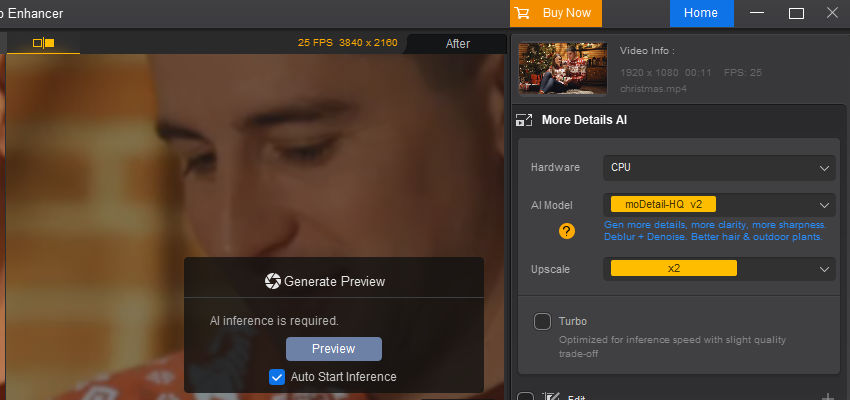
Step 4. Preview the result
Once settings are configured, click the Preview button. Aiarty will load the model and display Waiting for inference—this usually takes only a few seconds thanks to fast model loading and optimized inference speed. After processing, a real-time preview will be shown. If you're satisfied, move on; if not, here're some tips for you.
Pro-Tip: Fine-Tuning Your Results (Advanced Adjustment)
If you are not entirely satisfied with the real-time preview, or if you are aiming for the absolute best quality, try these three key adjustments before moving on to the final export:
- Quickly Compare AI Models: If the current model doesn't meet your expectations (e.g., if it adds too much texture or insufficient noise reduction), you can rapidly switch to a different model. Simply select another model and click the Preview button again to instantly view the new processing result on the same clip for comparison.
- Balance with Strength Control: Use the dedicated Strength slider to precisely adjust the intensity of the AI enhancement and sharpening effects. Fine-tuning this control is crucial to balance maximum video clarity with a natural, less 'over-processed' look.
- Activate Step Mode for Cleaner Quality: For high-resolution or complex footage, switching to Step Mode is highly recommended. This setting utilizes tiled AI inference, which, although slower than Turbo Mode, significantly enhances visual consistency and produces cleaner, artifact-free results by reducing the load on your GPU memory.
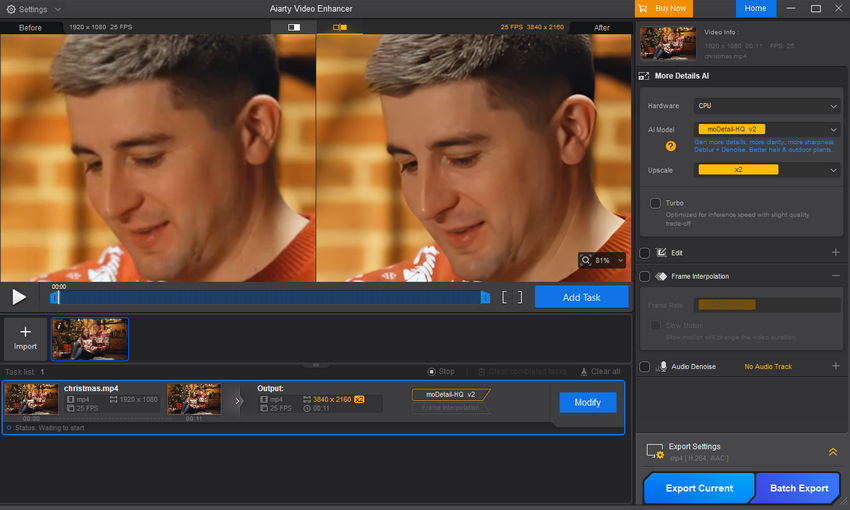
Step 5. Add task and export
Once satisfied, click Add Task to queue the video. Double-check the output settings. When ready:
- Click Export Current for a single video
- Click Batch Export to process multiple files at once
Aiarty’s models are deeply optimized for GPU acceleration—GPU usage can reach up to 95%, enabling much faster processing than similar tools. In tests using the latest RTX 5090 GPU and moDetail-HQ, upscaling from 1920×1080 to 3840×2160 (4K) reached 21.7 FPS, and with Turbo Mode enabled, it jumped to 31.3 FPS. In contrast, similar software only achieved around 7 FPS.
Comparing Video Quality: Before and After AI Upscaling
The image below presents a cropped comparison of the original video and the 4K upscaled video, both reduced to 50% of their size. From this comparison, we can observe that the video quality was not lost after upscaling; instead, it became even clearer.

Option 3: Upscale Video with AVCLabs Video Enhancer AI
For those working with ultra-high-definition displays or future-proofing content for 8K screens, AVCLabs Video Enhancer AI is a dedicated option to consider. While most users find 4K sufficient, AVCLabs pushes the boundary by supporting output resolutions up to 8K, coupled with specialized modules for specific frame-by-frame refinements.
However, this high-resolution capability comes with a premium price tag. At $199.99 for a 1-PC lifetime license, it is a significant investment compared to other market leaders, especially considering the license is tied to a single machine.
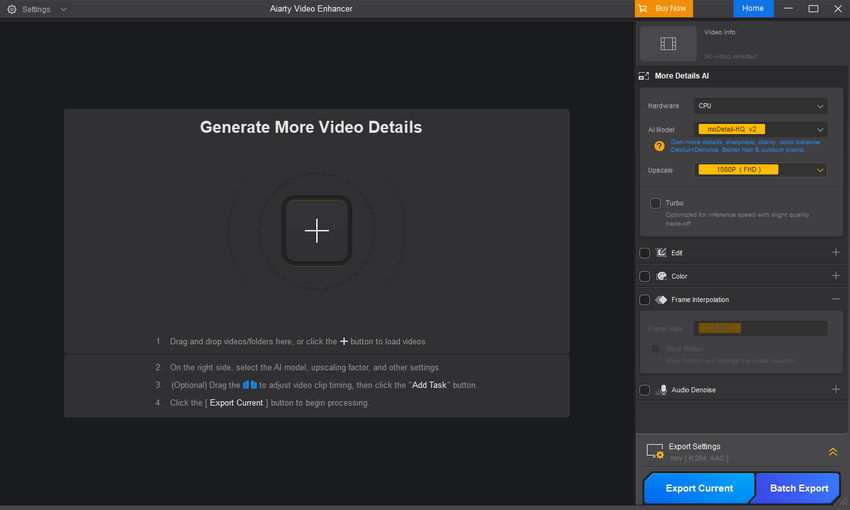
Step 1. Download and install
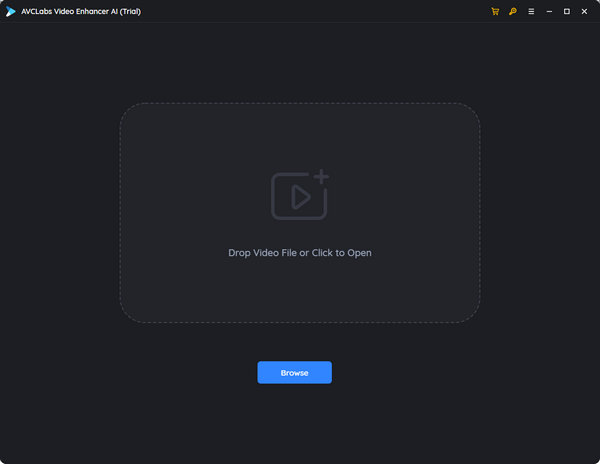
Download AVCLabs Video Enhancer AI from the official website and install it on your Windows or macOS system.
Step 2. Import your video
Open the program and click the "Browse" button to locate your file, or simply drag-and-drop your low-resolution video directly into the application window.
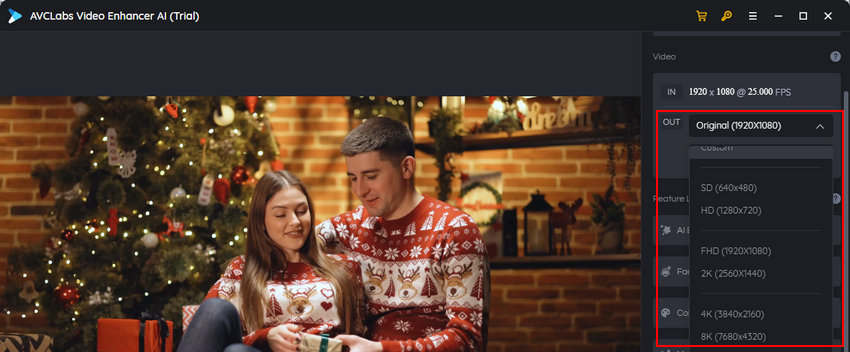
Step 3. Set output resolution
Navigate to the Out drop-down menu on the right panel. Here, you can select your target resolution - 1080p, 4K, or 8K.
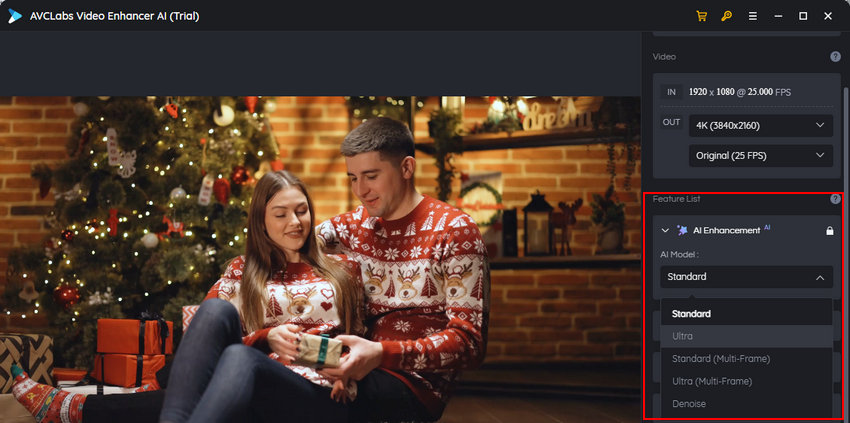
Step 4. Enable AI Enhancement and choose a model
This is where you define the output quality. Select "Ultra" if you need high-detail reconstruction, or choose "Standard" if you prioritize faster processing.
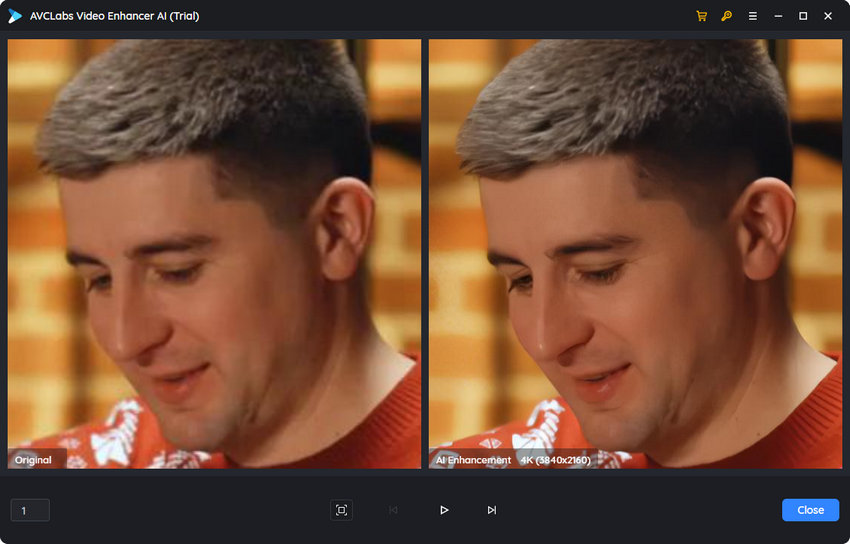
Step 5. Preview
To see the results before committing to a long render, click the eye-shaped icon located under the playback window. AVCLabs will generate a quick preview of 30 frames, allowing you to compare the original and the AI-enhanced version side-by-side.
Step 6. Start processing
Once you are satisfied with the preview, click the "Start Processing" button to begin the upscale.
Upscale Video with Online/Mobile Tools
If you don't want to install heavy software, online video upscalers and mobile apps offer a convenient way to enhance footage on the go.
These tools are perfect for social media creators (TikTok, Reels, Shorts) who need a quick resolution boost. While they often have file size limits or subscription requirements, they provide decent results for casual use.
Some commonly used online or mobile video tools include:
- CapCut – a popular mobile and desktop video editor with AI-powered video enhancement features
- Canva – offers basic video editing and resizing tools for social media content
- Vmake – an online AI video enhancement platform designed for quick quality improvements
Option 1: Upscale Video on Mobile with CapCut
If you want to upscale a video directly on your phone, CapCut offers a built-in AI Super Resolution feature that works surprisingly well for quick mobile edits.
Keep in mind that this feature is not available on all devices or regions, and processing time may vary depending on your phone’s performance.
Step 1. Create a new project and import your video
Open CapCut, tap New project, select your video, check HD, and then tap Add.
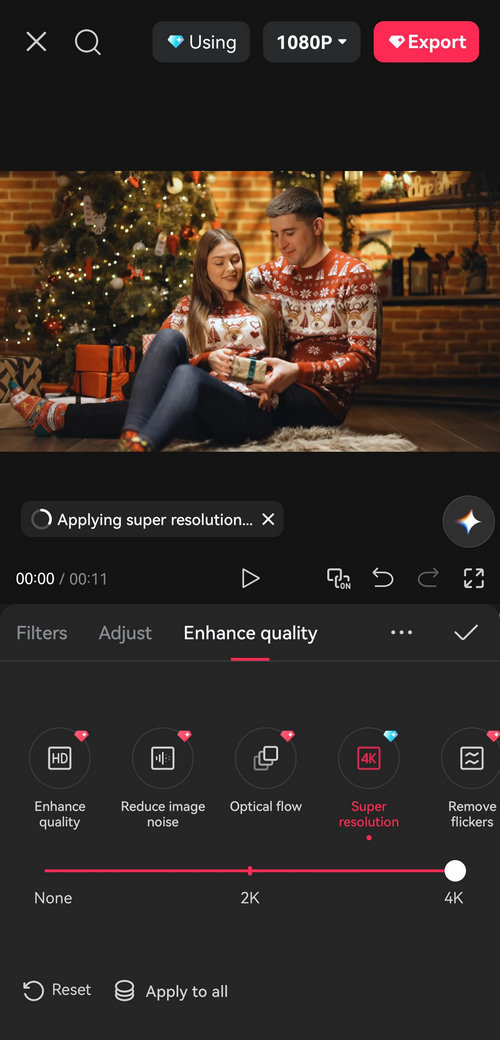
Step 2. Find the Enhance Quality option
Scroll the bottom toolbar to the right, find and tap Filters, then select Enhance quality.
Step 3. Enable Super Resolution and choose 2K or 4K
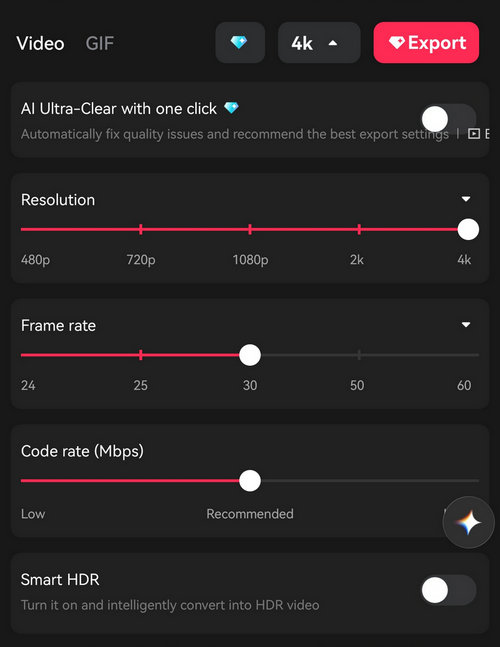
Tap Super Resolution, drag the slider to the 2K or 4K position, and wait while CapCut applies the enhancement. Once it’s done, tap the ✓ icon to confirm.
Step 4. Export the upscaled video
Tap Export to save the enhanced video to your device.
Tips: If you don’t use the Super Resolution feature, you can still manually choose a higher output resolution by tapping the resolution option next to Export.
Option 2: Upscale Video Online with Canva
If you want to upscale a video online without installing any software, Canva Video Upscaler offers a clean and beginner-friendly interface. It supports multiple output resolutions and different enhancement styles for various types of content.
However, Canva’s video upscaling requires credits to generate the final result, so it’s better suited for occasional use rather than frequent or long videos.
Step 1. Open Canva Video Upscaler
Go to the Canva Video Upscaler page and log in to your Canva account.
Step 2. Open the Video Upscaler tool
Under the Video Upscaler tool, click the Open button to access the workspace.
Step 3. Upload your video
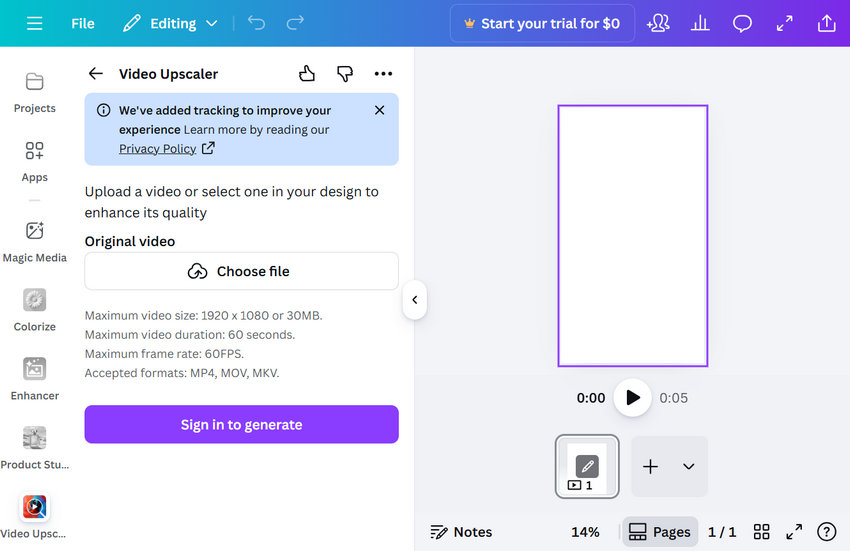
Click Choose file to import the video you want to upscale.
Step 4. Select output quality
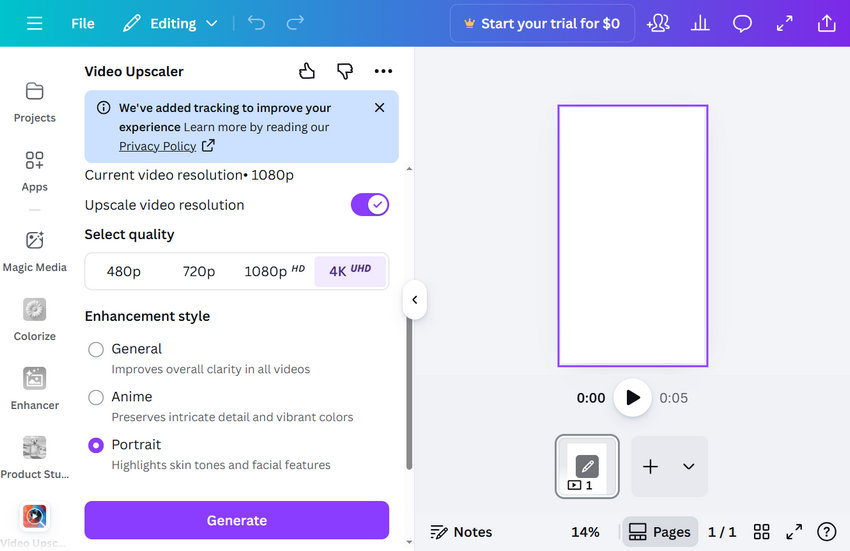
Under Select quality, choose your target resolution: 480p, 720p, 1080p, or 4K.
Step 5. Choose an enhancement style
Under Enhancement style, select General, Anime, or Portrait based on your video content.
Step 6. Generate the upscaled video
Click Sign in to generate. When prompted, allow Canva Video Upscaler to connect to your account by clicking Connect. Once connected, click Generate to start processing.
Step 7. Wait for generation (credits required)
Video generation consumes credits. In our test, upscaling a video required 33 credits. The required credits may vary depending on video length and selected resolution.
Option 3: Upscale Video Online with Vmake
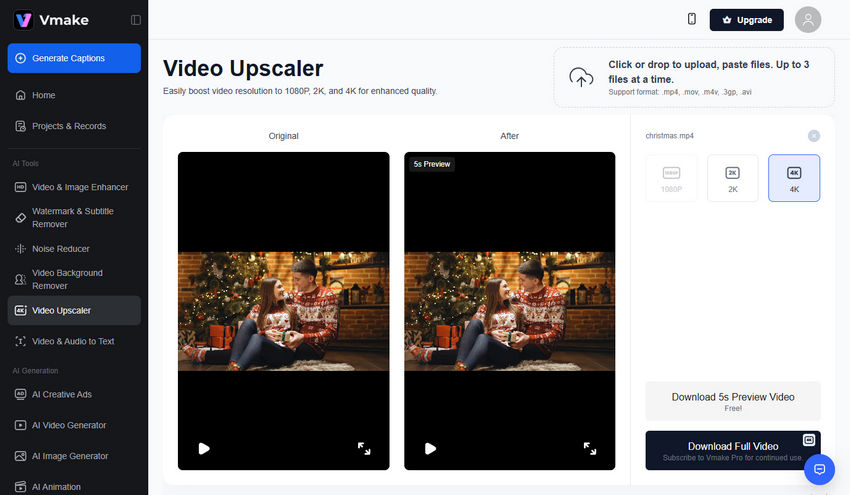
If you're looking for a quick, no-install way to upscale a video, Vmake Video Upscaler is one of the few online tools that actually work. It's super simple to use — just upload your clip, pick a target resolution (1080p, 2K, or 4K), and let the AI do the magic.
That said, there’s a catch: in the free version, you can only export 5 seconds of video. So it’s more of a preview tool unless you're okay with short clips or plan to upgrade.
Step 1. Go to the official Vmake Video Upscaler page
No download needed — it runs entirely in your browser.
Step 2. Upload your video
Drag and drop your file, or click to browse. It supports common formats including MP4, MOV, AVI, M4V and 3GP.
Step 3. Choose your upscale target
You’ll see options for 1080p, 2K, or 4K. Just pick one depending on your needs.
Step 4. Wait for processing
The AI takes a moment to analyze and enhance the video. You’ll see a preview once it’s done.
Step 5. Download the result (up to 5 seconds)
With the free plan, you can export a short 5-second clip to check the quality. For full-length exports, a subscription is required.
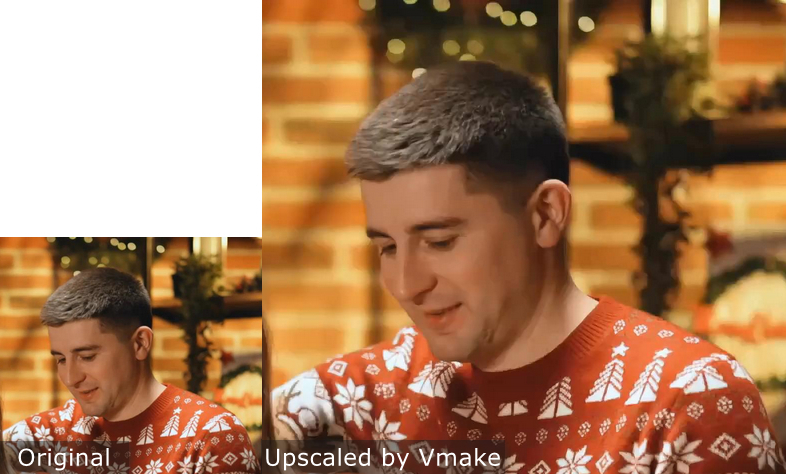
Comparing Video Quality: Before and After AI Upscaling
As you can see, the quality isn’t as sharp as what we got from Topaz, Aiarty, and AVCLabs — the image still looks quite blurry in comparison. However, if you want to upscale video online, you can give it a try.
Upscale Video with Professional Editing Software
Professional video editing software often includes built-in scaling algorithms or AI-assisted features for increasing video resolution. While these tools may not always reconstruct details like specialized AI upscalers, they are useful when upscaling videos within a full editing workflow.
Popular video editing software for upscaling includes:
- Adobe Premiere Pro – supports video scaling and AI-based enhancements through plugins and built-in tools
- DaVinci Resolve – includes the Super Scale feature for improving resolution and reducing artifacts
- Final Cut Pro – offers high-quality scaling options within professional editing projects
Option 1: Upscale Video in Adobe Premiere Pro
Premiere Pro doesn't have a single "AI Upscale" button, but it uses an advanced sampling method called "Bicubic" or "Frame Sampling." For even better results, many editors use the "Detail-preserving Upscale" effect in After Effects, which links directly to Premiere.
Step 1. Import your footage into a high-res sequence
Create a new sequence set to your target resolution (e.g., 4K/3840x2160). Drag your low-res clip (e.g., 1080p) onto the timeline.
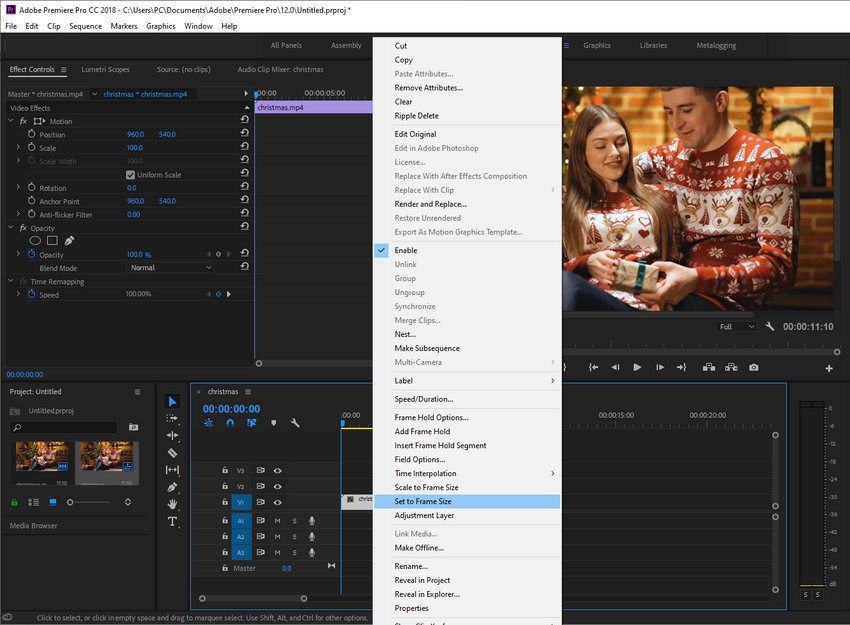
Step 2. Scale the clip to frame size
Right-click the clip on the timeline and select "Set to Frame Size." This expands the video to fill the 4K canvas.
Step 3. Apply the "Sharpen" or "Unsharp Mask"
Go to the Effects panel, find "Unsharp Mask," and apply it to the clip. Set the Amount to around 50-70 to recover some edge detail lost during the scaling process.
Verdict: Good for quick projects, but it can’t actually "create" missing pixels. If your source is very blurry, the result will still look soft.
Option 2: Upscale Video in DaVinci Resolve (Super Scale)
DaVinci Resolve is widely considered the king of video quality among editors. Its "Super Scale" feature is a powerful AI-assisted tool that significantly outperforms standard scaling.
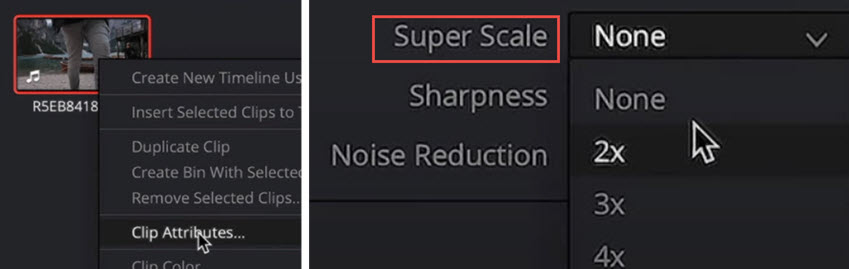
Step 1. Access Clip Attributes
Import your video, right-click it in the Media Pool or Timeline, and select "Clip Attributes."
Step 2. Enable Super Scale
At the bottom of the Video tab, find the "Super Scale" dropdown. You can choose 2x, 3x, or 4x scaling.
Step 3. Adjust Sharpness and Noise Reduction
Change the "Sharpness" and "Noise Reduction" settings within the Super Scale menu to "Medium" or "High" to refine the AI output.
Verdict: "Super Scale" is impressive, but it is extremely GPU-intensive. You may experience significant lag or long export times unless you have a high-end workstation.
Option 3: Upscale Video in Final Cut Pro (FCP)
For Mac users, Final Cut Pro offers a straightforward way to handle resolution changes, though it relies more on Apple’s hardware optimization than deep-learning pixel generation.
Step 1. Create a 4K Project
Create a new project (Cmd+N) and set the Video Properties to 4K (3840x2160).
Step 2. Change Spatial Conform
Select your clip in the timeline. In the Inspector window, go to "Spatial Conform" and change the Type to "Fill." This automatically scales the video to fit the 4K frame.
Step 3. Use the "Sharpen" Filter
Add the "Sharpen" effect from the Effects browser. Adjust the slider to minimize the blurriness caused by the resolution jump.
Verdict: Fast and stable on Mac, but the quality is noticeably lower than dedicated AI tools like Aiarty or Topaz, as it lacks true neural network enhancement.
Upscale Video with Free Open-Source Tool
For users who prefer free solutions, several open-source tools provide video upscaling capabilities using AI models or advanced scaling algorithms.
While these tools can deliver impressive results, they often require more technical setup compared with commercial software.
Some widely used open-source upscaling tools include:
- Video2X – an open-source AI video upscaler that uses deep learning models to improve resolution
- Waifu2x-Extension-GUI – a graphical interface that supports AI upscaling models such as Waifu2x and Real-ESRGAN
- Real-ESRGAN – a powerful AI model designed for image and video super-resolution tasks
Open-source tools are a good choice for advanced users who want more control over AI models and processing workflows.
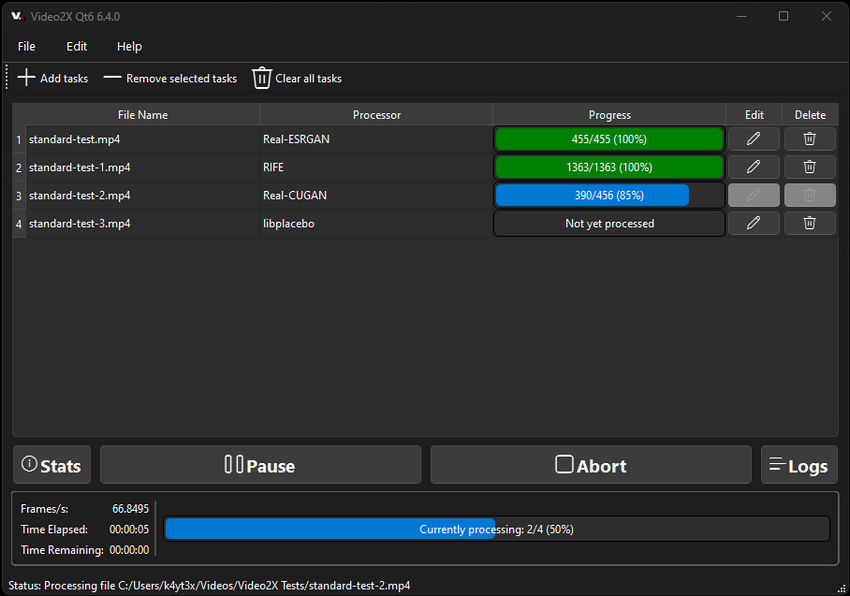
Option 1: Video2X – Best All-in-One Local Pipeline
Video2X is a powerful, actively maintained tool that acts as a comprehensive frontend for multiple AI engines. It automates the entire workflow: extracting frames from your video, upscaling each one, and reassembling them into a high-res output.
- Best for: General-purpose, high-quality, local video upscaling on Windows and Linux.
- Pros: Supports multiple engines, batch processing, and both NVIDIA/AMD GPU acceleration.
- Cons: Can have a steeper learning curve for beginners.
- How to use: Check out our full Video2X setup guide here →
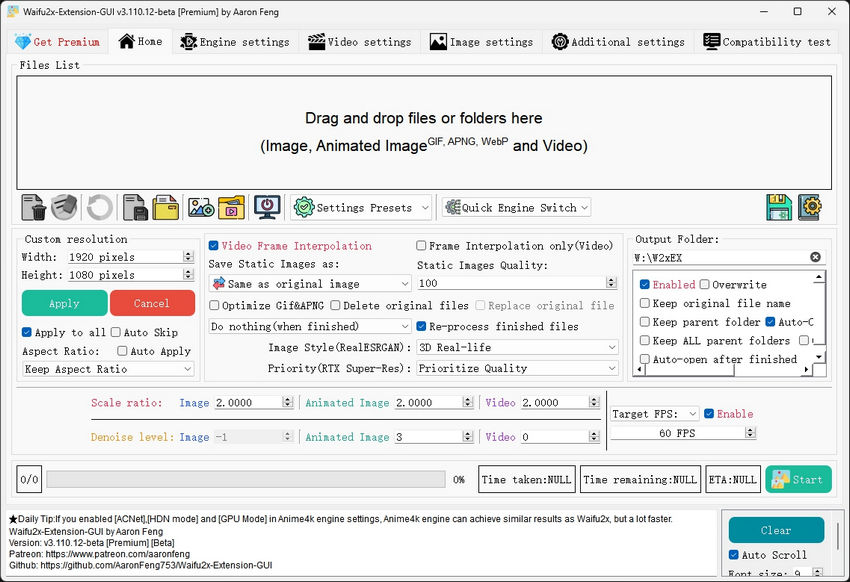
Option 2: Waifu2x-Extension-GUI – Best User-Friendly Interface
While the original Waifu2x was built for anime, this Extension-GUI version is a powerhouse for all types of content. It provides a full graphical user interface, making it much more accessible than command-line tools.
- Best for: Users who want a GUI to manage upscaling, denoising, and frame interpolation without coding.
- Pros: Very easy to use, supports many engines (Real-CUGAN, Real-ESRGAN), and includes built-in video player previews.
- Cons: Primarily designed for Windows users.
- How to use: Read how to use Waifu2x-Extension-GUI to upscale video →
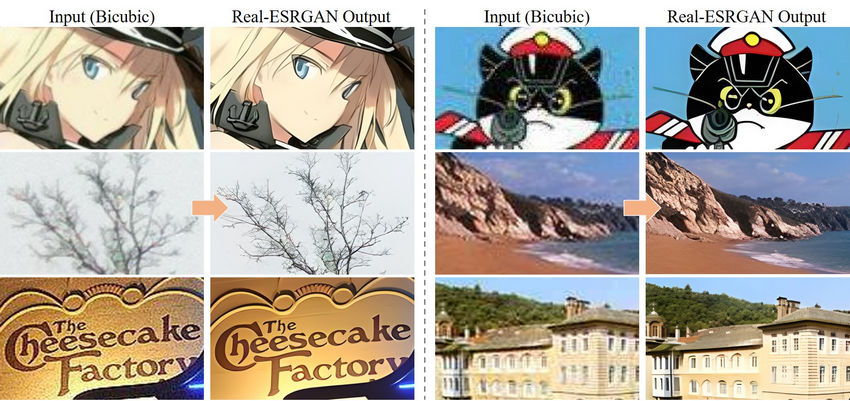
Option 3: Real-ESRGAN – Best for Realistic & Complex Content
Real-ESRGAN is widely considered the gold standard for restoring real-world footage. It is a deep-learning model designed to restore fine details and remove artifacts from highly compressed videos. Many paid software (including some mentioned above) actually use this as their core engine.
- Best for: Restoring old family footage, improving compressed YouTube videos, and enhancing real-life scenes.
- Pros: Industry-leading detail retention and artifact removal.
- Cons: Primarily a Command Line Interface (CLI) tool; requires some technical knowledge to set up.
- How to use: Read how to use Real-ESRGAN to upscale video →
Why Does Video Upscaling Take So Long?
If you’ve ever tried AI video upscaling, you’ve probably noticed that the process can take hours, especially for longer clips. This is because upscaling isn’t just about stretching pixels. Modern AI tools analyze every single frame, predict missing details, and rebuild textures to make the video look sharper and more natural.
Several factors affect how long it takes:
Video Length and Resolution
A 10-second 720p clip might upscale to 4K in minutes, but a 30-minute video could take hours because every frame must be processed individually.
AI Model Complexity
AI-powered enhancers use deep learning models that require heavy computation. More advanced models—those designed to reduce noise, sharpen faces, or restore details—naturally require more time.
Hardware Limitations
Your computer’s CPU and GPU have a huge impact. A high-end graphics card (e.g., NVIDIA RTX series) can speed up upscaling dramatically, while older hardware may struggle.
Additional Filters or Effects
If you apply extra enhancements like stabilization, color correction, or de-noising during upscaling, the processing time will increase.
Output Resolution and Bitrate
Upscaling from 720p to 1080p requires far less computation than pushing the same video to 4K or beyond. Higher bitrates and complex codecs also add to the rendering time.
To avoid excessive waiting times, consider using a powerful GPU, closing unnecessary apps, or splitting long videos into smaller segments. Choosing lighter AI models or skipping unneeded filters can also help.
What to Avoid When Upscaling Video
While upscaling can breathe new life into older or low-resolution footage, there are a few common pitfalls to steer clear of:
Pushing the resolution too far
Upscaling a 480p clip directly to 8K often introduces artifacts or overly smooth textures. Instead, aim for a reasonable jump (e.g., 1080p to 4K) to maintain a natural look.
Ignoring the source quality
Upscaling can’t fix extremely compressed or heavily pixelated videos. If the base quality is too poor, the final output may still look bad despite higher resolution.
Skipping preview checks
Always review a short preview segment before processing the entire video. This saves time and ensures you’re happy with the chosen settings.
Why Aspect Ratio is Critical for Video Upscaling
When upscaling video, aspect ratio (the proportional relationship between width and height, e.g., 16:9, 4:3, 9:16) is just as important as resolution. Ignoring it is the #1 cause of distorted (stretched or squashed) videos or unwanted black bars (letterboxing/pillarboxing) after upscaling.
Common Aspect Ratios:
- 16:9: Standard for HD (1280×720), Full HD (1920×1080), 4K UHD (3840×2160) — TVs, YouTube, modern video.
- 4:3: Standard Definition (SD), old TV shows, vintage camcorders (e.g., 640×480).
- 9:16: Vertical video for smartphones (e.g., 1080×1920).
- 21:9: Ultra-widescreen cinematic format.
- 1:1: Square format, common for social media previews.
So, if you’re working with a video whose aspect ratio doesn’t match your target resolution (for example, upscaling a 4:3 DVD to 16:9 HD), the upscaler has to decide how to handle it. Default settings often lead to stretched images or excessive black bars.
Modern AI upscaling tools usually offer two ways to handle mismatched ratios:
- Maintain Original Aspect Ratio — Safest option; black bars are added to preserve the original composition without distortion.
- Crop — Fills the frame by trimming edges; may remove important parts of the video.
Avoid using "stretch" or "fit to frame" options, as these distort the image. Always check your upscaler’s aspect ratio settings before processing.
 FAQs
FAQs
To upscale a video to 4K, you'll need a tool that supports resolution enhancement. All the video upscalers we recommended here let you select 4K as the target resolution directly. Just import your video, choose 4K in the resolution settings, and export. The better the original quality, the better the 4K result.
Yes. If you are tech-savvy, you can use open-source tools like Video2X or Waifu2x-Extension-GUI, which are 100% free with no time limits or watermarks. However, they require a high-end GPU and complex setup.
The easiest way to upscale video online is to use browser-based AI tools like Vmake and Canva. Typically, you just need to upload your file, select a target resolution (1080p, 2K, or 4K), and wait for the AI to process it. These are great for short social media clips or quick edits on the go.
However, online upscalers have drawbacks that many users on Reddit often complain about: privacy risks (uploading personal files to a cloud server), slow speeds for large files, and file size limits. If you are handling private footage or large 4K files, using a desktop tool like Aiarty Video Enhancer or Topaz is much safer and faster since all processing happens locally on your own computer.
Upscaling without losing quality is all about using the right tool. Traditional methods (like simply stretching resolution in an editor) can make your video look soft or pixelated. AI-powered tools are much better at preserving — or even improving — detail during upscaling.
For example, apps like Aiarty Video Enhancer and Topaz Video AI use trained AI models to intelligently enhance sharpness, reduce noise, and recover textures while increasing resolution. These tools don’t just blow up the image — they analyze frame-by-frame content to make the output look more natural on 1080p, 2K, or 4K displays. So, if you're aiming for the best quality, go with AI-based upscalers rather than manual resizing.
In After Effects, import your video and create a composition with 4K settings. Scale up the footage, then apply effects like "Detail-preserving Upscale" or use third-party plugins like Red Giant or Topaz Video Enhance AI via Dynamic Link for more refined results.
Check detailed guide on how to upscale video in After Effects >>
You May Also Like
This post was written by Brenda Peng who is a seasoned editor at Digiarty Software who loves turning ordinary photos into extraordinary works of art. With AI assistance for brainstorming and drafting, the post is reviewed for accuracy by our expert Abby Poole for her expertise in this field.