How to Get Good Quality in CapCut: 5 Fixes for Blurry and Low-Quality Videos
High-quality videos are essential for platforms like TikTok, Instagram, and YouTube, but many creators run into a common issue—blurry or low-quality exports after editing in CapCut. Even when the footage looks fine during editing, the final video can appear pixelated, soft, or compressed.
CapCut does offer built-in tools to improve video quality, but choosing the right settings is not always straightforward, especially if you're dealing with low-resolution or heavily compressed footage. In this guide, you’ll learn how to get good video quality in CapCut step-by-step, along with practical fixes to improve clarity and reduce blur.
For cases where CapCut’s built-in tools are not enough, we’ll also briefly explore an AI-powered solution that can further enhance and upscale video quality.
Have you ever wondered, “does CapCut reduce video quality?” or searched for ways to improve your clips using CapCut Video Enhancer, only to find countless others asking, “does CapCut ruin video quality?” You’re definitely not alone. Many users share the same frustrations:
- "Exporting video from Capcut ruins video quality." - By Funkki from r/CapCut
- "Capcut, why in the actual hell does my video get blurry/low qaulity after i crop & export it." - By therealpeppino from r/CapCut
- "Why does CapCut destroy the quality of my videos and make them look overexposed and grainy? "- By Substantial_Step_975 from r/CapCut
These complaints are common, and they often come down to a few critical reasons:
- Compression during export: CapCut compresses files, causing loss of detail and sharpness.
- Low-resolution source footage: If your original video was shot in 720p or lower, CapCut can’t magically upscale it without losing quality.
- Overused templates and filters: Excessive or poorly matched effects can distort clarity.
- Wrong export settings: Exporting at 720p, low bitrate, or mismatched frame rate will reduce output quality.
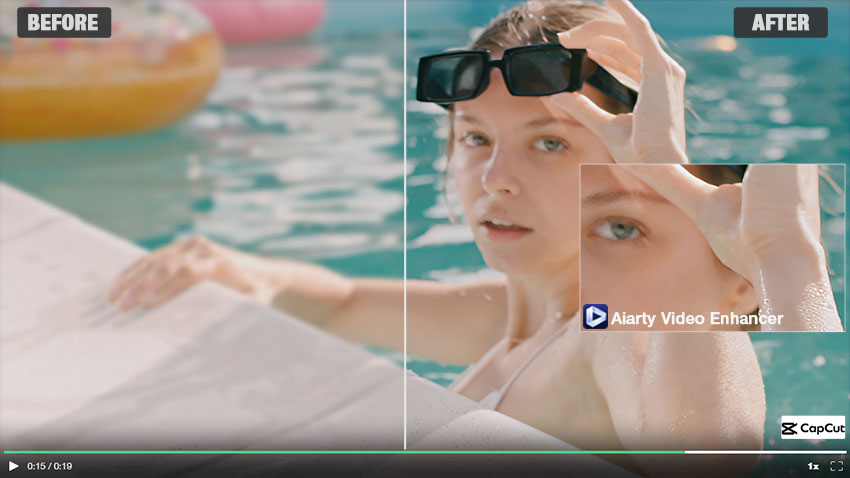
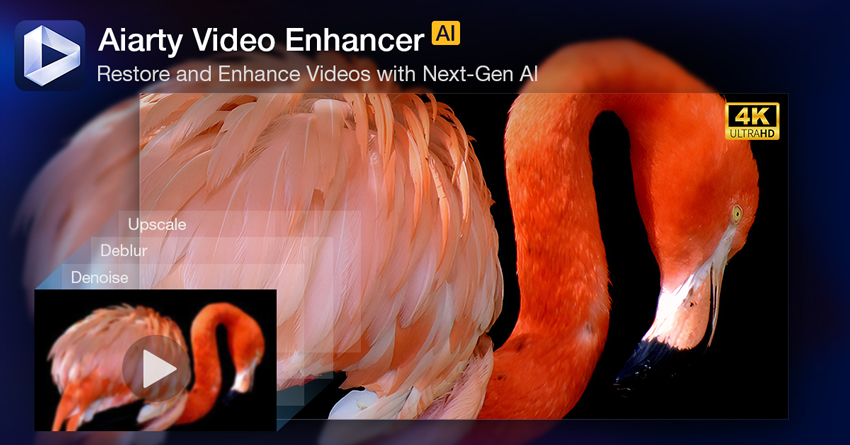
Though you can get good video quality in CapCut video enhancer with proper settings, Aiarty Video Enhancer goes further, using AI to denoise, deblur, and intelligently upscale videos, restoring sharpness and colors, and adding cinematic detail. All with a simple one-click workflow.
Try Aiarty Video Enhancer to instantly restore clarity, sharpen details, and give your footage a cinematic upgrade!
How to Enhance Video Quality in CapCut
If your videos look crisp while editing but blurry or grainy after exporting, you're likely missing a few key settings inside CapCut. While it’s not a professional-grade editor, you can still unblur videos in CapCut—if you know where to adjust the right settings.
Here’s a complete walkthrough to enhance video quality in CapCut, minimize compression issues, and achieve sharper, more vibrant exports.
1. Set the Correct Project Resolution Before Editing
Before importing clips or applying edits, make sure your project resolution is set up correctly:
- Open CapCut and tap New Project.
- Once inside the editing timeline, tap the gear icon in the top-right corner.
- Under Resolution, select 1080p, depending on your target output
- Under Frame Rate, choose 30fps or 60fps to match your original video
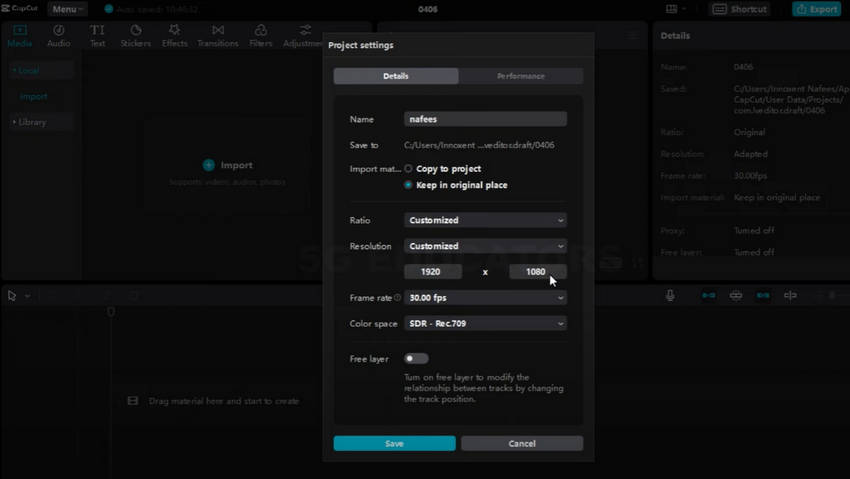
Pro Tip: If your footage was recorded in 720p, avoid setting your project to 4K. Upscaling low-res video this way can stretch pixels and reduce sharpness. Instead, match the native resolution—and use a dedicated AI video enhancer like Aiarty Video Enhancer afterward to upscale video to 4K could get better video quality.
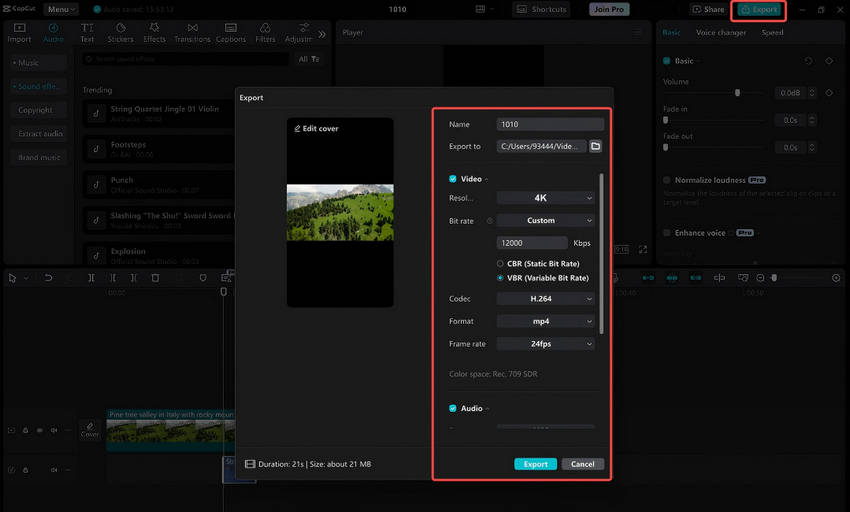
2. Optimize Export Settings for Maximum Quality
Your export settings are just as important as your edit settings in CapCut. CapCut’s default options are often optimized for smaller file sizes—not clarity. Here's how to fix that:
- Tap Export when your editing is complete.
- Set Resolution to 1080p or 4K.
- Choose Frame Rate: 60fps for smoother playback (especially for action or motion content).
- Tap More Settings > Bitrate, and select High (aim for 30–50 Mbps) for best clarity and minimal compression.
Always remenber that exporting with low bitrate (under 10 Mbps) will always introduce blurriness, compression blocks, and color banding—even if everything else is perfect.
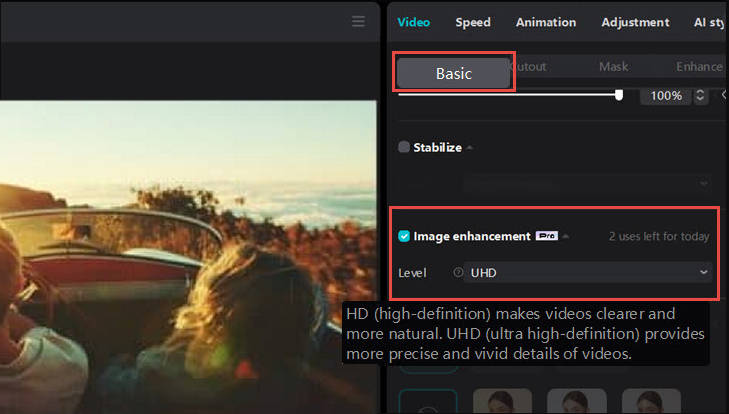
3. Use Image Enhancement to Upscale Low-Resolution Videos
If you're editing a video in HD or UHD but have some clips stuck in 720p resolution, CapCut Pro offers a solution. Its "Image Enhancement" tool, an AI-powered feature, can instantly boost the quality of these lower-resolution clips to match your project, eliminating the need for tedious manual adjustments. Keep in mind that this powerful feature is exclusive to CapCut Pro users.
Here are the steps to upscale videos with CapCut video upscaler:
- Import your standard definition (SD) or any other low-quality video clips into CapCut Pro on your desktop.
- Drag and drop the imported video onto your project's timeline.
- In the right-hand panel, navigate to the "Video" section, then "Basic." Here, simply toggle on "Image Enhancement" and select your desired output "Level" as HD or UHD.
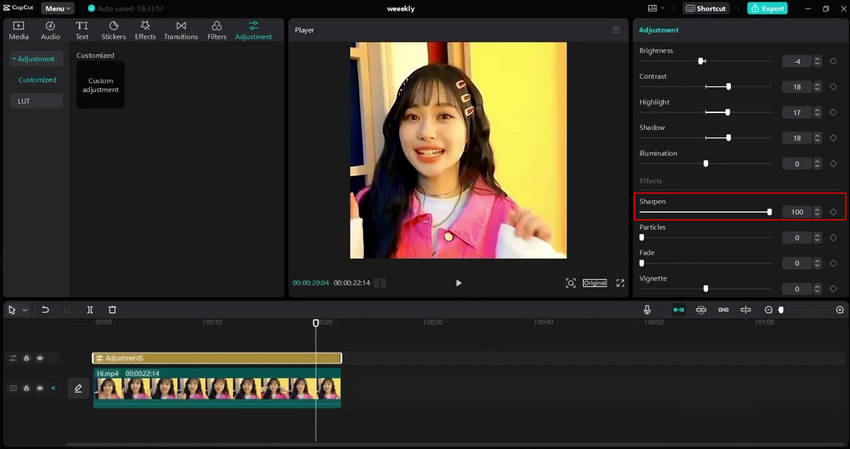
4. Sharpen Soft Footage and Improve Colors
If your CapCut video looks flat, dull, or slightly blurry, tweaking sharpness and color settings can dramatically improve its visual appeal—but only when done carefully. These adjustments enhance the perception of detail and make your footage more vibrant without distorting the original look.
Here’s how to safely get good video quality in Capcut by Sharpen without introducing unwanted noise or artifacts:
- Open your project and select the video clip you want to edit.
- Tap Adjustment in the toolbar.
- Scroll to find Sharpen below Effects, adjust the intensity slider to improve edge definition and fix soft-looking footage. The Recommended range could be from +10 to +20. Anything above +30 may introduce artificial halos or grainy textures, especially in darker scenes.
- For a more polished look, pair the Sharpen effect with CapCut's color and brightness adjust tools, like Brightness, Contrast, Saturation, Vignette, Exposure and so on.
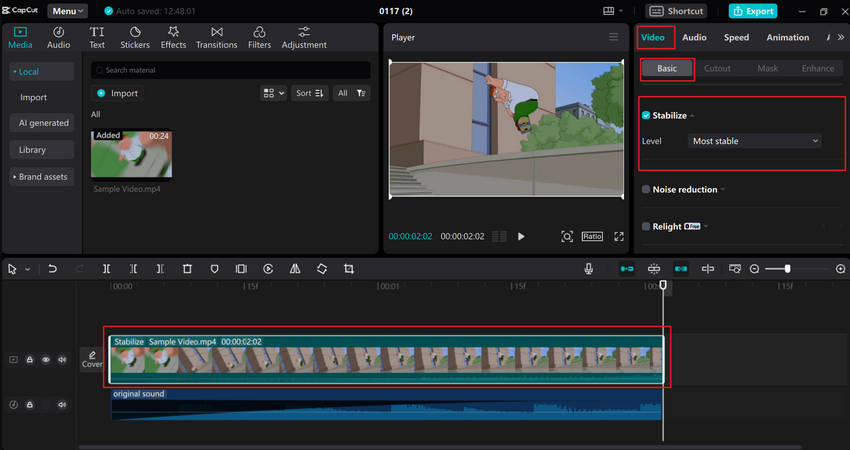
5. Stabilize Shaky Videos for a Cleaner Look
No matter how carefully you film, handheld footage often comes with jitter and shake—especially during walking shots, fast movement, or vlog-style filming. These unstable clips not only distract viewers but also give your video an amateur feel. If you're aiming to improve video quality in CapCut, stabilization is a must.
Fortunately, CapCut provides an easy-to-use video stabilization tool that helps fix shaky hands recordings in just a few taps.
- Open your project and import the shaky video clip.
- Select your video on the timeline, go to Video > Basic in the right panel
- Check the Stabilize box. Then, choose a stabilization level from the dropdown: Recommended, Minimum cut, or Most stable.
Why Your Video May Still Look Blurry After Editing in CapCut
If your video still looks blurry after adjusting the resolution, export settings, and enhancement tools in CapCut, the CapCut not working issue may be with the source footage itself. CapCut can improve the appearance of a video, but it cannot fully recover details that were never captured in the original recording.
Common causes include:
- Low-resolution source footage – Upscaling can increase the video size, but it cannot recreate all the missing details from a heavily compressed or low-resolution clip.
- Out-of-focus footage – If the camera failed to focus properly, important details may already be lost before editing begins.
- Motion blur – Fast movement or camera shake can create blur that basic editing tools cannot completely remove.
- Compression artifacts – Videos downloaded from social media platforms often contain compression artifacts that reduce clarity and image quality.
- Image noise – Footage recorded in low-light conditions may contain visible noise and grain, making videos appear softer and less detailed.
In these situations, adjusting settings alone may provide only limited improvements, especially when important visual details have already been lost.
The Limitations of CapCut Video Enhancement
While CapCut is an excellent and widely-used tool for mobile video editing, it's important to understand that it does have inherent limitations when it comes to genuinely increasing video quality, especially for more challenging footage. Its capabilities, while good for general edits, fall short in professional-grade enhancement:
- Can’t fully upscale low-res videos.
- Denoise and deblur functions are minimal.
- Post-export compression still happens.
- Image enhancement tool has low success rate on blurry scenes.
- Editing tools can’t recover lost detail
If you're working with blurry, noisy, compressed, or low-resolution footage, these limitations can quickly become noticeable. In such cases, dedicated AI video enhancement software can often achieve far better results by reconstructing missing details, reducing noise, and improving overall clarity—rather than simply adjusting existing pixels.
Want to go beyond CapCut's built-in enhancement tools? Try Aiarty Video Enhancer to upscale videos up to 4K, reduce noise, remove blur, and restore lost details with AI.
Better Way to Improve Video Quality Beyond CapCut with AI
While CapCut can improve the appearance of a video through resolution settings, sharpening, stabilization, and basic AI enhancement, it isn't designed for deep video restoration. If your footage suffers from heavy compression, motion blur, low-light noise, or low resolution, you'll often need a dedicated AI model trained specifically for video enhancement.
Aiarty Video Enhancer is built for exactly this purpose. Instead of simply enlarging a video or applying visual filters, it uses AI models to analyze each frame, recover missing details, reduce noise, improve sharpness, and upscale footage up to 4K.
Why Aiarty Delivers Better Video Quality Than CapCut
- AI Upscaling to 4K: Instead of just stretching low-resolution footage like CapCut, Aiarty intelligently rebuilds fine details such as faces, textures, and edges while upscaling videos to true 4K clarity.
- Video Denoising: Removes grain and low-light noise while preserving natural textures, avoiding the overly “smooth” or artificial look that basic filters often produce in CapCut.
- Deblur & Detail Recovery: Recovers lost sharpness from motion blur, focus issues, or compression artifacts, helping restore clarity that CapCut’s sharpening tools cannot fully bring back.
- SDR to HDR Conversion: Expands brightness and color range to improve visual depth and dynamic range, delivering richer and more vivid results than standard CapCut color adjustments.
- Frame Interpolation: Generates smooth intermediate frames for low-FPS footage, improving motion fluidity beyond CapCut’s basic stabilization or editing effects.
- Batch Processing: Allows multiple videos to be enhanced at once, making it far more efficient than editing and exporting clips individually in CapCut.
Unlike CapCut, which is mainly designed for editing and quick content creation, Aiarty focuses on restoring and enhancing video quality at a deeper level. This makes it especially effective when dealing with blurry, noisy, or low-resolution footage that standard editing tools cannot fully fix.
How to Improve Video Quality Using Aiarty Video Enhancer
Step 1. Import Videos to Aiarty Video Enhancer.
Launch Aiarty and simply drag and drop your blurry video into the program. If you haven’t installed it yet, you can download it for free and follow the installation steps to get started.
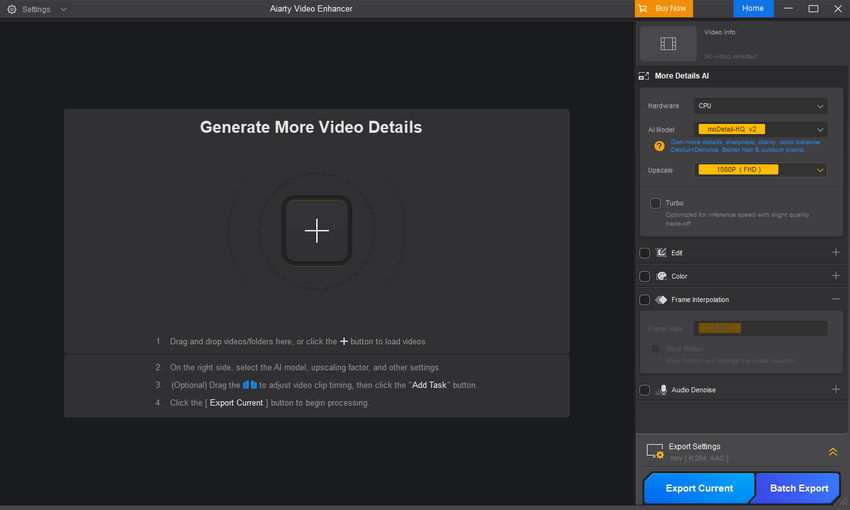
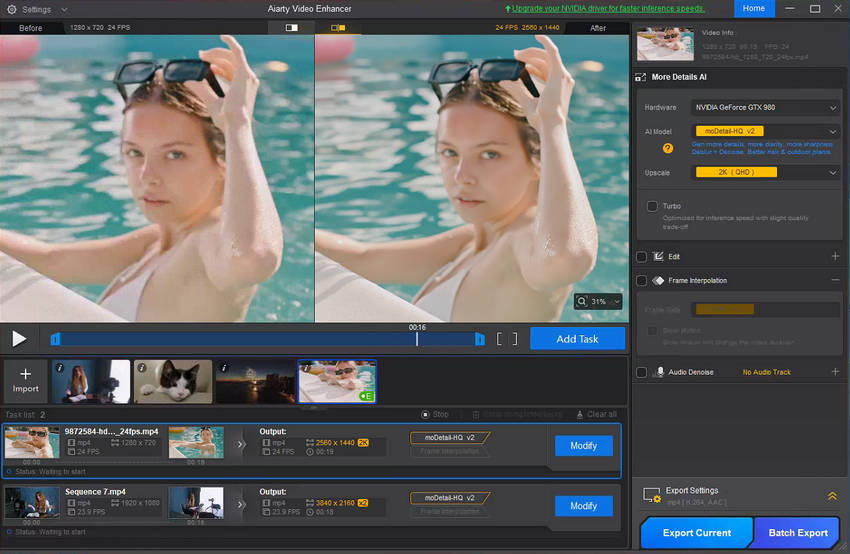
Step 2. Choose an AI Model
Click the AI Model dropdown to select the best fit for your footage.

- moDetail-HQ v2: Best for intricate details like hair and textures, it uses Diffusion+GAN for superior deblurring, denoising, and sharpness.
- Smooth-HQ v2: Ideal for faithful and smooth general video restoration, focusing on natural deblurring, denoising, and color realism.
- superVideo vHQ: A hybrid Diffusion+GAN model, it's designed for super denoising and deblurring grainy, low-light, and blurry clips for superior quality.
Step 3. Decide Upscale Scales.
Click the Upscale dropdown to choose your desired factor (2×, 4×, 1080p, 2K, 4K). For faster processing, enable Turbo Mode if you have a compatible GPU.
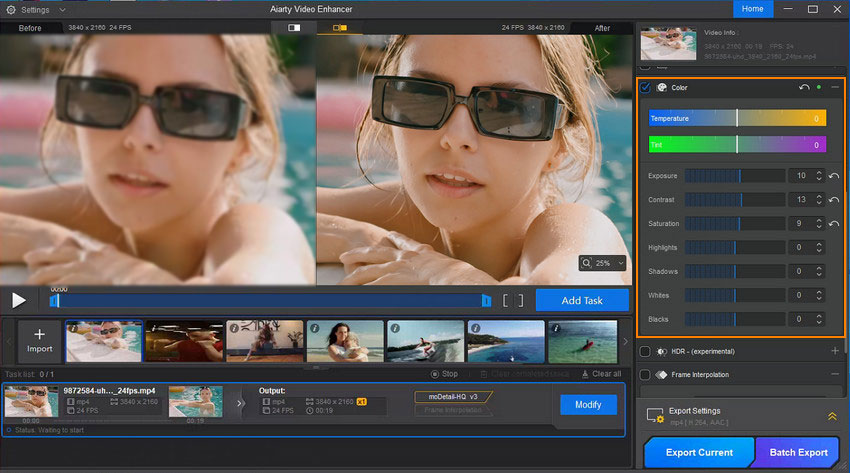
Step 4: Preview and Fine-tune Colors
Wait a while and you can see the preview side by side. If you're not satisfied with the color, you can also manually tweak the temperature, tint, white balance, conrast, saturation etc. until it meets your needs.
Step 5. Export
Once satisfied, select your output format and click Export Current or Batch Export to save your video with enhanced quality.
Conclusion
CapCut gives you a great starting point for video editing, but it can only do so much. By adjusting your resolution, frame rate, and export settings, you can already see improvement. However, if you want studio-quality results, especially when working with blurry, noisy, or compressed footage, Aiarty Video Enhancer is a must-have tool.
Unlock Viral-Ready Content: CapCut + Aiarty Video Enhancer in Minutes
Want your CapCut videos to truly stand out and grab attention? Combine the ease of CapCut's editing with the powerful enhancement of Aiarty Video Enhancer. This dynamic duo lets you create viral-ready content in minutes. You no longer have to worry about blurry exports or quality loss; Aiarty seamlessly picks up where CapCut leaves off.
Download Aiarty Video Enhancer today and transform your CapCut exports into sharp, vibrant videos!
 FAQs
FAQs
Set your project to 1080p or 4K, use high bitrate during export, and avoid overusing filters. For more advanced fixes, use Aiarty Video Enhancer.
CapCut compresses files during export, especially at lower bitrate or resolution settings. Templates and filters can also reduce clarity.
- Brightness: Start between -10 to -5, adjusting based on your video's original lighting.
- Contrast: Begin at +20 and increase it as needed to make details pop.
- Saturation: Aim for approximately +10 if your video features brighter colors, for a subtle boost.
- Vignette: Try setting this between +30 and +20 to gently darken the edges of your frame.
- Exposure: Adjust between +20 and -20 to control the overall lightness or darkness of your video.
- Sharpen: Set this to +10 to +20 for an initial crispness.
- Highlight: Start with approximately -15 to -20 to pull back overly bright areas.
CapCut has limited upscaling. Use Aiarty Video Enhancer for higher-quality upscaling with restored detail and sharpness.
Use 30–50 Mbps for 1080p or 4K videos. Lower bitrate will result in blur and color loss.
You May Also Like
This post was written by Brenda Peng who is a seasoned editor at Digiarty Software who loves turning ordinary photos into extraordinary works of art. With AI assistance for brainstorming and drafting, the post is reviewed for accuracy by our expert Abby Poole for her expertise in this field.