We’ve all been there: you capture a breathtaking landscape or a perfect candid moment, only to realize later that a stray power line, a trash can, or a random photobomber has ruined the shot. In the past, learning how to take something out of a picture required advanced Photoshop skills and a lot of patience.
Fast forward to today, and the game has changed. Thanks to the evolution of AI remove object from photo technology, what used to take hours of manual cloning and healing can now be done in seconds.
Whether you are looking for a quick mobile fix or a professional-grade solution that preserves every pixel of detail, there are several effective ways to remove objects from images without leaving a trace.
In this guide, we’ll break down the 4 best methods for removing objects from photos, ranging from instant online erasers to powerful AI-driven desktop software like Aiarty Image Enhancer, so you can choose the right tool for your specific needs.

Method 1: Remove Objects from Photos with AI (Best Quality & Offline Processing)
If you want to remove unwanted objects from photos while simultaneously enhancing image quality, such as denoising or deblurring, Aiarty Image Enhancer is a solid option.
This AI-powered image enhancer recently introduced AI Eraser (Beta), a feature designed not merely to cover up unwanted objects, but to intelligently reconstruct the surrounding background for natural-looking results.
Whether you’re removing distracting power lines or erasing a photobomber from a busy street scene, Aiarty aims to make the final image look as if the object was never there.
All processing is done locally on your device, meaning there’s no need to upload sensitive photos to a cloud server.
How to Edit Objects Out of Photos with Aiarty (Step-by-Step)
To get started, download and install Aiarty Image Enhancer on your Windows or Mac computer.
Step 1: Import Your Image
Launch Aiarty and drag and drop your photo into the interface, or click the + Add button to import it manually.
Step 2: Set Your Quality
Before erasing anything, choose an AI model based on your image type. If your goal is only object removal without changing the image resolution, select x1 under the Upscale options.
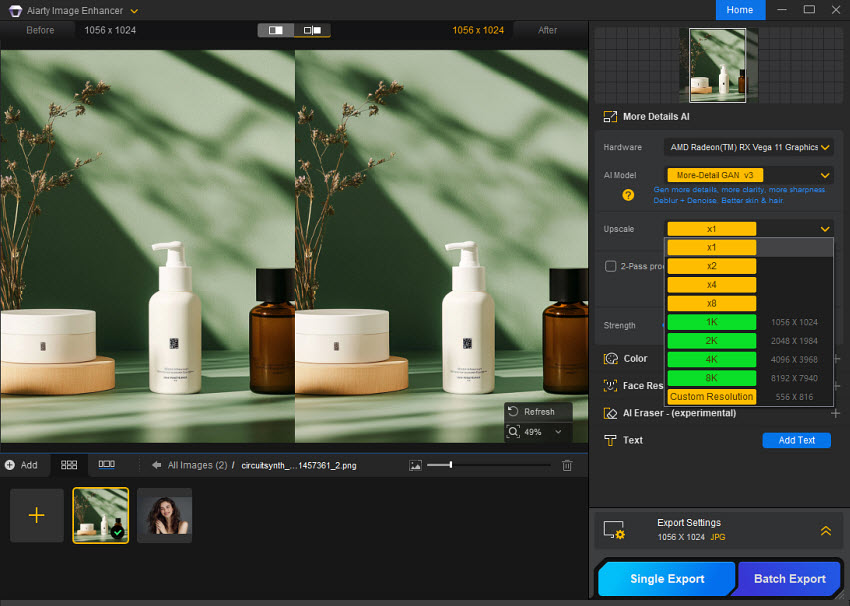
Then, Aiarty will start enhancing the image for preview.
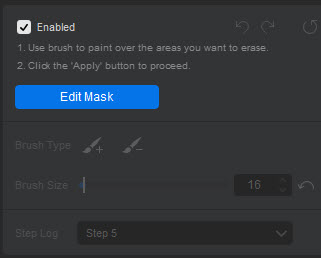
Step 3: Enable AI Eraser & Mask the Object
Once the enhancement is done, locate the AI Eraser panel on the right.
- Check Enabled (on first use, the required AI models will be downloaded locally).
- Click Edit Mask.
- Adjust your brush:
- Use Brush + to paint over the unwanted object.
- Adjust the brush size with the slider for precision, and make sure to cover nearby shadows or edges.
- If you overpaint, switch to Brush − to refine the selection.
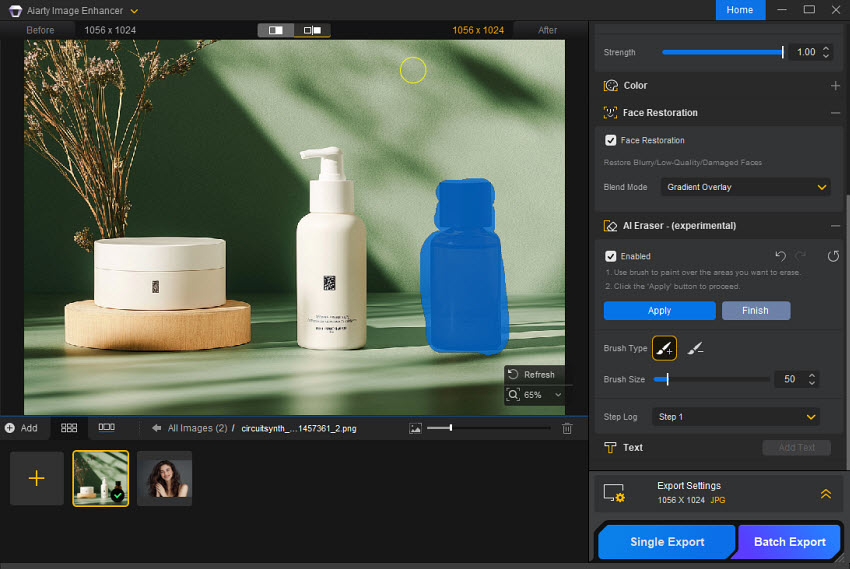
Step 4: Apply and Refine (Step-by-Step Erasing)
Instead of removing everything at once, Aiarty works best with a step-by-step approach:
- Paint over one element (for example, a photobomber) and click Apply.
- The AI processes only that selected area, and the action is recorded in the Step Log.
- Repeat the process for other distractions, such as signs or cables.
- Once the background looks clean and natural, click Finish.
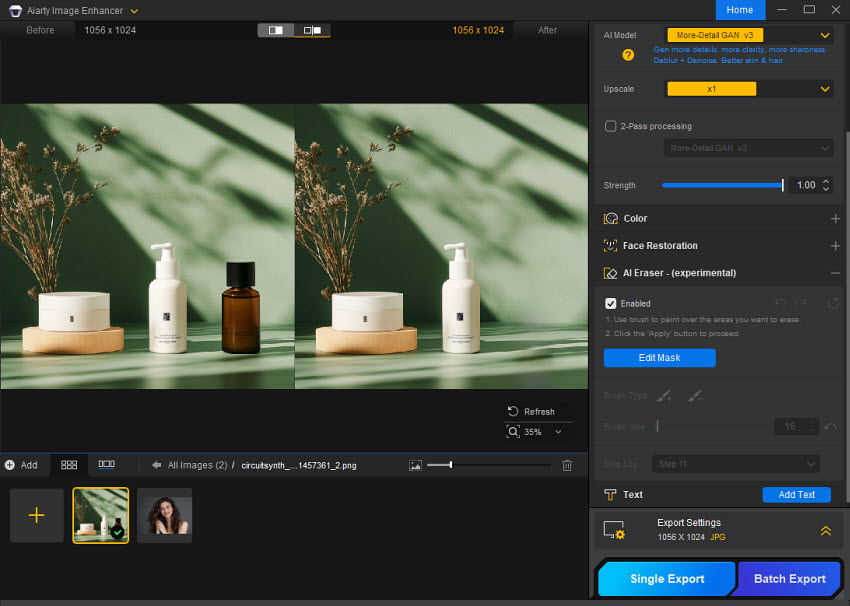
Step 5: Export Your Clean, Enhanced Photo
Finally, click the Export button in the bottom-right corner to save your high-resolution, clutter-free image.
Method 2: Remove Objects from Photos Online (Best for Quick, Low-Resolution Edits)
For users who need to erase something from a picture instantly without installing any software, web-based AI tools are a convenient shortcut. Popular platforms like PhotoRoom or Pixelcut offer dedicated eraser features that work directly in your browser. These are ideal for simple social media posts or small images where professional-grade resolution isn't the top priority.
While these tools are fast, they often come with trade-offs, such as file size limits and compressed output for free users.
How to Remove Objects from Images Online:
Step 1: Visit an Online Eraser
Head to a site like PhotoRoom’s Magic Eraser or Pixelcut’s Object Remover. Here we’ll take PhotoRoom as an example.
Step 2: Upload Your Photo
Click the upload button or drag your file into the browser.

Note: Most free online tools have a size limit; if your photo is a high-res RAW or 4K file, you may need to resize it first.
Step 3: Brush the Object
Use the virtual brush to highlight the object or person you want to remove from the photo.
Step 4: Process and Preview
The tool will generate a filled-in version of your background in a few seconds.
Step 5: Download the New Photo
Click the download button and select your desired quality to save.
Most online platforms allow free users to download only in "Standard Resolution". To get the high-definition (HD) or "Pro" version without watermarks, a monthly subscription is usually required.
Method 3: Remove Objects from Photos on Mobile (Best for Social Media & On-the-Go Editing)
If you’re out traveling and want to post a photo immediately but notice a distracting tourist in the background, a mobile app is your quickest fix. Smartphone apps have evolved from simple filters to featuring impressive object removing capabilities. Popular choices like Snapseed (using the "Healing" tool) or TouchRetouch are specifically designed for mobile finger-painting.
While these apps are incredibly convenient for removing objects from photos right after you take them, they are best suited for small screens. On a larger monitor, the "erased" areas may appear less detailed compared to desktop-processed images.
How to Take Something Out of a Picture on Mobile:
Step 1: Open Your Image
Launch your chosen app (e.g., Snapseed) and import the photo from your gallery.

Step 2: Select the Removal Tool
Look for terms like "Healing," "Object Removal," or "Eraser."
Step 3: Zoom and Brush
Use your fingers to zoom in for better accuracy. Brush over the unwanted object.
Step 4: Instant Auto-Fill
The app will use AI to fill the space. If the result looks unnatural, most apps allow you to "Undo" and try a smaller brush stroke.
Step 5: Save to Camera Roll
Export the photo directly to your phone for instant sharing.
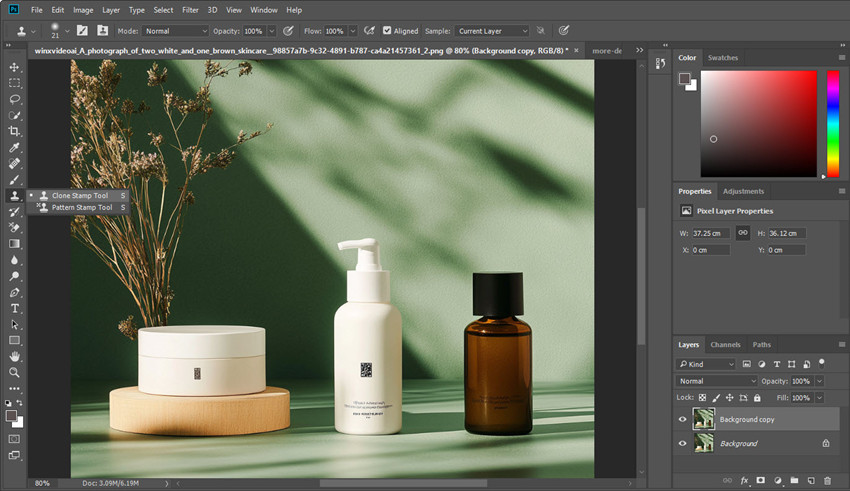
Method 4: Remove Objects from Photos in Photoshop (Best for Pixel-Level Control)
Photoshop remains one of the most powerful tools for object removal, especially when you need precise control over complex scenes. With features like Content-Aware Fill, Spot Healing Brush, and the newer Generative Fill, Photoshop allows you to remove unwanted objects while manually refining the result when needed.
That said, object removal in Photoshop often requires more hands-on work and a basic understanding of layers, selections, and masking—making it better suited for users who want full control rather than a one-click solution.
How to Remove Objects from Photos in Photoshop (Step-by-Step)
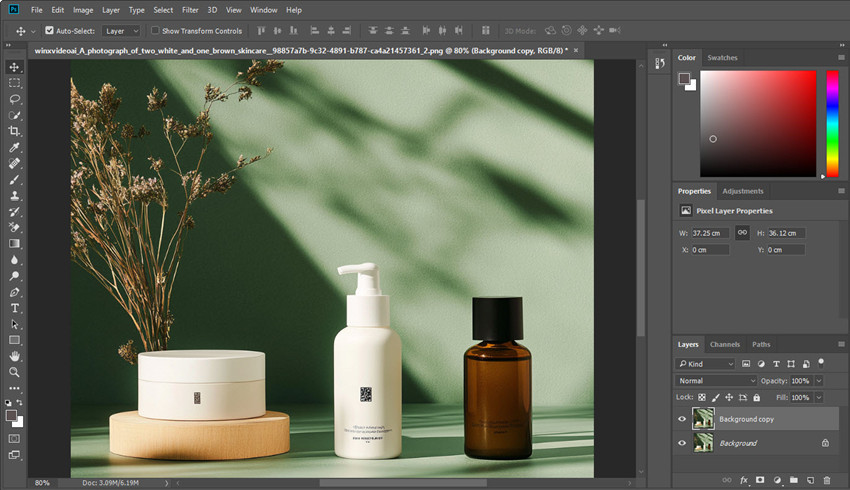
Step 1: Open Your Image and Duplicate the Background
Open your photo in Photoshop. In the Layers panel, duplicate the background layer (Ctrl/Cmd + J) so you can work non-destructively.
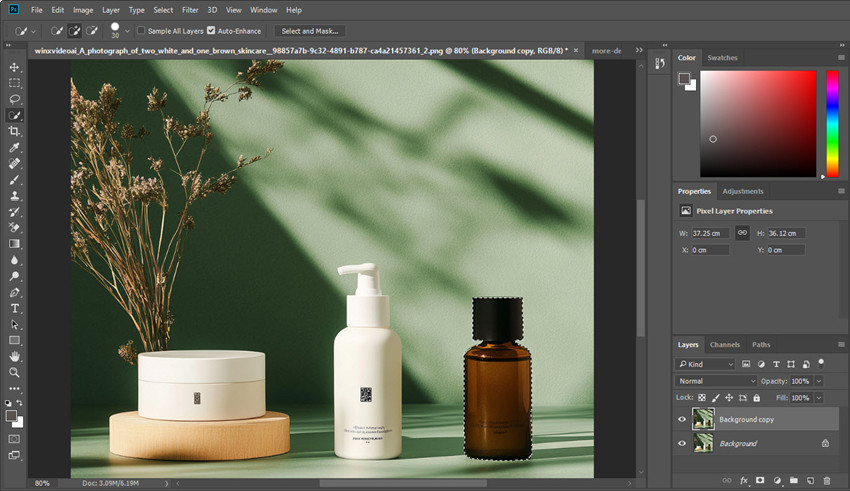
Step 2: Make a Selection Around the Object
Use a selection tool such as Lasso Tool, Object Selection Tool, or Quick Selection Tool to roughly outline the object you want to remove. There’s no need to be overly precise—just make sure the object is fully included.
Step 3: Use Content-Aware Fill
With the object selected, go to Edit → Content-Aware Fill.
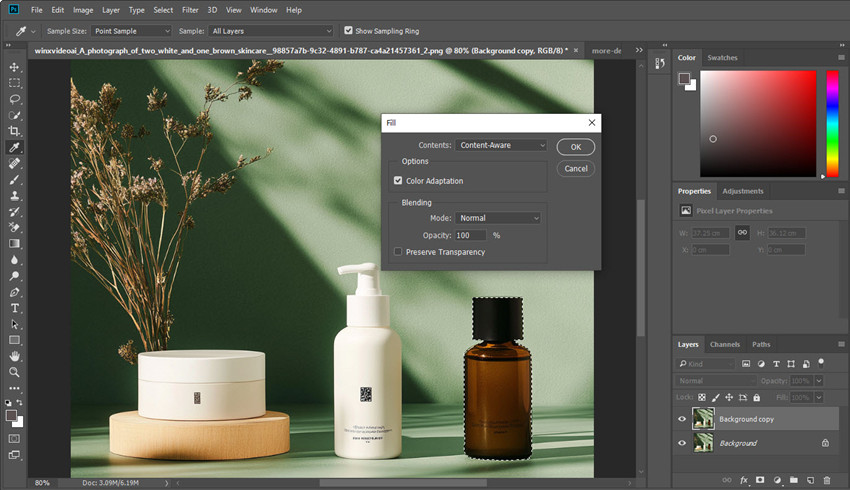
In the preview panel, Photoshop will analyze surrounding pixels and generate a fill based on the background. Adjust the sampling area if necessary to exclude unwanted textures or patterns, then click OK to apply the result.
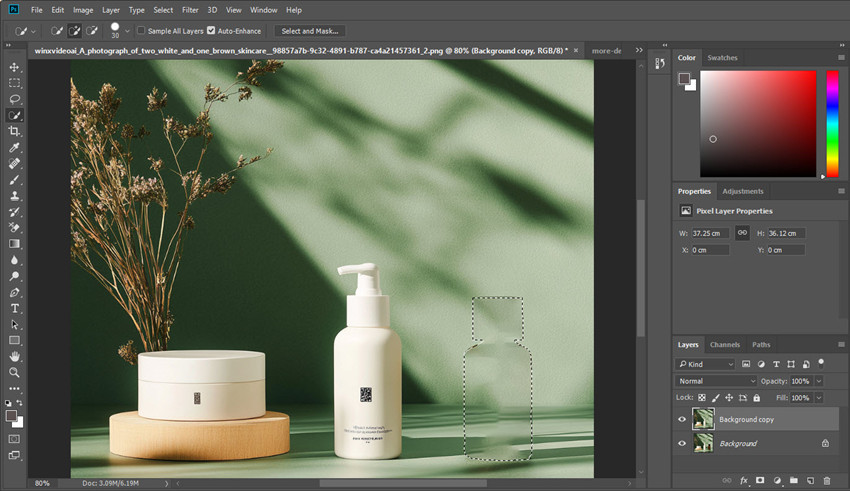
Step 4: Refine with Healing Tools
After applying Content-Aware Fill, zoom in and check for visible artifacts or repeating patterns.
Use tools like the Spot Healing Brush or Clone Stamp Tool to manually refine edges, fix texture inconsistencies, and blend the filled area more naturally with the surroundings.
Step 5: (Optional) Use Generative Fill for Complex Areas
For more challenging scenes—such as crowded backgrounds or detailed textures—select the remaining problem area and choose Generative Fill.
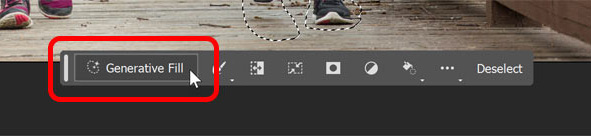
Leave the prompt blank to let Photoshop intelligently reconstruct the background, or enter a simple description if you want more control. Review the generated variations and select the one that blends best.
Step 6: Final Review and Export
Once you’re satisfied with the result, zoom out and review the image at 100% and full-frame views. When everything looks natural, export your image via File → Export → Export As.
Final Thoughts
Removing unwanted objects from photos no longer requires advanced editing skills or hours of manual work. Thanks to modern AI tools, what was once a Photoshop-only task is now accessible to everyone, regardless of experience level. For instance, if you are on editing photos on Mac, now you can use its free Photos App to remove objects.
That said, there’s no single “best” method for every situation. Online tools and mobile apps are perfect for quick, casual edits, while professional software like Photoshop still offers unmatched control for complex scenes. AI-powered desktop tools sit comfortably in the middle, balancing speed, quality, and privacy.
The key is choosing the right tool based on your image quality requirements, editing workflow, and where you plan to use the final photo. With the four methods above, you should be able to remove objects from photos confidently without compromising on results.
You May Also Like
This post was written by Brenda Peng who is a seasoned editor at Digiarty Software who loves turning ordinary photos into extraordinary works of art. With AI assistance for brainstorming and drafting, the post is reviewed for accuracy by our expert Abby Poole for her expertise in this field.