If you're trying to figure out how to open Camera Raw in Photoshop, you're not alone. Many users struggle with Camera Raw not opening, the filter missing, or RAW files opening directly in Photoshop instead.
This complete 2026 guide walks you through everything you need to know about Adobe Camera Raw, including how to open Adobe Camera Raw, how to open Camera Raw in Photoshop, how to enable the Camera Raw filter, why Camera Raw may not be opening, how to fix unsupported RAW files, and when it makes sense to use alternative solutions.
Let’s start with the basics.
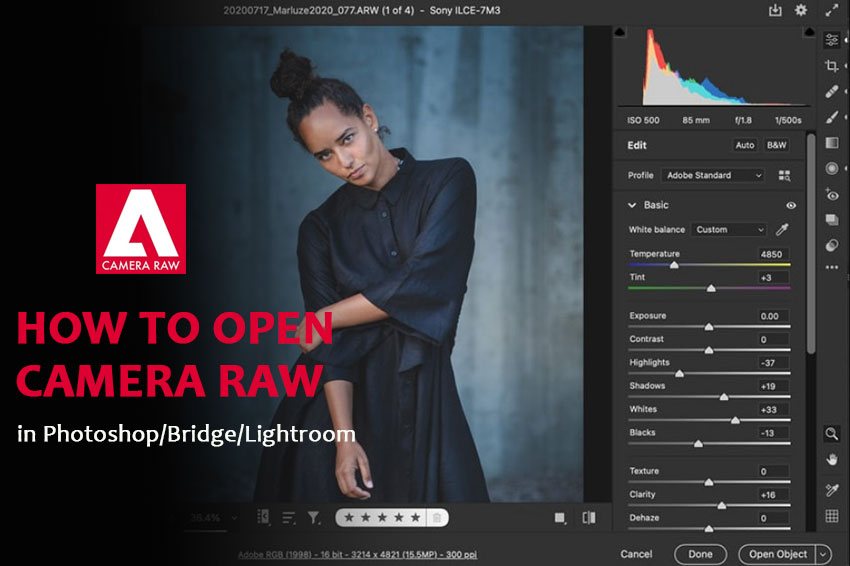
What Is Adobe Camera Raw?
Adobe Camera Raw (ACR) is a built-in Photoshop plugin that allows you to edit RAW images non-destructively before opening them into Photoshop.
Camera Raw allows you to:
- Adjust exposure
- Fix white balance
- Recover highlights and shadows
- Reduce noise
- Sharpen images
- Apply color grading
- Use masking tools
Unlike Photoshop’s destructive editing workflow, Camera Raw edits are reversible. But it's important to note that Camera Raw is not a standalone program. It works inside Photoshop or Bridge.
Hot Search: 11 Best RAW Editing Software (Free & Paid): Which RAW Photo Editor Is Worth It in 2026?
How to Open Camera Raw in Photoshop (Quick Answer)
If you need a fast answer, here are the main ways.
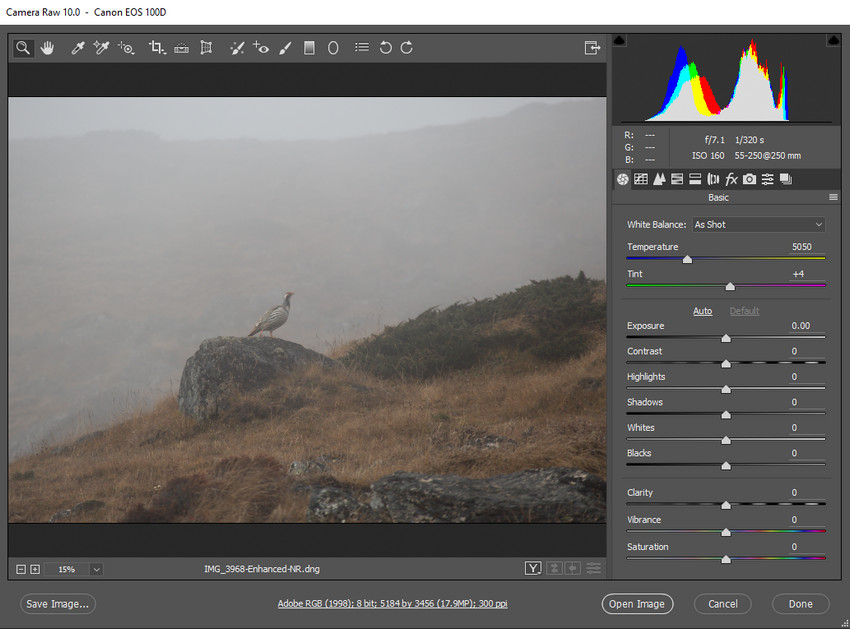
Method 1: Open a RAW File Directly
This is the most common method.
- Open Photoshop
- Click File > Open
- Select a RAW file (.CR2, .NEF, .ARW, etc.)
- Camera Raw opens automatically
If your file is supported, Camera Raw will launch before Photoshop opens the image.
Method 2: Open Camera Raw Filter from Photoshop
You can also manually open Camera Raw on any image, even if it isn’t a RAW file. This method is especially useful when you want to apply color correction, exposure adjustments, or basic enhancements to an existing photo.
- Open an image in Photoshop
- Go to Filter
- Click Camera Raw Filter
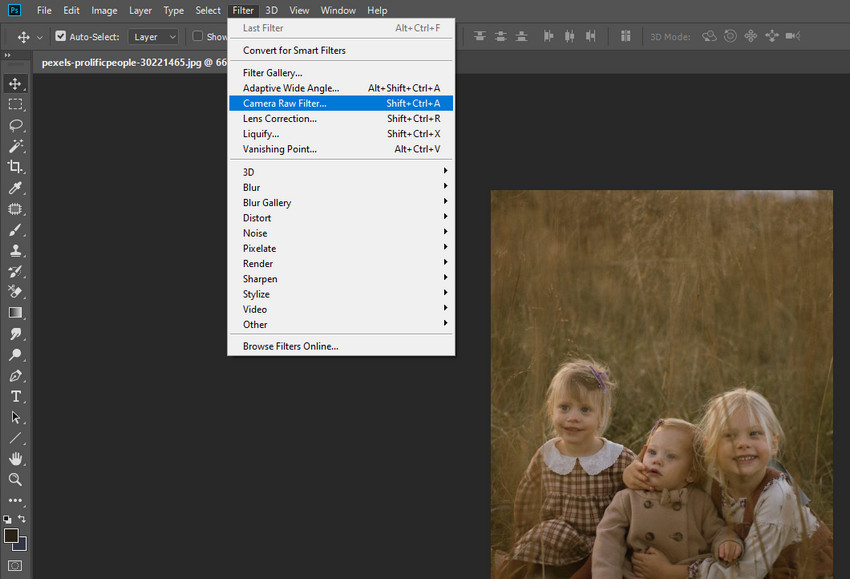
The Camera Raw workspace will open, allowing you to adjust lighting, color, texture, noise reduction, and more before applying the changes. This method works with JPEG, PNG, and TIFF files, making it a flexible option even if you’re not working with RAW images.
Hot search: How to Edit Raw Photos for Best Quality >>
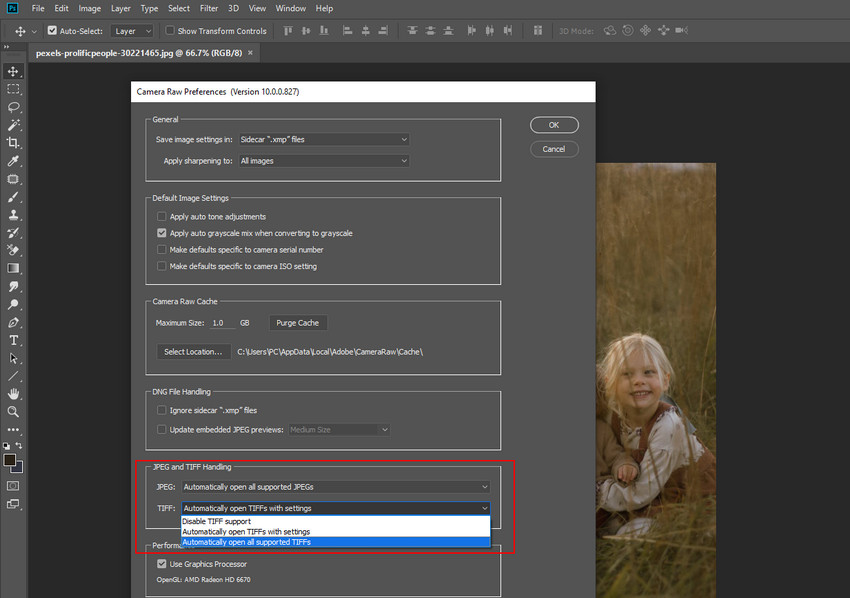
Method 3: Force Open JPEG or TIFF in Camera Raw
If your JPEG files open directly in Photoshop instead of launching Camera Raw first, you can change this behavior in the settings. Enabling this option allows supported JPEG and TIFF files to automatically open in the Camera Raw workspace for non-destructive adjustments before entering Photoshop.
- Go to Edit > Preferences > Camera Raw (on Mac, go to Photoshop > Settings > Camera Raw).
- Check the option “Automatically open all supported JPEGs and TIFFs.”
- Click OK to save the changes.
How to Open Adobe Camera Raw Without Photoshop
You can access Camera Raw without directly launching Photoshop.
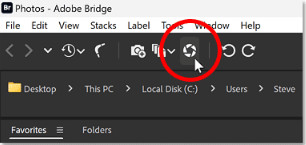
Option 1: Using Adobe Bridge
Adobe Bridge allows you to preview and open RAW files directly without manually launching Photoshop first. It acts as a file management tool and connects seamlessly with the Camera Raw engine.
Here're the steps to open Camera Raw in Bridge:
- Open Adobe Bridge.
- Navigate to the folder containing your RAW file.
- Click once to preview the image.
- Double-click the file to open it in Camera Raw.
Camera Raw will launch automatically, allowing you to adjust exposure, white balance, noise reduction, and other settings before sending the image to Photoshop. Bridge uses the same Adobe Camera Raw (ACR) engine, so the editing tools and results are identical to opening a RAW file through Photoshop.
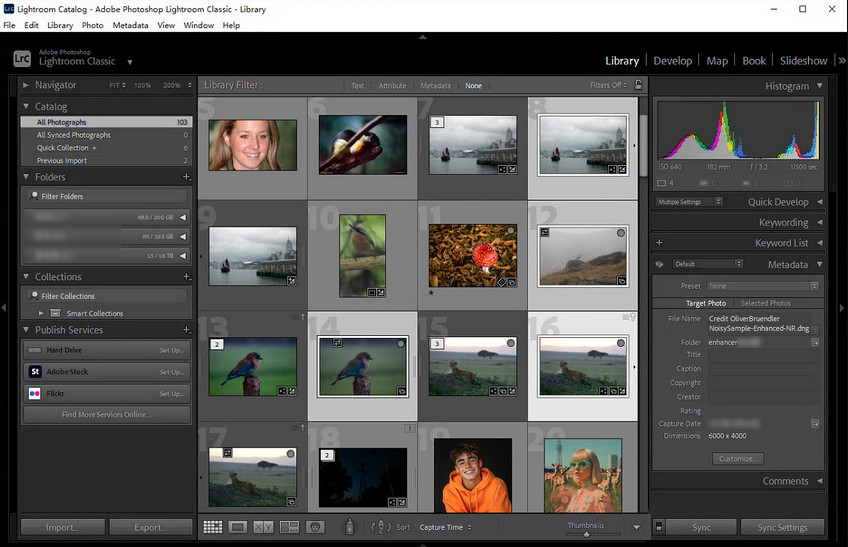
Option 2: Lightroom Uses the Same RAW Engine
Adobe Lightroom uses the same RAW processing engine as Camera Raw, meaning the core image adjustments, such as exposure, color grading, and detail recovery, are powered by the same technology.
However, Lightroom does not open a separate Camera Raw window. Instead, its Develop module integrates the RAW engine directly into its workflow. This makes Lightroom more suitable for photographers managing large image libraries, while Camera Raw is often preferred by Photoshop users who want to edit a single image before advanced retouching.
Why Is Camera Raw Not Opening & How to Fix It?
If you’re wondering why Camera Raw is not opening, you’re not alone. This is one of the most commonly reported issues among Photoshop users. The problem can usually be traced to outdated software, unsupported files, or incorrect settings.
Let’s go through the most common scenarios and how to fix them.
1. Camera Raw Filter Missing
If you don’t see Camera Raw Filter under the Filter menu in Photoshop, there are a few likely reasons.
Possible causes:
- Photoshop is outdated
- The Camera Raw plugin is not properly installed
- The file format is not supported
How to fix it:
- Update Photoshop through Creative Cloud
- Restart Photoshop after updating
- Make sure the latest version of Camera Raw is installed
In most cases, simply updating Photoshop resolves the issue, since modern versions bundle the latest Camera Raw plugin automatically.
2. RAW File Not Supported
If your RAW file doesn’t open in Camera Raw at all, it may not be supported by your current version of Adobe Camera Raw. This often happens with newer camera models, as older ACR versions may not recognize newly released RAW formats.
Solutions:
- Update Camera Raw (by updating Photoshop)
- Check Adobe’s official camera compatibility list
- Convert the RAW file to DNG format using Adobe’s free DNG Converter
Updating typically fixes compatibility issues immediately.
3. RAW File Opens Directly in Photoshop
Sometimes, a RAW file opens straight into Photoshop instead of launching the Camera Raw window first.
This usually happens when:
- Camera Raw preferences were changed or disabled
- The file extension looks like RAW but isn’t a true RAW format
To fix this, go to Preferences > Camera Raw and review your settings. Make sure automatic opening options are enabled and that the file format is supported.
In most situations, checking your preferences and updating Photoshop will restore normal Camera Raw behavior.
When Should You Use Camera Raw?
Camera Raw is best suited for photographers and Photoshop users who want precise control over their RAW images before moving on to more detailed edits. It excels at:
- Editing RAW files
- Adjusting exposure
- White balance correction
- Color grading before Photoshop retouching
- Noise reduction in RAW images
However, Camera Raw is not designed for AI-based upscaling, restoring low-resolution images, or performing heavy automated restoration. For tasks like enhancing image resolution or repairing blurry or old photos, AI-powered tools are more suitable.
When Camera Raw Isn’t Enough
While Camera Raw is powerful for RAW color correction, it has limitations:
- Requires Photoshop subscription
- No AI upscaling
- Limited old photo restoration
- Minimal automation
If your goal is enhancing low-resolution photos, restoring details, or improving image quality beyond exposure correction, you may need an AI-based solution.
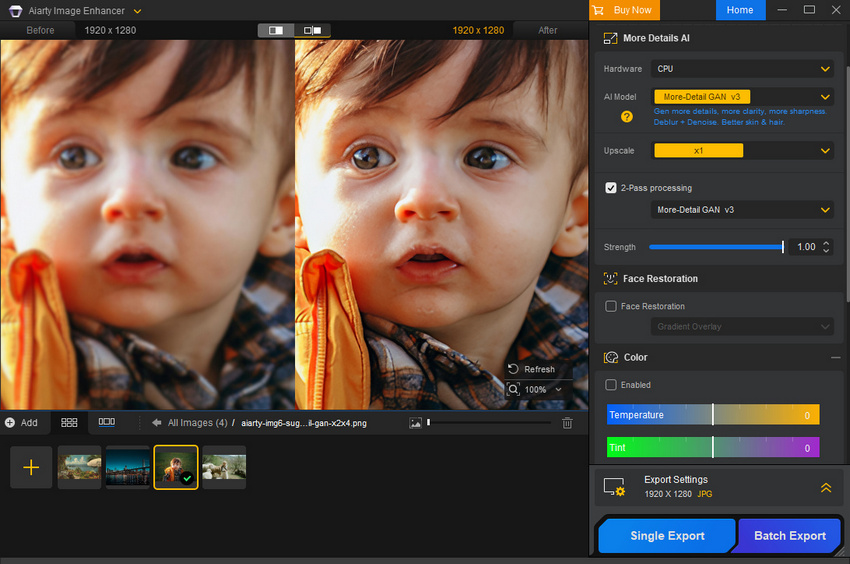
AI Enhancement Alternative to Camera Raw
Aiarty Image Enhancer focuses on AI-powered image enhancement instead of RAW editing. Unlike Camera Raw, which primarily focuses on adjusting light, color, and basic image corrections, Aiarty Image Enhancer is designed to take your images a step further using advanced AI technology. It specializes in:
- AI upscaling: increase image resolution while keeping sharpness and natural details.
- Detail restoration: recover textures and fine details lost to compression or blur.
- Noise reduction: remove grain and digital noise, ideal for low-light images.
- Old photo repair: restore vintage or damaged photos, fixing scratches and fading.
- Color correction: adjust color, contrast, exposure, and temperature for accurate tones.
- Batch enhancement: process multiple images at once, saving time for large collections.
Quick Comparison: Camera Raw vs Aiarty Image Enhancer
Summary
- Camera Raw is ideal for professional RAW workflows.
- Aiarty Image Enhancer is better for improving resolution and restoring image quality using AI.
They serve different purposes and can complement each other.
 FAQs
FAQs
Camera Raw is included with Adobe Photoshop and Adobe Bridge, so you don’t need to purchase it separately. However, you do need an active Adobe Creative Cloud subscription to access Photoshop or Bridge, which provides the Camera Raw plugin and ensures it stays updated.
Camera Raw works only inside Adobe Photoshop and Adobe Bridge; it is not a standalone application. This means you need one of these programs installed to open and edit RAW files using Camera Raw’s non-destructive editing tools.
If a RAW file doesn’t open in Camera Raw, it’s likely that your version of Camera Raw does not support your camera model or file format. Updating Photoshop (and Camera Raw) usually resolves the issue. You can also convert unsupported files to DNG format using Adobe’s free DNG Converter for compatibility.
To reset Camera Raw settings to their default state, open any image in Camera Raw, click the three-dot menu in the top right corner, and select Reset Settings. This will restore all adjustments and preferences to the original defaults.
To ensure images open in Camera Raw by default, go to Preferences > Camera Raw and enable “Automatically open all supported JPEGs and TIFFs”. After saving the changes, supported files will open in Camera Raw first, allowing you to make adjustments before entering Photoshop.
You May Also Like
This post was written by Brenda Peng who is a seasoned editor at Digiarty Software who loves turning ordinary photos into extraordinary works of art. With AI assistance for brainstorming and drafting, the post is reviewed for accuracy by our expert Abby Poole for her expertise in this field.