If you shoot with large raw files in batch, and need to quickly preview and curate these photos, FastRawViewer is one of the most popular options among these photo culling software, especially when speed and efficiency is your top concern.
In the review, I will guide you through its features, key strength, and tips for a quick workflow to curate images before further editing.
Why You Need FastRawViewer
FastRawViewer is built for quick preview, culling, and making decisions for a large volume of photos, especially those computing-intensive RAW files.
While comprehensive photo management apps like Lightroom incorporates photo culling, editing and enhancement features, there are occasions when photographers need a separate culling tool for viewing, anazlyzing, and pre-processing.
FastRawViewer captures my attention for much faster previews, and it reads the actual RAW data directly, instead of offering a proxy JPG preview.
Key Features of FastRawViewer
Real Raw Rendering Instead of JPG Previews
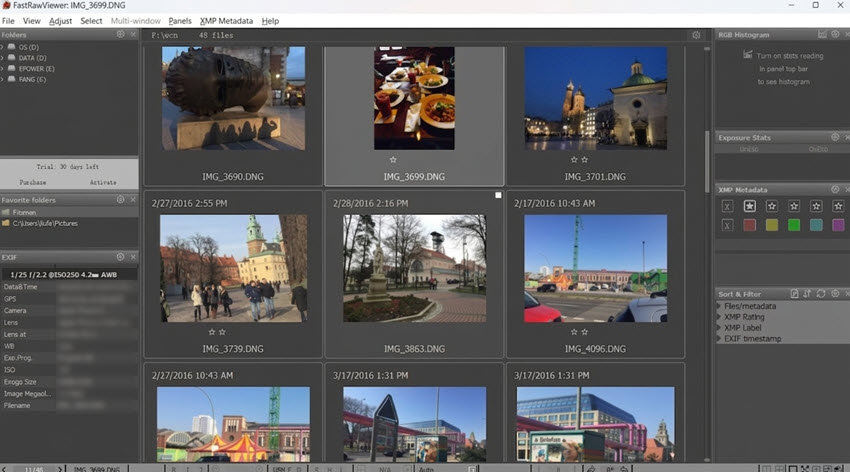
While some other image culling or editing apps show the embedded JPEG preview, FastRawViewer let use preview the RAW file directly.
The best part is, you can quickly arrow left and right along hundreds of rolls, and its real-time previewer corresponds with quick rendering, without "loading forever" freezes.
You can easily check Raw histogram and exposure data, thus making better decisions, such as if there's enough room to fix highlights clipping or bring back details in shadow areas.

Precise Analysis Tools
Instead of relying on guesswork or post-import adjustments, FastRawViewer gives you a set of analysis tools based on RAW sensor data, not processed previews.
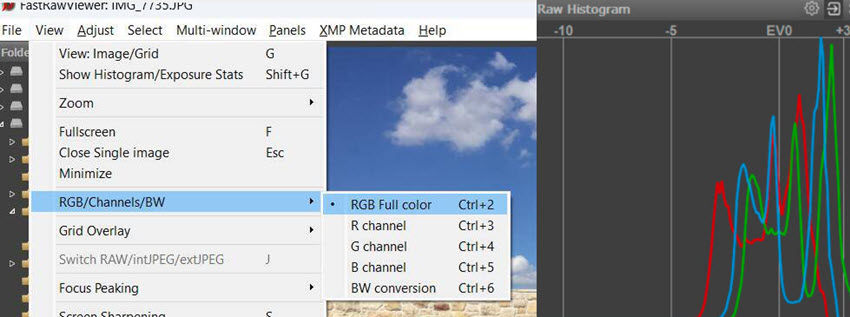
1) Channel-based clipping warnings
Besides standard highlight warnings, FastRawViewer also shows clipping in RBG channel. This is handy for experienced photographers, as sometimes only one channel is blown, and that can still be recoverable in post-processing.
2) Focus peaking for sharpness
FastRawViewer includes a focus peaking feature to check critical area. You can quickly confirm whether details are in focus without zooming in repeatedly.
This is particularly helpful when reviewing large chunks of wildlife shots, portraits, and action sequences.
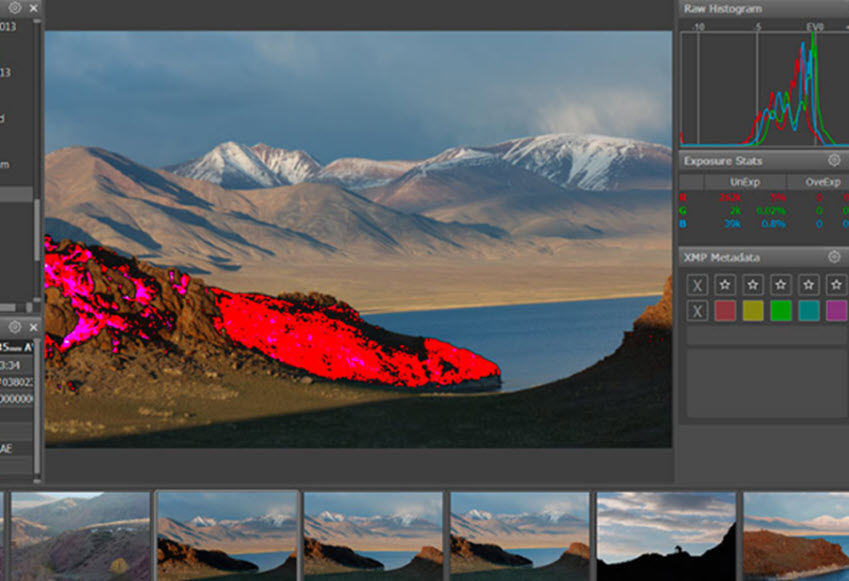
3) Simulate Exposure Before Further Editing
FastRawViewer provides accurate exposure analysis tools based on RAW data. The RAW histogram shows the true distribution of data from the sensor. You can simulate how much data is actually lost as compared to what is recoverable.
It enhances the entire editing workflow, as you can use FastRawViewer to make quick decisions before later importing photos into Lightroom or dedicated raw editing software.
For instance, you can quickly brighten dark areas without altering the original Raw file. This makes it easier to evaluate hidden noise in shadow regions, determine how much detail can be recovered.
Workflow Tips for Faster Culling
FastRawViewer is not just about viewing RAW files quickly. Its real advantage comes from how you build a consistent culling workflow around it.
Since I was already used to Adobe Lightroom Classic shortcuts, the first step was to configure FastRawViewer to match that muscle memory.
1. Set Keyboard Shortcuts
To work efficiently, customizing shortcuts is essential. Simply go to File > Customize > keyboard shortcuts.
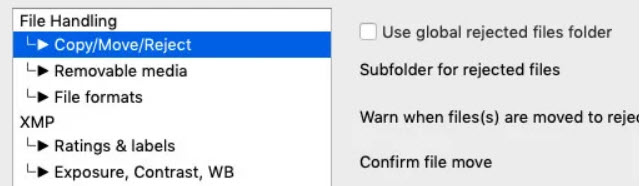
Step 1. In the settings window, go to File Copy/Move/Reject.
Step 2. Tick "enable move to selected subfolder" and select No for "warn when files are moved or rejected".
Step 3. Set P to move current photo to the selected subfolder to keep the consistency as Pick in Lightroom. Set X to move it to the reject subfolder.
Here are some other settings:
- Z: zoom to 100% (Shift+Z to apply to all photos)
- = (equal key) for synchronized zoom/pan
- 0 to 5 star rating, instead of pressing ALT+ numbers
- U: unrate
- Shift + arrow: replace one image in the comparison set
Once you get used to it, you can go through thousands of images in minutes without breaking concentration.
Tips:
You can also enable Auto Move to next photo after applying rating, just as how you do that in Lightroom (Auto Advance) and other culling software.
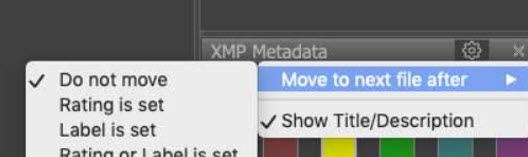
Here's how to do it:
XMP Metadata panel > Gear icon > Move to next file after > Rating or Label is set
2. Reject First, Then Select the Best
After testing different approaches, I found a "reject first" workflow to be much more efficient and easier to manage, especially when dealing with large batches of RAW files.
Instead of picking "good" photos first, the idea here is to remove the bad ones quickly, then refine what’s left. To keep things organized, I use a simple folder structure:
RAW/
├─ _rejected
├─ _candidates (optional)
└─ _selected
Step 1. For first pass, remove the obvious rejects.
Use X to send anything out of focus, badly exposed photos straight into _rejected.
Step 2. For the second pass, rate the potential keepers.
Assign star ratings and move anything around 3 stars and above into a _candidates folder.
Step 3. Select the best for further editing.
Compare similar shots and only keep the strongest one from each set, and send them into _selected. These are photos I will import in Lightroom for post processing.
3. Integrate with Your Editing Software
Many photographers combine FastRawViewer with tools like Adobe Lightroom Classic, Capture One, or DxO PhotoLab. The idea is simple: use FastRawViewer for speed and technical evaluation, then switch to your preferred editor for color grading, adjustments, and final polishing.
Instead of bringing thousands of images into Lightroom and sorting them there with slow rendering, we can complete most of the culling process inside FRV and only import the keepers, as shown in that 3pass workflow above.
Tips:
1. Save the ratings to XMP sidecar files.
2. Import only the selected images into Lightroom or another RAW editor.
FastRawViewer writes your ratings and labels into metadata files that other editing programs can read.
When you open the same folder in Lightroom, it automatically recognizes the ratings and labels you assigned earlier.
Enhance Borderline Photos with AI Image Enhancer
When rating potential keepers during the second pass culling, you may notice that some images are flawed. They could be slightly soft, a bit noisy, or underexposed, but the image content are valuable and worth keeping.
In a traditional workflow, these photos might be discarded early. However, with recent improvements in image enhancers with AI inference, these precious shots can be recovered and improved before final delivery.
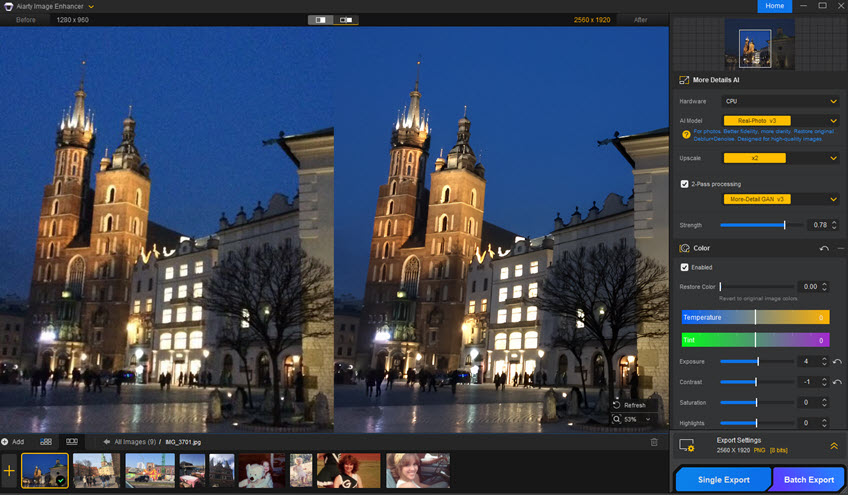
For example, tools like Aiarty Image Enhancer can help enhance RAW, JPG, PNG and mainstream images and photos. With specialized AI models to reduce noise, improve sharpness, and optionally upscale resolution. It will restore natural details, without introducing distracting artifacts or over-processing.
This can be especially useful for photos taken in low-light or situations where you had to push ISO, or when you crop wildlife photos to zoom-in on cute birds.
Limitations to Consider
While FastRawViewer is excellent at what it does, it is not an all-in-one solution.
- It does not include editing tools like color grading or retouching.
- The interface can feel technical or less beginner-friendly.
- It requires some initial setup and learning, especially for shortcuts and tools.
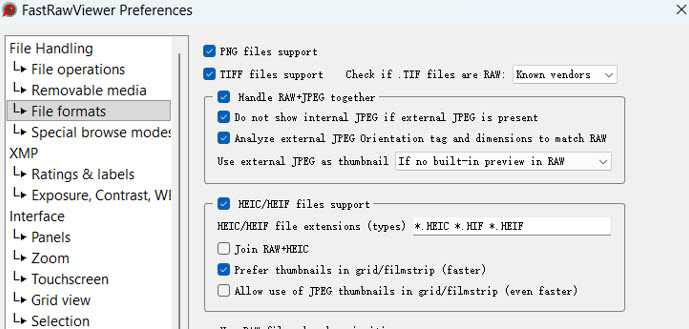
FastRawViewer supports a wider range of RAW file, such as CR2, CR, CRW, DNG, RW2, SRW, NEF, as well as HEIC/HEIF files. However, based on my recent tests, it still won't import Sigma Foveon raw, and non-raw compressed format such as AVIF.
Pricing and Licensing
FastRawViewer is relatively affordable compared to most photography software.
Lifetime license: $17.99, up to two computers.
It also offers a 30-day fully functional trial, giving you enough time to test whether it fits into your workflow before committing.
Final Thoughts
FastRawViewer is a specialized tool, but for photographers who regularly handle large batches of RAW files, it can significantly improve efficiency.
What makes it stand out is not just speed, but confidence in decision-making. You are evaluating real RAW data, not compressed previews. This reduces mistakes during culling and helps you keep only the images that truly matter.
If your current workflow feels slow or cluttered, adding FastRawViewer before your editing stage can be a simple but impactful upgrade.
You May Also Like
This post was written by Brenda Peng who is a seasoned editor at Digiarty Software who loves turning ordinary photos into extraordinary works of art. With AI assistance for brainstorming and drafting, the post is reviewed for accuracy by our expert Abby Poole for her expertise in this field.