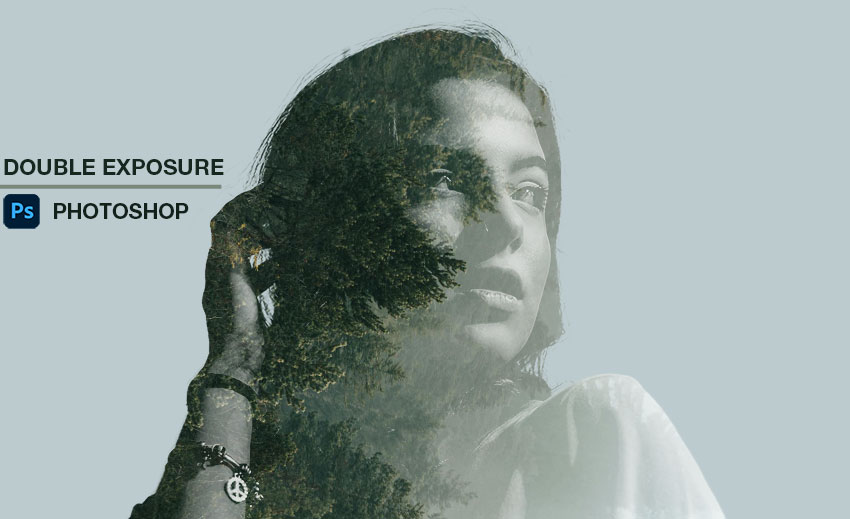
Quick Answer: Create a double exposure in Photoshop by converting your subject to black and white, adding an overlay image, applying a clipping mask, and using blending modes like Screen or Overlay. Then refine the result with layer masks and lighting adjustments. The key to a professional-looking double exposure is a clean cutout subject and well-balanced blending.
Double exposure in Photoshop is one of the most popular techniques for creating artistic and surreal images. Whether you're working on portraits, social media graphics, or branding visuals, learning how to create a double exposure effect in Photoshop gives you full creative control.
In this guide, you’ll learn a beginner-friendly method for creating double exposure in Photoshop, discover the best blending modes to use, understand common mistakes and how to fix them, and explore a faster way to prepare images for better results.
What Is Double Exposure in Photoshop?
Double exposure in Photoshop is a digital adaptation of the classic photography technique that blends two images using layers and blending modes into a single composition. This technique allows photographers and designers to combine multiple visual elements seamlessly, creating unique artistic effects that are difficult to achieve in-camera alone.
It usually combines:
- A portrait or silhouette (main subject), which serves as the focal point of the composition
- A texture, landscape, or pattern (overlay image) to add depth, emotion, or narrative
Double exposure is widely used to create artistic, emotional, and storytelling-driven visuals for purposes such as social media content, promotional materials, album covers, and creative photography projects.
How to Create Double Exposure in Photoshop (Step-by-Step)
Before starting your double exposure in Photoshop, select a high-contrast subject with clear edges and pair it with an overlay image featuring strong textures or patterns. The right images make blending easier and help achieve a clean, professional result.
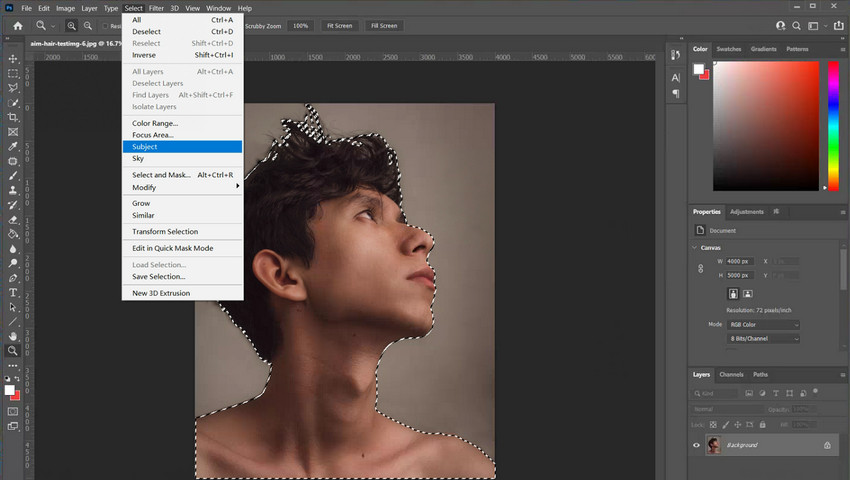
Step 1. Isolate the Subject
A clean subject is essential for professional double exposure, as rough edges, lost hair details, or leftover background can make the effect look unnatural. While you can remove backgrounds manually in Photoshop using tools like the Pen Tool, Select and Mask, Select Subject, or Quick Selection, these methods are time-consuming and tricky, especially around hair or fine details, and even experienced users may struggle to get perfectly smooth edges.
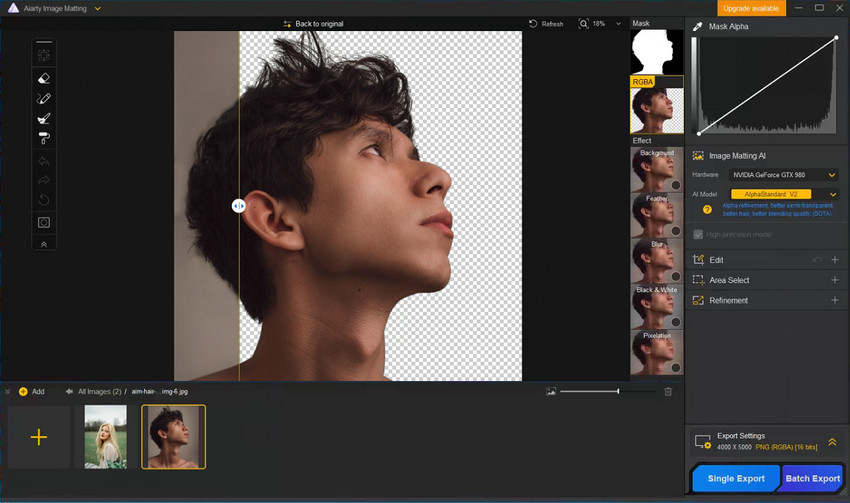
Instead of spending time manually refining edges in Photoshop, many creators now use tools like Aiarty Image Matting to automatically remove backgrounds. This is especially useful for hair, fine details, and complex edges, making the process faster and more accessible for beginners. Starting with a clean cutout can dramatically improve your double exposure Photoshop results and reduce editing time.
Ready to save time and get perfect cutouts? Download Aiarty Image Matting now to create a clean subject.
Aiarty Image Matting Review: Precise Background Removal in Bulk >>
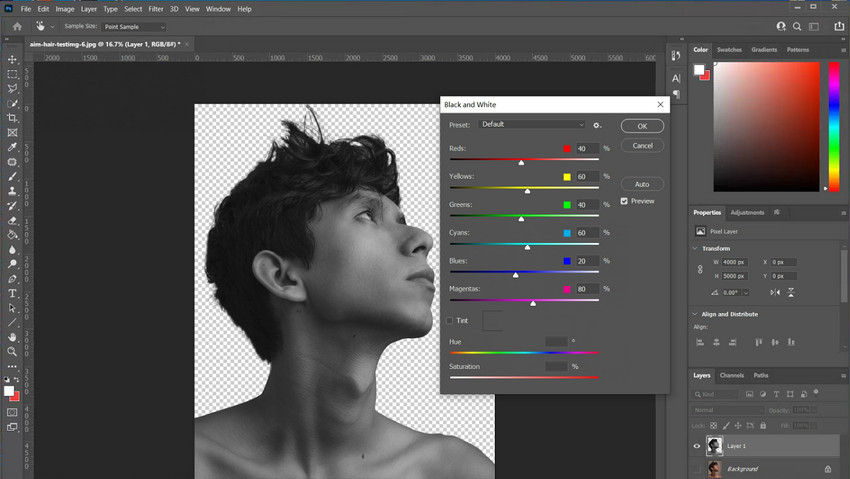
Step 2. Convert Image to Black and White
Open your subject image in Photoshop. Go to the top menu Image → Adjustments → Black & White…, and adjust the sliders for each color channel if needed to boost contrast. Converting to black and white helps define the subject shape and makes blending easier.
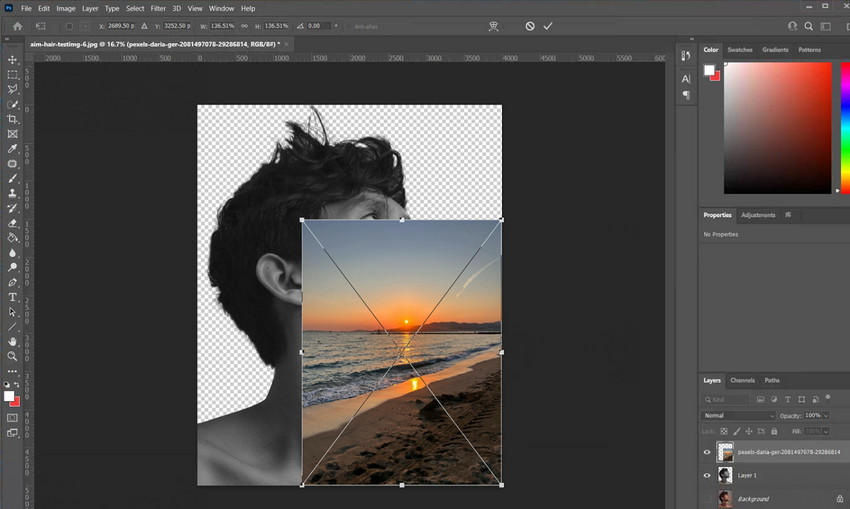
Step 3. Add Overlay Image
Go to File → Place Embedded… and select your overlay image. Resize and position it over the subject using the transform handles (Ctrl+T / Cmd+T). Press Enter to apply the placement.
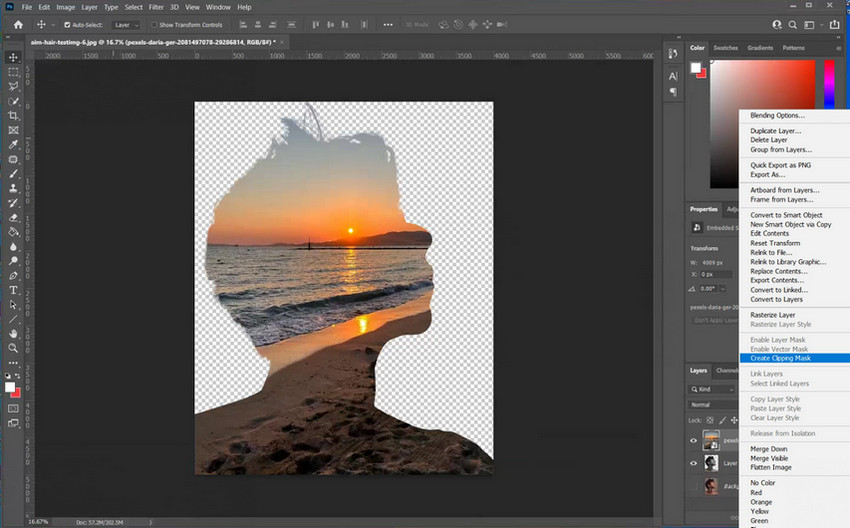
Step 4. Create a Clipping Mask
Make sure the overlay image layer is directly above your subject layer. Right-click the overlay layer in the Layers panel and select Create Clipping Mask. >> How to Make a Clipping Mask in Photoshop
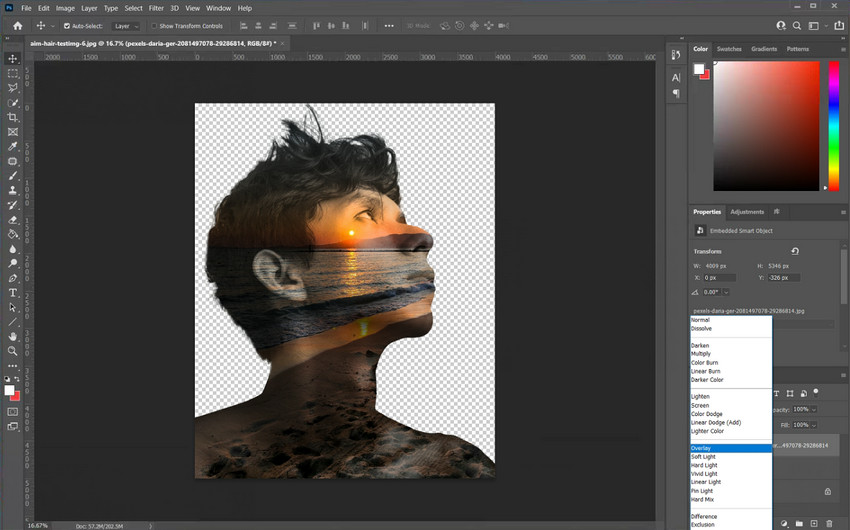
Step 5. Apply Blending Mode
Select the overlay layer and click the Blend Mode dropdown in the Layers panel (default: Normal). Choosing the right mode is key for a realistic double exposure:
- Screen creates a bright and airy look;
- Overlay adds striking contrast;
- Multiply produces a darker, moodier effect.
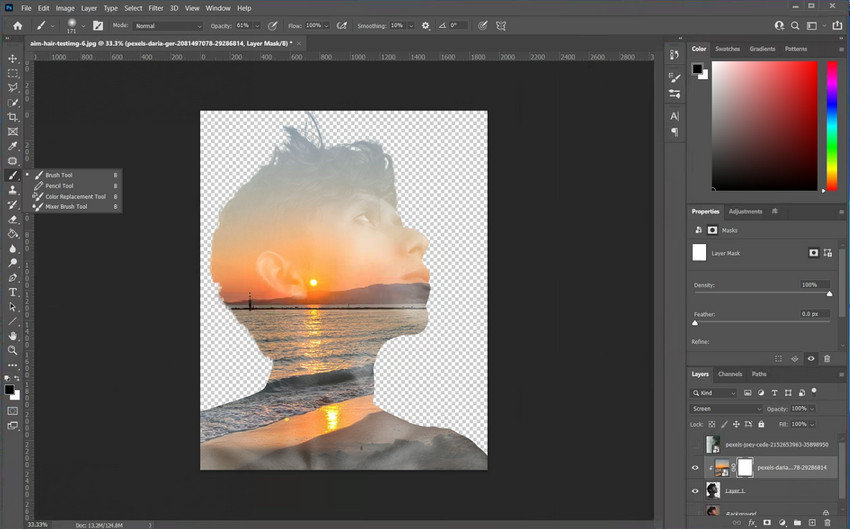
Step 6. Refine with Layer Mask
With the overlay layer selected, click Add Layer Mask at the bottom of the Layers panel. Select the mask thumbnail, then use a soft brush or gradient to hide unwanted areas. Switch between black and white brush to hide/reveal parts as needed.
Step 7. Adjust Contrast and Lighting
Select the top layer or add a new Adjustment Layer → Curves or Levels, then adjust highlights, shadows, brightness, and contrast to match the overall composition. Careful lighting adjustments are essential, as consistent lighting is what makes a double exposure look natural rather than artificial.

Advanced Double Exposure Techniques
Once you’ve mastered the basic double exposure steps, these advanced techniques can help elevate your images, adding more visual interest and professional polish.
- Use multiple overlay layers to add complexity and depth to your composition.
- Add subtle light leaks or glow effects to enhance mood and atmosphere.
- Apply cinematic color grading to unify tones and give your image a professional, polished look.
Advanced techniques help create depth, realism, and emotional impact, making your double exposure images more compelling and visually striking.
Common Mistakes for Photoshop Double Exposure & How to Fix Them
Even experienced Photoshop users can struggle when creating double exposures. Beginners often share that their results look “messy” or “flat.” Most issues come down to a few common mistakes, but once you know how to fix them, your images will look much more professional and polished.
1. Rough, jagged edges ruining the blend in double exposure.
Fix: Start with a clean cutout. You can refine edges manually in Photoshop, or save time using Aiarty Image Matting, which handles fine details like hair and complex shapes automatically.
2. Low contrast making the double exposure look flat or washed out.
Fix: Use Curves or Levels adjustment layers to boost contrast, enhancing the subject’s shape and making the overlay stand out.
3. Poor image choice making the double exposure composition feel cluttered or mismatched.
Fix: Select high-quality, high-contrast photos with clear subjects and visually interesting overlays. Consider patterns, textures, and how shapes interact to create a harmonious double exposure effect.
By addressing these common mistakes, you can create double exposures that feel intentional, professional, and visually striking rather than rushed or amateurish.
Conclusion
Creating a double exposure effect in Photoshop is a combination of technique and preparation. The key elements are a clean subject, the right blending mode, and balanced lighting to make the final composition look polished and professional.
If you want faster and cleaner results, starting with a high-quality cutout using tools like Aiarty Image Matting can make the entire process much easier and more consistent, saving time while ensuring your double exposure images look stunning.
Download Aiarty Image Matting today and start creating perfect cutouts in seconds!
 FAQs: Double Exposure in Photoshop
Screen is the most commonly used blending mode for double exposure in Photoshop because it creates a bright and natural-looking overlay. It works especially well for combining textures like smoke, light, or landscapes with portraits.
Yes. Removing the background helps isolate the subject and significantly improves blending accuracy and realism. Clean edges allow blending modes to work more effectively and produce a more professional result.
A double exposure often looks unnatural due to poor masking, mismatched lighting, or low contrast between layers. Fixing these issues with better cutouts, consistent lighting, and contrast adjustments can greatly improve realism.
Yes. With the right step-by-step process and a clean subject, beginners can easily create professional-looking double exposure effects in Photoshop, even without advanced editing experience.
You May Also Like
This post was written by Brenda Peng who is a seasoned editor at Digiarty Software who loves turning ordinary photos into extraordinary works of art. With AI assistance for brainstorming and drafting, the post is reviewed for accuracy by our expert Abby Poole for her expertise in this field.