Why Instagram Makes Videos Blurry: Compression Explained + Best Fixes
Why does Instagram ruin video quality? Most of the time, your video does not become blurry because the original file is bad. It happens because Instagram re-encodes every uploaded video, lowers the bitrate, resizes oversized footage, and optimizes playback for mobile networks. A sharp 4K clip can look soft, pixelated, or muddy after upload if the resolution, codec, frame rate, aspect ratio, or upload settings do not match Instagram's preferred workflow.
This guide explains why Instagram video quality drops after uploading, why Reels look blurry even when the original file is clear, the best export settings for Instagram Reels, and how to fix videos already damaged by compression using Aiarty Video Enhancer.
Why Does Instagram Ruin Video Quality? 6 Common Reasons
Instagram prioritizes fast playback, small file size, and smooth viewing across different phones and networks. That means every video is processed on Instagram's servers before viewers see it. If your upload is too large, too sharp, too noisy, incorrectly formatted, or transferred through a compressed channel, Instagram has to do more re-encoding, which usually means visible quality loss.
1. Instagram Compresses Every Uploaded Video
Instagram uses video compression to reduce storage and bandwidth. Compression removes data that the platform considers less important, including subtle textures, fine edges, film grain, and high-frequency details. This is why skies may show banding, skin may look waxy, and detailed areas such as hair, fabric, foliage, or city lights may turn blocky after upload.
2. 4K Videos Are Often Downscaled to 1080p
Uploading a 4K video does not guarantee better Instagram quality. Instagram usually displays Reels and Stories around 1080p, so 4K footage may be resized during processing. If the platform handles the downscaling instead of your editing software, the final video can look softer than a clean 1080p export prepared in advance.
3. High Bitrate Files Trigger Heavier Re-Encoding
A camera file exported at 30 Mbps, 60 Mbps, or higher may look excellent locally, but Instagram will still compress it. Extremely high bitrate uploads do not stay untouched. Instead, Instagram reduces the bitrate to make the video streamable, which can create blocky shadows, crushed gradients, or a general loss of clarity. The better strategy is to export at a stable, Instagram-friendly bitrate before uploading.
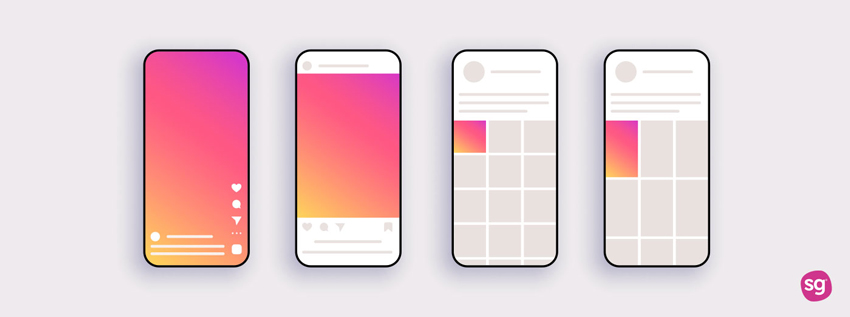
4. Wrong Aspect Ratio Forces Cropping or Scaling
Reels and Stories work best in 9:16 vertical format, while Feed portrait videos work best in 4:5. If you upload a non-standard size, Instagram may crop, pad, stretch, or resize the video. This extra processing can make details look less sharp and may introduce black bars or unexpected framing.
5. 60 FPS, HDR, and HEVC Can Cause Compatibility Issues
Modern phones often record in 4K, 60 fps, HDR, or HEVC/H.265 by default. These settings are useful for editing, but they are not always the safest final format for Instagram. If your file uses a format Instagram has to convert, the platform may reduce frame rate, change color, or introduce extra compression. For consistent uploads, H.264 MP4 at 30 fps is still the safer export choice.
6. Data Saver and Weak Networks Reduce Upload Quality
Instagram's Data Saver mode, low-quality upload settings, or unstable mobile networks can all reduce final quality. When Instagram tries to make an upload finish faster, it may compress the file more aggressively. This is why the same video can look worse when uploaded on cellular data than when uploaded over stable Wi-Fi.
In short, Instagram video compression is unavoidable. The goal is not to bypass it completely, but to give Instagram a clean, correctly formatted file that needs as little extra processing as possible.
Best Export Settings for Instagram Reels, Stories, and Feed Videos
The best way to prevent Instagram from ruining video quality is to export your video close to Instagram's preferred delivery format. Do not upload a massive master file and hope Instagram preserves it. Export a clean, platform-ready version first.
Should you upload 4K videos to Instagram? You can use 4K as your editing master, but for the final upload, a clean 1080 x 1920 export often gives more predictable results. If your original video is soft, noisy, or heavily cropped, upscale and clean it first, then export the final Instagram version at 1080p vertical.
How to Upload High Quality Videos to Instagram: 6 Practical Fixes
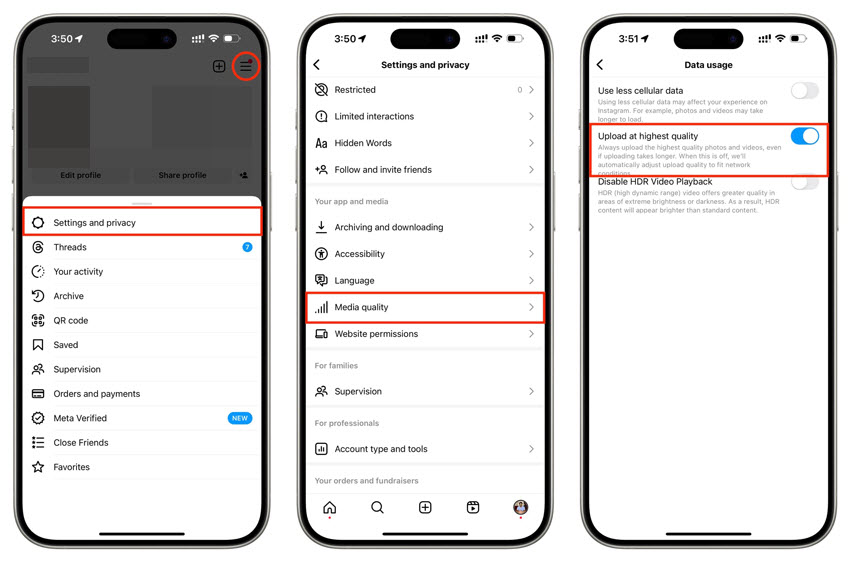
1. Turn on "Upload at Highest Quality"
Instagram has a built-in setting that can improve upload quality. If it is turned off, Instagram may prioritize faster uploads over better video detail.
- Open Instagram and go to Settings and activity.
- Find Data usage and media quality.
- Turn on Upload at highest quality.
- Turn off Data Saver when quality matters more than mobile data usage.
This setting does not remove Instagram compression, but it helps prevent unnecessary quality loss during upload.
2. Start with Clean Source Footage
Instagram compression exaggerates existing problems. If the source video is dark, noisy, oversharpened, or already compressed, the uploaded version will look worse. Record with enough light, avoid unnecessary digital zoom, and keep the original file as clean as possible before editing.
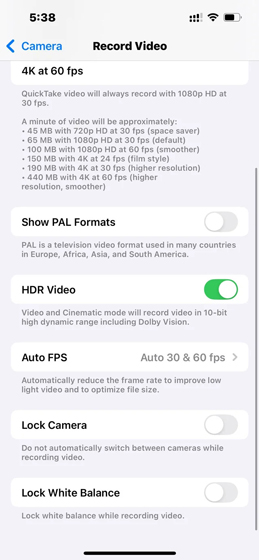
For iPhone users: Record at 4K 30 fps when you need a high-quality editing master, but export the final version in H.264 MP4 for Instagram. If HDR causes color shifts after upload, try exporting a standard dynamic range version.
For Android users: Check whether your phone records in HEVC by default. HEVC can save storage, but H.264 MP4 is often safer for Instagram compatibility.
3. Upload Over Stable Wi-Fi
A weak connection can make Instagram process your upload more aggressively. For important Reels, Stories, product videos, travel clips, or creator content, upload over a stable Wi-Fi connection instead of a fluctuating cellular network. This gives Instagram a better chance to receive the full file cleanly.
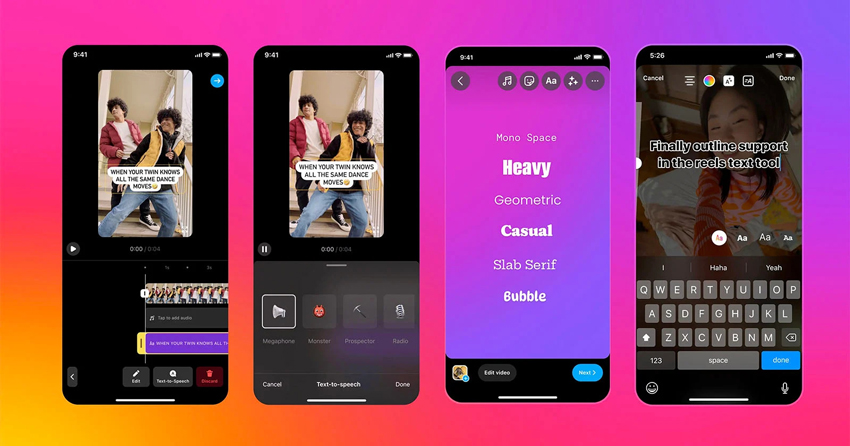
4. Avoid Over-Editing Inside the Instagram App
Filters, stickers, text layers, and repeated saving inside Instagram can trigger additional reprocessing. It is fine to add simple captions or music, but heavy color grading, sharpening, effects, and text animation are better done in a video editor before upload. Export once, then upload the final file.
5. Transfer Files Without Compression
If you edit on a computer, do not send the final video to your phone through WhatsApp, Messenger, or other apps that compress videos automatically. Use AirDrop, USB transfer, Google Drive, Dropbox, iCloud Drive, or another method that preserves the original file. Always download the full-resolution file before posting.
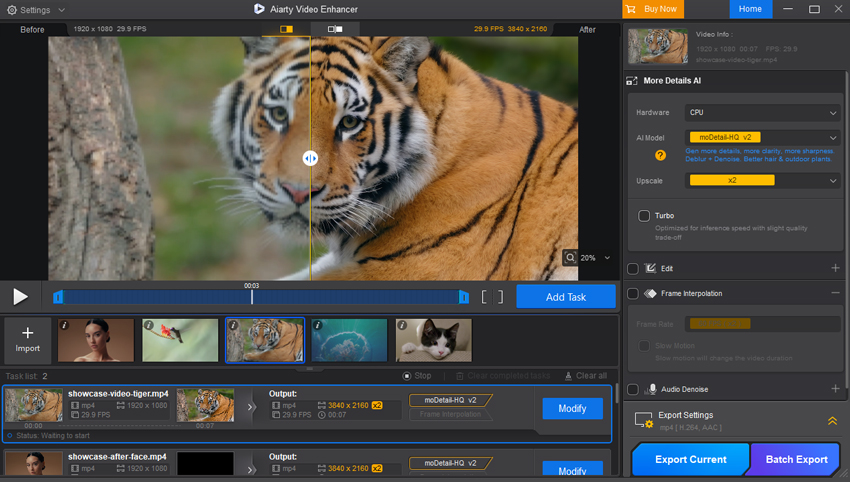
6. Enhance the Video Before Uploading
If your source video is soft, low-resolution, noisy, or heavily cropped, clean it before Instagram compresses it. Aiarty Video Enhancer uses AI upscaling, denoising, deblurring, and detail reconstruction to create a sharper master file before upload. This gives Instagram a cleaner input and helps the final Reel or Story keep more visible detail after compression.
This is especially useful for low-light phone videos, old footage, creator clips, product demos, travel videos, screen recordings, and social media edits that need to look crisp on mobile.
How to Fix Videos Already Ruined by Instagram Compression
If Instagram has already compressed your video, you cannot perfectly recover every original pixel from the uploaded version. Compression permanently discards some data. However, you can improve the perceived quality by restoring detail, reducing compression artifacts, sharpening edges, and preparing a cleaner version for re-upload.
Aiarty Video Enhancer is built for this type of repair workflow. It can help with:
- AI Upscaling: enlarge low-resolution or compressed clips with more natural edge detail.
- Denoising: reduce grain and low-light noise before Instagram makes it more visible.
- Deblurring: improve soft phone footage, motion blur, and low-detail clips.
- Compression Artifact Reduction: soften blocky areas, banding, and muddy textures caused by repeated uploads or messaging-app transfers.
- Detail Reconstruction: rebuild visible texture in hair, fabric, landscape details, product edges, and other fine areas.
Recommended workflow:
- Import the original video or the highest-quality version you still have.
- Use AI denoise or deblur if the clip is soft, grainy, or compressed.
- Upscale only when the source resolution is too low or heavily cropped.
- Export a clean H.264 MP4 version at 1080 x 1920 for Reels or Stories.
- Upload with "Upload at highest quality" enabled over stable Wi-Fi.
For more general repair workflows, see how to improve video quality and how to fix grainy video.
 FAQs
FAQs
Instagram Reels look blurry after upload because Instagram compresses and re-encodes every video. If your Reel is exported in the wrong resolution, wrong aspect ratio, unsupported codec, very high bitrate, 60 fps, HDR, or a noisy low-light source, Instagram may process it more heavily and make it look soft or pixelated.
You cannot completely stop Instagram compression, but you can reduce quality loss. Export your video as MP4 with H.264 video and AAC audio, use 1080 x 1920 for Reels and Stories, keep the frame rate at 30 fps, use a stable bitrate, turn on "Upload at highest quality," upload over Wi-Fi, and avoid sending the file through apps that compress video.
For most Instagram Reels, export as MP4, H.264 video codec, AAC audio, 1080 x 1920 resolution, 9:16 aspect ratio, 30 fps, and about 8-15 Mbps bitrate. These settings give Instagram a clean upload file while avoiding unnecessary resizing and heavy re-encoding.
Use 4K for recording and editing if you need more detail, but a clean 1080 x 1920 export is often safer for Instagram Reels and Stories. Instagram may downscale 4K uploads anyway, and platform-side resizing can make the final video look softer than a properly exported 1080p version.
Instagram may lower iPhone video quality because iPhones often record in 4K, HDR, HEVC, or 60 fps by default. These formats are excellent for editing but may require conversion before Instagram playback. Exporting a standard H.264 MP4 at 1080 x 1920 and 30 fps usually gives more consistent results.
AI cannot restore every piece of data removed by Instagram compression, but it can improve perceived quality by reducing noise, sharpening soft edges, upscaling low-resolution footage, and reconstructing visible detail. For the best result, enhance the original file before uploading instead of repairing the already-compressed Instagram version.
This post was written by Brenda Peng, a seasoned editor at Digiarty Software who focuses on video enhancement, creator workflows, and practical AI editing guides. With AI assistance for brainstorming and drafting, the post is reviewed for accuracy by Abby Poole for her expertise in this field.