How to Upload High-Quality Videos to Instagram Story Without Losing Quality
Have you ever noticed that the videos you upload to your Instagram Story look crisp and clear on your phone, but turn blurry or pixelated once they're posted? It's frustrating—especially if you spent time editing or filming something in high quality. You're not alone. Many users run into this issue and wonder why Instagram seems to ruin their video quality.
In this guide, we’ll walk you through what’s really happening behind the scenes and show you how to upload high-quality video to Instagram Story without losing all that detail.
Why Instagram Story Reduces Your Video Quality
Instagram doesn’t always show your videos the way you intended—and that’s mostly because of compression. To keep things running smoothly for everyone, Instagram automatically compresses videos when you upload them. This helps the app load faster and saves data, but it often comes at the cost of image quality.
There are a few reasons why your Story might end up looking worse than the original:
- Your video resolution is too high or too low. Instagram is optimized for 1080x1920 (that’s vertical HD). If your video doesn’t match this, Instagram will resize it—and not always in a good way.
- Bitrate and file size are too high. If your video is too large, Instagram will shrink it down to fit its limits, which can make it blurry.
- You’re on a weak internet connection. Sometimes, if your Wi-Fi or mobile data is slow, Instagram will upload a lower-quality version of your video without asking.
- You used a third-party app that compressed the video. If you’ve sent the video through WhatsApp, Messenger, or similar apps before uploading, it may have already lost quality.
Understanding these factors is the first step to fixing the problem—and the good news is, there are ways to work around them.
How to Upload High-Quality Instagram Story Videos (Preparation + Upload Tips)
If you want your Instagram Stories to look as good as they do on your phone, a little planning goes a long way. From shooting to uploading, every step matters when it comes to preserving video quality. Here’s how to do it right:
Part 1: Get Your Video Ready Before Uploading
Shoot vertically (9:16 aspect ratio)
Instagram Stories are built for vertical videos. Shooting in portrait mode from the start means you won’t have to crop or adjust later, which helps avoid losing quality.
Also learn: how to change video quality on iPhone
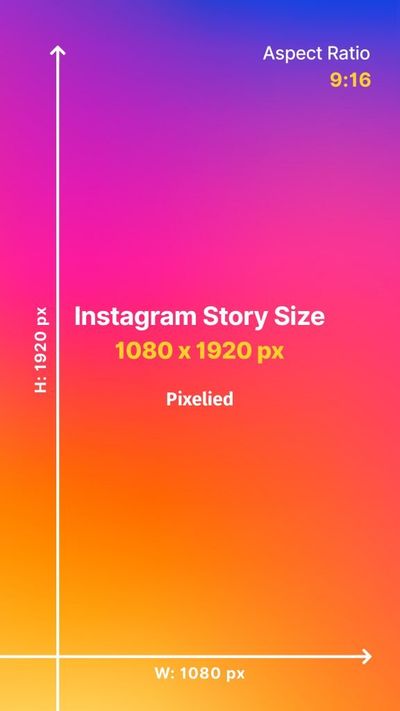
Use the ideal resolution: 1080x1920
This is Instagram’s sweet spot. Uploading in 4K might sound like a good idea, but the app will just compress it down. Stick with 1080p for the best balance between quality and compatibility.
Export with Instagram-friendly settings
When you’re done editing, export your video using:
- MP4 format with H.264 codec
- 30 frames per second
- Bitrate around 3,500 kbps
These settings help maintain sharpness while keeping the file size reasonable.
Avoid over-editing or repeated re-saving
Every time you export and re-import a video into a new app, it can lose clarity. Try to do all your edits in one go and keep the original export for upload.
Transfer the video without compression
If you’re moving the file from your computer or another phone, avoid using apps like WhatsApp or Messenger. They compress videos by default. Use AirDrop, a USB cable, or cloud storage (like Google Drive or Dropbox) to keep your footage untouched.
Use AI to clean up and enhance your footage
If your video looks a little grainy, blurry, or was shot in poor lighting, you can improve it before uploading using an AI-powered tool like Aiarty Video Enhancer. It automatically reduces noise, sharpens detail, and can even upscale resolution—all with just a few clicks.
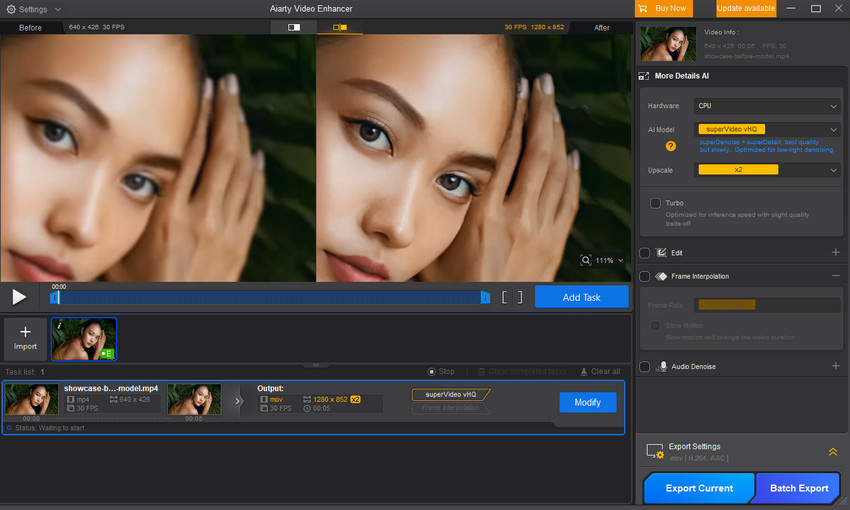
Just import your video into this AI video enhancer, choose an AI model that suits your footage, and let the tool handle the rest. You can preview the results and export a cleaner, crisper version that’s ready to shine on Instagram.
Upload videos without music, stickers, or GIFs
Instagram automatically compresses videos that are too large, which can reduce quality. Adding extra elements like music, stickers, or GIFs increases file size and may trigger more aggressive compression. If you want to keep your Story videos crisp and clear, try uploading them without these extras.
Use original video files instead of restored backups
Videos restored from backups may have already gone through multiple compressions or format changes, which can degrade quality. For the best results, upload the original video directly from your camera or editing software.
Ensure content complies with Instagram guidelines
Videos that violate Instagram’s community standards may be compressed more aggressively or even restricted. To avoid unexpected quality loss, make sure your content meets Instagram’s guidelines before uploading.
Part 2: Upload the Smart Way
Use a strong Wi-Fi connection
If your internet is slow or unstable, Instagram may automatically reduce the quality of your upload in the background. A fast, stable Wi-Fi connection helps ensure the original quality gets through.
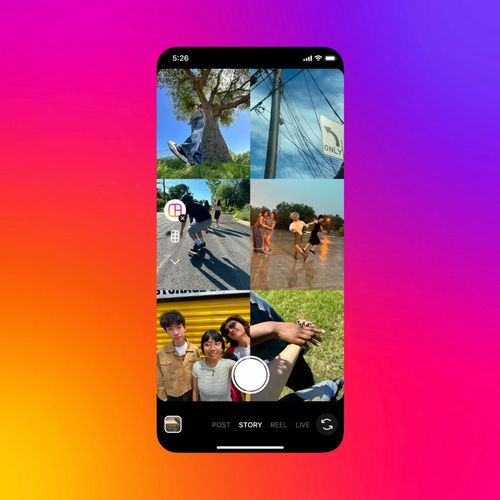
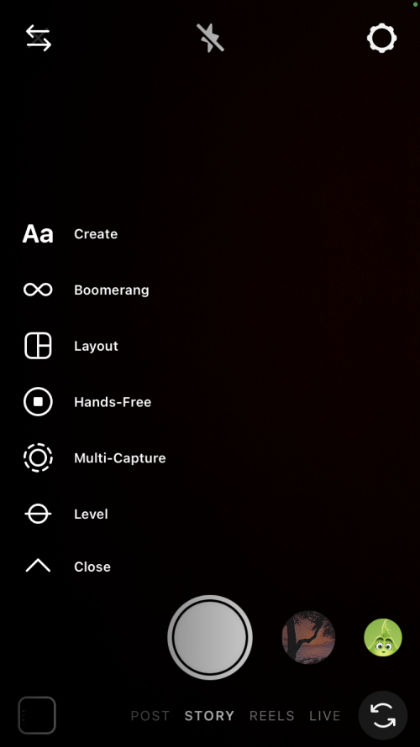
Upload directly from the Instagram app
Instead of sharing the video from your phone’s gallery, open Instagram, tap the Story icon, and upload from there. It reduces the chance of extra compression.
Double-check before posting
After selecting the video, use the preview to make sure it looks crisp and isn’t being cropped in a weird way. You can always cancel and re-export if something looks off.
Restart the app if needed
If Instagram has been running for a while, it might act up or cache old settings. A quick restart can clear things out and help with smoother uploads.
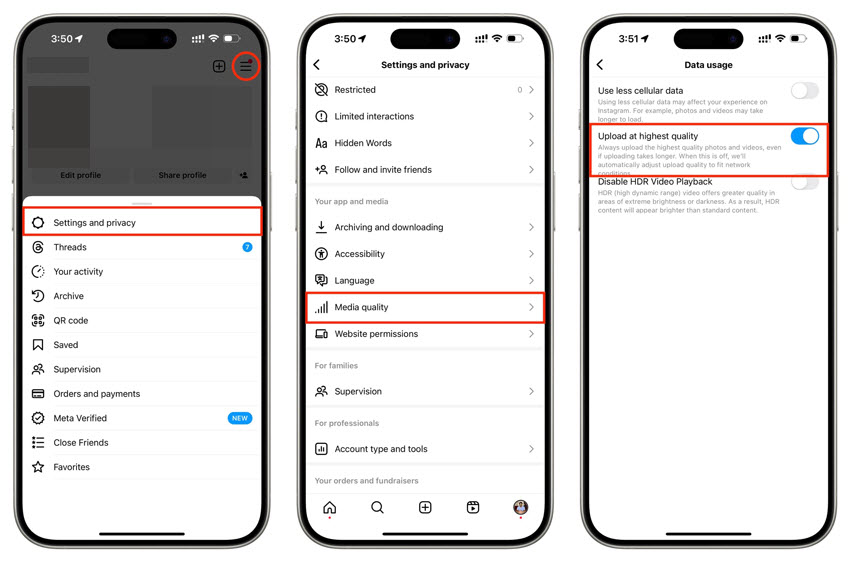
Enable “Upload at highest quality” in Instagram Settings
There is an in-app settings called “Upload at highest quality” on Instagram to help upload your videos to Stories in better quality. When you turn it on, Instagram tries its best to upload your videos and photos with as much of their original quality as possible. Just keep in mind that it might take a little longer to upload and use a bit more data.
Here's how you can usually find and switch it on, and the steps are pretty much the same whether you're on an Android or an iPhone:
- Fire up your Instagram app.
- Tap your profile picture down in the bottom right corner.
- Hit those three little lines (the menu) up in the top right.
- Go into Settings and privacy .
- Tap on Account.
- Look for Media quality.
- You should see an option like Upload at highest quality. Just flick the switch next to it so it's turned on (it'll usually change color).
Just a heads-up:
- Even with this setting on, Instagram still does a little bit of compressing to make things work smoothly on their platform. This setting just tries to keep that extra compression to a minimum so your Stories look better.
- The quality of your original video totally matters too! If your original video isn't great quality to begin with, this setting can only do so much.
- Keep in mind that using this setting will probably eat up a bit more data, and uploads might take a little longer, especially if your internet connection isn't super speedy.
By taking a few extra minutes to prep your video properly and upload it the right way, you can avoid those annoying blurry results and make sure your Stories actually look as good as you intended.
 FAQs about Uploading Videos to Instagram Story
You actually can't directly upload a 4K video to your Instagram Story. Instagram automatically compresses videos to optimize them for the platform. Even if you upload a 4K file, it will be downscaled to a lower resolution during processing.
The best video format for Instagram Stories is MP4 with H.264 video codec and AAC audio codec. This format ensures the best balance of compatibility, compression, and visual quality on the platform.
Your 4K video appears blurry because Instagram compresses it to reduce resolution and file size. The platform optimizes videos for mobile viewing, so high-res uploads are downscaled and may lose sharpness due to compression artifacts.
Instagram Stories are generally limited to 1080 x 1920 resolution at 30 frames per second. Although you can upload higher quality files, Instagram will compress and downscale them. Each story clip can be up to 60 seconds long, and uploading very large files may trigger extra compression or errors.
You May Also Like
This post was written by Brenda Peng who is a seasoned editor at Digiarty Software who loves turning ordinary photos into extraordinary works of art. With AI assistance for brainstorming and drafting, the post is reviewed for accuracy by our expert Abby Poole for her expertise in this field.