Practical Photo Editing and Enhancement Lightroom & Aiarty Workflow Guide

Lightroom handles RAW development, color correction, and photo organization, while Aiarty Image Enhancer adds specialized AI tools for denoising, deblurring, detail restoration, and upscaling.
This guide shows how to combine both tools in a practical photo editing workflow, from initial Lightroom adjustments to AI enhancement in Aiarty and final image output.
How to Use Aiarty Image Enhancer with Lightroom
Lightroom offers a versatile workflow for RAW development, color correction, and photo library management, including built-in tools for noise reduction and upscaling. For photographers looking for more ways to enhance image quality, Aiarty Image Enhancer provides an additional option within their existing workflow.
You don’t have to replace Lightroom or change your existing editing process. Instead, you can add Aiarty Image Enhancer as a dedicated image enhancement step when a photo needs extra attention. Send it from Lightroom to Aiarty for denoising, deblurring, detail enhancement, or upscaling, then return to Lightroom for further edits or finish the image in Aiarty. This guide walks you through the workflow, file-handling options, and practical tips for enhancing image quality while protecting your original photos.
This article takes about 9 minutes to read. Use the left navigation menu to quickly find the sections most relevant to you. Learn how to combine Lightroom's editing tools with Aiarty for a practical workflow that covers everything from basic adjustments to AI-powered image enhancement.
Add Aiarty Image Enhancer to Your Lightroom Workflow
You can keep Lightroom as your main photo editor and use Aiarty Image Enhancer whenever an image needs extra attention. Lightroom offers two ways to send photos to Aiarty: Edit In and Plug-in Extras. They differ in how files are passed between the applications and how enhanced images are handled when the processing is complete.
Send Photos from Lightroom to Aiarty with Edit In
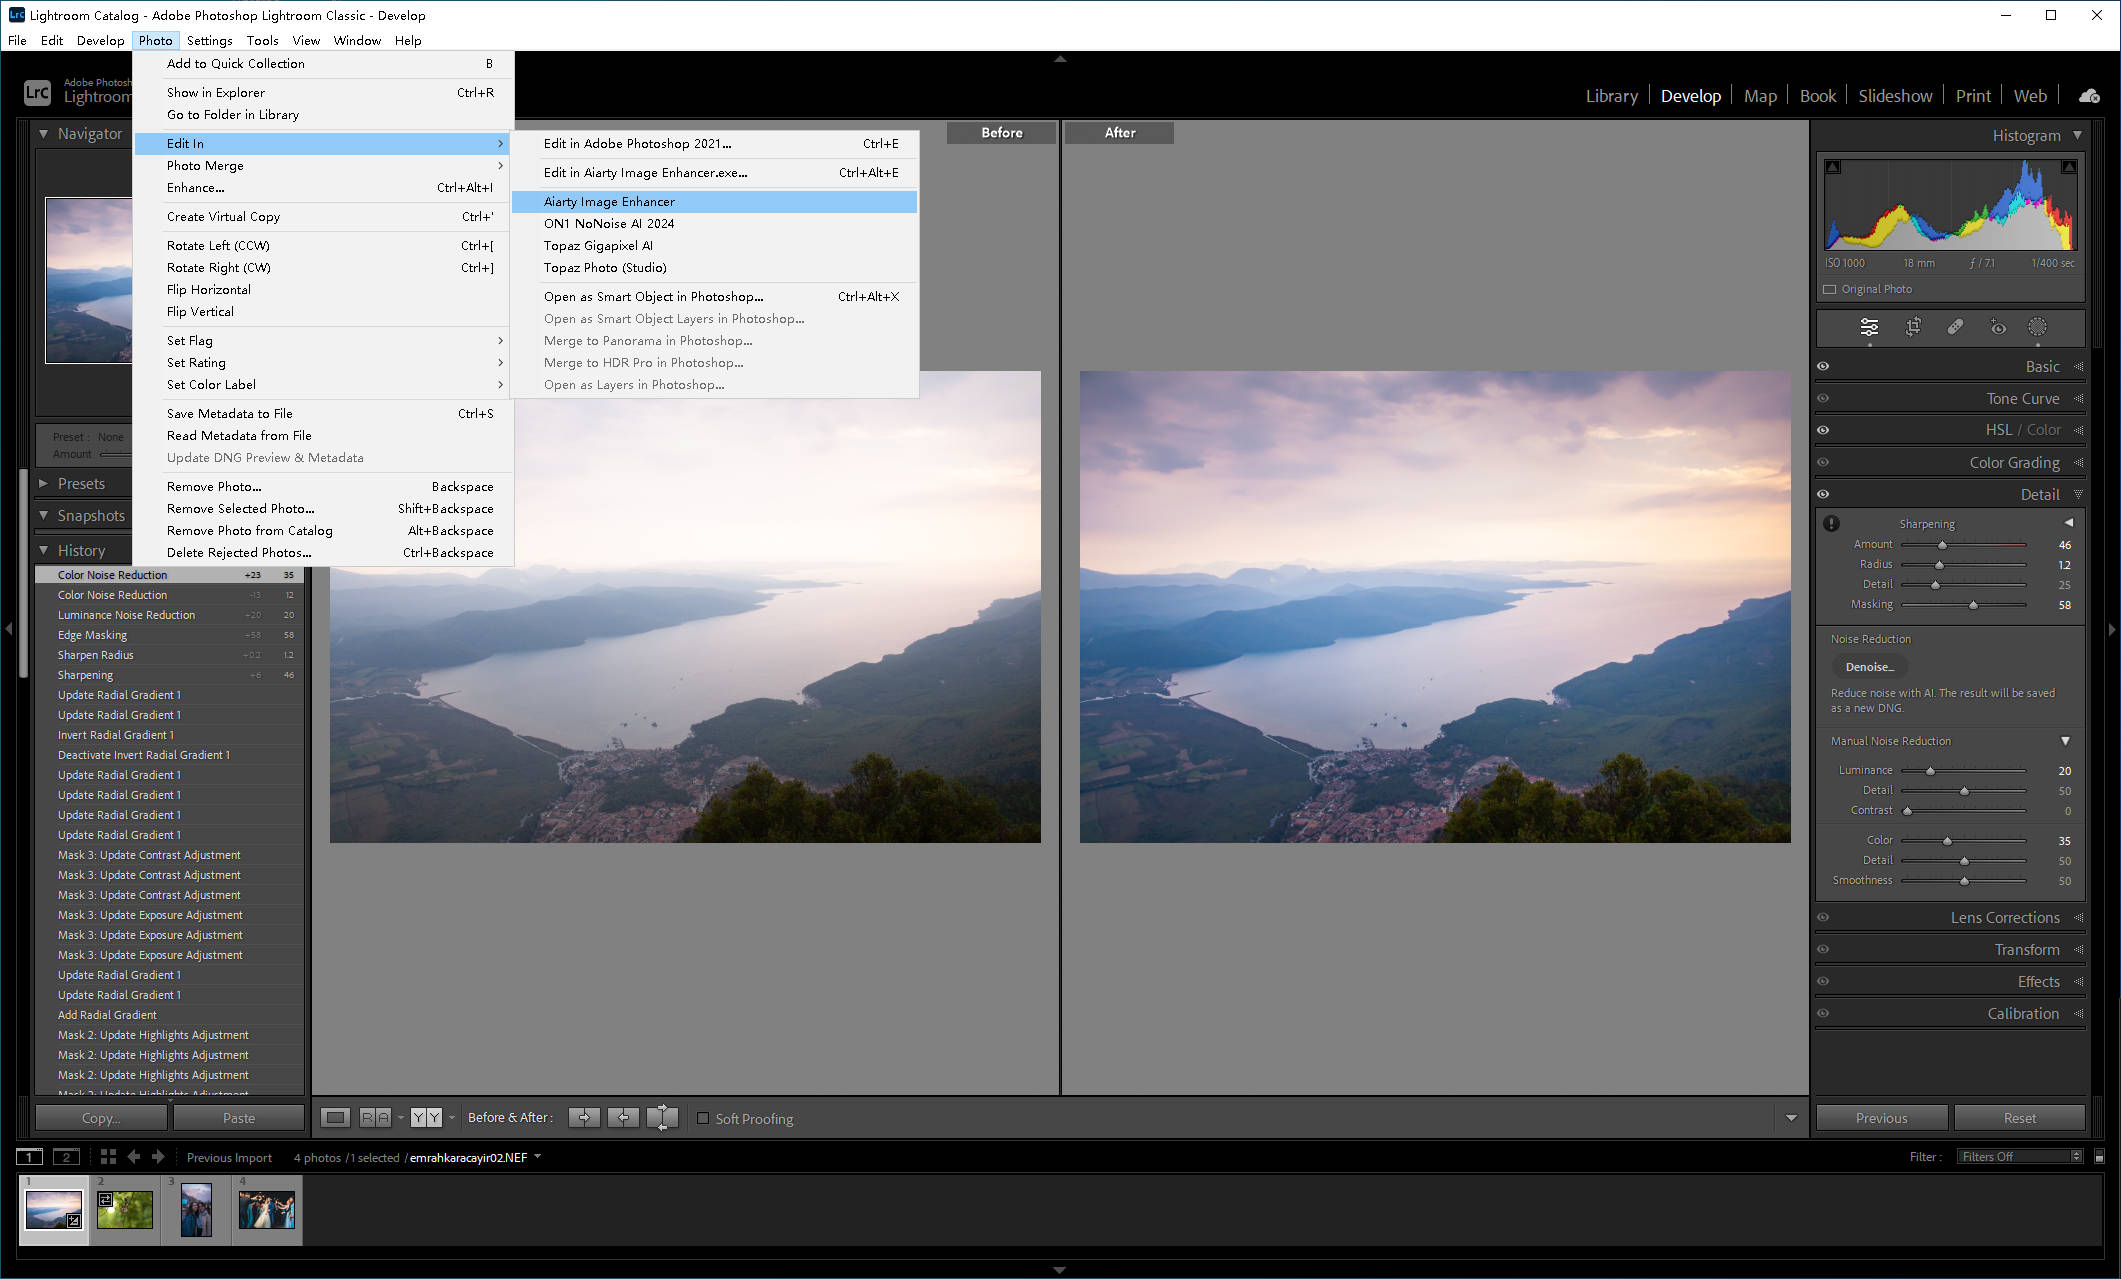
In Lightroom or Lightroom Classic, select the photo you want to enhance, then go to Photo > Edit In > Aiarty Image Enhancer. You can also right-click the photo and choose Aiarty Image Enhancer from the Edit In menu.
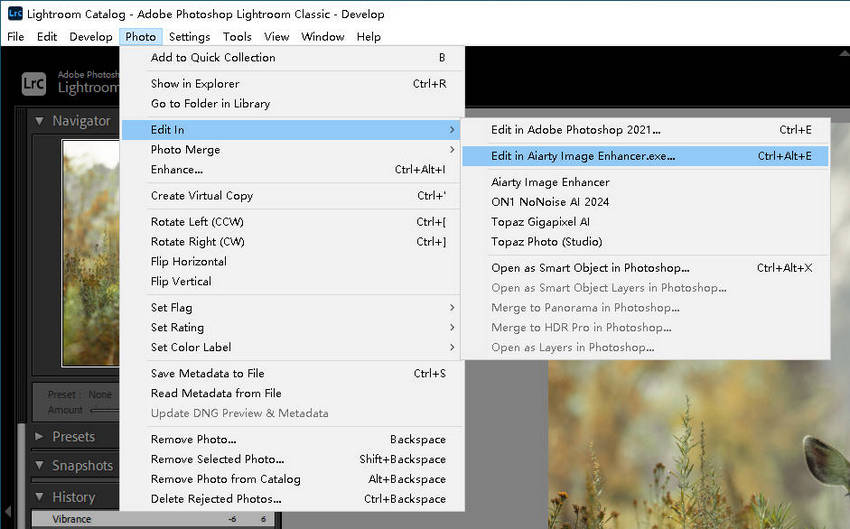
Before opening the photo in Aiarty, Lightroom may ask how you want to handle the file. For supported non-RAW formats, you'll typically see three options:
-
Edit a Copy with Lightroom Adjustments
Creates a copy with your current Lightroom adjustments applied to the image. Aiarty receives the rendered copy, so your Lightroom edits are visible in the file you enhance.
-
Edit a Copy
Creates a copy of the original file without baking in your Lightroom adjustments. Aiarty receives the unadjusted image, even if the photo looks different in Lightroom.
-
Edit Original
Opens the original file for editing without applying Lightroom adjustments. This option requires extra care because Aiarty saves the enhanced image to the original file’s path and filename referenced by Lightroom by default, allowing Lightroom to reflect the updated image.
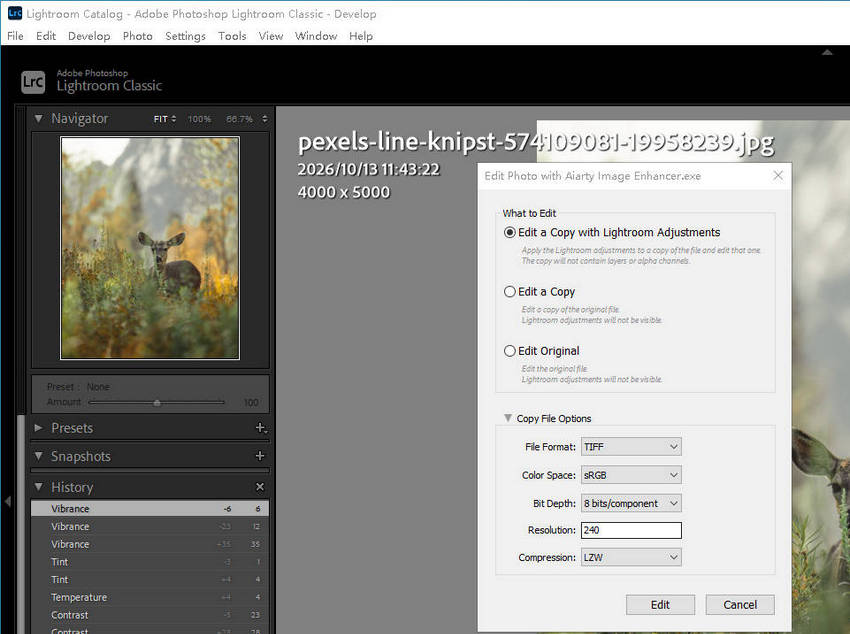
Choose the Edit In option that best fits your workflow. If you’ve already adjusted exposure, color, or contrast in Lightroom, Edit a Copy with Lightroom Adjustments carries those edits into Aiarty. If you prefer to enhance image quality first and handle Lightroom adjustments separately, choose Edit a Copy.
The resulting file depends on your choice: Lightroom may create a rendered TIFF with your adjustments applied, or a copy in the original format. Aiarty opens this file for enhancement, leaving the original photo in Lightroom unchanged.
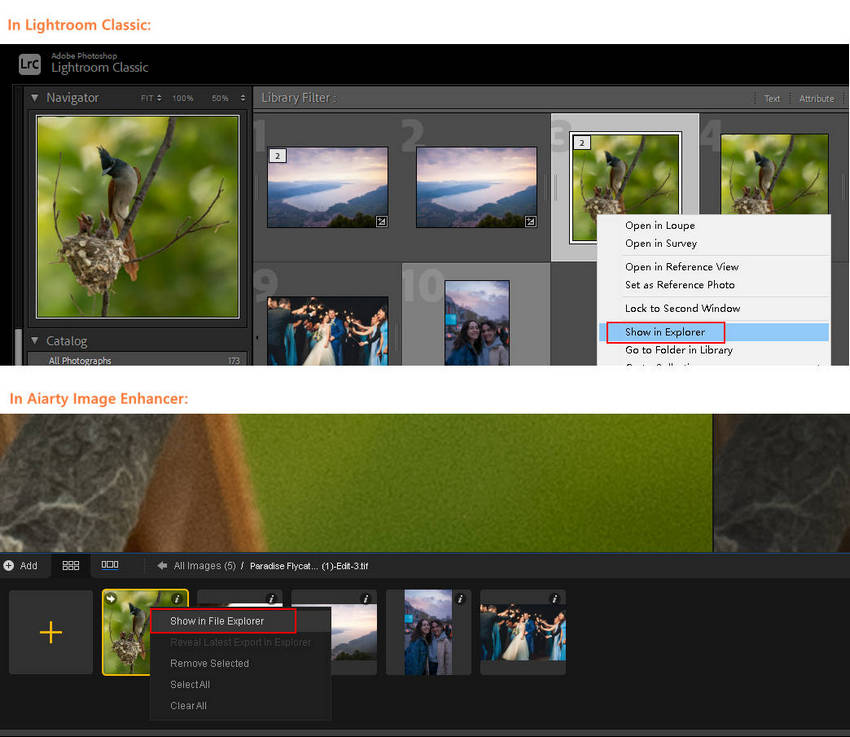
To understand how files are handled between Lightroom and Aiarty and locate the images involved, you can open their file locations directly:
In Lightroom, right-click the photo and select Show in Explorer.
In Aiarty, right-click the thumbnail and select Show in File Explorer.
What Happens When You Send a RAW Photo?
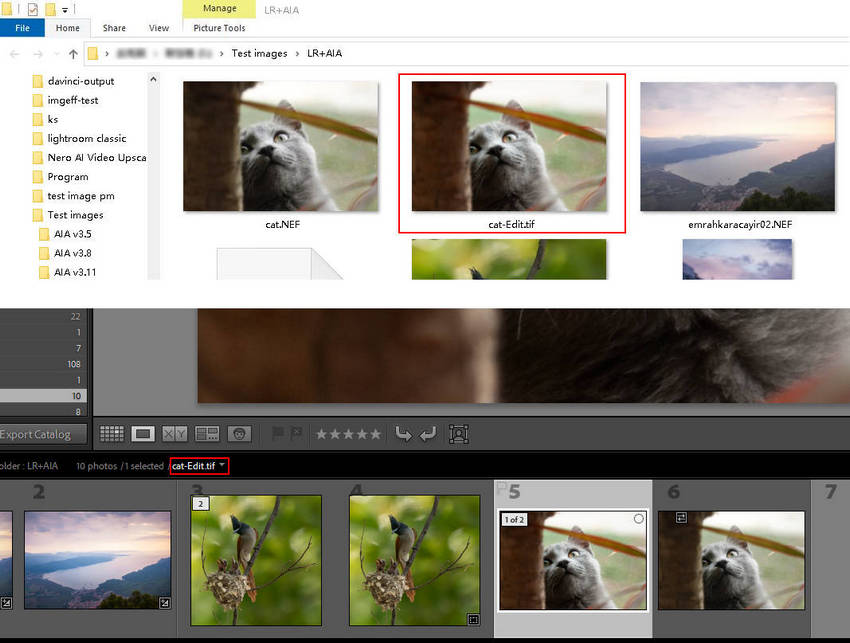
Lightroom handles RAW files differently. In Lightroom Classic, Edit a Copy with Lightroom Adjustments is generally the available option for sending a RAW photo to an external editor. Lightroom renders the image into a supported format, such as TIFF, and sends that rendered copy to Aiarty rather than the original RAW data.
For example, cat.orf may be rendered as cat-Edit.tif. This lets you develop the RAW photo in Lightroom before using Aiarty for further enhancement, while keeping the original RAW file intact.
To keep your original photos safe, choose a copy when you want to preserve the source file. Before exporting from Aiarty, check the output filename and save location so you can easily find the enhanced image and avoid overwriting an existing file.
Use Plug-in Extras to Send Photos to Aiarty and Return Them to Lightroom
If you want enhanced images to appear in your Lightroom Library automatically, Plug-in Extras offers another way to connect the two applications. In Lightroom Classic, select the photo you want to enhance, then go to File > Plug-in Extras > In Aiarty Image Enhancer.
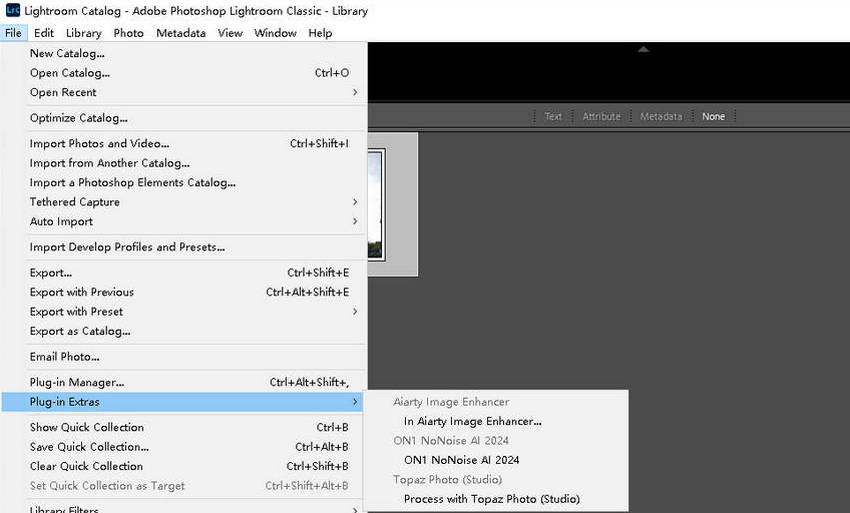
After you select this option, Aiarty opens the original image for enhancement. Once processing is complete, Aiarty exports an enhanced TIFF file, which is automatically imported into the Lightroom Library and displayed alongside the original photo.
For example, if you start with a RAW file such as kitty.orf, Aiarty exports the enhanced result as a TIFF file, such as kitty_aiarty.tif. The new TIFF appears next to the original RAW photo in Lightroom, making it easy to compare the results and continue managing your images in your existing workflow.
Build Lightroom and Aiarty Workflows for Different Editing Needs
You don't need to send every photo through an additional enhancement tool. The idea is to keep Lightroom as your main workspace and bring Aiarty Image Enhancer into the process when a particular image could benefit from more noise reduction, clearer details, facial enhancement, or higher resolution.
The workflow depends on your editing goals. For RAW photos, develop the image in Lightroom before enhancing a rendered copy in Aiarty. For JPEGs, PNGs, and other supported formats, use Aiarty when further image quality improvements are needed, while keeping your existing workflow and results natural. The following examples show how to combine the two tools while keeping the results natural and preserving your existing editing workflow.
RAW Photo Development: Recover Fine Details After Basic Adjustments
RAW files retain substantial image data for adjusting exposure, color, and fine detail during post-processing.
Start with basic exposure, white balance, and color adjustments in Lightroom, then send a copy with those adjustments applied to Aiarty for further enhancement. Lightroom typically renders the RAW image as a TIFF for external editing, so Aiarty processes the rendered copy rather than the original RAW data.
In Aiarty, choose an enhancement model suited to the scene and adjust Strength to refine fine details without making textures look harsh or artificially reconstructed. For a landscape, compare clouds, foliage, and rocky surfaces at 100% zoom to check whether the enhanced details remain natural.
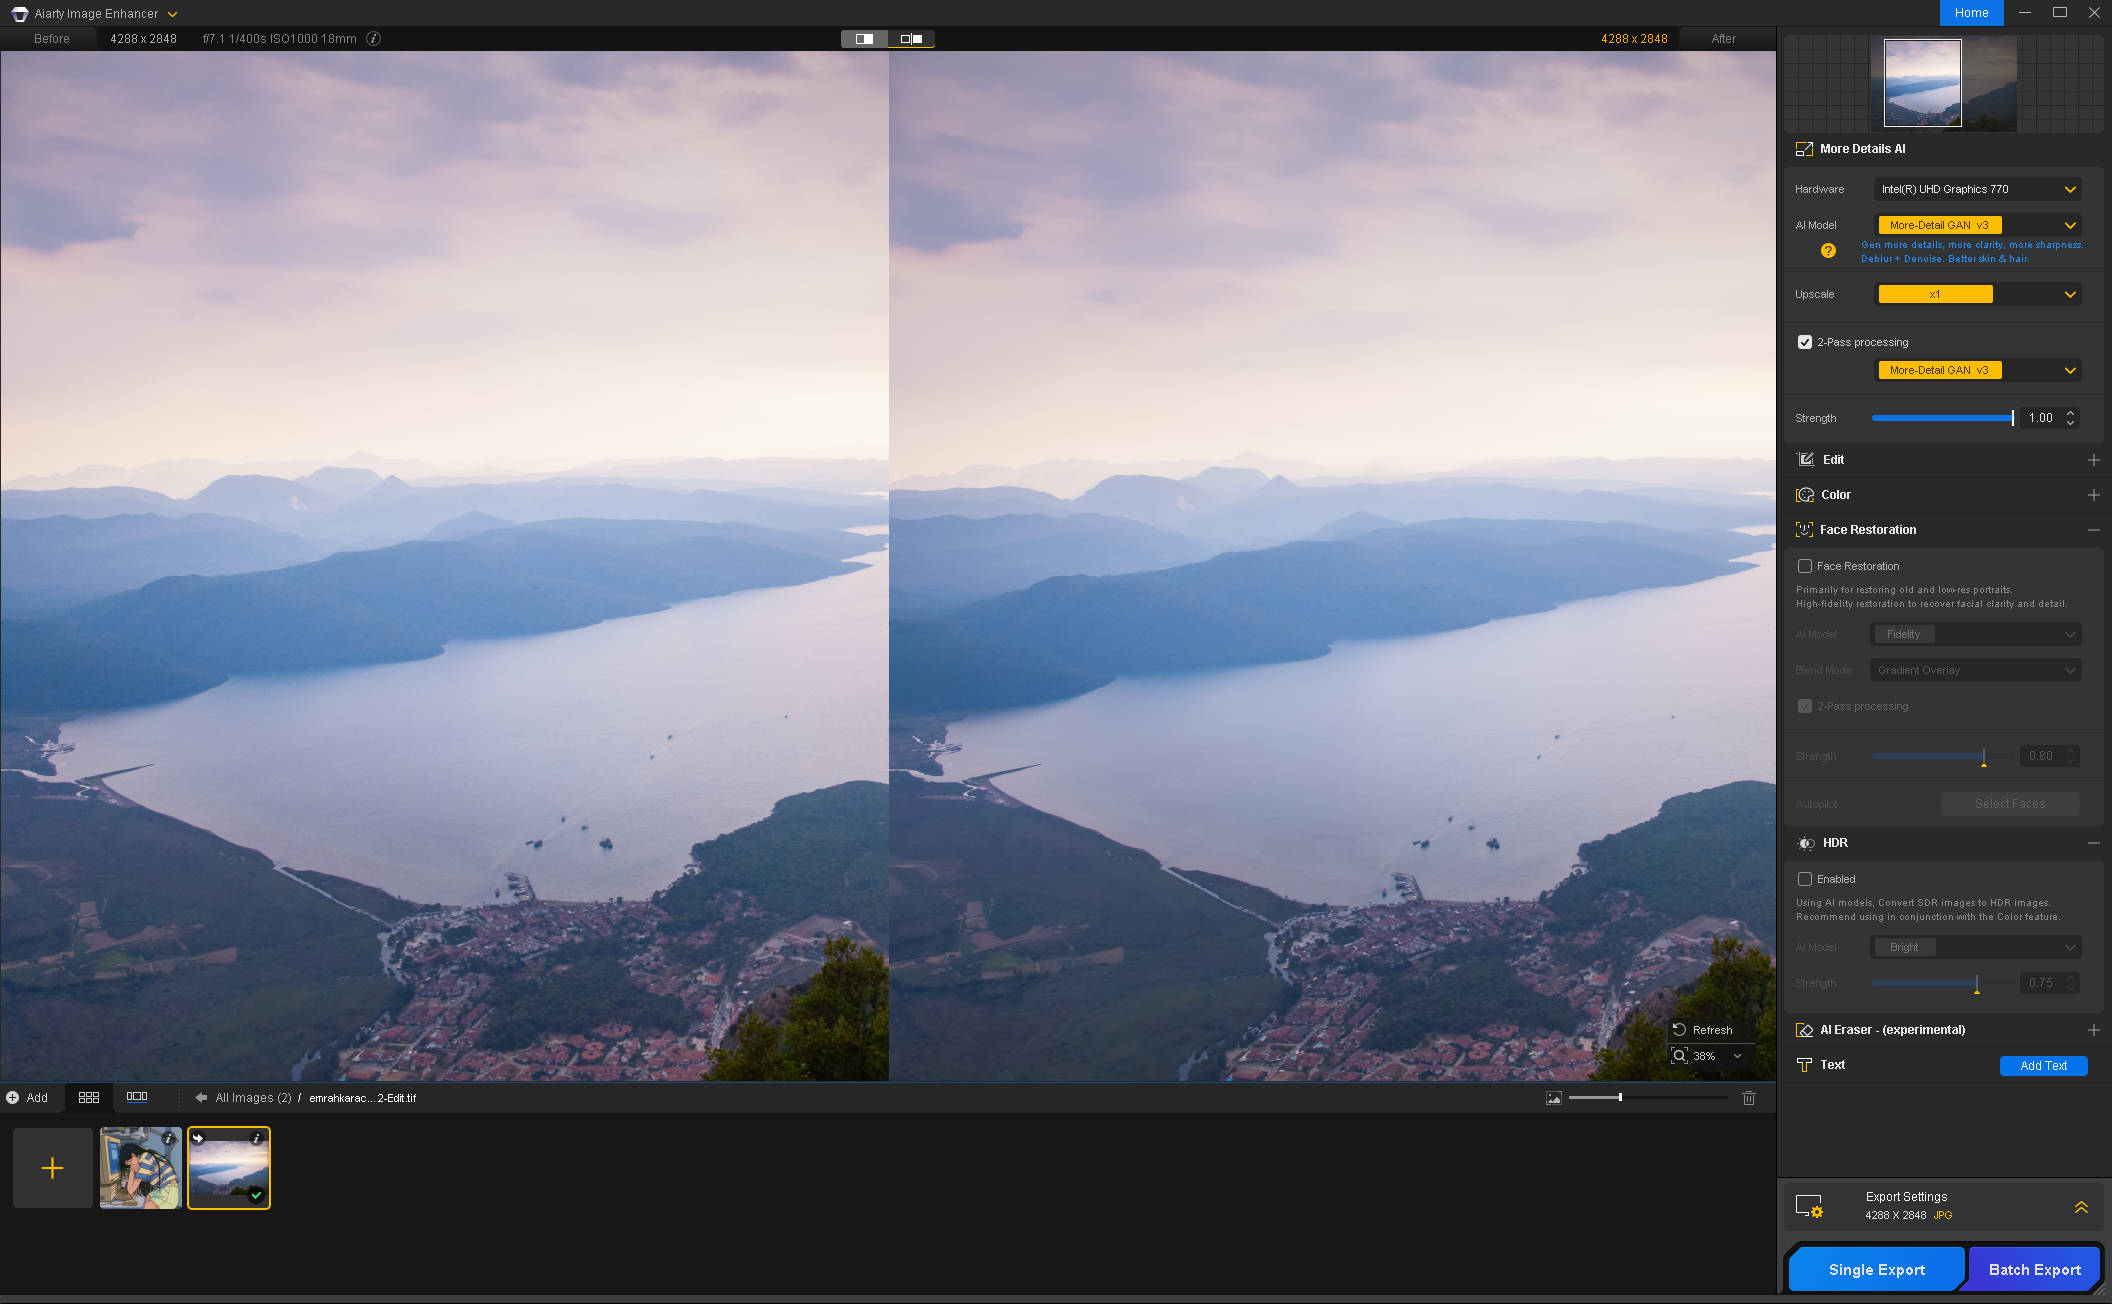
Once the result looks right, return the enhanced TIFF to Lightroom for any final adjustments and export.



1. Lightroom Edited
RAW Development


2. Aiarty Enhanced
Clarity & Detail Refined

Low-Light and High-ISO Photos: Reduce Noise and Improve Clarity
Low-light and high-ISO photos often show distracting noise in shadows and flat areas, while fine details may look muddy after editing or JPEG compression. Lightroom's AI Denoise is designed for supported RAW files, so Aiarty can provide an alternative for already-processed JPEGs and other non-RAW images that need further noise reduction and detail refinement.
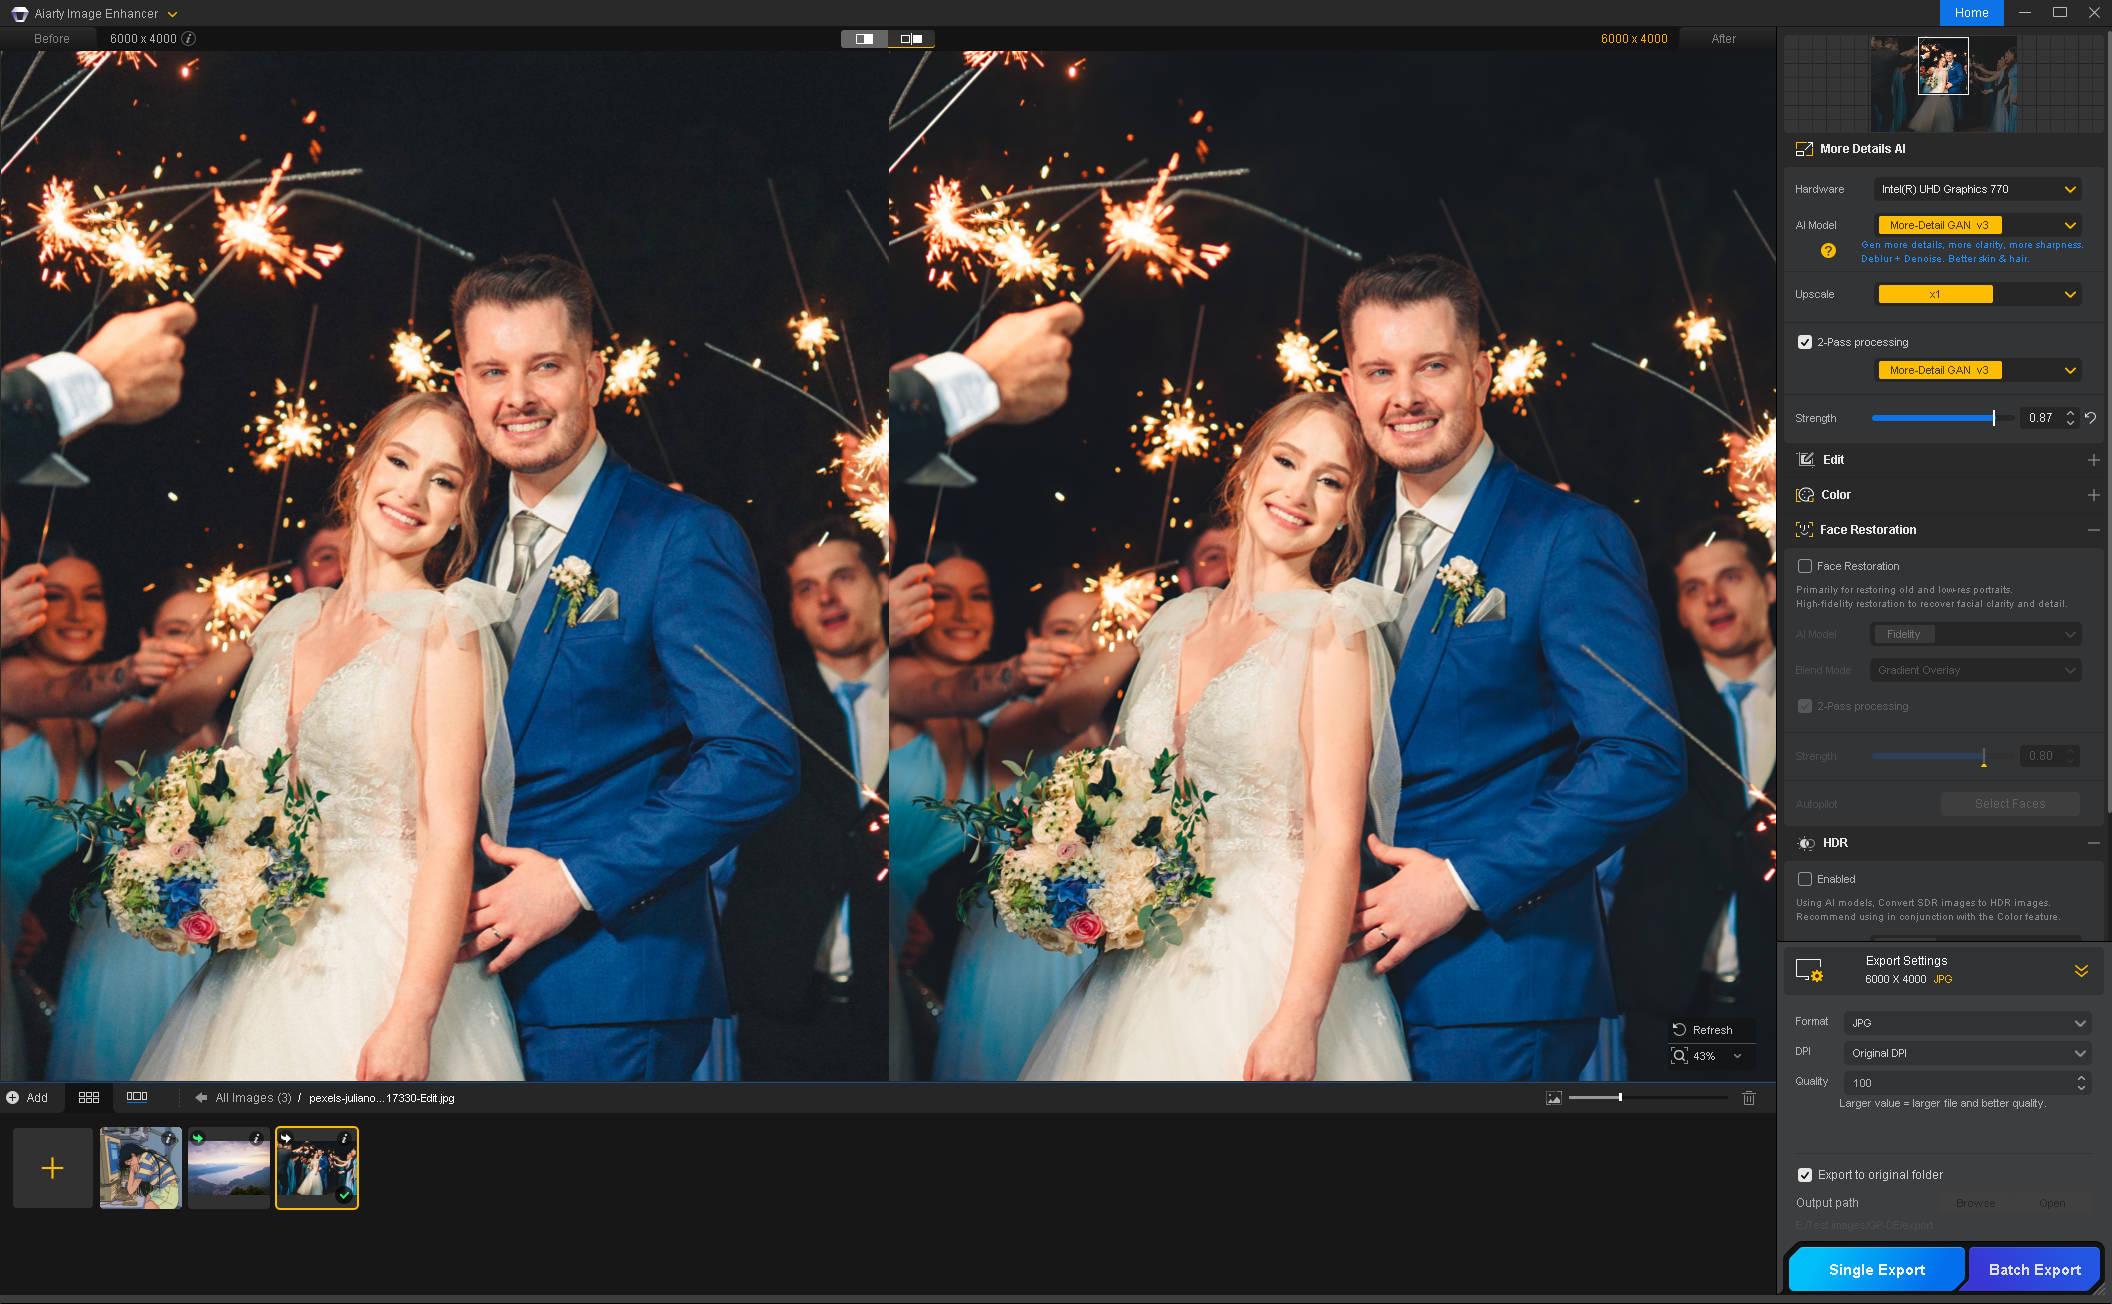
For a dimly lit wedding photo, choose an enhancement model suited to the source and adjust Strength to balance noise reduction with detail retention. Stronger settings may reduce grain and color speckles in dark areas, but can also soften hair, fabric, and the fine texture of a wedding dress.
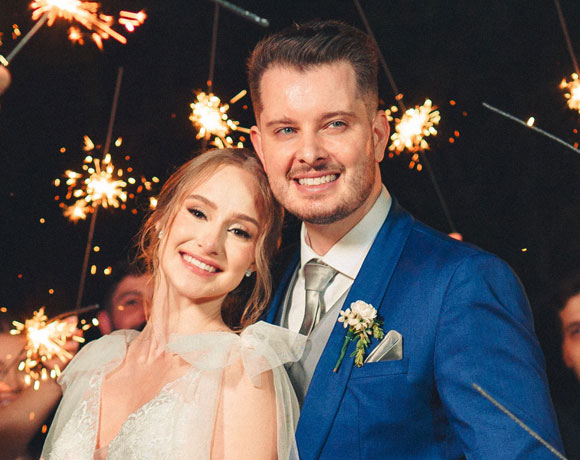
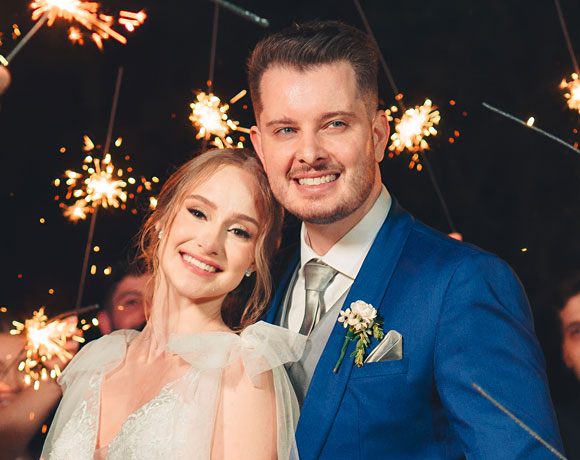
Aiarty Denoised & Enhanced
Facial Details

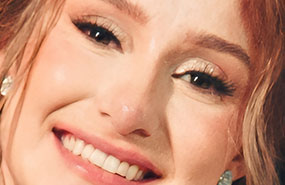
100% Zoom
Flower & Fabric Textures


Compare the result at 100% zoom, checking both shadow noise and important details. For JPEGs, also look for compression artifacts around edges and in smooth areas.
Portraits and Old Family Photos: Enhance Face Without Overprocessing
Portraits and old family photos need different levels of enhancement. Recent portraits may need clearer facial details, while older scans may have faded tones or low-resolution faces. Start by identifying which details need improvement, making basic exposure and color adjustments in Lightroom before enhancing the image in Aiarty.
For portraits, a standard enhancement model may be enough to refine facial details. If faces remain soft or indistinct, compare Face Restoration. For group photos, Select Faces lets you target specific people. Alpha better preserves original colors and suits relatively clear, higher-resolution faces, while Gradient offers stronger reconstruction for blurry, lower-resolution faces.
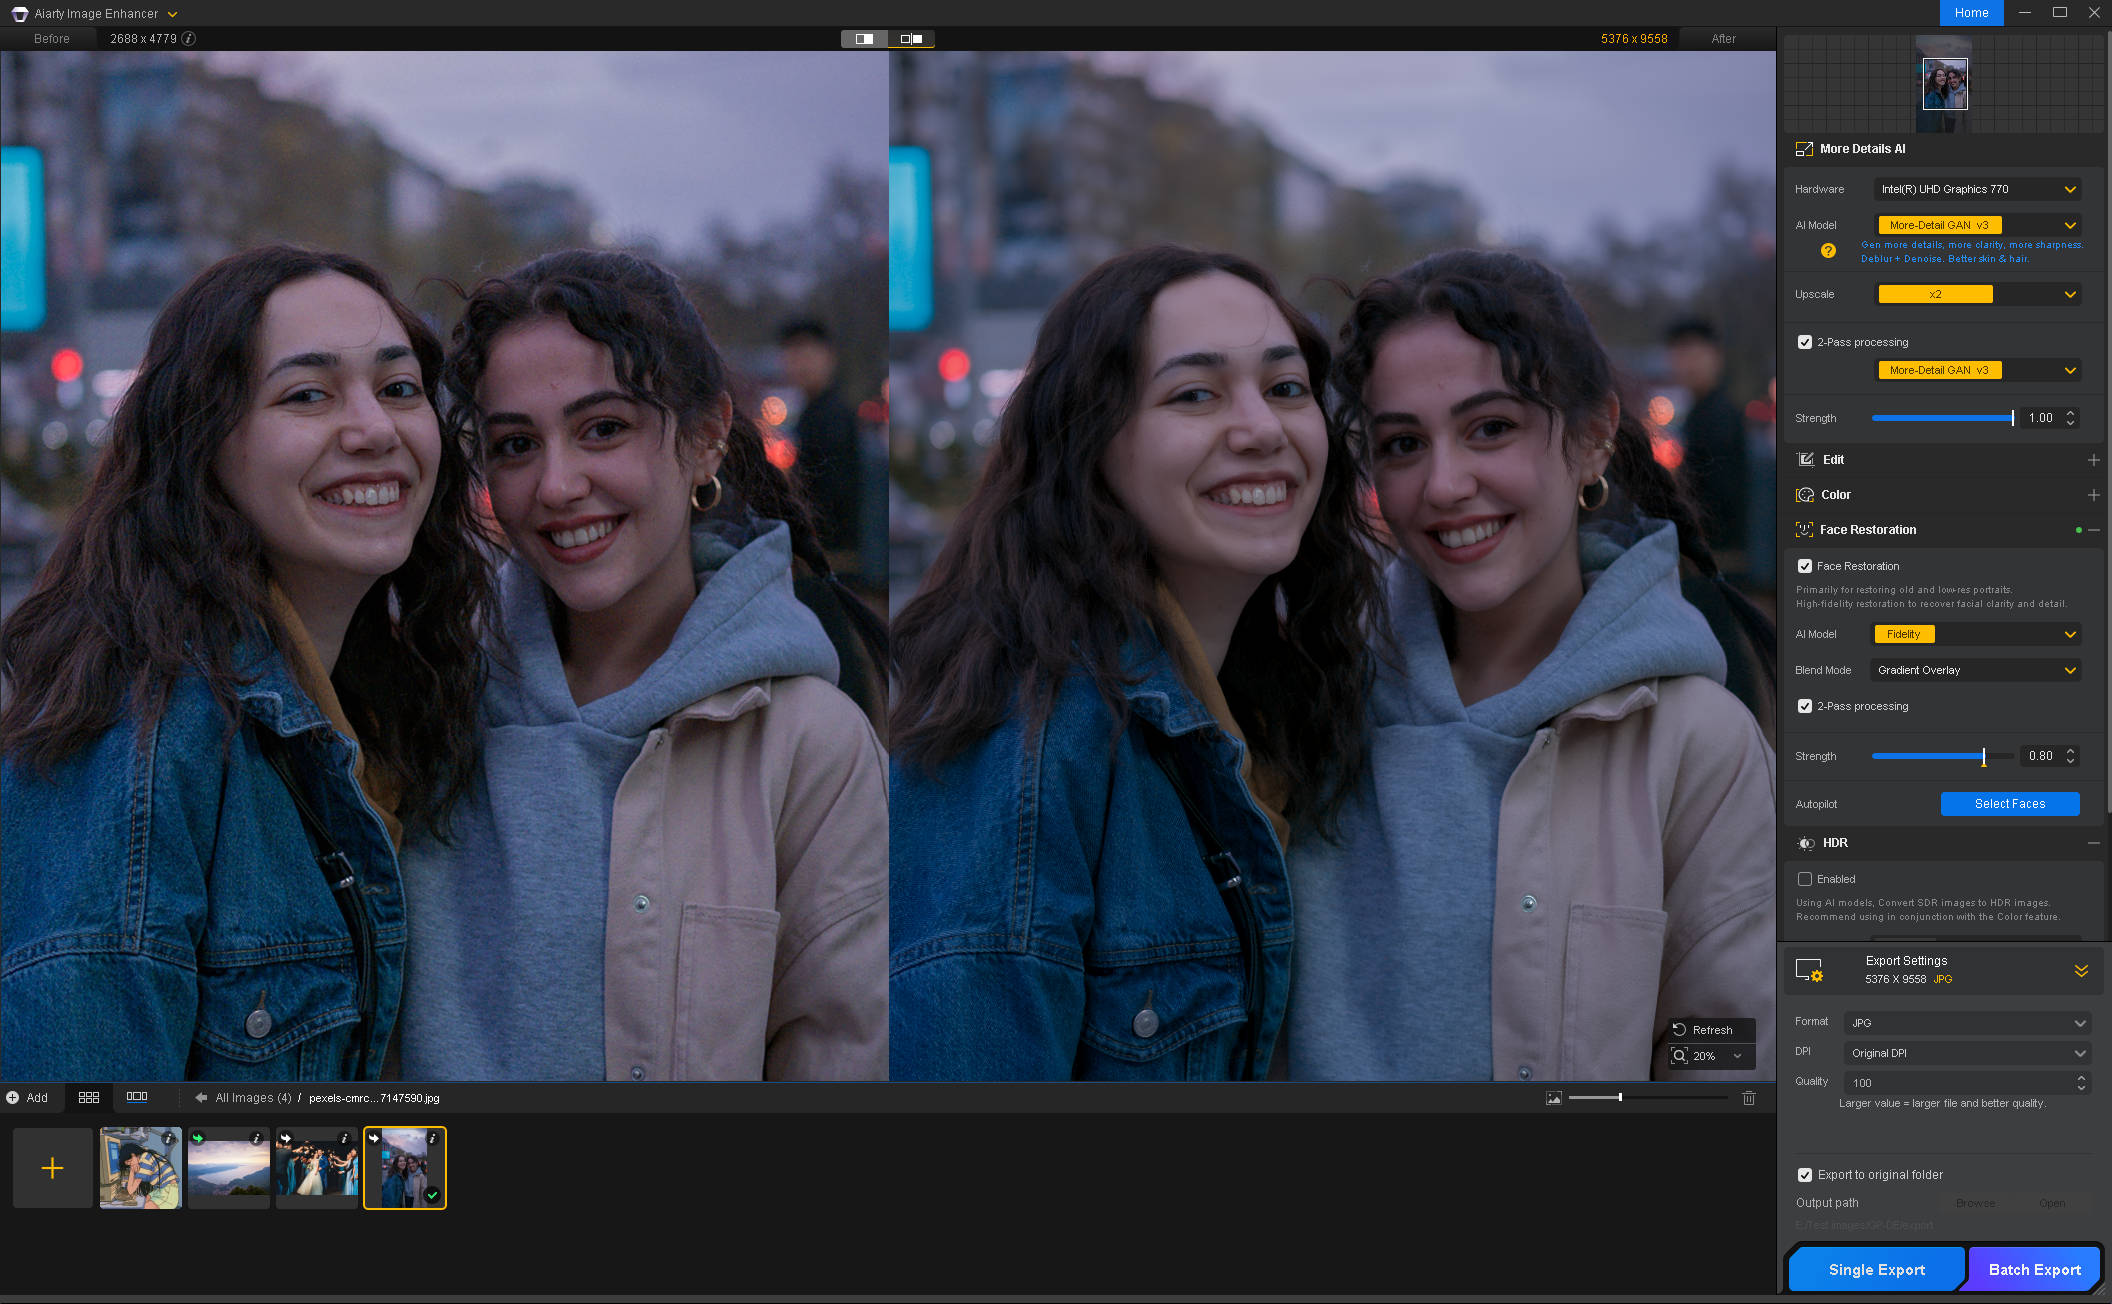
Adjust Strength and inspect faces at 100% zoom. Skin should retain natural texture, and eyes and facial contours should look plausible rather than overly smooth or artificially defined. For old photos, also check that recognizable features remain intact. Missing or completely obscured details cannot always be reliably recovered.


Aiarty Denoised & Enhanced
Eyes & Facial Contours
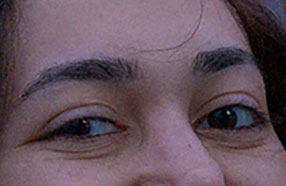
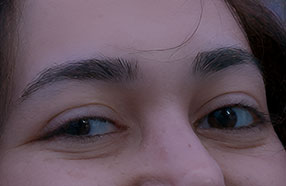
100% Zoom
Hair & Skin Texture
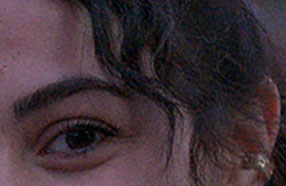
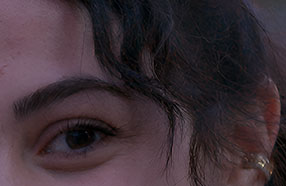
Cropped or Low-Resolution Photos: Upscale While Preserving Natural Detail
A tightly cropped bird photo, a distant subject, or an older low-resolution image may need more pixels for a larger display or print. Lightroom's Super Resolution is a good starting point: it doubles the image's width and height, producing 4× the total pixel count, while aiming to preserve detail and clean edges. It also works with supported non-RAW formats such as JPEG and TIFF.
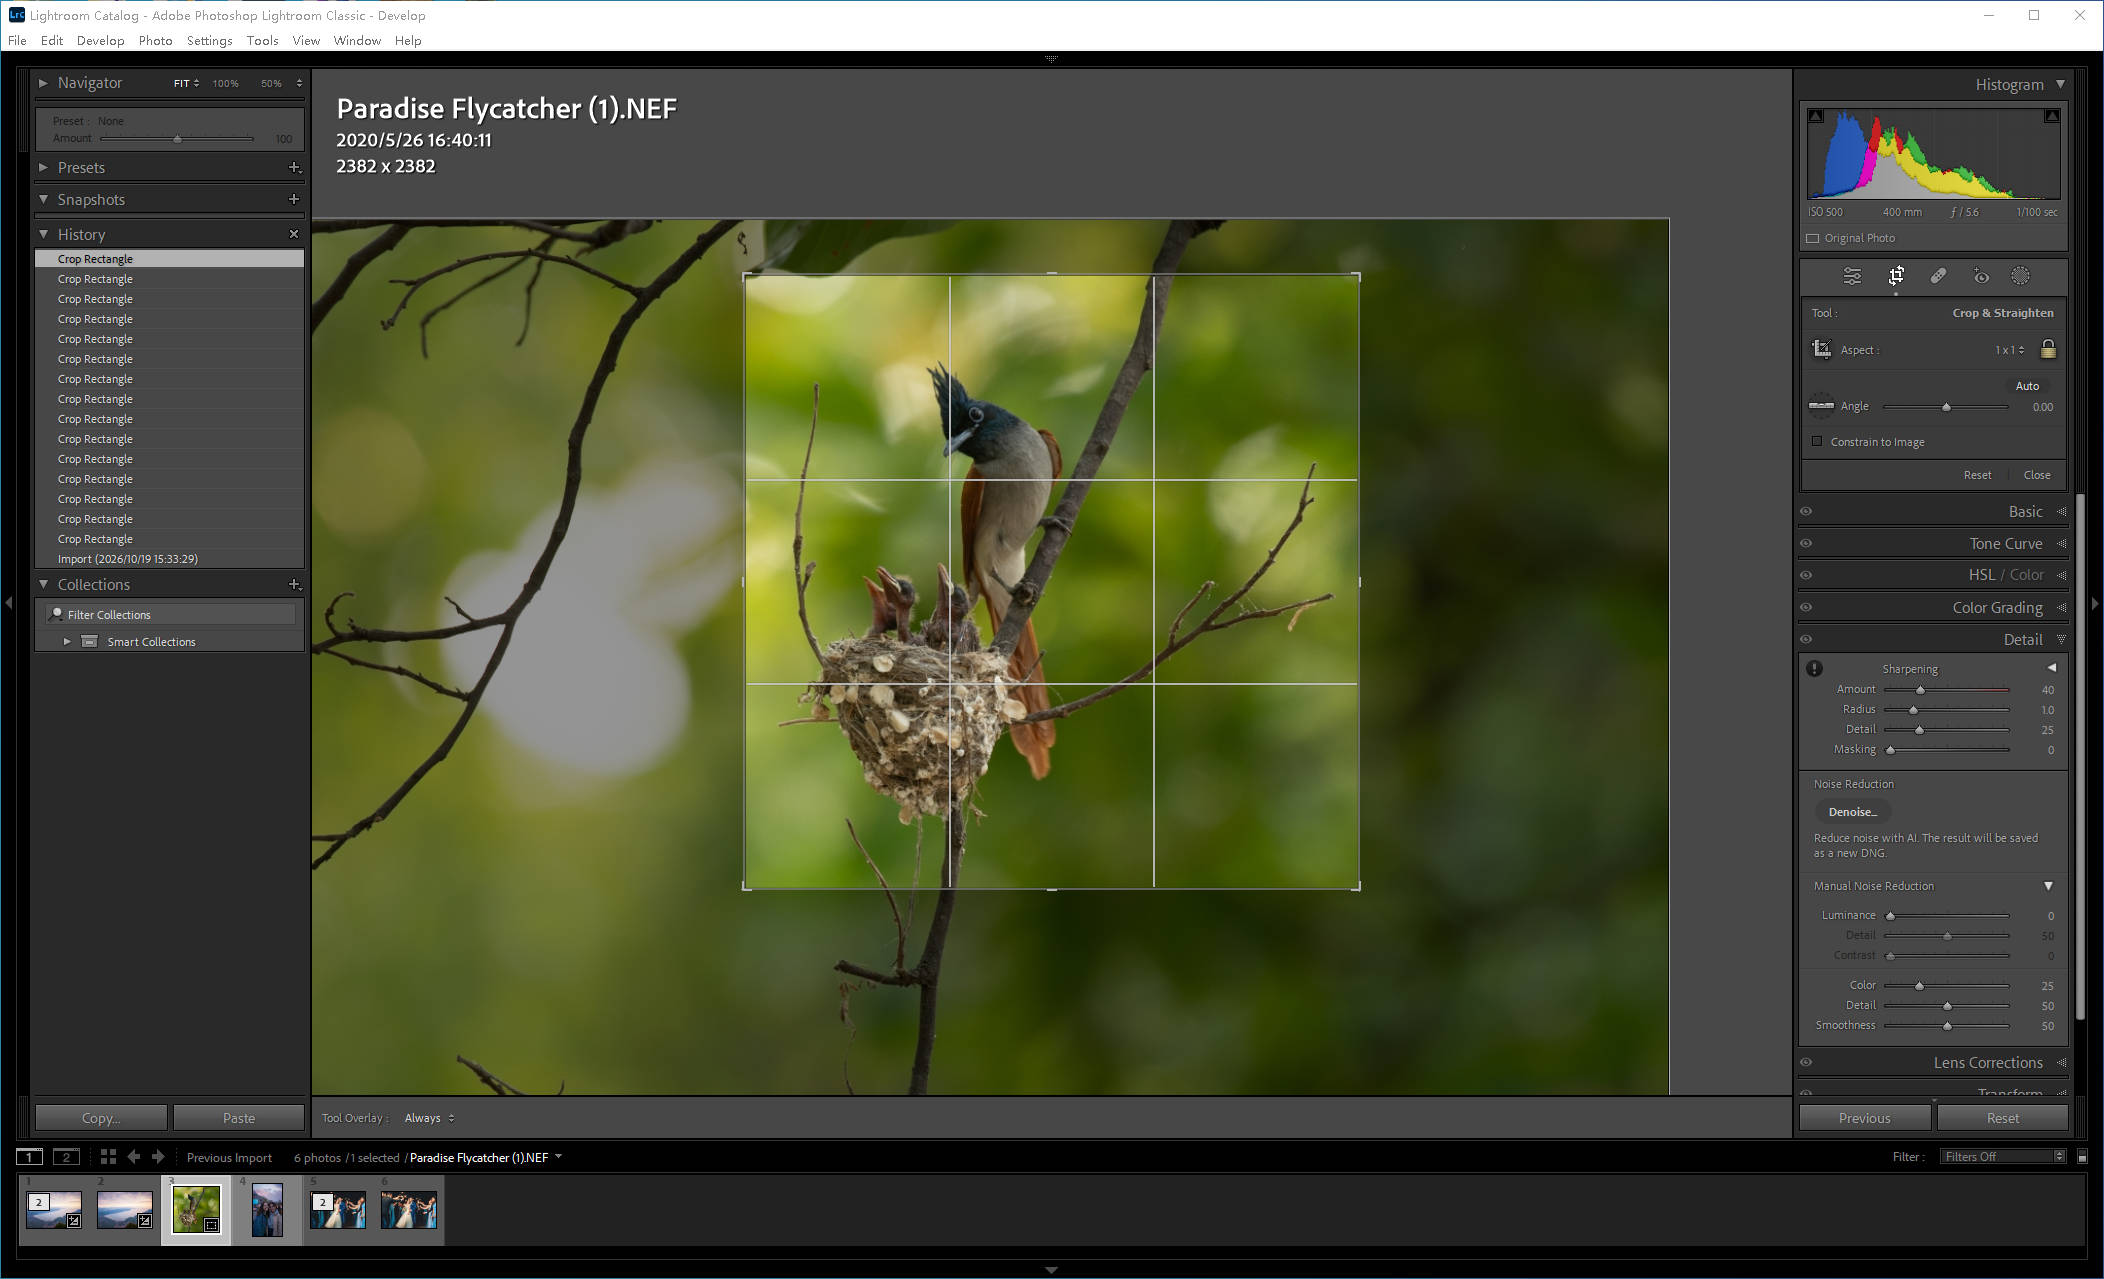
When a 2× enlargement isn't enough for the intended output, or you want to compare different detail reconstruction results, Aiarty offers 1×, 2×, 4×, and 8× upscaling options, with output resolution up to 32K. The higher factors can provide more pixels, but the actual benefit depends on the source image and how naturally the model renders fine details.
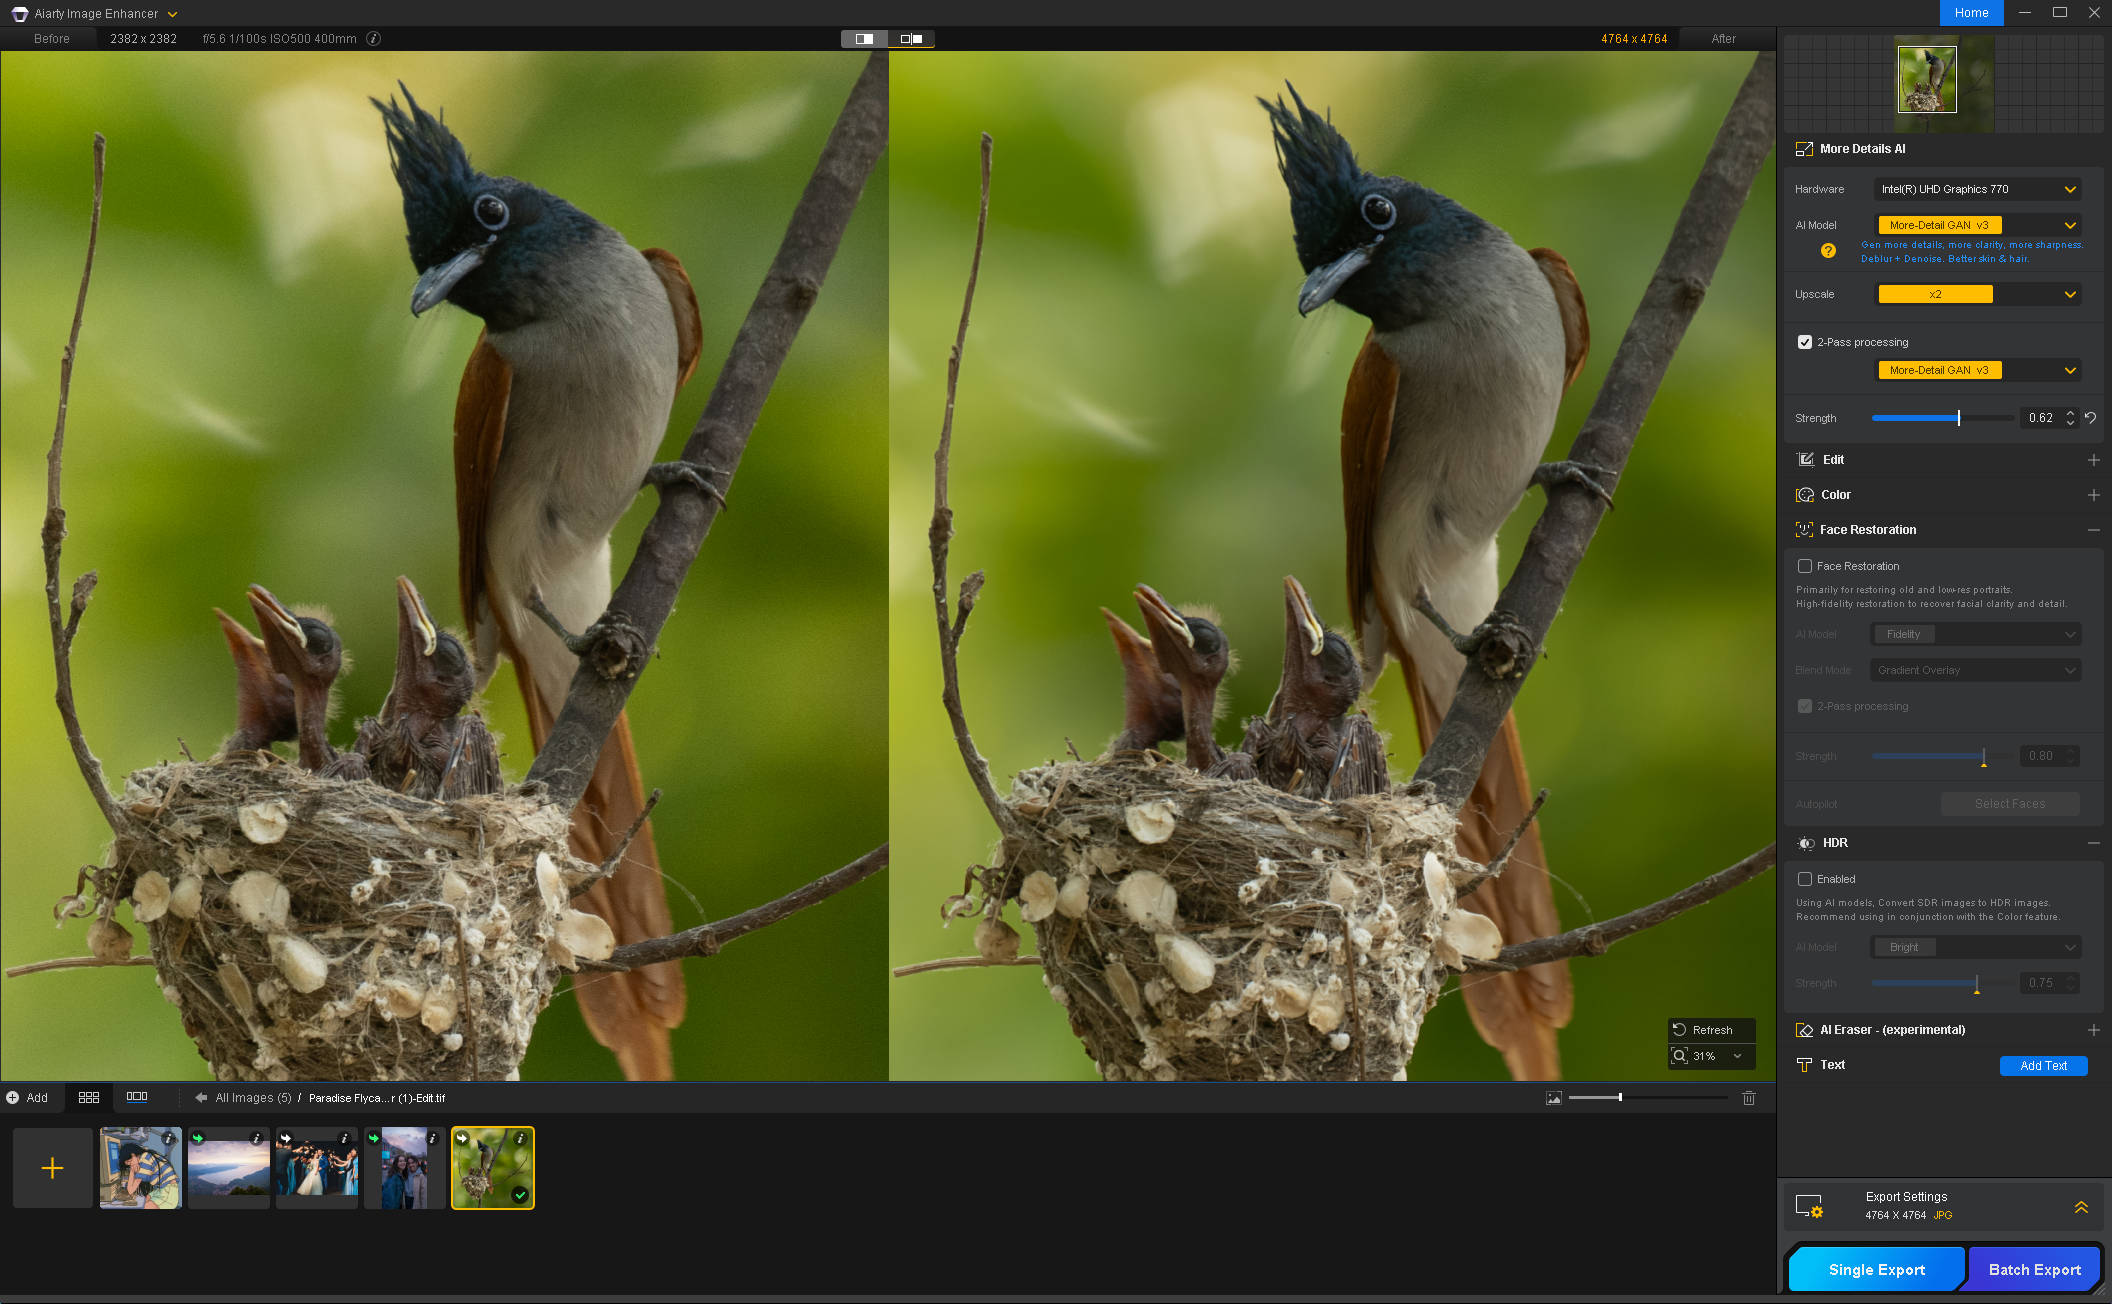
For a cropped bird, inspect feather patterns, the beak, and the edges of the bird against the background at 100% zoom. For print, larger screens, or other uses that require more pixels, the best result is one that improves clarity and preserves believable textures without introducing harsh edges or an artificial, waxy look. The ideal output depends on the image content and its intended use, not simply the number of pixels.
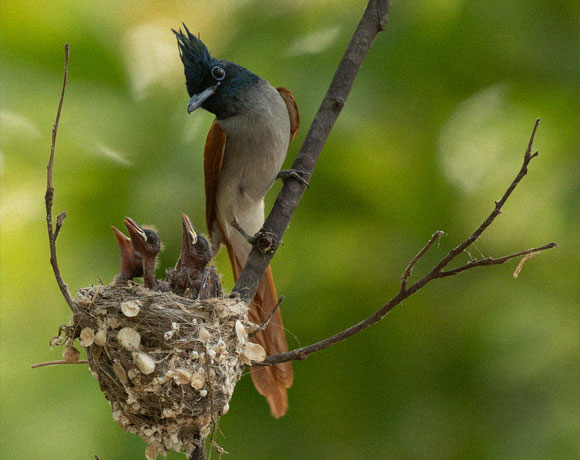

Enhance Lightroom Crops with Aiarty
Eye, Beak & Feather
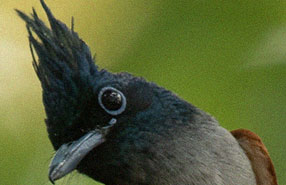

100% Zoom
Young Birds in the Nest


Continue Your Lightroom Workflow or Finish in Aiarty
Once Aiarty finishes enhancing your image, you can either return to Lightroom for further adjustments and final export or finish the workflow directly in Aiarty. Choose the option that best fits your editing needs.
Continue Editing in Lightroom
After enhancement, return the image to Lightroom for further adjustments, series-wide consistency checks, or final export. This is useful when you need to refine the overall look or maintain a consistent style across a batch of photos. Keep enhanced images organized in a dedicated Aiarty output folder, then import or synchronize that folder in Lightroom. You may need to refresh or reimport files to reflect file changes.
You can continue with tasks such as:
Exposure and color correction: Fine-tune white balance, exposure, contrast, highlights, and shadows.
Batch consistency: Match tones and colors across a series of portraits, event photos, or product images.
Final export: Set the file format, dimensions, resolution, and output sharpening for your intended use.
Finish in Aiarty Image Enhancer
If the enhanced image already meets your needs, you can finish the workflow in Aiarty without reopening Lightroom just to export. Review the result at 100% zoom, then confirm the output format, dimensions, filename, and save location before saving the finished image.
You can then use the enhanced image directly for:
Online sharing: Upload images to social media, websites, or online portfolios.
Printing: Prepare high-resolution photos for prints, albums, or framed displays.
Design projects: Add enhanced images to presentations, marketing materials, or other creative layouts.
Extend Your Photo Enhancement Workflow to Other Editors
Aiarty Image Enhancer can complement other photo editing tools, including Capture One, DxO PhotoLab, ON1 Photo RAW, and Adobe Bridge. You can keep your preferred editor for RAW development, color correction, photo organization, and selection, then bring Aiarty into the workflow when images need additional noise reduction, detail enhancement, or upscaling.
The integration experience varies by application. Some editors support external-editor commands or configurable handoffs, while others may require exporting a file before opening it in Aiarty. File formats, metadata transfer, and how enhanced images return to the original application can also differ. The best approach depends on how you prefer to manage and finish your photos.
FAQs
-
1. Does Aiarty Image Enhancer Replace Lightroom?
No. Lightroom remains useful for RAW development, color correction, photo organization, and export. Aiarty complements it with dedicated tools for noise reduction, deblurring, upscaling, and detail enhancement.
-
2. Will My Lightroom Adjustments Be Applied in Aiarty?
It depends on the Edit In option you choose. Edit a Copy with Lightroom Adjustments applies your Lightroom edits to the copy sent to Aiarty. Edit a Copy and Edit Original do not bake those Develop adjustments into the file sent to Aiarty.
-
3. Can I Send RAW Photos Directly from Lightroom to Aiarty?
In the Lightroom external editing workflow described here, Lightroom typically renders the RAW photo as a TIFF or another supported copy before sending it to Aiarty. The original RAW data is not directly processed in this handoff.
-
4. Will Enhanced Photos Automatically Return to Lightroom?
Behavior depends on the workflow. In our tested Plug-in Extras workflow, the enhanced TIFF was automatically imported into Lightroom. With other workflows, you may need to import the saved file or synchronize its folder manually.
-
5. Should I Finish Editing in Lightroom or Aiarty?
Return to Lightroom if you need further color adjustments, cropping, photo organization, or batch export. If the image already looks right and needs no additional editing, you can finish in Aiarty and use the exported file directly.
