Pixelation is often used to hide or protect parts of an image, but sometimes, you might just want to fix an over-censored or low-quality picture. Whether it’s an old family photo, a blurred face in a screenshot, or a pixelated product image, learning how to uncensor a pixelated image can help you restore clarity and detail.
In this guide, we’ll walk you through five effective ways to uncensor or depixelate images using tools like Aiarty Image Enhancer, Photoshop, GIMP, Inpaint, and Pixelied. Each tool serves a different need — from one-click AI fixes to professional manual restoration.
Why Do Images Get Pixelated or Censored?
Pixelation occurs when an image’s resolution is too low or when parts of the photo are intentionally blurred to obscure details. It can make faces, objects, or text appear blocky and difficult to recognize. Common causes of pixelation include:
- Privacy masking: intentional censorship applied to faces, license plates, logos, or other sensitive areas to protect identity or confidential information.
- Image compression: photos shared on social media or messaging apps often lose detail due to aggressive compression, resulting in pixelated visuals.
- Poor-quality scans or enlargements: when small or low-resolution images are scanned, resized, or printed at larger dimensions, the pixels become noticeable and reduce overall clarity.
If your goal is to recover clarity rather than reveal intentionally hidden or private content, the following methods will help you safely and effectively remove pixelation, restoring a sharper and more natural-looking image.
How to Uncensor Images: 5 Proven Methods to Restore Censored Photos
Method 1: Aiarty Image Enhancer – Best AI Tool for Light Pixelation
Best for: Light to moderate pixelation, blurry faces or compressed social media images, and users seeking a one-click AI uncensoring solution
Aiarty Image Enhancer uses AI to automatically restore details from blurry or pixelated photos. It reconstructs lost information using deep-learning models trained on 6.78 million image dataset. Unlike traditional photo editors, this photo sharpening software doesn’t rely on manual sliders or filters — it analyzes pixel patterns and intelligently predicts the missing data, making it one of the most powerful AI censor remover tools today.
- AI-driven detail reconstruction: Enhances lightly censored, pixelated, or compressed areas without distortion.
- Up to 32K resolution upscaling: Produces sharp, professional-quality images.
- Denoise and deblur: Reduce digital noise and smooth out pixelation while sharpening details to make the image clearer and more natural.
- Automatic enhancement: No technical skill or software installation required.
Step-by-Step Guide to Uncensor a Pixelated Image Using Aiarty Image Enhancer
Step 1. Open Aiarty Image Enhancer, drag and drop to import your pixelated censored image.
Step 2. Set the hardware to GPU if possible. Choose an AI model based on your image such as more-Detail GAN v3 for texture and details, AIGCsmooth v3 for AIGC images and Real-Photo v3 for photo restoration.
Step 3. Select a Upscale factor according to your needs, such as 1x, 2x, 4x, 8x, 1080p, 2K, 4K, 8K and even customize up to 32K.
Step 4. Tick on the Face Restoration if you're tend to restore facial details while removing common imperfections such as blemishes, acne, redness, freckles, blurriness, and grain.
Step 5. Expand the Export settings panel to set output folder, format, quality etc. Then tap the Single Export and wait. The pixelation, blurriness, or grain on your image will be removed automatically during this process.
- AI-based pixel restoration with natural results
- Supports upscaling up to 32K resolution
- Removes compression artifacts and digital noise
- Works best for mild pixelation (not heavy censorship)
Method 2: Photoshop – Best for Professional Manual Editing
Best for: Professional photographers, designers, and editors who need fine-grained control over image texture and tone.
Adobe Photoshop remains the gold standard for photo restoration and retouching. While it cannot truly “reveal” intentionally hidden or censored areas, it offers complete control over reducing pixelation through a combination of advanced filters, smart sharpening, and AI-powered enhancement tools. With its wide range of adjustment options, users can fine-tune textures, smooth blocky edges, and restore natural detail with professional-level precision.
How to Uncensor Images in Photoshop
Step 1. Open your image in Photoshop.
Step 2. Go to Filter → Noise → Reduce Noise to smooth out harsh block edges and minimize graininess.
Step 3. Apply Filter → Blur → Gaussian Blur (radius between 0.5–2px) to gently blend pixels and create a more natural surface.
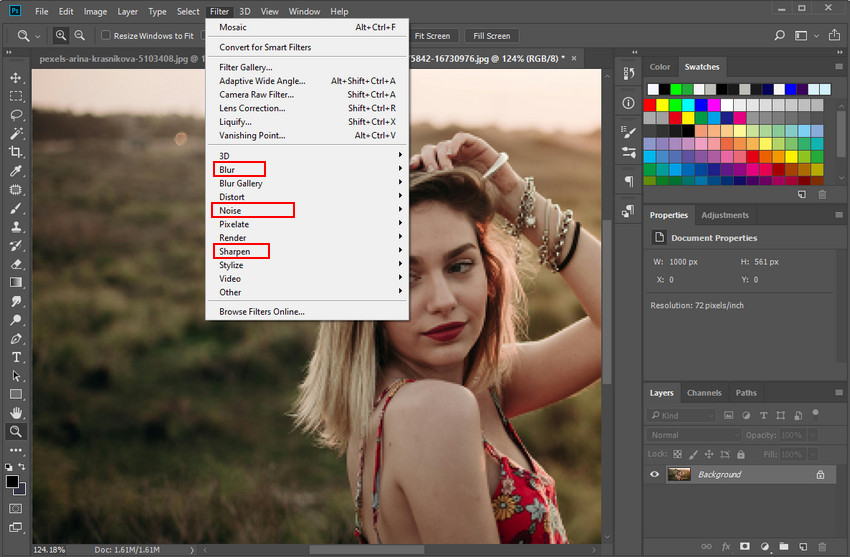
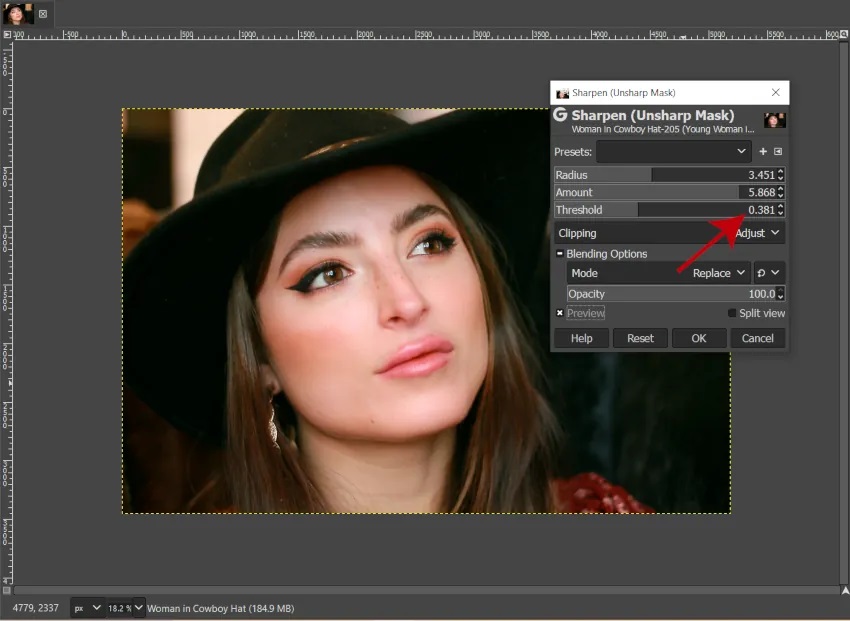
Step 4. Use Filter → Sharpen → Smart Sharpen to bring back edge definition and enhance fine details.
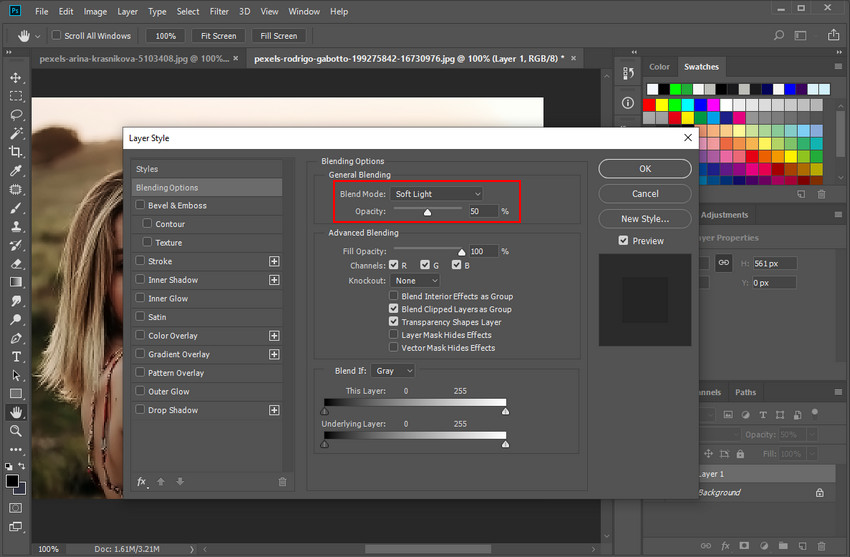
Step 5. Duplicate the layer, then change the Blend Mode to Soft Light and lower the opacity to around 50% for added contrast and depth.
Step 6. For areas with missing or distorted detail, try Generative Fill (Photoshop Beta) to intelligently rebuild textures and fill in lost regions with realistic precision.
💬 Tip: Alternate between blurring and sharpening for best results. Overuse can make your image appear too smooth or artificial.
Learn more: How to Sharpen an Image in Photoshop Nondestructively (Steps)?
- Precise noise and blur reduction
- Non-destructive layer editing
- Generative Fill can reconstruct missing textures
- Steeper learning curve
- Subscription-based software
Method 3: GIMP – Best Free Photoshop Alternative
Best for: Users who want to remove censor from image or fix pixelation without paying for Photoshop.
GIMP (GNU Image Manipulation Program) is a free and open-source image editor that’s surprisingly capable when it comes to depixelation and image restoration. While it lacks built-in AI-powered enhancement tools, its flexible range of manual filters—including blurring, sharpening, and noise reduction—can produce solid, natural-looking results when used carefully. For users who prefer a cost-free yet customizable alternative to Photoshop, GIMP offers all the essential tools needed to reduce pixelation and recover image clarity with a bit of hands-on adjustment.
Step 1. Open your image in GIMP.
Step 2. Duplicate the original layer to keep a safe backup in case you need to revert changes.
Step 3. Go to Filters → Blur → Selective Gaussian Blur and adjust the radius until the pixel edges appear smoother and less harsh.
Step 4. Then apply Filters → Enhance → Sharpen to bring back edge definition and restore some of the lost detail.
Step 5. Finally, use the Smudge or Heal Tool to manually refine important areas such as skin tones, fabric, or backgrounds, ensuring a more natural and balanced look.
- 100% free and open-source
- Works across Windows, macOS, and Linux
- Excellent manual filters
- Lacks AI features
- Interface can feel complex for beginners
💬 Tip: Combine soft blur (around 1.0–2.0) with light sharpening (20–30%) for the most natural uncensor effect.
Method 4: Inpaint – Best for Removing Censored Blocks
Best for: Localized pixelation or mosaic censorship in small areas.
Inpaint uses advanced AI-based texture reconstruction to intelligently analyze your image and fill in pixelated or blurred areas with matching surrounding content. Instead of simply blurring or sharpening, it rebuilds missing textures to make the edited region blend seamlessly with the rest of the image. This makes it especially useful when only a small section—such as a logo, text, watermark, or facial blur—is pixelated, allowing you to restore clarity while keeping the overall photo natural and balanced.
Step 1. Open your browser and navigate to Inpaint’s official online editor. No installation is required.
Step 2. Click Upload Image and select the photo you want to fix from your computer or device.
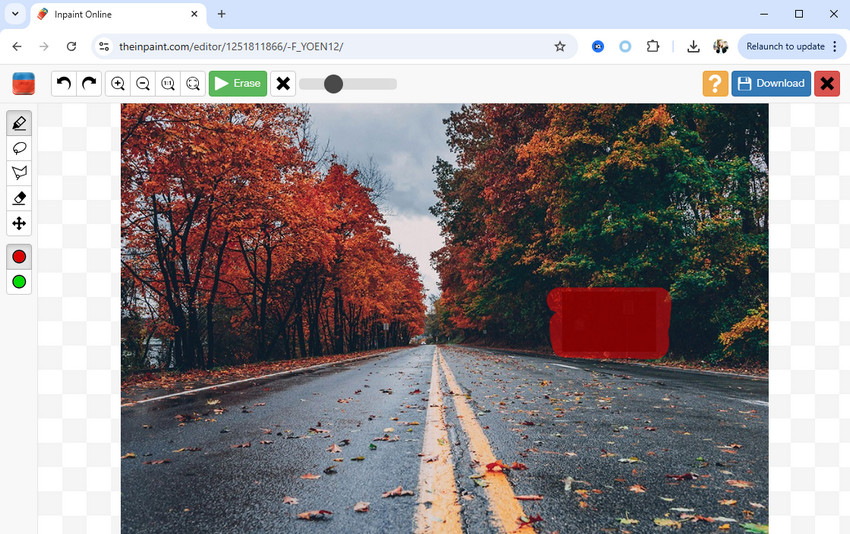
Step 3. Use the marker tool to carefully select the pixelated or blurred area you want to restore. You can adjust the brush size for better precision around edges.
Step 4. Inpaint’s AI will automatically analyze the surrounding pixels and reconstruct the selected region using nearby colors and textures for a natural result.
Step 5. If some areas still look off, repeat the process or fine-tune the selection until the repaired section blends seamlessly with the rest of the image.
- Simple online workflow
- AI fills missing textures automatically
- No software installation required
- Not effective for full-image censorship
- Limited editing control
💬 Tip: Combine soft blur (around 1.0–2.0) with light sharpening (20–30%) for the most natural uncensor effect.
Method 5: Pixelied – Best for Quick Online Fixes
Best for: Quickly uncensoring profile photos or social media pictures.
Pixelied is an all-in-one online photo editor that features a convenient AI Unpixelate function designed to fix pixelated or blurred images in just a few clicks. It’s an excellent choice for beginners, marketers, and social media users who want quick, high-quality results without diving into complex manual adjustments. Beyond unpixelating, Pixelied also offers tools for background removal, filters, color correction, and text overlays, making it a versatile solution for creating clean, share-ready visuals with minimal effort.
Step 1. Open your browser and head to the official Pixelied website.
Step 2. Click Upload to import the image you want to enhance from your computer or mobile device.
Step 3. Navigate to the AI Enhance section and select Unpixelate to let Pixelied’s AI automatically smooth rough edges and restore missing details.
Step 4. Fine-tune the sharpness and clarity sliders until the image looks natural and well-defined, avoiding an overly smooth or artificial finish.
Step 5. Once you’re satisfied with the results, click Download to save your restored image in high quality, ready for sharing or further editing.
- Browser-based and beginner-friendly
- AI-driven “Unpixelate” and “Enhance” filters
- Free plan available
- Export quality limited in free version
- Not as accurate as Aiarty Image Enhancer or Photoshop
Conclusion
Learning how to uncensor a pixelated image isn’t about revealing hidden content — it’s about restoring clarity and improving image quality.
If your photo is lightly pixelated, start with the Aiarty Image Enhancer — it delivers instant, realistic restoration using AI. For advanced control, tools like Photoshop and GIMP let you manually fine-tune textures, while Inpaint and Pixelied provide quick online fixes. With the right balance of AI automation and manual precision, you can bring your pixelated photos back to life — sharp, detailed, and ready to share.
Try Aiarty Image Enhancer — quickly turn pixelated photos into sharp, high-quality images with AI restoration.
 FAQs
FAQs
No. Once details are replaced with solid pixel blocks, they are permanently lost. AI tools can predict and rebuild details, but they cannot recover the original data.
For facial clarity, Aiarty Image Enhancer’s Face Mode or Pixelied’s AI Unpixelate are the top options, providing natural-looking restoration with minimal manual editing.
Yes — as long as the image belongs to you or you have permission to edit it. Avoid attempting to reveal content that has been intentionally hidden for privacy or copyright reasons.
You May Also Like
This post was written by Brenda Peng who is a seasoned editor at Digiarty Software who loves turning ordinary photos into extraordinary works of art. With AI assistance for brainstorming and drafting, the post is reviewed for accuracy by our expert Abby Poole for her expertise in this field.