When it comes to digital images, there are times when you might need to increase their size in MB or KB - whether for printing high-quality photos, enhancing images for web display, or ensuring they meet the requirements of various platforms. However, increasing image size can often lead to quality degradation, such as pixelation, blurriness, or loss of detail. The good news is that with the right techniques and tools, you can successfully increase image size in both KB and MB, without compromising on quality. In this guide, we'll walk you through the best methods to enlarge your images, including bulk resizing options for when you have multiple images to enhance.
How to Increase Image Size in MB/KB
Increasing image size in MB or KB doesn't have to mean sacrificing quality. With the right tools and methods, you can enhance your images to meet your needs without losing resolution or clarity. Here's a breakdown of the best ways to increase your image size in both MB and KB, whether you're resizing a single image or handling multiple files in bulk.
Best Way to Increase Image Size in MB/KB and Bulk (No Quality Loss)
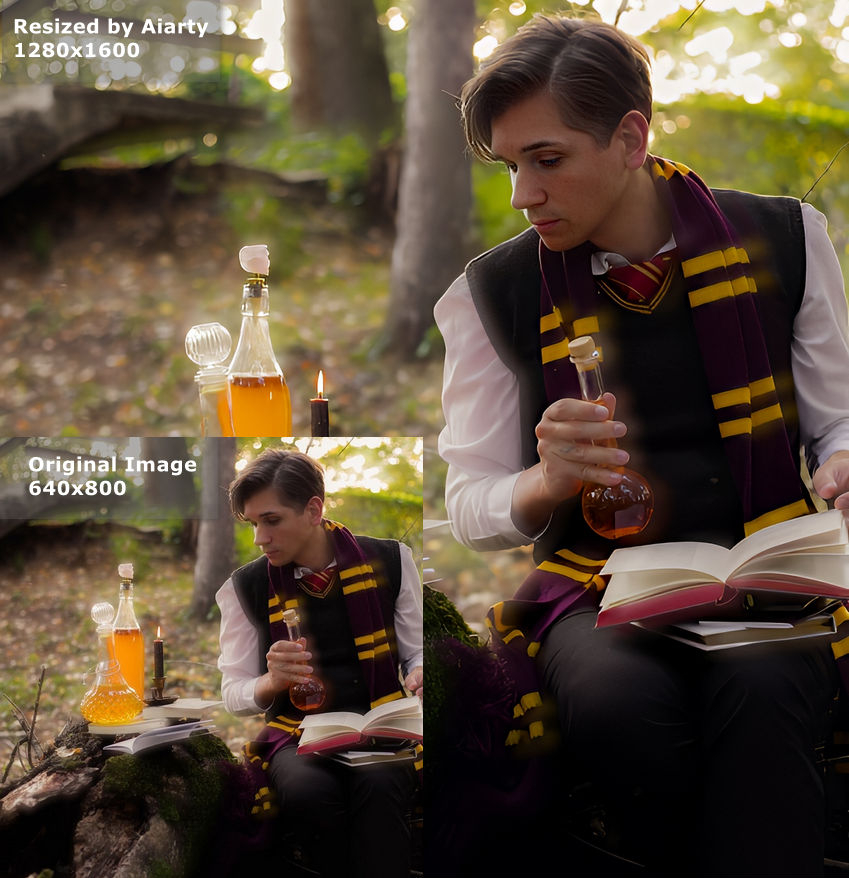
Aiarty Image Enhancer is an advanced AI-powered tool designed specifically for enlarging images without compromising their quality. Unlike traditional image resizing methods, which often result in pixelation or blurring, Aiarty leverages cutting-edge artificial intelligence algorithms to intelligently reconstruct and enhance image details as it increases the size.
The AI analyzes each pixel, recognizing patterns and textures, and then reconstructs them at a larger scale, ensuring there's no loss of sharpness. This is especially useful for enhancing images where the original file size or resolution is insufficient for certain applications, such as creating large banners, prints, or high-quality product images. With Aiarty, you can enhance fine details, such as facial features, intricate textures, or even subtle elements like reflections and shadows, without introducing unwanted artifacts like halos or distortion.
Step 1: Upload your image to Aiarty Image Enhancer. Simply drag and drop your image into the workspace or use the upload button.
Step 2: Select the resolution you want for your image. You can choose from presets like 1K, 2K, 4K, or 8K for a more specific resolution, or you can manually select an upscale factor like x2, x4, or x8 to increase the size of your image by the desired amount. Aiarty allows you to scale images up to 32K on Windows computers and 16K on Macs.
Step 3: Enable "2-Pass Processing" for the highest quality. This option performs an extra pass on the image, refining details and eliminating artifacts during upscaling, ensuring sharpness and clarity.
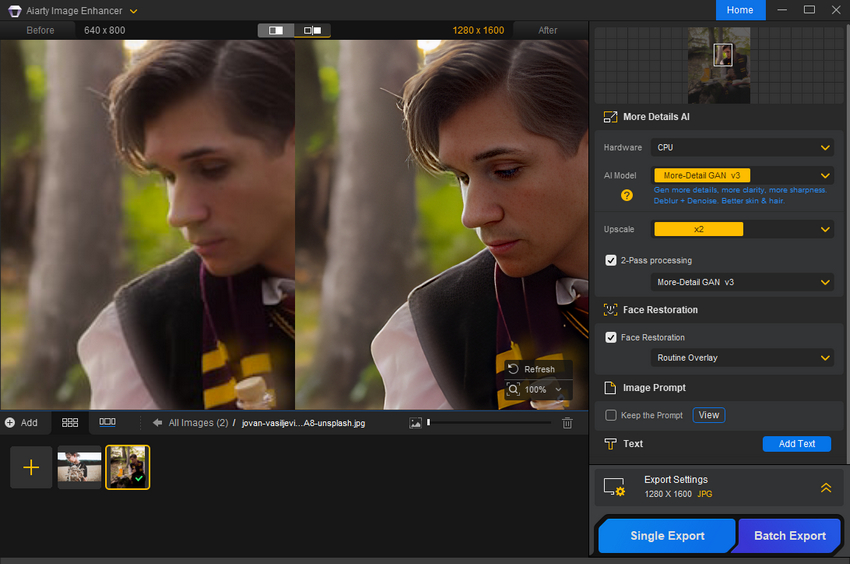
Step 4: Adjust the DPI settings in the export section. If you're preparing images for printing, you can increase the DPI to 300 for professional-quality prints, or adjust it to 72 DPI for web use. This ensures that your image will have the correct resolution for its intended purpose.
Step 5: Once you've selected the appropriate resolution, DPI, and other settings, click the Export button to let Aiarty enhance your image. The AI will upscale the image while preserving fine details and reducing distortion.
Bulk Resizing: If you need to process multiple images, Aiarty allows bulk processing. Upload several images at once, select your resolution settings, and let the tool handle the rest, saving you time and effort.
How to Increase Image Size in MB/KB with Photoshop
Photoshop is one of the most robust image editing tools available, offering complete control over resizing and enhancing images. While it requires a bit more skill than simpler tools, it provides exceptional results when it comes to enlarging images without losing critical detail or sharpness. Here's how to use Photoshop for increasing image size:
Step 1: Open your image in Photoshop. Launch Photoshop and load the image you want to resize by navigating to File > Open and selecting your file.
Step 2: Go to "Image Size" settings. In the top menu, click on Image and then select Image Size from the dropdown. This will open the image size dialogue box, where you can adjust the dimensions of your image.
Step 3: Adjust the resolution and dimensions.
- In the Resolution field, increase the DPI (dots per inch). For print, 300 DPI is ideal, but for web use, you can go with 72 DPI.
- Change the Width and Height in pixels to increase the size. Make sure the Constrain Proportions box is checked to maintain the aspect ratio.
- If you're increasing the resolution, ensure that Resample is selected (which allows Photoshop to add pixels to the image), and choose the appropriate resampling method.
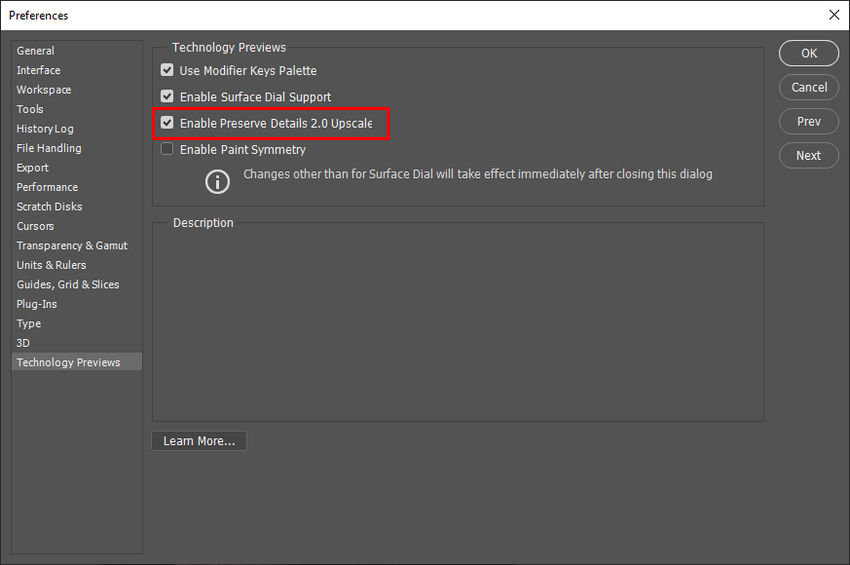
Step 4: Select a resampling method. In the resample dropdown, choose Preserve Details 2.0. This setting ensures that Photoshop will maintain the sharpness and clarity of your image while adding pixels during the resizing process. If you're enlarging the image significantly, this method is especially helpful in minimizing pixelation and noise.
Step 5: Save your resized image. After adjusting the resolution and dimensions, click OK to apply the changes. Save your image by navigating to File > Save As, and choose the appropriate file format (e.g., JPEG, TIFF, PNG) depending on your output needs. For high-quality prints, save as TIFF with high resolution; for web, save as JPEG or PNG with a reduced resolution if necessary.
Bulk Resizing: Photoshop allows you to batch resize multiple images using its Automate feature. To do this:
- Navigate to File > Automate > Batch.
- Choose the folder containing the images you want to resize and select the Action (you can create a custom action that includes resizing steps).
- Photoshop will apply the resize settings to all images in the folder in one go, saving you time when processing large batches of photos.
How to Increase Image Size in MB/KB Online
For those who prefer a quicker and more accessible way to increase image size without the complexity of desktop software, online tools provide a great solution. Platforms like Let's Enhance, Upscayl, and ResizeImage.net offer AI-powered upscaling features that can automatically enhance and enlarge images in just a few simple steps. These tools are perfect for users who need fast, hassle-free results without the need for advanced technical knowledge.
Step 1. Head to the Let's Enhance website (https://letsenhance.io).
Step 2: Once you're on the Let's Enhance homepage, click on the "Drag and drop anywhere to upload" to upload your image directly into the workspace. Supported formats include JPEG, PNG, TIFF, and others.
Step 3: Let's Enhance will automatically suggest the best resolution based on the image's current quality and the intended use. You can choose from the following resolution options.
- 1K, 2K, 4K, or 8K for standard enhancements.
- x2, x4, x8 scaling for enlarging the image by set multiples. This is especially useful if you need to upscale images significantly without losing quality.
Step 5: After adjusting the resolution and enhancement settings, click on the "Enhance" button. Let's Enhance will use its AI-powered algorithms to process and upscale your image, preserving fine details while enlarging it. The process may take a few minutes depending on the size of the image and the resolution you've chosen.
 FAQs
FAQs
Yes, it is safe to increase image size as long as you're using the right tools. AI-powered tools like Aiarty Image Enhancer use advanced algorithms to upscale images intelligently, preserving details and minimizing quality loss.
To maintain high image quality when increasing size, use tools that offer AI-based enhancement like Aiarty Image Enhancer. These tools analyze the image and intelligently add pixels, preserving fine details, reducing noise, and keeping the image sharp.
The terms KB (Kilobytes) and MB (Megabytes) refer to the file size of the image, while the resolution (number of pixels) determines how detailed and sharp the image will appear. Increasing the size of an image in KB or MB typically means you are enlarging the image resolution, leading to a larger file size. MB refers to larger file sizes with higher resolution and more image data, while KB usually corresponds to smaller, compressed images with lower resolution.
Yes, both Photoshop and online tools like Let's Enhance and Aiarty Image Enhancer support bulk resizing. This feature allows you to upload and process multiple images at the same time, applying the same settings to all of them. Bulk resizing is perfect for tasks like creating product catalogs, web galleries, or social media posts where you need to process many images quickly and consistently.
DPI (dots per inch) is a measure of image resolution that defines how many dots of ink are placed per inch when printed. A higher DPI means a higher print quality. When increasing image size, adjusting the DPI is crucial for ensuring the image prints clearly at larger sizes. For professional print quality, aim for 300 DPI, while 72 DPI is typically sufficient for web images.
The best tool depends on your specific needs:
- For high-quality professional prints, Photoshop is a top choice due to its control over resolution and DPI settings.
- For AI-powered upscaling, Aiarty Image Enhancer and Let's Enhance offer excellent options for maintaining detail while enlarging images.
- For quick online resizing, Upscayl and other similar tools provide user-friendly solutions for resizing images in bulk without software installation.
You May Also Like
This post was written by Brenda Peng who is a seasoned editor at Digiarty Software who loves turning ordinary photos into extraordinary works of art. With AI assistance for brainstorming and drafting, the post is reviewed for accuracy by our expert Abby Poole for her expertise in this field.