There's a huge difference between viewing art on a screen and actually holding it in your hands. Being able to touch and feel a print brings a special sense of accomplishment, and opens up so many more possibilities. You can wrap it as a gift for a friend, hang it on a wall, or start an online business.
When I make art prints, I usually focus on a few key questions:
Do I need glossy or matte paper? How can I ensure accurate colors? Will the printing technique faithfully present my intentions and brush textures? And how large should I print the artwork?
In this blog, I'll share my general practices and step-by-step approach to making high-quality art prints.
If you're working with digital art, jump ahead to the section on common print options. If you want to reproduce and print physical artwork, let's start from accurate and high quality scanning.
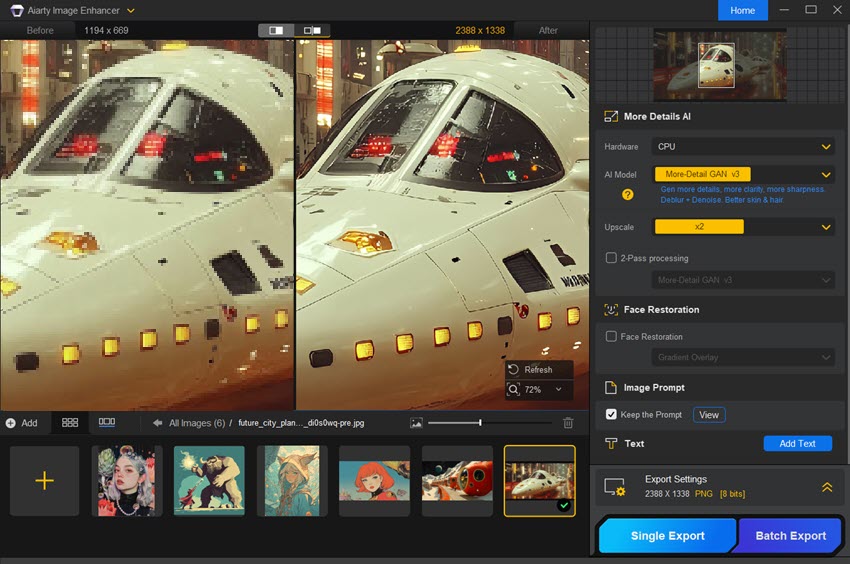
When your file doesn’t meet the resolution needed for your intended print size, AI upscaling can help prepare it for printing without quality loss.
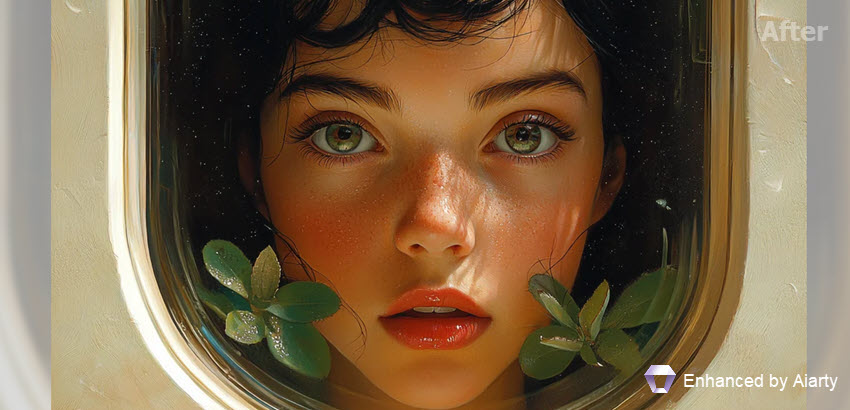
![]() Quick Solution: Upscale, enhance, prepare for large size print
Quick Solution: Upscale, enhance, prepare for large size print
Aiarty Image Enhancer is designed to upscale, sharpen, and refine artwork while preserving textures and edges. You can adjust enhancement strength flexibly for better fidelity.

Download Aiarty Image Enhancer to upscale and enhance art work:
Scan the Art Work
Getting your physical art into a clean, high quality digital file is a must before you print. A good scan captures the nuance, texture, and color of the original piece far better than a quick phone snap.
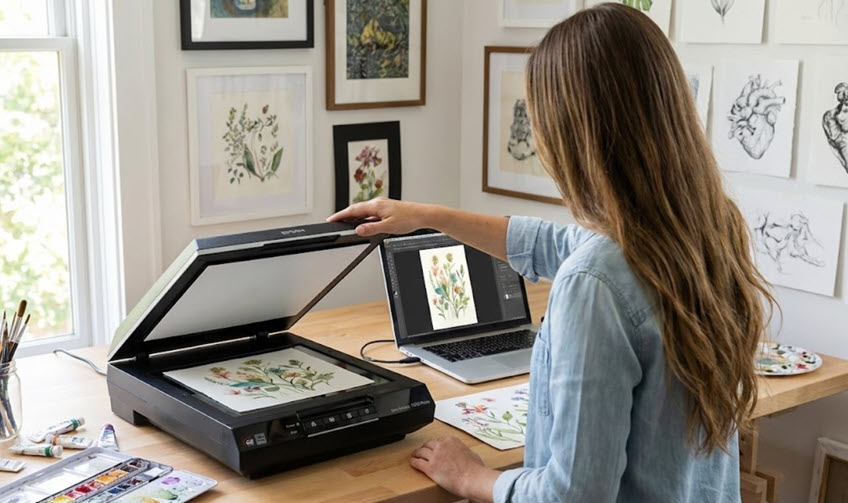
Flatbed scanners like the Epson V‑series are nice for home use, as they capture detail and color cleanly. If your piece is bigger than the scanner bed, scan it in overlapping sections and then stitch the pieces together in Photoshop.
Tips:
- Scan at 300 PPI as a minimum for print, more if you want enlargement later. Make sure to avoid automatic adjustments on the scanner software.
- Dust the scanner glass, flatten the art so no shadows creep in, and if dust or loose media is an issue, consider using a fixative spray first.
About ICC Profiles
Before you hit print, there is one technical concept you really need to know about, and it answers the question: Why do my colors look wrong when printed?
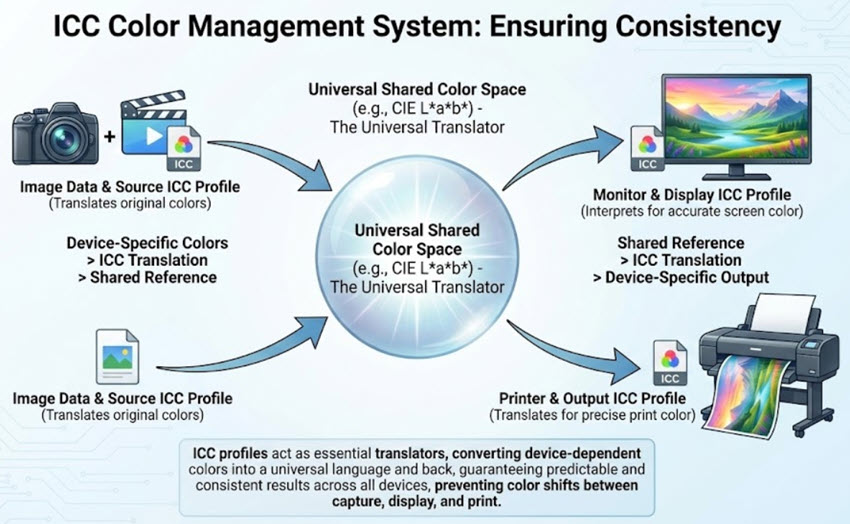
It's usually an ICC profile issue.
The ICC file is a small piece of data that ensures your display screen and printer understand each other. It describes exactly how a specific printer and specific paper handle color.
If you are printing at home, you need to download the profile for your specific paper. If you are outsourcing to a studio, ask them if they have a custom ICC profile you can use for previewing your work.
A shop that uses custom profiles for their materials is a sign they care about accuracy.
Common Print Options
Not all prints are created equal, and the method you choose changes the entire vibe of the piece.
Giclée Prints
If you are looking for that museum-quality finish, this is where you want to be. Giclée, or "micro-spray" in some circles, is the gold standard for fine art reproduction. It relies on high-resolution inkjet printers that spray pigment-based inks onto heavyweight, archival papers. It is usually cotton rag or alpha cellulose.
It is ideal for artists selling limited editions, gallery work, or premium reproductions, as they closely replicate the look and feel of the original artwork.
Risograph
Then there is the fun, slightly messy cousin of printing: Risograph. This process uses soy-based inks and a stencil method that creates bold, flat colors. The results have this distinctive, textured finish that is often a little imperfect. The colors are printed separately, which can lead to subtle misalignments, embraced as part of the aesthetic.
It is popular for zines, posters, and graphic designs, especially where vibrant colors or retro feeling are important than accuracy.
Digital Offset Printing
Sometimes, you don't need museum quality. laser or toner-based standard digital printing is cost-effective and fast. It is suitable for art posters and open-edition prints.
Select Your Print Paper
Choosing the right paper can affect how your artwork looks and feels once printed. Depending on the mood, colour, and intended display of your piece, paper choice is both a creative decision and a technical afterthought.
One of the first things to decide is the surface finish: gloss, matte, or semi-gloss, such as satin, lustre, or pearl.
- Gloss paper is exactly what it sounds like. It creates high contrast and works really well with dye inks if you want the colors to scream. However, I usually avoid it for wall displays because it catches the light. The reflection can make it hard to see the actual image from certain angles.
- Matte is my personal go-to for fine art. It has no shine, reducing reflections and creating a softer, more artistic feel. It’s well suited to fine art prints and exhibition work.
- Semi-gloss papers sit between the two. They offer a good color impact without the aggressive glare of full gloss, making them a versatile all-round choice.
Calculate Pixel Resolution for the Desired Print Size
Now that you have selected the paper type for the desired feels and corresponding printing technique, how large should the digital resolution be? For the fixed DPI, larger print size entails higher digital resolution.
Here is a quick math formula.
Physical print size(in) = Digital Resolution ÷ DPI
Digital Resolution (px) = Physical print size x DPI
Now that we need a fixed 300DPI or even 600DPI, if the art work is intended for 16x20 inch print size:
- For 300DPI, you need resolution at 4800x6000px
- For 600DPI, its 9600x12000px
Pro Tips: Use Image Upscaler Tool for 300DPI Print
Sometimes, the scanned resolution of your art work is not sufficient for larger size printing.
That's when you can resort to Aiarty Image Enhancer, image enhancer and upscaling software to upscaling art work to the desire resolution, without quality loss. It has a strength slider to control the enhancement strength, so that the upscaling can be faithful to your original work.
Follow the steps below to make prints of your art with the desire resolution:
Step 1. Add your art work into Aiarty Image Enhancer, and select the desired resolution.
Choose a scaling factor (x2, x4, 4K, 8K, or higher) that matches your print size at 300 DPI or 600 DPI.
Step 2. Choose the suitable AI model.
You can easily switch models, zoom in to check, and preview the results to find the best settings for specific art work.
Step 3. Export the art work for high quality print.
Once satisfied, export the upscaled file in a high-quality format. TIFF or PNG is recommended for printing.
You can use this free pixel-print-size calculator to check resolution at different DPI, with chart for common print sizes, wall art size guide, and helpful resources.

You May Also Like
Rico Rodriguez is an experienced content writer with a deep-rooted interest in AI. He has been at the forefront of exploring generative AI tools like Stable Diffusion. His articles offer valuable insights into the world of AI, providing readers with practical tips and informative explanations.