How to Upscale Video in Final Cut Pro (2 Methods)
Many creators and editors want to upscale videos in Final Cut Pro, especially when working on projects that combine different resolutions. For example, you might have some 1080p footage that needs to fit into a 4K timeline. Instead of reshooting, Final Cut Pro gives you a couple of ways to scale up your videos.
In this guide, we’ll walk through how to upscale video in Final Cut Pro using both its built-in tool and third-party plugin. Then, we’ll also look at an alternative option for those who want even cleaner, sharper results.
Method 1: Using Final Cut Pro’s Built-in Upscaling
Final Cut Pro can automatically upscale your footage when you place it in a higher-resolution timeline. This built-in method is quick and works well for simple upscaling, but it won’t restore missing details — it simply enlarges the existing pixels to match the new resolution.
If you’re still interested in this method, here’s how to do it.
Step 1: Create a new project
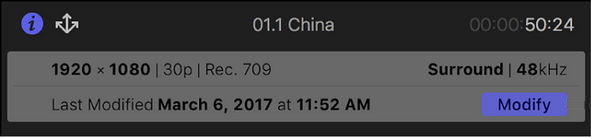
Open Final Cut Pro, go to File > New > Project. Name your project and click the small “Modify” button next to the video properties.
Step 2: Set the project resolution
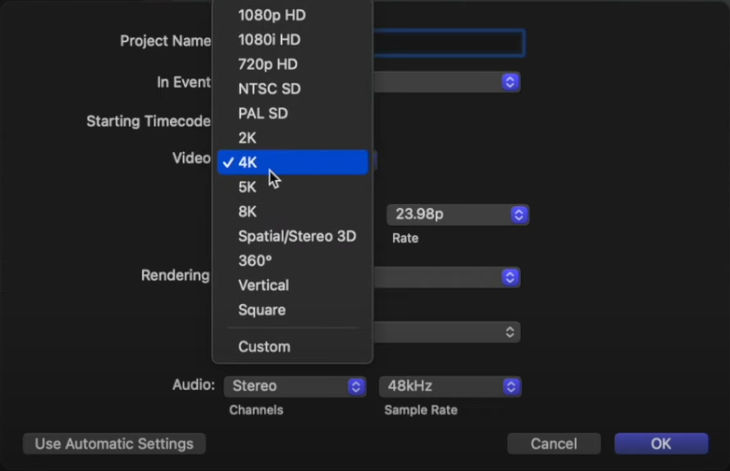
In the Video dropdown, choose 4K (or any higher resolution you want). Make sure the frame rate matches your original footage — for example, 24 fps or 30 fps — to maintain smooth motion.
Step 3: Import and place your footage
Import your 1080p or lower-resolution video clips into the library. Then, drag them onto your new 4K timeline. Final Cut Pro will automatically scale the video to fit the frame.
Step 4: Check the scaling quality
If the clip looks cropped or doesn’t fill the frame properly, right-click the clip in the timeline, choose Transform > Fit, or manually adjust the scale in the Inspector panel.
Step 5: Render and export
Once everything looks right, Final Cut Pro will render the upscaled version during playback or export. Go to File > Share > Master File, choose your preferred codec and resolution, and export the final upscaled video.
Method 2: Using Third-Party Plugin for Final Cut Pro
If you want more refined results and better control over sharpness, texture, and smoothness, plugins like FidelityFuze can help. FidelityFuze uses a deterministic (non-AI) algorithm to upscale videos. The plugin is available for a one-time purchase of €79.
Keep in mind that while it offers a better image quality bump, it may require more rendering time and system resources compared to Final Cut Pro’s default method.
Step 1: Install FidelityFuze plugin
Download the installer from the developer's website. Crucially, make sure Final Cut Pro is completely closed before running the installer. Once done, double-click the downloaded file and follow the standard macOS installation process.
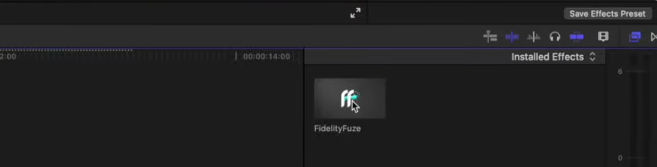
Next, relaunch Final Cut Pro. The plugin will now appear in the Effects Browser.
Step 1: Create a new timeline
Set up a new project or timeline with your desired output resolution (e.g., 4K or higher).
Step 2: Place your clip
Drag your lower-resolution clip onto the timeline as usual.
Step 3: Create a compound clip or adjustment layer
For best results, select your clip and press Option + G to create a compound clip, or apply the plugin to an adjustment layer above the footage. This ensures the plugin processes at the timeline’s full resolution.

Step 4: Apply the plugin
Find FidelityFuze (or your preferred upscaling plugin) in the Effects Browser and drag it onto the compound clip or adjustment layer.
Step 5: Fine-tune the settings
- Source Width: Set this to match your original clip’s width (e.g., 1920 for 1080p footage).
- Detail Recovery & Sensitivity: Adjust these sliders to bring back texture and edge sharpness.
- Supersampling: Enable 2× Supersampling for smoother gradients and motion (note: this increases render time).
- Noise Reduction: If the upscaled footage looks grainy, apply mild noise reduction to smooth it out.

Step 6: Preview and export
Play back the result in real time to check the improvement, then export the final project in 4K or your chosen resolution.
When Final Cut Pro’s Upscaling Isn’t Enough
While Final Cut Pro’s built-in scaling and plugins like FidelityFuze can handle most basic upscaling tasks, the results don’t always live up to expectations. Some users find that the footage still looks soft or slightly blurred after upscaling — especially when trying to turn old 720p or 1080p clips into crisp 4K. The process can also be time-consuming and resource-heavy, depending on your hardware and project size.
If you’ve spent time tweaking settings and still aren’t satisfied with the quality, it might be worth switching to a dedicated upscaling tool.
A Better Way to Upscale Video: Aiarty Video Enhancer
Aiarty Video Enhancer is designed specifically for video enhancement and AI-powered upscaling. Unlike Final Cut Pro, which mainly enlarges pixels, Aiarty uses deep-learning models to actually reconstruct details, reduce noise, and restore clarity in each frame.
Here’s what makes it stand out:
- AI Upscaling up to 4K or higher: Choose your target resolution (such as 4K) or upscale by multiples (2×, 3×, 4×).
- Automatic enhancement: Sharpens edges, removes compression artifacts, and restores natural detail.
- Multiple AI models: Pick different models depending on your footage type.
- Fast and GPU-accelerated: Optimized for both speed and quality so you can upscale videos quickly without lag.
- All-in-one workflow: Besides upscaling, it also offers color correction, SDR to HDR conversion, frame interpolation, and audio enhancement.
If Final Cut Pro’s upscaling left your video looking dull or grainy, Aiarty Video Enhancer can bring it back to life, making it sharper, cleaner, and ready for high-resolution projects.
You can click the download button below to try Aiarty Video Enhancer for free and see the difference for yourself.
Once you’ve downloaded and installed the software, follow these simple steps to upscale your videos:
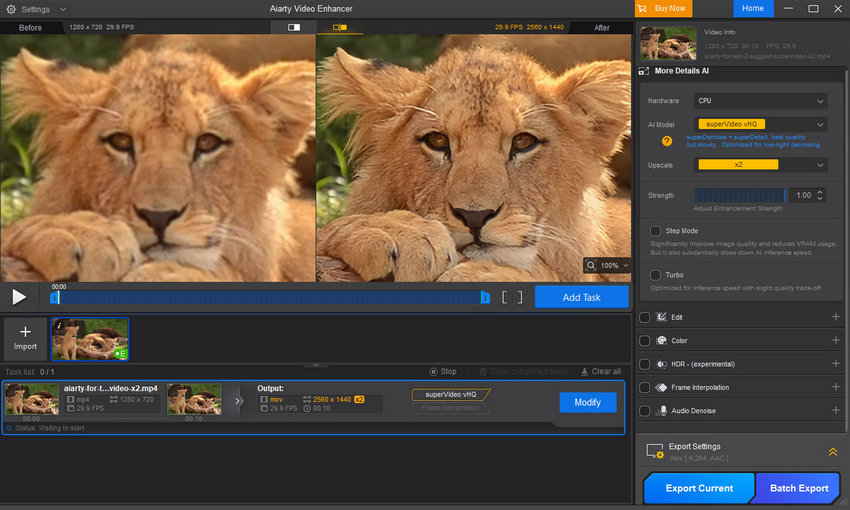
Step 1: Open Aiarty and import your video.
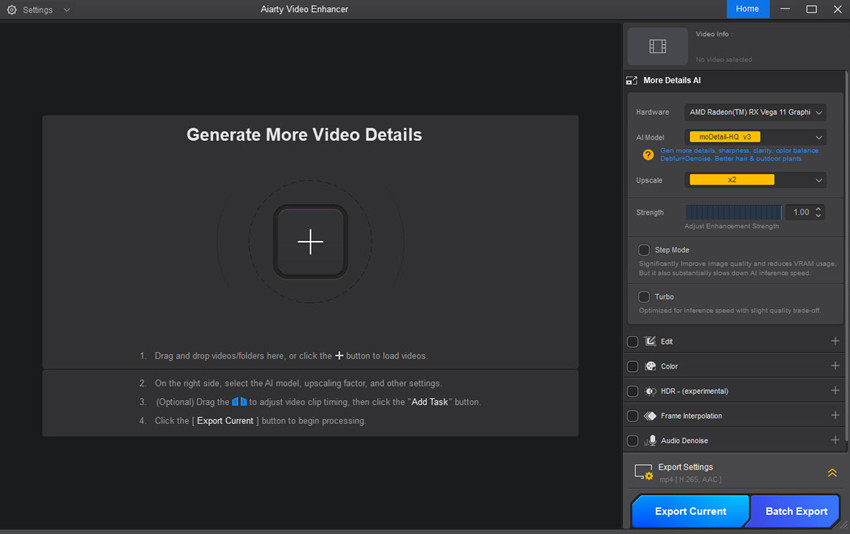
Launch the program and drag your clip into the workspace, or click + to import it manually.
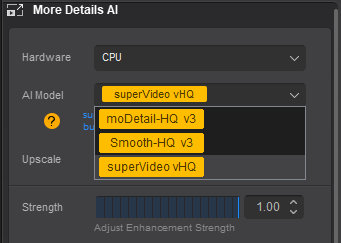
Step 2: Select an AI model.
Choose from three available models based on your video type: moDetail-HQ v3, Smooth-HQ v3, superVideo vHQ.
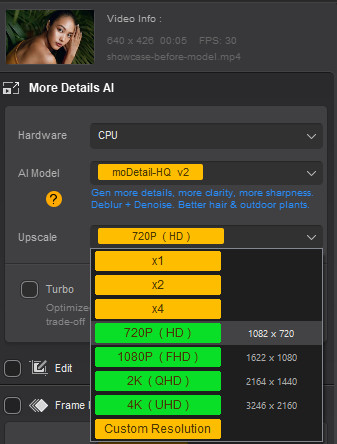
Step 3: Set the upscale level or target resolution.
Click the Upscale drop-down menu and choose your desired scale factor (2×, 3×, or 4×) or select a specific resolution such as 4K or 8K.
Step 4: Generate a preview.
Click Preview to see how the upscaled version looks before exporting. This helps you compare the original and enhanced results side by side.
Step 5: Export your video.
Once you’re satisfied with the preview, click Export Current for a single clip or Batch Export to process multiple videos at once.
If you’d like to see what Aiarty Video Enhancer can do before trying it yourself, check out the showcase video below for real examples of its upscaling results.
You May Also Like
This post was written by Brenda Peng who is a seasoned editor at Digiarty Software who loves turning ordinary photos into extraordinary works of art. With AI assistance for brainstorming and drafting, the post is reviewed for accuracy by our expert Abby Poole for her expertise in this field.