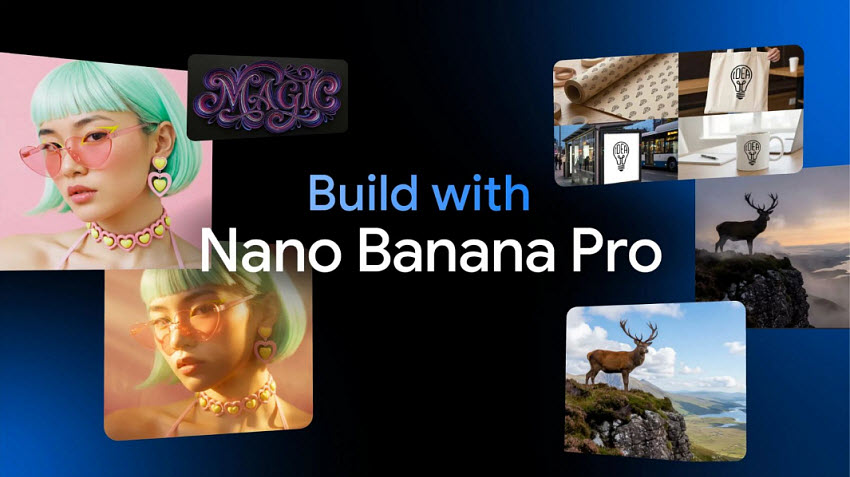
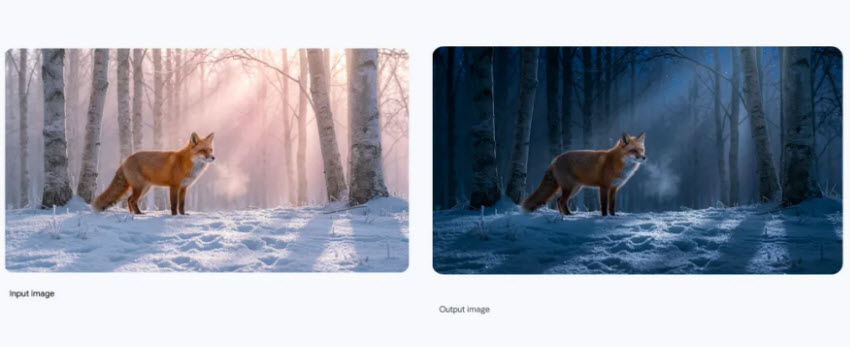
Google has officially launched Nano Banana Pro, the upgraded image generation and editing model built on Gemini 3 Pro Image. Compared with the earlier Nano Banana, the Pro version offers much sharper text rendering, improved lighting control, 4K-class visual quality, and support for up to 14 reference images, making it one of the most capable image models.
Now, tons of content creators, e-commerce sellers, designers, and AI enthusiasts are wondering how to access Nano Banana Pro for free. In this post, we will show you how to use Nano Banana Pro to create stunning images step-by-step, plus practical tips and prompts to get professional-grade results.
What is Nano Banana Pro (Gemini 3 Pro Image)?
Nano Banana Pro is Google DeepMind’s new “studio‑grade” image generation and editing model. It’s a major upgrade over the original Nano Banana (Gemini 2.5 Flash Image).
- It supports high‑fidelity visuals (up to 2K/4K resolution), much improved text rendering (multi‑language, legible fonts), and more sophisticated creative controls: lighting, camera angles, focus/depth‑of‑field, color grading, aspect ratio, etc.
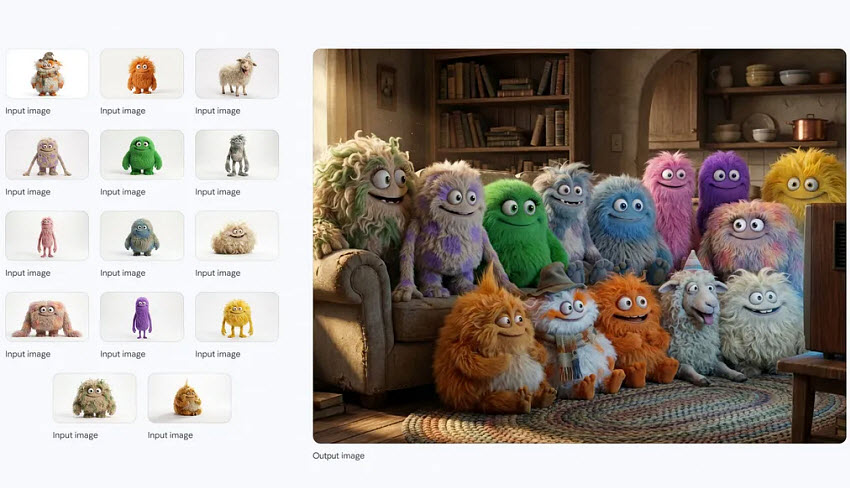
- It allows creators to blend many elements, up to ~14 reference images, and even maintain consistent appearance for up to 5 different people in one composition. This makes it powerful for collages, mockups, group compositions, marketing materials, product visuals, etc.
- Nano Banana Pro offers Strong product photography capabilities, useful for infographics, diagrams, brand materials, mockups, ads, storyboards, etc.
How Much is Nano Banana Pro?
Google now offers the model under a tiered pricing structure, depending on resolution, platform, and usage level. Nano Banana Pro has a free trial, but the “Pro” and “Ultra” tiers require a monthly subscription fee, with costs varying based on usage and platform. This means casual users can explore the tool at no cost, while professionals and businesses can opt for higher-quality, higher-volume plans.
- For standard 1K/2K images: about US $0.13–$0.14 per image.
- For 4K images: about US $0.24 per image.
- If you use “Batch mode” (for bulk or less time-sensitive generation), costs may be lower, e.g. 4K could drop to ~US $0.12 per image.

This pricing applies when you use Nano Banana Pro via API / developer platforms (e.g. AI Studio, Vertex AI) or any paid plan that bills per generation. So how can we access free-user generations with Nano Banana Pro? Check ways below.
How to Access Nano Banana Pro (Free or Limited-Free Ways)?
Currently, here are different ways to get Nano Banana Pro for free. Below we will show you how to use Nano Banana Pro free step by step.
1. Gemini App/Web (Best Free Method)
For new and regular users, the easiest way to use Nano Banana Pro free without paying is the Germini app or website. Nano Banana Pro inside the Gemini app offers a free tier for limited generation.
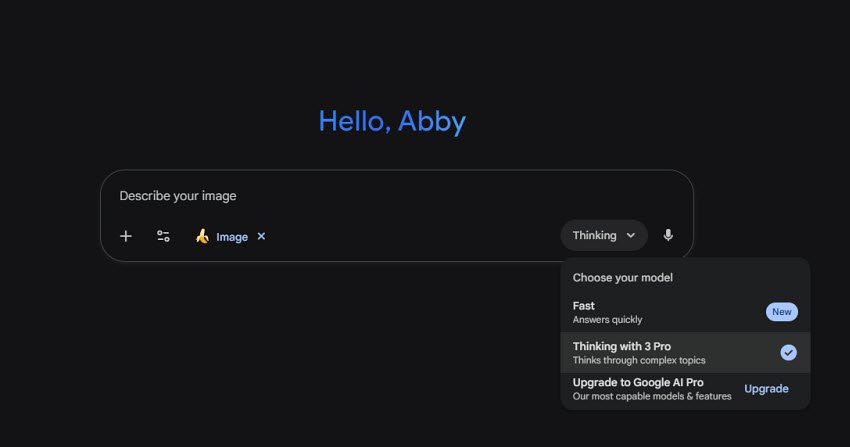
Step 1. Open the Gemini app or visit gemini.google.com.
Step 2. Click the Tools button and choose Create images.
Step 3. In the model selector (bottom right), choose “Thinking / Gemini 3 Pro”. This activates Nano Banana Pro automatically.
Notes for free users:
- The free credits of Nano Banana Pro allow a limited number (currently 2 images per day) of generated images.
- After hitting the limit, it may revert to the older Nano Banana model.
2. Google Flow Labs for 30-day Free Trial
Google Flow Labs offers one of the most generous ways to test Nano Banana Pro free with full feature access. Unlike the Gemini app’s small daily quota, Flow provides a full 30-day trial where users can explore the Pro model without hard usage restrictions other than monthly AI credits. Flow Labs uses a credit-based system for image generation. When you activate the trial, Google grants you 1,000 free monthly credits, which is usually enough to produce hundreds of Pro-quality images, depending on image size and prompt complexity.
Here’s how to unlock the free trial of Nano Banana Pro:
Step 1. Open Flow Labs in your browser and log in with a Google account. From the home interface, start a new creative project.
Step 2. Inside the workspace, choose the workflow designed for image generation. Flow will load a minimalist canvas where you can enter prompts or upload references.
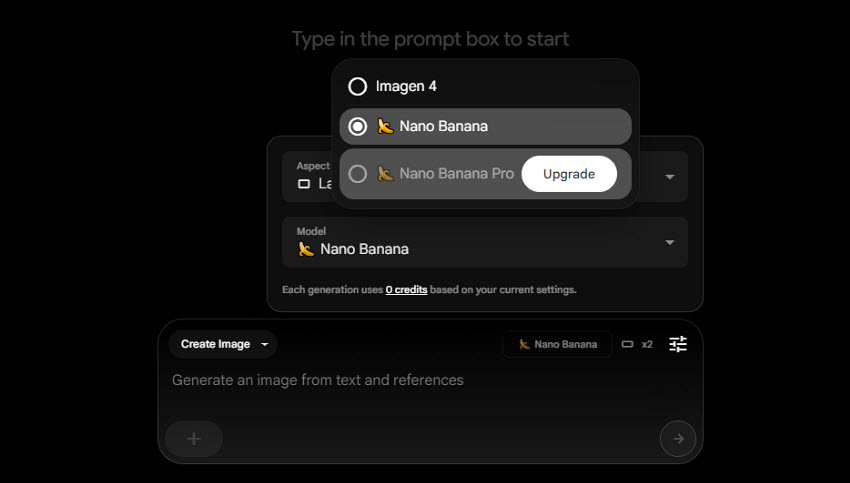
Step 3. Before generating anything, open the model selector in the settings panel.Flow defaults to the older Nano Banana model and you need to switch it manually to Nano Banana Pro.
Step 4. Next, you need to activate the 30-Day free trial by adding a payment method, but you won’t be charged during the first 30 days. Once activated, the full Nano Banana Pro model becomes available across all Flow projects.
3. Adobe Photoshop/Firefly Integration for Advanced Users
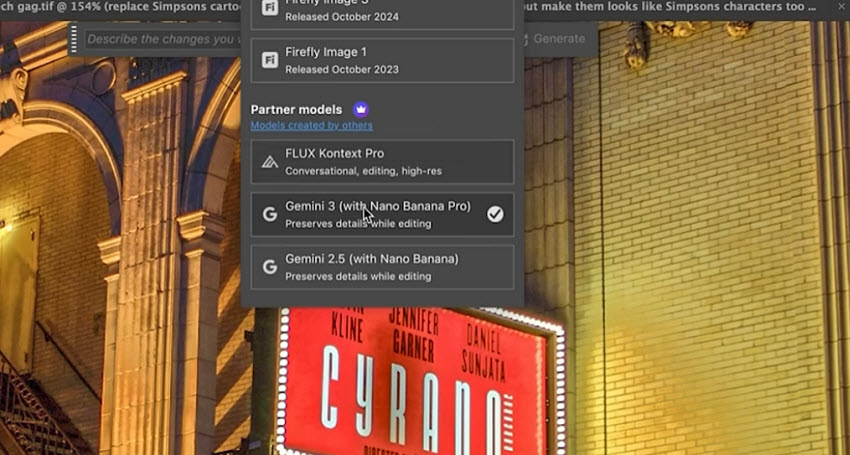
For advanced users who need more professional edits, they can try Nano Banana Pro inPhotoshop. Google and Adobe publicly confirmed that Nano Banana Pro is now available inside Photoshop and Firefly as a selectable model:
- Photoshop: Generative Fill / Generate Image
- Firefly (web and mobile): Text-to-image model selection
When using these models, just choose “Gemini 3 (with Nano Banana Pro)”, it will then use Nano Banana Pro to generate images.
Notes for free users: To use Nano Banana Pro in Photoshop or Firefly, it will require an Adobe account. And some features require paid Adobe plans after free credits run out. Also, the image generation speed will be slower than the web Gemini due to the Photoshop pipelines.
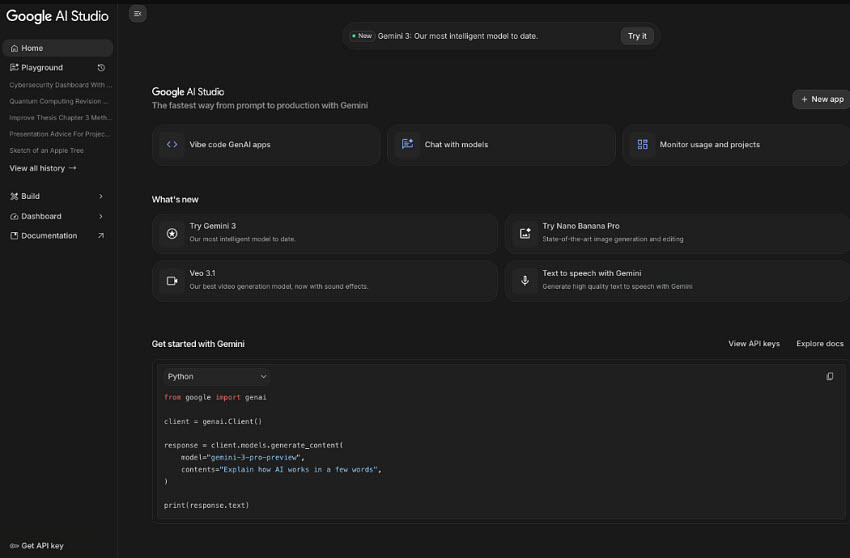
4. AI Studio & Vertex AI for Developers
Nano Banana Pro is also rolling out to Google’s developer tools, where technical users or businesses can experiment programmatically. It’s available in both Google AI Studio and Google Vertex AI, both platforms include free-tier credits, meaning you can test Nano Banana Pro free without paying.
How to Access Nano Banana Pro in Google AI Studio?
Step 1. Go to aistudio.google.com and sign in. AI Studio automatically creates a workspace linked to Google Cloud.
Step 2. Create or select a Google Cloud project. This project will be connected to your free-tier credits.
Step 3. Open the Models section and inside the model list, scroll to the image generation section. Select Gemini 3 Pro Image, which contains the Nano Banana Pro engine.
Step 4. AI Studio offers two access paths: Playground UI with no code; ideal for testing prompts, styles, prompts with references, etc.; and API tab with ready-made Python/Node.js snippets for production integration.
Note: Free-tier credits refresh monthly (often $300 credits in trial + ongoing limited free credits afterward). API usage requires enabling billing after the trial expires, but you won’t be charged until you exceed free limits. If Nano Banana Pro does not appear, switch the project region to Global as rollout timing varies.
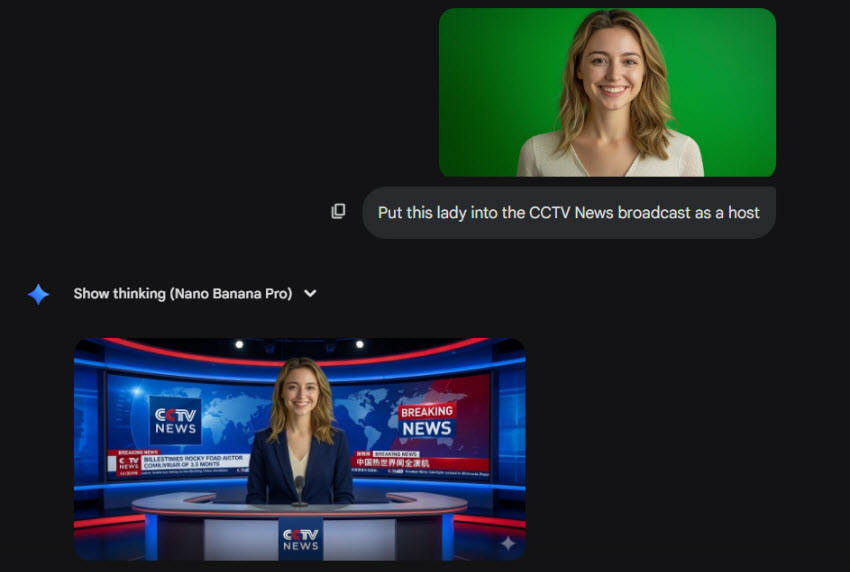
How to Use Nano Banana Pro to Generate Images?
No matter which platform you gain free access to Nano Banana Pro, Gemini app, Flow Labs, Adobe tools, or AI Studio, the core workflow for generating images with Nano Banana Pro remains consistent. Below is a step-by-step workflow that shows exactly how to generate an image in Nano Banana Pro.
Related Search: Is Nano Banana Pro Good for True 4K AI Upscaling?
Step 1. Input a focused prompt
Write one clear sentence that establishes subject, lighting, and style (see prompt templates below). Keep this first pass concise, Nano Banana Pro interprets compact briefs very efficiently.
Step 2. Attach reference media (optional)
Upload example images to guide look, color palette, or subject consistency. Nano Banana Pro allows you to upload up to 14 images and maintains the consistency and resemblance of up to 5 people.
Step 3. Pick output format
Set aspect ratio (square, vertical, horizontal) and target resolution (1K/2K/4K).
Step 4. Generate, review, iterate
Produce a batch of outputs, inspect them, then refine with short follow-up instructions, e.g., tweak lighting, tighten crop, or swap a background element. Use localized edit commands to change parts of the image rather than full regeneration. Once you have a suitable image, export it.
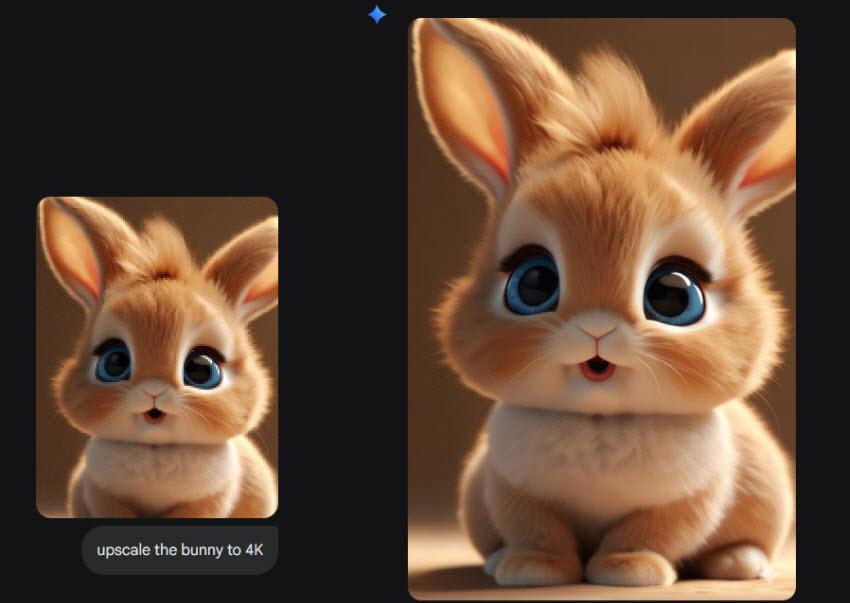
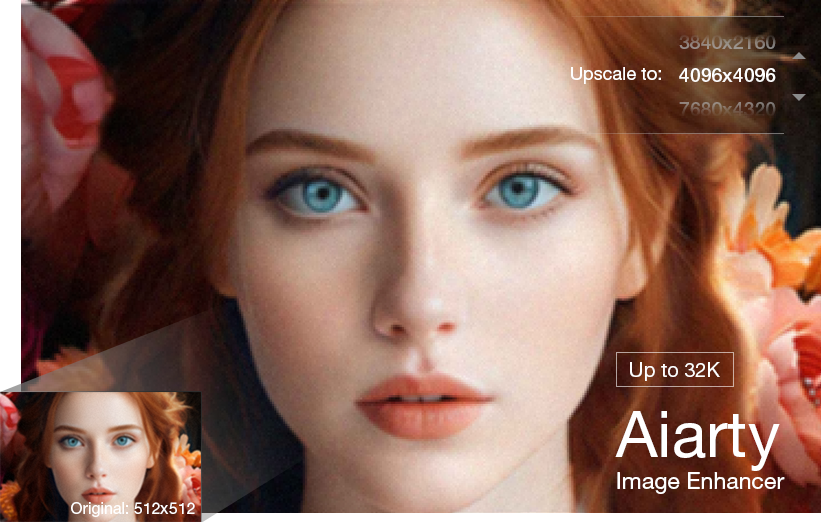
Tips:
To finalize your image, a post-processing enhancer can make a big difference.Tools like Aiarty Image Enhancer are ideal for boosting clarity, sharpening edges, removing noise, and upscaling Nano Banana Pro outputs to 4K, 8K, or even 32K for print-ready visuals.

Generate Images in Nano Banana Pro with Proper Prompts
To unlock the full creative potential of Nano Banana Pro, you need more than basic descriptions. The model responds exceptionally well to prompts that define style, composition, lighting, and constraints. Below are ten actionable techniques to help you generate cleaner, sharper, and more consistent images with Nano Banana Pro.
1. Start with a Clear Subject Focus
State your main subject clearly. For example, say “a stainless-steel water bottle on a white background” instead of vague phrases. A focused subject ensures sharper, more consistent images.
2. Add Style or Art Direction Early
Specify style upfront: photorealistic, cinematic lighting, studio-quality product photo, or anime-style illustration. Early style cues improve consistency, especially for series of images.
3. Use Camera Terms to Control Composition
Photography terms like “35mm lens,” “top-down shot,” or “macro close-up” help the AI understand framing and perspective, producing professional-looking compositions.
4. Specify Lighting for More Realistic Results
Detail light type and direction: “soft diffused light,” “golden hour warm light,” or “hard shadows for dramatic effect.” Proper lighting enhances realism and depth.
5. Describe Texture and Material Clearly
Explicitly mention surfaces: “matte ceramic,” “smooth reflective metal,” or “textured linen fabric.” Essential for product photos or any scene requiring realistic materials.
6. Use Negative Prompts to Avoid Unwanted Artifacts
Prevent unwanted artifacts with phrases like “no extra limbs, no distortion, no text, no watermark.” Keeps outputs clean and reduces post-editing.
7. Use Multi-Sentence Prompts Instead of One Overlong Sentence
Structure your prompt by covering the subject in one sentence, style or camera in the next, lighting in another, and negative constraints at the end. Clear segmentation helps the model follow instructions accurately.
8. Give the Model a Purpose
Specify the image’s intended use: “for e-commerce listing,” “for character sheet,” or “for cinematic poster.” This guides composition, scale, and clarity.
9. Use Reference Art Directions (Non-Copyrighted)
Guide style safely: “3D Pixar-like lighting,” “retro 90s magazine photography,” or “K-pop fashion editorial look.” Improves lighting, colors, and composition.
10. Add Output Constraints for Better Control
Include constraints like “centered composition,” “plain white background,” or “high contrast.” Helps produce consistent, controlled results across multiple images.
Learn more: How to use Nano Banana Pro to restore old damaged photos
 FAQs
FAQs
Nano Banana Pro offers limited free access through platforms like the Gemini app, Flow Labs, and Google AI Studio/Vertex AI. Free-tier users can generate a certain number of Pro images each month before needing to subscribe. For full-featured access, Nano Banana Pro has paid tiers, Pro and Ultra, priced based on usage and platform, providing higher generation limits, faster rendering, and advanced controls.
Using Nano Banana Pro in Gemini is straightforward:
- Open the Gemini app or visit the web platform.
- Go to Create Images.
- In the model selector (usually at the bottom right), choose “Thinking / Gemini 3 Pro Image”, which activates Nano Banana Pro.
- Enter your text prompt describing subject, style, lighting, and composition. You can also upload reference images to guide the AI.
- Click Generate to create the image. You can refine it further by adjusting lighting, style, or specific areas with follow-up prompts.
The older Nano Banana version is suitable for general image generation. It’s faster and lighter but lacks advanced reasoning, fine detail control, and high-end photorealistic rendering. The upgraded Nano Banana Pro (Gemini 3 Pro Image) model with DeepMind reasoning, capable of understanding complex prompts, generating realistic textures, maintaining composition consistency, and supporting higher resolutions (up to 4K+). Pro also supports reference image guidance, style transfers, and advanced post-processing refinements.
This post was written by Brenda Peng who is a seasoned editor at Digiarty Software who loves turning ordinary photos into extraordinary works of art. With AI assistance for brainstorming and drafting, the post is reviewed for accuracy by our expert Abby Poole for her expertise in this field.