Best Midjourney Camera Prompts for Photography
Updated on
Capturing the perfect photograph often hinges on the nuances of camera settings, angles, and lighting. If you're striving to elevate your photography, Midjourney camera prompts are a powerful tool to enhance your creative process. These prompts guide you through the intricacies of photography, helping you achieve stunning results with every shot.
Midjourney, an innovative AI tool, is designed to provide photographers with precise prompts to refine their techniques. Whether you're exploring new camera angles, selecting the ideal lens, or mastering lighting setups, Midjourney prompts offer valuable insights that can transform your photography.
In this comprehensive guide, you'll discover how to utilize Midjourney camera prompts to improve your images. We'll delve into various aspects such as camera angles, lens choices, brand preferences, lighting techniques, etc. By the end of this article, you'll be equipped with the knowledge to make the most of these prompts.
More than Midjourney Camera Prompts
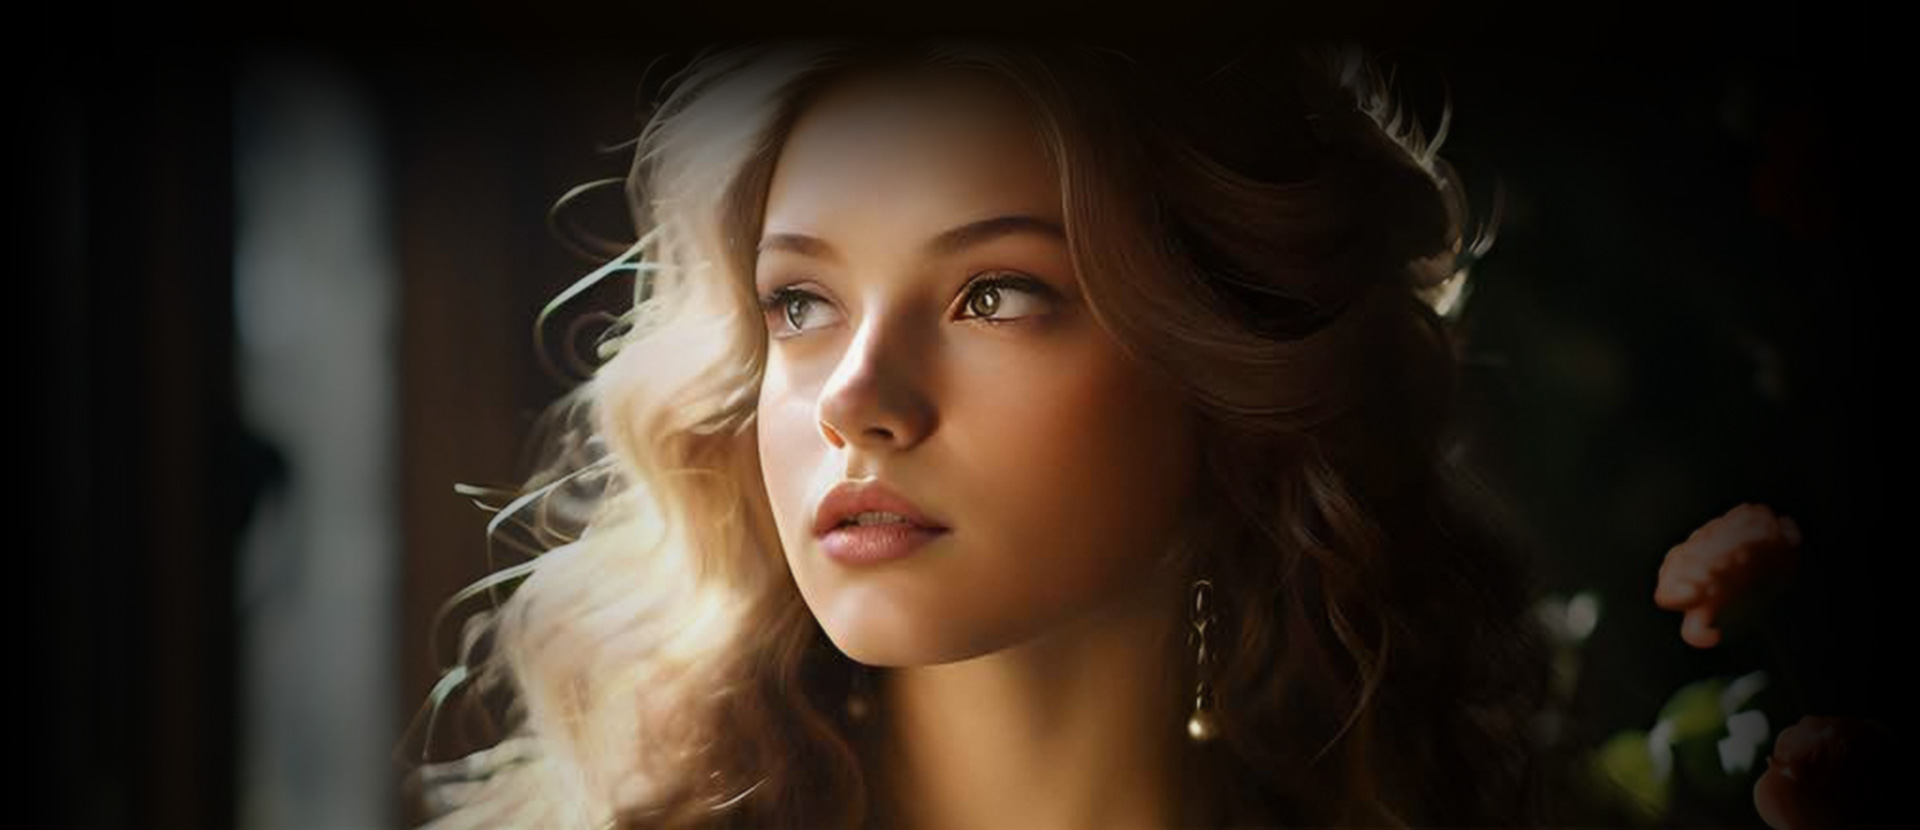
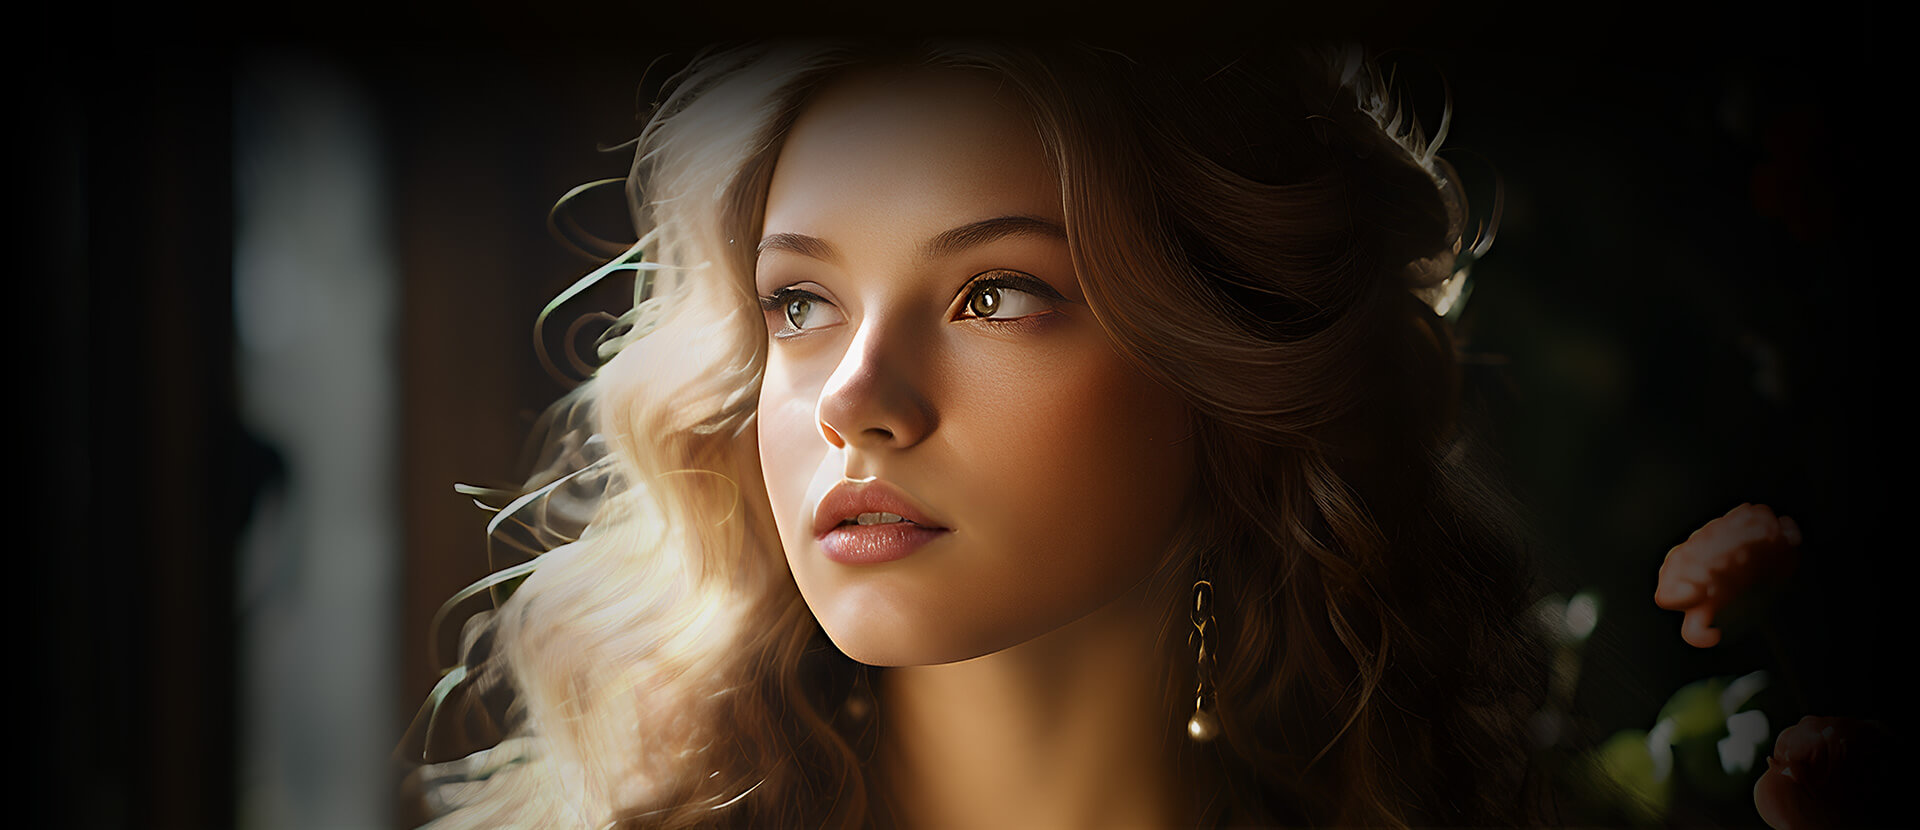
It's no secret that Midjourney has a limited maximum resolution, leading to an inevitable image quality degradation with its upscaler. That will definitely take away from the brilliance of your Midjourney photography with camera prompts. Aiarty Image Enhancer is designed for this. It can effectively enhance and upscale your Midjourney AI art up to 800% and 32K resolution with ultra-claire details—no distortion, pixelation, or artifacts. To further enhance your AI art with Aiarty Image Enhancer:
- Submit your Midjourney prompt for creative outputs
- Upscale and enhance the fine details with Aiarty Image Enhancer
- Get up to 8x upscaling and 32K(Win)/16K(Mac) resolution AI art with stunning fine details
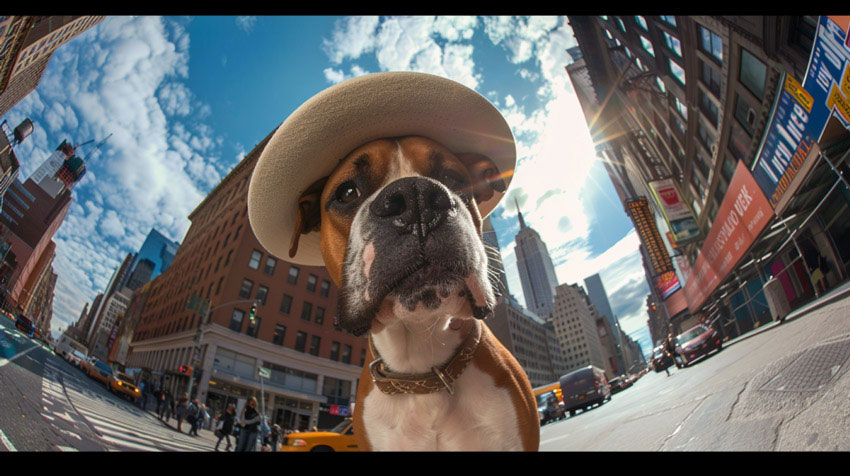
Midjourney Camera Angle Prompts
In MidJourney, camera angles play a crucial role in shaping the mood, composition, and storytelling of an image. Below, we'll explore some popular camera angle prompts and how they affect the scene, along with helpful tips on how to use them.
low camera angle, high camera angle, wide angle shot, bird's eye view, extreme close-up, dutch angle, over-the-shoulder shot
Low Angle
A low-angle shot is captured from below the subject’s eyeline. It conveys power, dominance, or grandeur, often making the subject appear larger than life. This angle is ideal for heroic, imposing, or epic scenes.
For example, using the prompt "low camera angle" can emphasize a character’s strength and presence. It’s perfect for a superhero shot, a towering building, or a dramatic portrait.
Tip: Avoid using extreme low angles with small objects, as they can appear unnatural or awkward.
High Angle
A high-angle shot is taken from above the subject, making them appear smaller, more vulnerable, or detached. This perspective is often used to evoke a sense of overwatch, fragility, or isolation.
Using the prompt "high camera angle" works well for scenes that convey observation or a sense of helplessness. For example, a bird’s-eye view of a person walking through a vast desert or an overhead shot of a small figure in a crowd.
Tip: Be mindful of the scene’s context. High angles can make a character appear weak or overwhelmed, but in the right setting, they can also create a sense of detachment or alienation.
Wide Angle
Wide-angle shots capture a broad field of view, making them perfect for establishing shots, landscapes, or large groups of people. These shots create a sense of space, openness, and vastness.
The prompt "wide angle shot" helps frame expansive scenes effectively, such as wide vistas, wide interior shots, or even large crowds.
Tip: At extreme wide angles, distortion can occur, especially with objects near the edge of the frame. Use this for dramatic effects, but be careful not to distort the focal point too much.
Overhead (Bird's Eye) View
An overhead or bird’s eye view shot provides a unique perspective from above, often used to show patterns, layouts, or the relationship between multiple elements in a scene. This angle can evoke feelings of detachment, observation, or abstractness.
Use the prompt "bird’s eye view" or "drone shot" to capture an aerial view of a city, landscape, or any dynamic scene from above.
Tip: This view works best for geometric compositions or showing the relationship between subjects in a large environment. Be mindful of the abstract nature this angle can bring.
Close-up and Extreme Close-up
Close-up shots focus on the details of a subject, emphasizing their expression and emotions. They bring the viewer closer to the action, creating an intimate and engaging connection. Extreme close-ups go even further, capturing fine textures or details that are normally invisible.
The prompts "close-up" or "extreme close-up" are perfect for highlighting facial expressions, intricate textures, or small objects like a flower’s petal or a piece of jewelry.
Tip: Extreme close-ups can make textures appear larger than life, so use them to emphasize the smallest details, but be cautious with overuse, as they can be overwhelming.
Dutch Angle (Tilted Angle)
The Dutch Angle, also known as a tilted angle or canted angle, is a technique where the camera is tilted on its axis, creating a sense of disorientation, tension, or instability. This shot can evoke feelings of unease, chaos, or psychological discomfort, often used in thriller, horror, or action scenes to visually represent the instability or confusion within the scene. Use the prompt "Dutch angle" or "tilted angle" when you want to make the viewer feel that something is wrong or out of balance.
Tip: Don’t overuse this angle, as it can quickly become overwhelming. Use it strategically for specific moments where you want to enhance the feeling of tension or instability.
Over-the-Shoulder Shot
The Over-the-Shoulder (OTS) shot is a popular technique used in dialogue scenes or moments of introspection, where the camera is positioned behind one character, typically over their shoulder, and focuses on the subject they are looking at or interacting with. This angle creates intimacy, focus, and a sense of perspective, helping the viewer to feel connected with the character's point of view.
To use it effectively, prompt with "over-the-shoulder shot" for visualizing moments of interaction between characters or when emphasizing the subject that the character is looking at.
Tip: Position the camera carefully behind the character to avoid losing the depth of the scene or making the shot feel too static. It’s crucial to frame the shot well so that the character's emotions are conveyed through their gaze.
As an artist using Midjourney, the camera angle from which you capture your subject can profoundly influence the mood, perspective, and storytelling impact of your AI-generated images. See more in our comprehensive guide of Midjourney camera angles.
Midjourney Camera Lens Prompts
Camera lenses and film types play a significant role in determining the aesthetic quality of an image. In MidJourney, using specific camera and lens prompts can evoke a particular mood or style, enhancing your creative output. Below are some popular camera lens and film prompts, along with explanations of their effects:
shot with Canon 50mm f/1.8, shot on Fujifilm Pro 400H, shot on Kodak Ektachrome E100
Canon EF 50mm f/1.8 STM Lens
The Canon EF 50mm f/1.8 STM, often called the "Nifty Fifty," is a versatile, affordable lens known for its sharpness, fast aperture, and beautiful bokeh (background blur). The f/1.8 aperture allows for stunning depth of field, making the subject stand out against a soft, blurred background, ideal for portrait photography and close-up shots. The lens excels in low-light environments, allowing for more detailed and vibrant portraits.
For example, using the prompt "shot with Canon 50mm f/1.8" helps you create portraits with sharp focus on the subject and a soft, blurred background, emphasizing the subject's details and expressions. While great for portraits, the fixed focal length of 50mm means it’s not ideal for wide-angle scenes or zooming in on distant objects. You can use it for product photography or when you want to highlight a character or object in a visually engaging way.
Fujifilm Pro 400H
Fujifilm Pro 400H is a color-negative film known for its fine grain, natural skin tones, and soft, pastel-like colors. It’s often used in portrait photography and for capturing vintage-style images that feel timeless and nostalgic. This film offers a smooth, organic look that works well for street photography or capturing candid moments with a retro feel.
When you use the prompt "shot on Fujifilm Pro 400H", you’re likely to get a soft, warm look with smooth transitions between colors, evoking nostalgia. This is perfect for street scenes, portraits, or any situation where you want to evoke warmth and a sense of the past. However, while it delivers a nostalgic look, the film’s softer characteristics may not provide the same sharpness as modern digital sensors. It’s perfect for organic, nostalgic aesthetics but not ideal for ultra-detailed shots.
Kodak Ektachrome E100
Kodak Ektachrome E100 is a slide film renowned for its vibrant colors, high contrast, and fine grain, making it ideal for landscapes, travel, and nature photography. This film type produces rich, saturated colors and high contrast, resulting in vivid and striking images that capture detail and depth.
Using the prompt "shot on Kodak Ektachrome E100" helps you achieve a high-impact, visually rich shot, especially when shooting landscapes or travel photography. It’s perfect for scenes that need to pop with color—like a sunset, an ocean scene, or even urban exploration in bright daylight. However, it’s worth noting that Ektachrome E100 is not the best choice for low-light photography, as slide film generally requires more exposure to maintain detail and color vibrancy. This makes it less forgiving in low-light conditions compared to other film types.
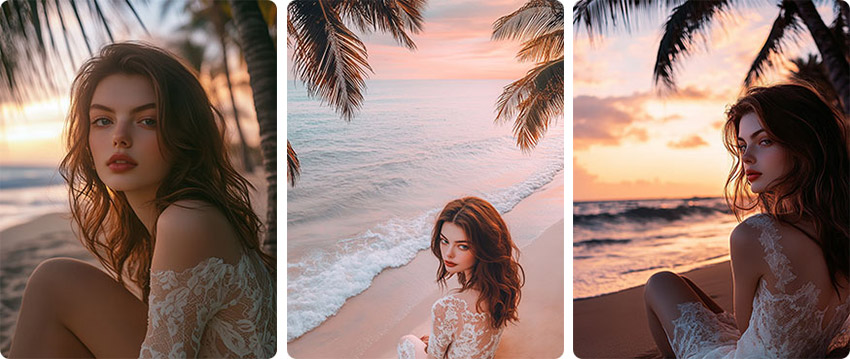
Midjourney Camera Brand Prompts
The brand of camera used for capturing an image can greatly influence its final aesthetic, particularly in terms of color science, dynamic range, and image detail. Below are some popular camera brands and their unique characteristics. Using these prompts can help you replicate the signature look associated with each brand in your MidJourney images.
shot with Arri Alexa, shot with RED Weapon 8K, shot with Nikon, shot with Canon, shot with Pentax
Arri Alexa Series
The Arri Alexa series is renowned for its exceptional dynamic range and cinematic color science, making it a favorite among high-end filmmakers and photographers. Known for its film-like aesthetic, the Alexa captures stunning images with rich color depth and detailed shadows. It is often used in Hollywood productions, music videos, and high-end commercials where capturing dramatic lighting and lifelike skin tones is crucial.
Using the prompt "shot with Arri Alexa" in MidJourney can help you create images with cinematic qualities—vibrant colors, rich tonal contrasts, and beautifully softened highlights. This prompt works best for narrative-driven projects, such as cinematic portraits, dramatic action scenes, or commercial ads with a polished, professional look.
RED Weapon 8K
The RED Weapon 8K camera is known for its ultra-high-definition resolution and versatility. It’s a top choice for professionals in both film and photography due to its ability to capture fine details and vibrant, lifelike colors. With its 8K resolution, the RED Weapon excels in capturing extremely crisp, high-resolution images, making it ideal for large prints and detailed digital displays.
Using the prompt "shot with RED Weapon 8K" in MidJourney will guide the model to generate extremely detailed images with sharpness and clarity, making it perfect for projects where fine textures or large-scale prints are needed. It’s particularly suitable for landscapes, sports photography, or architectural shots that demand precision and clarity.
Nikon
Nikon cameras are celebrated for their durability, image quality, and wide variety of lenses. With everything from professional DSLRs to advanced mirrorless systems, Nikon offers tools that suit a variety of photography styles. Nikon’s wide dynamic range and excellent low-light performance make it ideal for portrait photography, landscape shots, and action scenes.
The prompt "shot with Nikon" brings out the brand’s hallmark sharpness, excellent color accuracy, and balanced lighting in your MidJourney creations. It’s perfect for generating dynamic landscapes, action-packed scenes, or natural portraits with high clarity and natural tones. Whether you're looking to capture a breathtaking sunset or a fast-moving subject, Nikon’s strengths will shine through in the final image.
Canon
Canon is known for its user-friendly cameras and extensive lens lineup, making it a top choice for both beginners and professionals. Canon cameras are particularly praised for their reliable performance and exceptional color science, which results in vibrant, lifelike images. This makes Canon ideal for photographers looking for a camera that provides superb image quality without extensive post-processing.
The prompt "shot with Canon" is perfect for producing vibrant, detailed photos with realistic color depth and dynamic range. Whether you’re creating portraiture, landscapes, or action shots, the Canon brand’s color science helps you achieve natural-looking and richly detailed imagery. This is the go-to choice for those who want clear, sharp photos with excellent color reproduction.
Pentax
Pentax cameras are appreciated for their rugged build and weather-resistant features, making them ideal for outdoor, adventure, and nature photography. In addition to their durability, Pentax cameras offer excellent image stabilization and unique color rendering, which allows them to produce images with rich textures and tones, even in challenging environments.
When using the prompt "shot with Pentax", MidJourney will produce images with the distinctive colors and textural detail associated with Pentax’s unique imaging system. Pentax is especially well-suited for capturing dynamic outdoor scenes, such as mountain landscapes, stormy skies, or wildlife photography, where environmental conditions add drama and depth to the composition.
Midjourney Lighting Prompts
Lighting plays a crucial role in how an image is perceived, influencing its mood, depth, and atmosphere. The right lighting can elevate your visuals and add professional polish. Below are some common lighting techniques and how they affect the look and feel of your images.
natural lighting, diffused lighting, rim lighting, neon side lighting
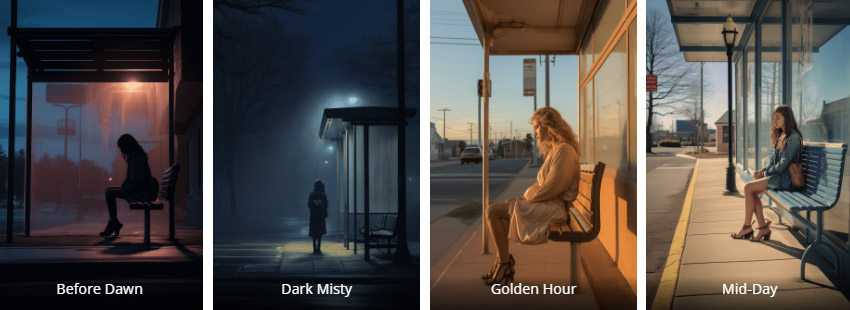
Natural Lighting
Natural lighting refers to the use of sunlight to illuminate your subject. This lighting technique provides a soft, authentic look that enhances the subject’s features without casting harsh shadows. It is often favored in portrait photography for its ability to produce a warm, realistic atmosphere that feels inviting and intimate.
Using prompts like "natural lighting" can help create scenes that feel authentic, such as outdoor portraits, lifestyle shots, or morning light streaming through a window. Natural light works best in environments where sunlight is abundant, like outdoor settings or indoor spaces near large windows.
Tip: The time of day can greatly affect natural light. Morning and late afternoon light (the golden hour) is softer and more flattering, while midday sunlight can be harsher and more direct.
Diffused Lighting
Diffused lighting softens the light, spreading it across the subject evenly. This effect reduces harsh shadows and creates a balanced exposure throughout the scene, which can make it perfect for portraits, still-life shots, and product photography. Diffused lighting is often achieved using softboxes, umbrellas, or overcast skies in natural environments.
Prompts like "diffused lighting" are ideal for creating even, smooth lighting that flatters the subject and minimizes shadows. This technique is commonly used in studio settings, but it can also be applied to outdoor scenes when the light is naturally diffused by clouds.
Tip: Diffused lighting works well when you want to highlight details without creating any strong contrast, such as in product photography or fine art.
Rim Lighting
Rim lighting positions the light source behind the subject, creating a glowing outline around the edges. This technique highlights the silhouette of the subject, adding depth, dimension, and a dramatic effect to the image. It’s particularly popular in portrait photography, fashion shoots, and dramatic scenes.
Using the prompt "rim lighting" can create striking, attention-grabbing images with strong contrasts and outlines. This technique works well when you want to emphasize the shape and contours of the subject, such as for character portraits, fashion editorials, or artistic representations.
Tip: Rim lighting works best in dark backgrounds to create a strong contrast, making the subject's edges stand out more dramatically.
Neon Side Lighting
Neon side lighting utilizes colorful neon lights to create a bold, edgy look. This lighting technique is often used in urban photography, night scenes, or creative portraits to produce a vibrant and dynamic atmosphere. Neon lights offer a futuristic, electric feel, adding a unique glow and color to the subject.
Using the prompt "neon side lighting" can create an edgy, modern vibe with vibrant color contrasts. This style is ideal for capturing street photography, nightlife, or alternative fashion shoots, where you want to evoke energy and create visually engaging compositions.
Tip: To enhance the neon effect, use a dark background or nighttime setting to allow the colorful neon lights to shine through more intensely.
Midjourney Camera Settings Prompts
The camera settings you choose can significantly influence the exposure, mood, and focus of your images. By adjusting settings like ISO, aperture, and shutter speed, you can craft specific effects, control the level of detail, and manipulate light in creative ways. Below is a breakdown of these essential settings and how they affect your image in MidJourney.
ISO 100, aperture f/1.8, shutter speed 1/500
ISO Settings
ISO controls the camera’s sensitivity to light. Lower ISO values (e.g., ISO 100) are best for well-lit environments, producing clean, sharp images without grain. Higher ISO values (e.g., ISO 1600 or above) increase sensitivity, allowing you to capture images in low-light conditions but often introduce grain or noise.
Using the prompt "ISO 100" is ideal for capturing crisp, high-quality images in bright environments such as landscapes or outdoor portraits on a sunny day. The result will be minimal grain, ensuring that the image is clear and detailed.
Tip: For low-light conditions, you can increase the ISO to capture more detail, but be aware that high ISO settings may lead to noise in the image.
Aperture Settings
The aperture setting (measured in f-stops) controls how much light enters the camera and directly influences the depth of field. A lower f-stop (e.g., f/1.8) allows more light to pass through, creating a shallow depth of field, which means the background will be blurred while the subject remains in focus. This effect, known as bokeh, helps to isolate the subject and draw the viewer’s attention.
Using the prompt "aperture f/1.8" in MidJourney will guide you to create stunning portrait shots or macro photography, where the subject stands out from the soft, blurred background. This setting is perfect when you want to create an intimate, focused image, especially in portraiture, fashion, or product photography.
Tip: A lower f-stop (e.g., f/1.8) is excellent for isolating subjects and creating artistic, soft backgrounds, but be careful when using it for scenes where you need more of the environment in focus.
Shutter Speed
Shutter speed refers to how long the camera's sensor is exposed to light. Faster shutter speeds (e.g., 1/500 second) are used to freeze motion, making them perfect for action shots like sports or wildlife photography. Slower shutter speeds (e.g., 1/30 second) allow more time for light to hit the sensor, which can create motion blur and artistic effects like light trails or flowing water. The prompt "shutter speed 1/500" in MidJourney will help you capture sharp, action-packed images with minimal motion blur. This is particularly useful for fast-moving subjects, like sports, wildlife, or street photography, where freezing the action is crucial.
Tip: Slow shutter speeds are perfect for artistic effects, like capturing the motion of flowing rivers or car lights at night, but be mindful that it can introduce motion blur in the image.
Conclusion
Capturing stunning photographs involves more than just pointing and shooting; it requires careful consideration of various factors such as camera angles, lens choices, brand preferences, lighting techniques, camera settings, composition methods, post-processing tips, and scenario-based prompts. By utilizing Midjourney camera prompts, you can enhance your creative process and achieve exceptional results.
In this guide, we've covered a range of topics to help you make the most of Midjourney prompts, from mastering different camera angles and lenses to optimizing your images with advanced settings and post-processing techniques. Whether you're shooting outdoors, indoors, or at dynamic events, these prompts provide valuable guidance to elevate your photography skills.
Embrace the power of Midjourney camera prompts and experiment with these techniques to unlock your full creative potential. With practice and dedication, you'll be able to capture breathtaking images that stand out and leave a lasting impression.
You May Also Like
Abby Poole is a seasoned AI enthusiast, with years of experience in the generative AI field. She has become a proficient user of AI tools like Midjourney. Abby’s expertise in crafting intricate prompts has led to the creation of countless stunning visuals. Her in-depth knowledge of AI and her passion for sharing it make her a valuable asset to the Aiarty team.