


VHS tapes preserve birthdays, holidays, school performances, weddings, and ordinary family moments that may not exist anywhere else. Unfortunately, the magnetic tape inside each cassette was never designed to last forever.
Most VHS tapes have an estimated usable lifespan of approximately 10 to 30 years, although there is no fixed expiration date. Some tapes from the 1980s still play today, while newer tapes may already show picture dropouts, faded colors, mold, or physical damage because of poor storage.
If you have irreplaceable recordings, the safest approach is to inspect and digitize them while both the tapes and reliable VHS playback equipment are still available.
Quick answer: How long do VHS tapes last?
Under normal household conditions, VHS tapes may remain usable for around 10 to 30 years. Tapes stored in a cool, dry, and stable environment can remain playable for several decades, while heat, humidity, mold, repeated playback, and a poorly maintained VCR can cause much earlier failure.
How Long Do VHS Tapes Last?
The exact lifespan of a VHS tape depends on its manufacturing quality, recording history, storage conditions, frequency of use, and the condition of the VCR used to play it.
The Canadian Conservation Institute estimates that magnetic tape has an average lifetime of approximately 10 to 30 years. However, this is a general preservation estimate rather than a guaranteed expiration date for every cassette.
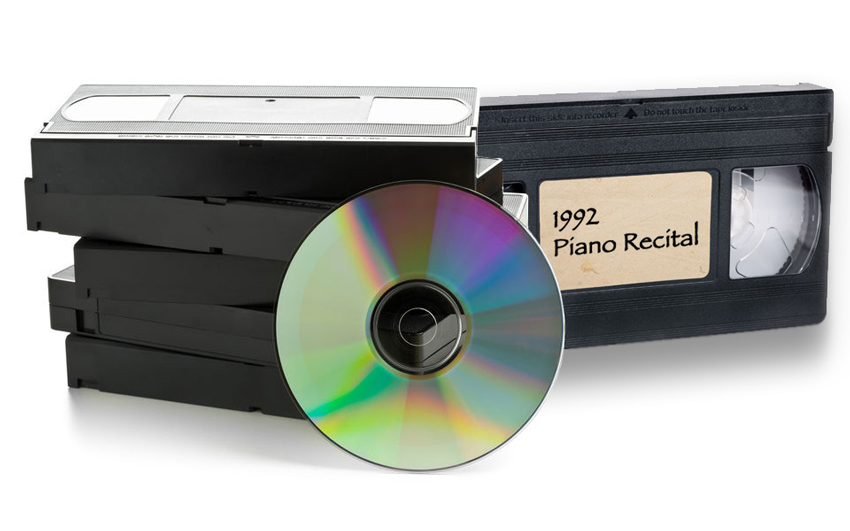
Do VHS Tapes Go Bad If They Are Never Played?
Yes. An unused or factory-sealed VHS tape can still deteriorate because the materials inside the cassette continue to age.
VHS tape is made from magnetic particles attached to a polyester base by a chemical binder. Its binder and lubricants may gradually change because of moisture exposure, oxidation, evaporation, and other chemical processes—even when the cassette has never been played.
The Council on Library and Information Resources explains that moisture can contribute to binder hydrolysis, which may soften or weaken the binder, increase friction, create debris, and interfere with playback. Tape lubricants can also diminish through evaporation and chemical degradation.
Factory shrink-wrap may reduce dust and handling, but it does not stop internal chemical aging. Therefore, “still sealed” does not necessarily mean “still in perfect condition.”
Related guide: what to do with old VHS tapes.
Why VHS Tapes Deteriorate
VHS deterioration is usually caused by several factors acting together. Understanding these causes can help you decide whether a tape is safe to play, needs professional attention, or should be digitized immediately.
Binder and Lubricant Breakdown
The binder holds the magnetic particles to the tape base and helps the tape move smoothly through a VCR.
When the binder absorbs moisture or chemically deteriorates, the tape may become softer, produce debris, or create excessive friction during playback. This can lead to squealing, sticking, signal dropouts, clogged VCR heads, or a tape that stops inside the machine.
Binder problems are sometimes broadly described as sticky-shed syndrome. However, not every sticky or difficult VHS tape has the same type of chemical deterioration, and treatments developed for other magnetic tape formats may not be suitable for VHS.
Do not attempt methods such as heating or “baking” an irreplaceable VHS tape without a professional assessment.
Loss or Weakening of the Recorded Signal
The picture and sound on a VHS tape are stored through the magnetic properties of particles on the tape surface. As the materials age or become physically damaged, the recorded signal may become less stable.
This can appear as:
- Reduced color saturation
- Increased visual noise
- Unstable tracking
- Short picture dropouts
- Distorted or missing audio
Deterioration is not always uniform. One part of a tape may play normally while another section contains severe picture or sound problems.
Physical Wear and VCR Damage
During playback, VHS tape moves across several guides and a rapidly rotating video head. Every playback, rewind, and fast-forward cycle adds some mechanical movement.
Normal use does not immediately destroy a healthy tape, but repeated playback, dirty equipment, worn components, and mechanical misalignment can contribute to:
- Scratches on the tape surface
- Wrinkled or stretched sections
- Damaged tape edges
- Uneven winding
- Magnetic coating loss
- Complete tape breakage
A poorly maintained VCR can cause more immediate damage than the age of the tape itself.
Heat and Humidity
High temperatures accelerate chemical reactions inside the tape materials. High humidity can contribute to binder deterioration and create conditions in which mold can grow.
Repeated changes in temperature and humidity are also harmful. Moving tapes between hot, cold, dry, and damp environments may create condensation and physical stress within the tape pack.
This is why attics, garages, vehicles, outdoor sheds, and uncontrolled basements are unsuitable for long-term VHS storage.
Mold, Dust, and Contamination
Mold may appear as fuzzy, powdery, or thread-like growth around the edges of the wound tape. Depending on the type of contamination, it may appear white, black, brown, yellow, or green.
A strong musty odor, water-stained label, corroded metal component, or stuck tape pack can also indicate previous moisture exposure.
The Canadian Conservation Institute recommends isolating mold-contaminated tapes and having them handled by people experienced in mold remediation. Mold can affect human health, spread to other tapes, penetrate between tape layers, and contaminate playback equipment.
Signs a VHS Tape Is Going Bad
Some warning signs are visible before playback, while others only become apparent after the tape is inserted into a VCR.
Warning Signs Before Playback
Inspect the outside of the cassette and look through its transparent windows before inserting it into a machine.
- White, black, brown, green, or yellow growth around the tape pack
- A strong musty odor
- Water stains or damaged labels
- Cracks in the cassette housing
- A broken or missing cassette window
- A cassette door that does not open or close correctly
- Warped plastic
- Loose tape visible inside the cassette
- Reels that appear stuck or unevenly wound
Do not force the reels to turn. A damaged cassette may tear the tape or damage the playback machine.
Warning Signs During Playback
Stop playback if you notice persistent mechanical or signal problems, especially when the recording is irreplaceable.
- Tracking lines that cannot be corrected
- Repeated picture dropouts
- Severe flickering, rolling, or image instability
- Washed-out or rapidly changing colors
- Warped or wavy images
- Audio that repeatedly cuts in and out
- Loud squealing, scraping, or grinding noises
- The VCR slowing down or stopping
- The cassette repeatedly ejecting
- Visible debris left inside the VCR
Some visual problems can be caused by dirty or misaligned playback equipment rather than the tape. Testing the VCR with a non-valuable cassette can help determine whether the machine is functioning correctly.
Important: Do not play a visibly moldy tape in a household VCR. Mold and debris can spread inside the machine and contaminate every tape played afterward.
Is an Old VHS Tape Safe to Play?
Age alone does not determine whether a VHS tape is safe to play. A clean, properly stored 35-year-old tape may be safer than a 15-year-old cassette that has been exposed to moisture or played in a damaged VCR.
Use the following checks before playing an important tape.
1. Inspect the Cassette Shell
Check for cracks, warping, loose components, damaged windows, and a cassette door that does not move normally.
2. Examine the Wound Tape
Look through the cassette windows for fuzzy growth, powder, dirt, irregular edges, loose tape, or uneven winding.
3. Check for Moisture Damage
Water stains, corrosion, stuck labels, a musty smell, or tape layers that appear stuck together may indicate previous exposure to moisture.
4. Test the VCR Separately
Use a disposable or non-valuable cassette to confirm that the VCR loads, plays, rewinds, fast-forwards, and ejects correctly.
5. Stop If You Hear Unusual Noises
Do not repeatedly attempt to play a tape that squeals, sticks, slows down, or jams. Repeated attempts may turn a repairable problem into permanent damage.
6. Use a Professional for Irreplaceable Recordings
Moldy, broken, wrinkled, or chemically deteriorated tapes may require cassette repair, controlled cleaning, specialized playback equipment, or careful signal stabilization.
The Library of Congress recommends keeping audiovisual playback equipment clean and properly maintained. It also notes that cleaning magnetic tape itself is delicate work that is better handled by a preservation specialist.
How to Store VHS Tapes Properly
Proper storage cannot reverse existing deterioration, but it can slow further damage and reduce the risk of mold, warping, and physical contamination.
Keep Temperature and Humidity Stable
For home video collections, the U.S. National Archives recommends the following general storage conditions:
- Temperature: approximately 55–70°F or 13–21°C
- Relative humidity: approximately 30–55%
Avoid extreme or repeated fluctuations. A climate-controlled closet or unused interior room is generally safer than an attic, garage, outdoor shed, or damp basement.
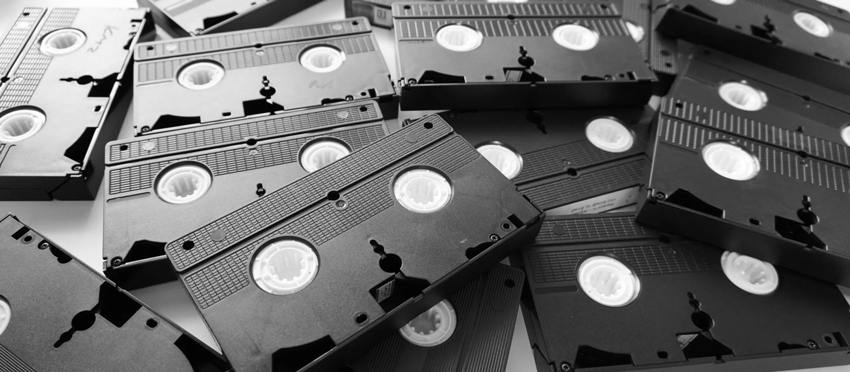
Store VHS Tapes Vertically
Place VHS cassettes upright like books, preferably in their original cases or clean replacement cases.
- Do not place heavy stacks of tapes on top of one another.
- Do not allow tapes to lean at a sharp angle for long periods.
- Use shelving that supports the entire cassette.
Keep Tapes Off the Floor
Store tapes on shelves rather than directly on the floor. This reduces exposure to floodwater, plumbing leaks, insects, rodents, dust, and accidental impact.
Use clean protective cases or archival-quality storage boxes. Avoid sealing damp or contaminated tapes inside airtight containers, as trapped moisture can create a harmful microenvironment.
Avoid Sunlight, Heat, and Strong Magnetic Fields
Keep tapes away from direct sunlight, radiators, heating vents, motors, transformers, and strong magnetic sources.
Although normal household electronics are unlikely to instantly erase a VHS tape, long-term storage next to loudspeakers, large motors, or powerful magnets should still be avoided.
Handle the Cassette, Not the Tape
- Hold the cassette by its outer plastic shell.
- Do not touch the exposed magnetic tape.
- Keep food and drinks away from tapes and playback equipment.
- Do not leave a cassette inside a VCR when it is not in use.
- Do not repeatedly rewind or fast-forward a fragile tape without a reason.
There is no universal requirement to fully rewind every VHS tape before storage. The more important priorities are stable storage, a clean cassette, an even tape pack, and avoiding unnecessary mechanical wear.
When Should You Digitize VHS Tapes?
You should digitize an important VHS tape before obvious deterioration appears, not after the recording becomes difficult or impossible to play.
Digitization should be prioritized when:
- The recording is unique or irreplaceable
- The tape was recorded in the 1980s or 1990s
- Its storage history is unknown
- It has been kept in an attic, basement, garage, or storage unit
- Picture or audio problems have started appearing
- The cassette housing is cracked or damaged
- You no longer have reliable VHS playback equipment
- The recording exists only on one physical tape
The preservation problem is not limited to the tape itself. VHS recordings also depend on working VCRs, replacement parts, compatible capture equipment, and people who know how to repair and operate older machines.
The Canadian Conservation Institute warns that VHS playback technology is approaching the end of its useful life and that expertise in repairing playback equipment is becoming increasingly difficult to find.
DIY VHS Digitization
A basic home conversion setup usually requires:
- A clean and properly working VCR
- A compatible video capture device
- Composite or S-Video cables, depending on the equipment
- A computer with capture software
- Enough storage space for the captured files
DIY conversion gives you control over the process and can work well for clean, non-valuable tapes. However, the result depends heavily on the VCR, capture device, signal stability, cables, and recording settings.
See the full guide to convert VHS tapes to digital files.
Professional VHS Conversion
Consider a professional service when:
- The tape contains visible mold
- The cassette housing is broken
- The reels do not move correctly
- The tape is wrinkled, torn, or stuck
- The recording has high personal, historical, or financial value
- You do not have a reliable VCR
- Previous playback or capture attempts have failed
Before choosing a service, ask how it handles damaged or contaminated tapes, whether its VCRs are regularly cleaned and maintained, and which digital file formats it provides.
How to Preserve and Enhance Digitized VHS Footage
Digitization protects the recording from further mechanical wear during playback, but creating one digital file is not the end of the preservation process.
Keep an Untouched Preservation Master
After capture, create at least two versions of the recording:
- A high-quality preservation master: keep this file unchanged.
- A viewing or sharing copy: use this version for trimming, compression, enhancement, and online sharing.
Do not apply permanent noise reduction, sharpening, color changes, or upscaling to the only copy of the recording.
Create Multiple Backups
Keep at least one additional copy in a different physical or cloud location. Do not rely on one hard drive, USB drive, disc, or online account as the only copy.
Use clear filenames that identify the recording without opening it. For example:
1994-12-25_Family-Christmas_Tape-01_Master
For more format guidance, see how to convert VHS to MP4.
Optional Step: Improve a Viewing Copy After Digitization
Digitization and video enhancement serve two different purposes. Digitization captures and preserves the signal that remains on the tape. Enhancement creates a more watchable version of the resulting digital file.
Digitized VHS footage commonly contains analog noise, soft edges, muted colors, motion blur, low apparent resolution, and compression artifacts introduced during capture or export.
Aiarty Video Enhancer can help reduce noise and blur, improve clarity, correct color, and upscale a duplicate of the original VHS capture. It processes video locally on Windows and Mac, so private family recordings do not need to be uploaded to an online enhancement service.
For a more natural result:
- Keep the original capture unchanged.
- Work on a duplicated viewing copy.
- Use moderate denoising to avoid removing natural texture.
- Avoid excessive sharpening around faces, text, and high-contrast edges.
- Apply color correction conservatively.
- Preview difficult scenes before exporting the full recording.
- Compare the enhanced version with the untouched capture.
AI enhancement cannot recover information that was never recorded or has been completely destroyed. It may reconstruct or infer detail based on the remaining visual information, so the enhanced file should be treated as a viewing copy rather than a replacement for the preservation master.
Learn more about how to restore digitized VHS and old videos.
Sources and Further Reading
The preservation recommendations and technical explanations in this guide were reviewed against guidance from established archival and conservation organizations.
- Canadian Conservation Institute: The Digitization of VHS Videotapes
- U.S. National Archives: Video Guidance—Storage of Materials
- Library of Congress: Care, Handling, and Storage of Audiovisual Materials
- Council on Library and Information Resources: What Can Go Wrong with Magnetic Media?
- Preservation Self-Assessment Program: Videotape Identification and Preservation
 FAQs
FAQs
Yes. VHS tapes deteriorate over time because their binder, lubricant, magnetic coating, plastic components, and physical tape pack gradually age. Heat, humidity, mold, repeated playback, and damaged equipment can accelerate the process.
Most VHS tapes have an estimated usable lifespan of approximately 10 to 30 years. Some properly stored tapes remain playable for 40 years or longer, but there is no guaranteed expiration date or maximum lifespan.
Yes. Some VHS tapes can remain playable for 40 or 50 years, especially when stored in a cool, dry, and stable environment. However, continued playability does not mean the tape has avoided signal loss, physical wear, or chemical deterioration.
Yes. Factory packaging may reduce dust and handling, but it cannot stop the binder, lubricant, magnetic coating, and plastic components from aging internally. A sealed cassette should still be inspected before playback.
A moldy, shedding, broken, or badly wound VHS tape can contaminate or damage a VCR. The reverse is also true: a dirty or mechanically damaged VCR can stretch, wrinkle, tear, or break an otherwise playable tape.
Normal rewinding in a properly maintained VCR is part of normal use. However, repeated or unnecessary fast-forwarding and rewinding add mechanical movement and may increase wear, especially when the cassette or VCR is already in poor condition.
Many mold-contaminated VHS tapes can be professionally cleaned and digitized. The result depends on the severity of the contamination, the condition of the binder, and whether the tape layers have become stuck together. Do not play a moldy cassette in a household VCR.
Yes, especially when the recording is important. A tape that works today may become more difficult to play later, while suitable VCRs, replacement parts, and repair expertise are becoming harder to find. Keep an untouched master file and at least one additional backup.

This post was written by Brenda Peng, an experienced editor at Digiarty Software. The article was reviewed by Abby Poole, and its preservation guidance was cross-checked against recommendations from the Canadian Conservation Institute, U.S. National Archives, Library of Congress, and other audiovisual preservation resources.
