Summary: This post explores two easy methods to zoom in on video clips in Adobe Premiere Pro, including using the Transform effect for precise control. It highlights the common issue of quality loss when over-zooming low-resolution footage and introduces Aiarty Video Enhancer's upscaling and denoising tools help restore clarity and sharpness.
When editing videos in Adobe Premiere Pro, zooming in on your clips can help highlight important details and create more dynamic visuals. Whether you're focusing on a specific element or emphasizing movement, learning how to zoom in precisely is essential for enhancing your projects.
In this guide, we'll explore two straightforward methods to zoom in on your footage, including how to use the powerful Transform effect for greater control and customization.
What is the Biggest Challenge When Zooming in on Premiere Pro?
One common challenge when zooming in on footage, especially low-resolution clips, is the noticeable loss of image quality. Over-zooming can lead to pixelation, blurriness, and reduced sharpness, which can detract from the overall professionalism of your video project. While Premiere Pro offers powerful tools, these scaling adjustments sometimes aren't enough to fully preserve your footage's clarity.
This is where Aiarty Video Enhancer comes in as a valuable addition to your editing toolkit. Aiarty uses advanced AI-driven algorithms to upscale your video, improving details and reducing artifacts without the typical quality degradation seen in standard zoom methods. With Aiarty, you can maintain crisp, high-quality visuals even after significant zoom-ins, helping your final output look polished and professional.
By integrating Aiarty Video Enhancer into your workflow after applying zoom effects, you can confidently enhance your footage's resolution and detail, overcoming the common pitfalls of quality loss. This approach ensures your creative zoom-ins remain visually impressive and seamless.
Method 1. How to Zoom in on Premiere Pro Using the Transform Effect
In Adobe Premiere Pro, you can achieve a zoom-in effect in a few ways. Here's the detailed breakdown of the most common method using the Transform effect and keyframes.
Step 1. Setting up the Zoom
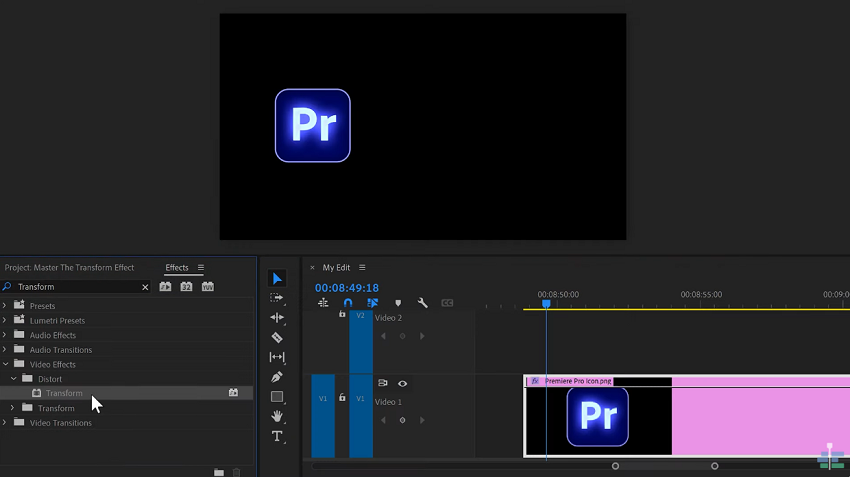
Drag your desired video clip from the Project panel onto your timeline. Select the clip in your timeline and then open the Effect Controls panel. If you don't see it, go to Window > Effect Controls. In the Effects panel (Window > Effects), search for "Transform". Drag and drop the Transform effect onto your selected clip.
Step 2. Defining the Zoom Animation
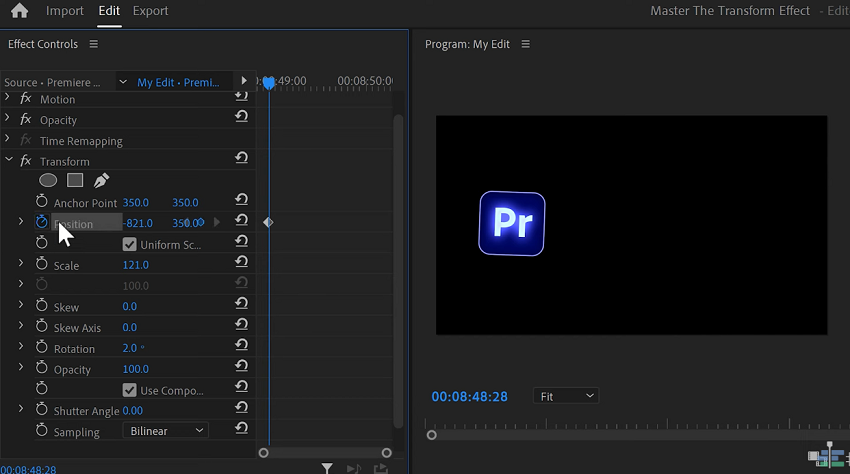
Move the playhead in the timeline to the exact point where you want the zoom to start. In the Effect Controls panel, under the Transform effect, find the Scale property. Click the stopwatch icon next to Scale to create the first keyframe.
Then move the playhead to where you want the zoom to end. Now, adjust the Scale value to your desired zoom level. Premiere Pro will automatically create a second keyframe at this point.
Step 3. Customizing the Zoom
If you want to zoom into a specific area rather than just the center, you can adjust the Position property. Ensure your playhead is at the starting keyframe, click the stopwatch icon next to Position, and adjust the values to focus on your desired area. Then move the playhead to the ending keyframe and adjust the Position again to maintain focus during the zoom.
To make the zoom appear smoother, rather than abrupt, right-click on the first keyframe (Scale) and select Temporal Interpolation > Ease Out. Then, right-click on the second keyframe (Scale) and select Temporal Interpolation > Ease In.
For an even more professional touch, add motion blur. Under the Transform effect, uncheck "Use Composition's Shutter Angle", and increase the Shutter Angle value (e.g., to 180 or 360).
Step 4. Reusing Your Zoom (Optional)
To save time in the future, you can save your zoom animation as a preset. Right-click on the Transform heading in the Effect Controls panel, choose Save Preset, give it a name, and click OK.
Method 2. How to Zoom in on Premiere Pro Using the Scale and Position
Using the Scale and Position properties directly in Premiere Pro's Effect Controls panel is a fundamental way to create a zoom effect, and it's quite easy to grasp for beginners.
Here's how to do it step-by-step:
Step 1. Prepare Your Clip
First, you need to import the video clip you want to zoom into your Premiere Pro project. Drag the clip from your Project panel to your timeline to begin editing. Click on the clip on your timeline to select it.
Step 2. Open Effect Controls
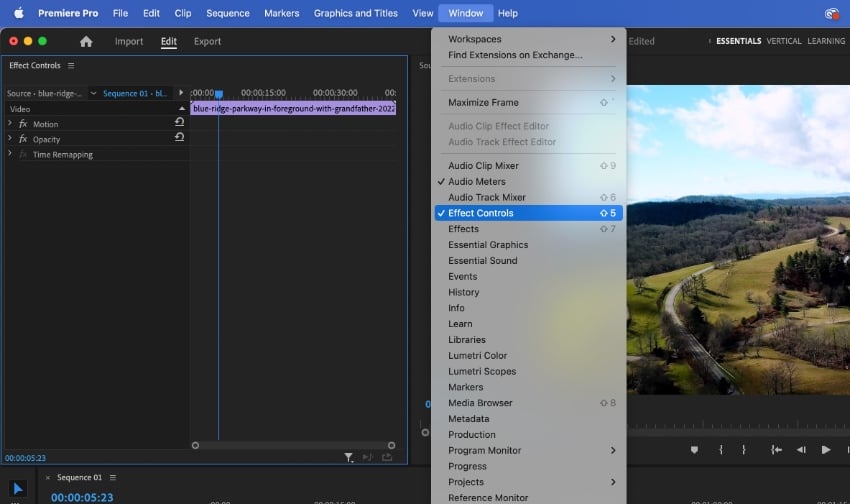
Locate Effect Controls: Go to the top menu bar, click on Window, and then select Effect Controls from the dropdown menu if the panel isn't already open.
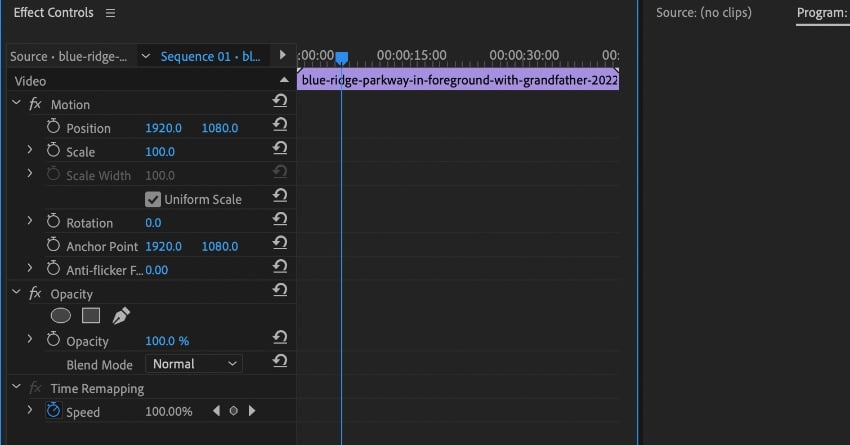
Step 3. Set the Initial Zoom State
Position the playhead in the timeline to the frame where you want your zoom effect to begin. In the Effect Controls panel, you'll see a section called Motion. Inside this, you'll find the Scale and Position properties. Click on the stopwatch icon next to Scale and then the stopwatch icon next to Position. This turns on keyframing, allowing you to animate changes over time. Premiere Pro will automatically create the first keyframes for both Scale and Position at your current playhead location.
Step 4. Define the Zoom Animation
Drag the playhead to the frame where you want the zoom to be complete. Increase the Scale value. You can do this by dragging the slider or clicking the numbers and typing in a higher value (e.g., 150% or 200%). A higher percentage will create a greater zoom.
As you adjust the Scale, the clip will zoom towards the center of the frame by default. If you want to zoom into a specific area (like a person's face or a particular object), you'll need to adjust the Position values. The Position has two numbers, X (horizontal) and Y (vertical). Adjust these numbers to shift the zoomed area within the frame until it's centered on your desired focal point. Premiere Pro will automatically create new keyframes at this point for both Scale and Position to mark the end of the zoom effect.
Step 5. Smooth the Zoom (Optional)
Right-click on the first keyframe for Scale (the one at the beginning of your zoom). Go to Temporal Interpolation > Ease Out. Repeat this for the first Position keyframe. Then right-click on the second keyframe for Scale (the one at the end of the zoom). Go to Temporal Interpolation > Ease In. Repeat this for the second Position keyframe. This makes the zoom start and end gradually, creating a smoother and more natural effect.
Step 6. Review and Refine
Play your clip in the Program Monitor to see the zoom effect. If the zoom is too fast or too slow, or if the position isn't quite right, you can adjust the keyframes. To change the speed, drag the keyframes closer together for a faster zoom, or further apart for a slower zoom. You can also adjust the Scale and Position values at each keyframe to fine-tune the effect.
This method gives you precise control over your zoom effect, allowing you to not only enlarge the image but also direct the focus to a specific area of the frame.
How to Choose From These Two Zoom-In Methods
To pick the right zooming method in Premiere Pro, mainly consider the type of footage, the desired outcome, and the potential issues that might arise. Here are the breakdown details.
Using the Transform Effect
Best for: When you need to incorporate other transformations like rotation or skewing along with your zoom, and when motion blur is a desired element in your zoom animation.
Strengths: Includes built-in motion blur, which makes the zoom look more natural and dynamic, particularly at higher speeds. Allows for other transformational properties to be animated alongside the zoom, and can be used on adjustment layers for global effects.
Potential Problems:
- Loss of Quality: Over-zooming on low-resolution footage can cause quality degradation. The scaling interpolation methods might be slightly different than Motion's default.
- Potential Glitches or Bugs: Some users have reported issues with the Transform effect not functioning correctly or glitching when specific parameters or motion blur are enabled, notes an Adobe Community thread. Nesting the clip or checking the composition angle marker can sometimes help resolve these issues, advises.
- Playback Performance: Applying Transform effects, particularly with higher shutter angles for motion blur, can be resource-intensive, potentially causing choppy playback.
- Workflow complexities: Stacking Transform effects, especially on adjustment layers, requires careful keyframe management to avoid accidental overlaps or unintended animations.
Directly Using Scale and Position (Motion)
Best for: General zooming and repositioning of video clips or images, where you need a simple, controlled, and animating zoom to a specific area.
Strengths: Simple and intuitive, great for beginners. Offers precise control over the zoom and pan over time using keyframes.
Potential Problems:
- Loss of Quality: Similar to the first method, zooming excessively on low-resolution footage using this way can also lead to noticeable pixelation or blurriness, impacting the visual quality. Try to avoid pushing the scale beyond 150% for 1080p footage.
- Jittery or Choppy Zoom: Improper keyframe placement or large changes in Scale or Position values between keyframes can result in a less-than-smooth animation, suggests Reddit users. Apply "Ease In" and "Ease Out" to keyframes to create a smoother, more natural-looking zoom.
- Playback Performance: Scaling effects can be resource-intensive, potentially leading to choppy playback, especially with high-resolution footage or multiple effects.
In Summary
- Choose Scale and Position (Motion) for straightforward, animated zooms with precise keyframe control over the pan and zoom values. It's the standard for most zooming needs.
- Opt for the Transform effect when you want to add motion blur to your zoom, combine it with other transformations like rotation, or utilize adjustment layers for applying effects globally.
- Both methods will potentially bring you video quality loss, so please do not forget to try Aiarty Video Enhancer to fix this issue.
You May Also Like
This post was written by Ashley Brown, a videographer turned AI explorer. As an associate writer at Digiarty Software, she dives into the latest AI-powered tools for video enhancement and content creation, offering practical insights and unbiased commentary. Accuracy confirmed by Abby Poole.