Ever found yourself struggling in Photoshop, trying to crop an image only to accidentally cut off the canvas too? Or maybe you crop an image, and it ends up looking like it went through a blender—blurry and low-quality? Don’t worry, you’re not alone in this Photoshop chaos.
If you want to crop an image to a specific size or shape, or just need to make precise adjustments without messing with the canvas, Photoshop has your back and this guide is for you. Get ready to learn how to how to crop an image in PhotoShop without all the headaches.
How to Crop an Image to a Specific Size in Photoshop
When you need to crop an image in Photoshop, it's important to keep the original canvas intact while achieving the perfect composition. Below are detailed steps to get your image cropped and ready for use.
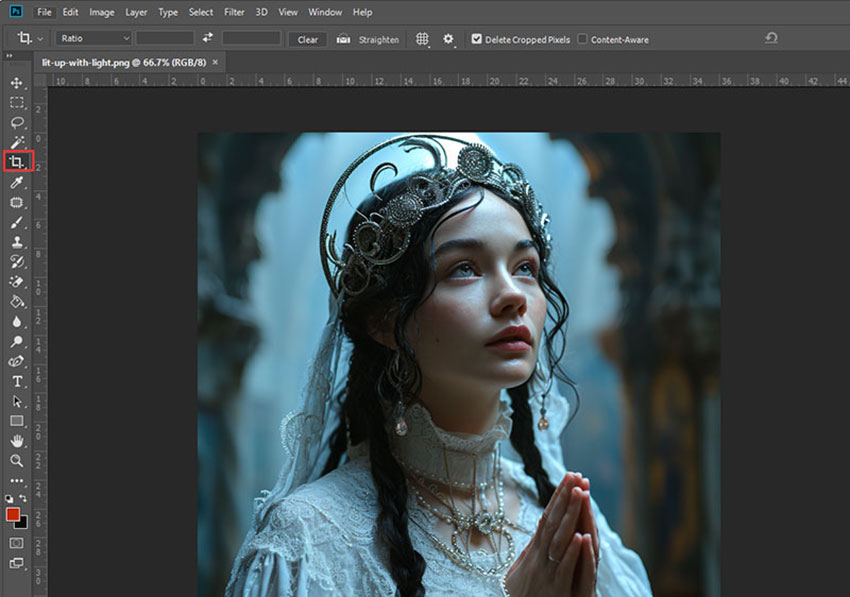
Step 1. Open Your Image and Select the Crop Tool
Launch Photoshop and open the image you want to edit. On the left toolbar, locate the Crop Tool—it's usually the 5th tool down. Once selected, you'll see the crop borders appear around your image. This is your workspace for cropping.
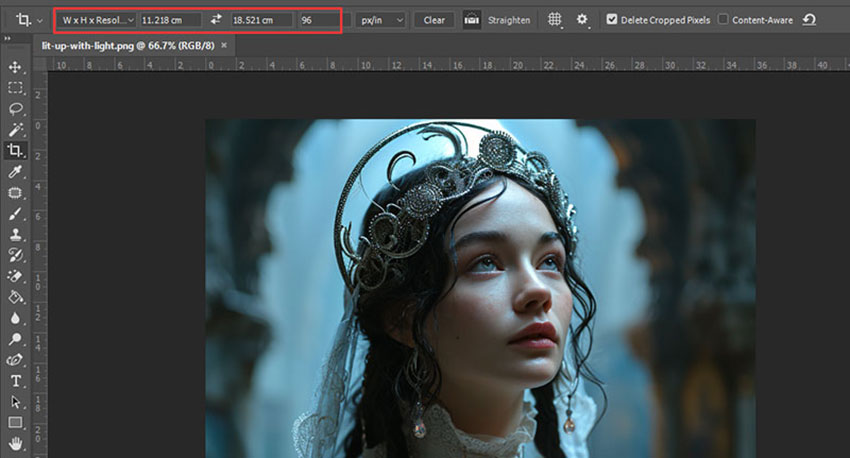
Step 2. Set Your Crop Dimensions
At the top of your screen, in the Control Bar, you'll find an option to define the crop’s size. How to crop an image in PhotoShop without rounded corners or into a circle? Choose the dropdown in the Aspect Ratio section, and select W x H x Resolution. Enter the pixel dimensions you need—Width, Height, and a resolution of 72 px/inch (ideal for web use). This ensures your crop is tailored exactly to your project’s needs.
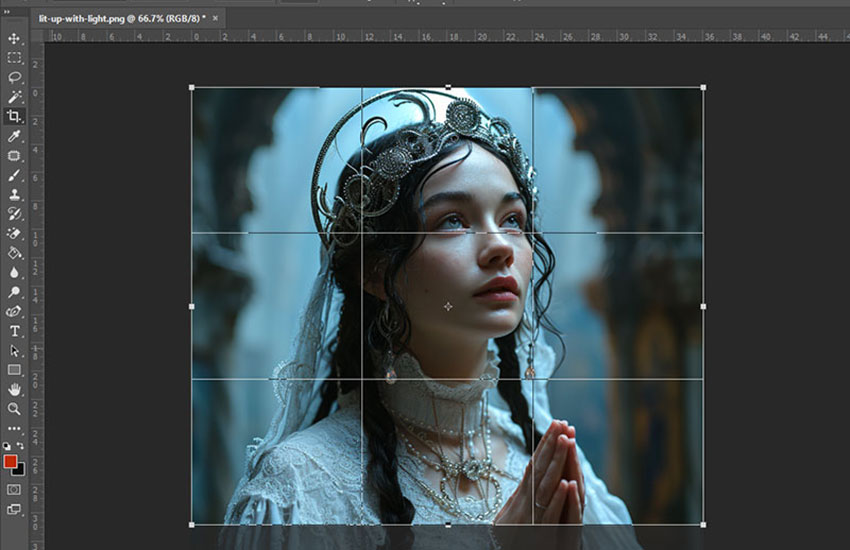
Step 3. Adjust the Crop Area
Now that your dimensions are set, fine-tune your crop area. Simply drag the corner or edge handles of the crop box to adjust the crop’s size and positioning. You can move the entire box around as well, to focus on the key part of your image.
Tips: How to crop an image in PhotoShop without changing the canvas size?
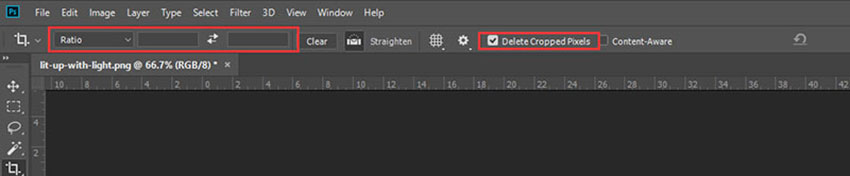
To crop an image without altering the canvas size, use the Crop tool's options. In the Options bar, set the crop to match the canvas size, or adjust the crop dimensions to fit your desired area while maintaining the overall canvas size. Drag the crop handles to define the cropped area within the boundaries of the existing canvas, ensuring the canvas itself remains unaffected.
How to crop an image in PhotoShop without losing quality? While it's impossible to perfectly crop an image in Photoshop without losing any data from the discarded areas, you can crop non-destructively to ensure you don't permanently lose those pixels and maintain the original image quality within the cropped area. In the Options Bar, make sure the "Delete Cropped Pixels" checkbox is unchecked.
Step 4. Finalize the Crop and Save Your Work
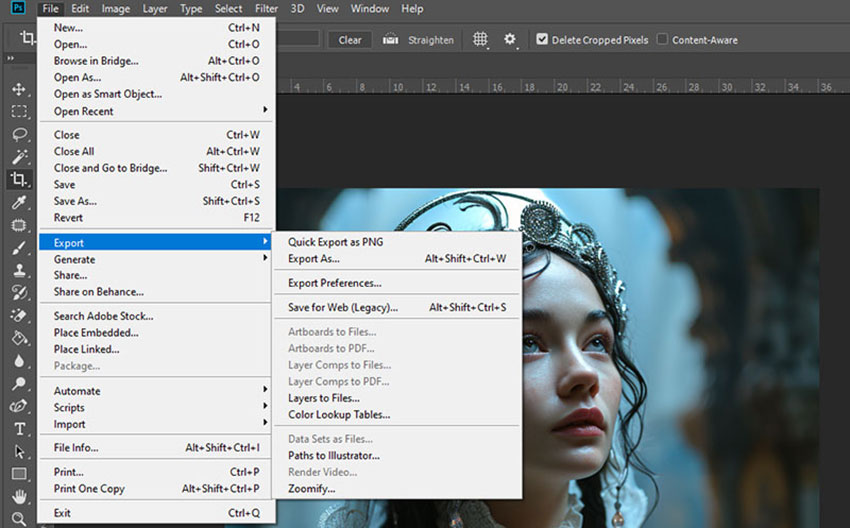
Once you're satisfied with the crop, hit File > Crop to apply the changes. Your image will be cropped to the specified dimensions. Now, it's time to save your file—go to File > Export > Save for Web to make sure it's optimized for online use.
Step 5. Optimize the Image for Web Use
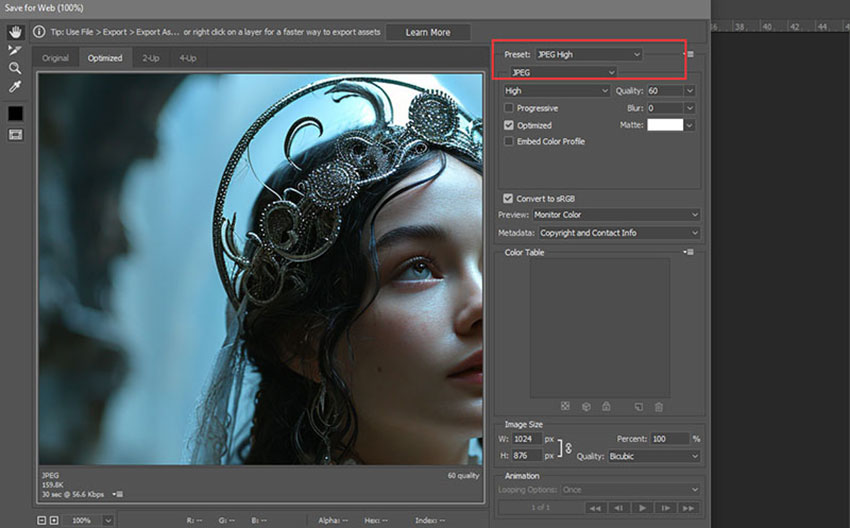
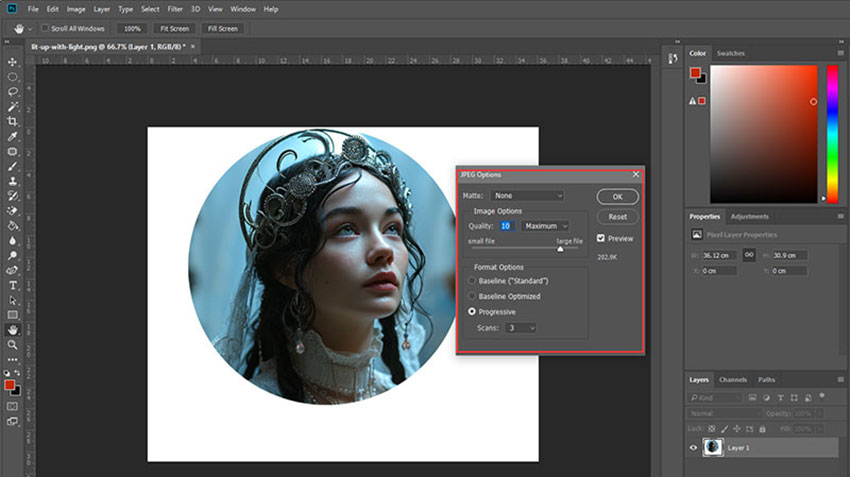
When the Save for Web window opens, set the format to JPEG High in the top-right Preset dropdown. For optimal quality-to-size ratio, adjust the Quality slider to 60. This will keep the image’s resolution high while reducing the file size, making it perfect for email or web sharing.
Step 6. Save the Final Image
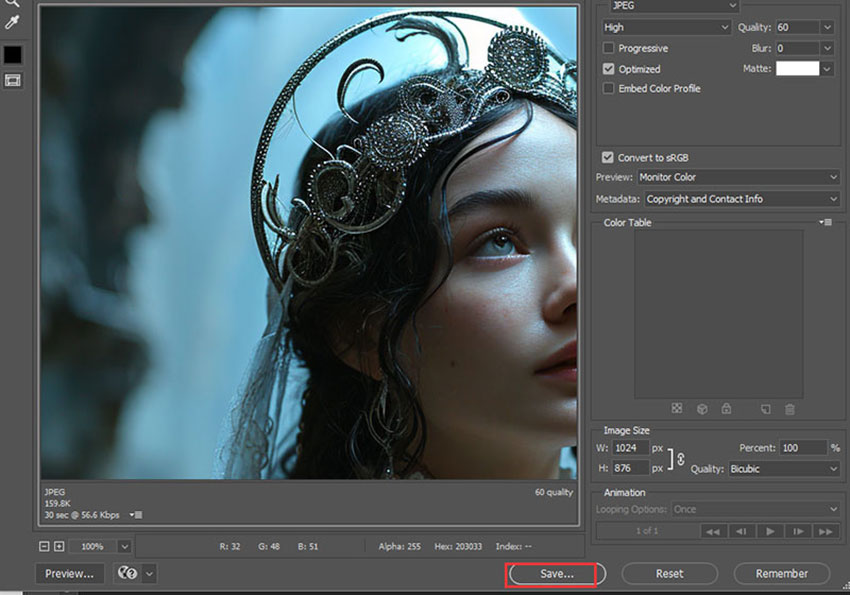
Once you’ve configured your export settings, click Save. Don’t forget to rename your file to avoid overwriting your original image. Now, your cropped image is ready to use wherever you need it。
Tips: how to crop a single layer from multiple layers in Photoshop?
In Photoshop, you can't crop a single layer from a multi-layer document directly. When you try to crop, it affects the entire canvas, which means all layers get cropped together. However, there are two ways to work around this:
Drag the Layer to a New Document: First, drag the layer you want to crop into a new document. Once it's in the new file, crop it as needed. Afterward, you can drag the cropped layer back into the original document.
Use a Layer Mask: Alternatively, you can use a layer mask to hide the unwanted portion of the layer. Add a mask, paint the areas you want to hide with black, and then right-click the layer to select Apply Layer Mask. This way, the layer will be cropped visually without affecting the other layers.
Learn More: How to Resize an Image without Losing Quality
How to Crop an Image into a Circle in Photoshop
Want to crop your image into a perfect circle for use in graphics or design projects? Here’s a step-by-step guide to help you create a clean circular crop in Photoshop.
Step 1. Unlock the Background Layer
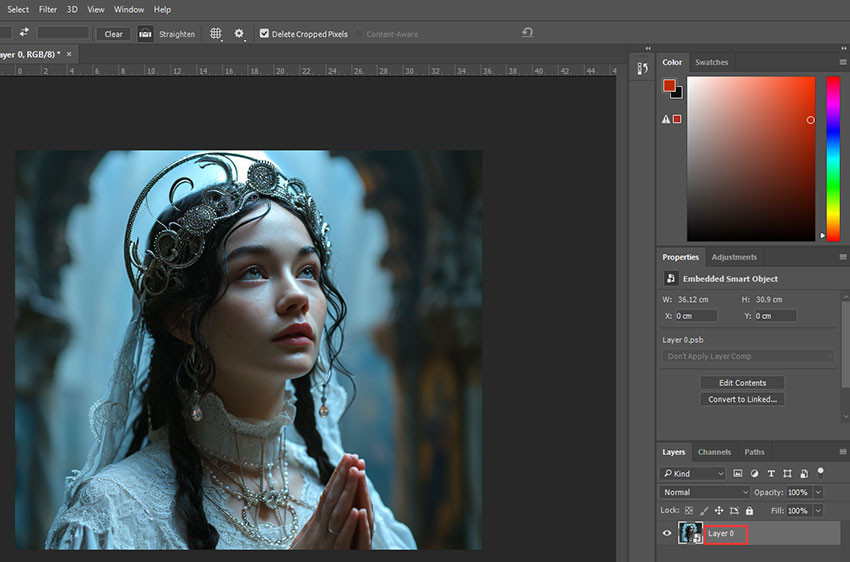
Start by opening your image in Photoshop. You’ll notice the image is placed on the Background layer in the Layers panel. Before we can crop into a circle, we need to unlock this layer because background layers do not support transparency.
To unlock it, click on the lock icon next to the Background layer. If you're using an older Photoshop version, hold Alt (Win) / Option (Mac) and double-click the Background layer to convert it into a normal layer. Photoshop will rename it as Layer 0 and remove the lock icon.
Step 2. Select the Elliptical Marquee Tool
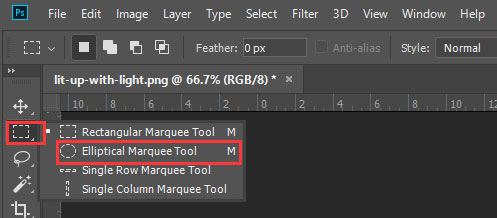
Now, let’s move on to the tool we’ll use to create the circular selection. On the left toolbar, look for the Marquee Tool, which might show the Rectangular Marquee Tool by default. Hold and click on the tool to reveal the dropdown menu, then select the Elliptical Marquee Tool.
Step 3. Draw a Circular Selection
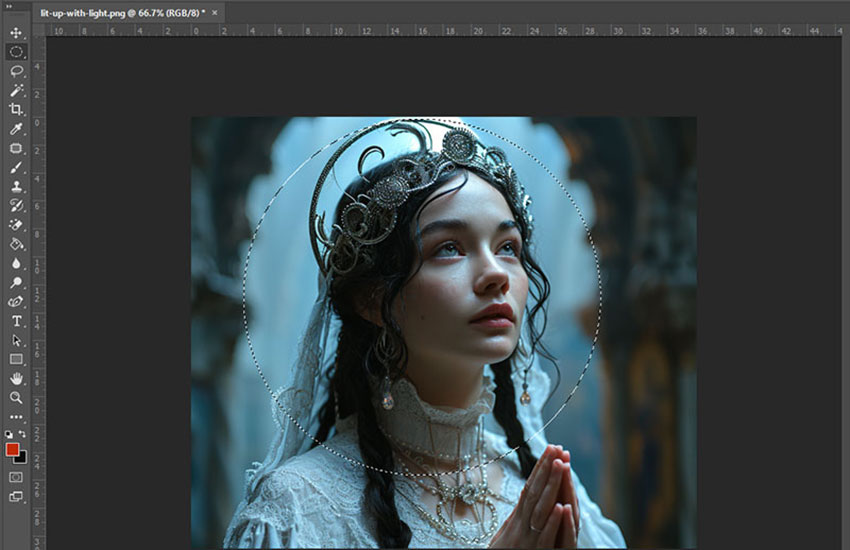
With the Elliptical Marquee Tool active, click and drag on the image to start forming the selection. Don’t stress if it’s not perfectly round yet or not positioned as you’d like. We can adjust both of those aspects.
To keep the shape perfectly circular, hold down the Shift key while dragging. This will constrain the selection into a circle, not an ellipse.
If you want to reposition the circle as you draw, hold down both the Shift key and Spacebar at the same time, then drag to center the circle over your subject. Once it’s in place, release the Spacebar and continue dragging to finalize the circle size.
Remember, release your mouse button before letting go of the Shift key to maintain the perfect circle.
Step 4. Add a Layer Mask
At this point, we have our circular selection. Instead of directly cropping the image, we’ll use a Layer Mask to hide the parts of the image outside the circle, maintaining a non-destructive workflow.
In the Layers panel, click the Add Layer Mask icon at the bottom. This will create a mask that hides the areas outside the circle while keeping the subject inside the circle visible. You’ll notice the mask appears as a thumbnail next to your layer.

Step 5. Trim the Transparent Areas
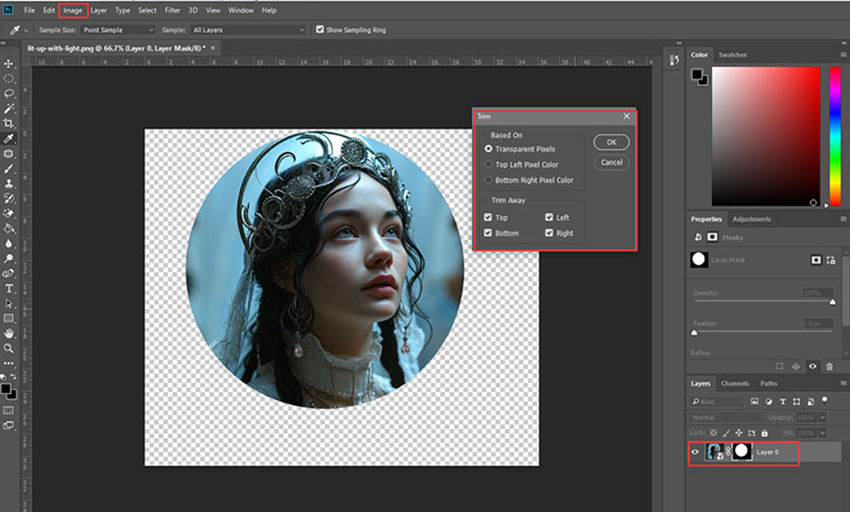
Now, let’s get rid of any unnecessary transparent areas around the circular crop. To do this, go to the Image menu and choose Trim.
In the Trim dialog box, select Transparent Pixels under Trim Away and make sure all sides (Top, Bottom, Left, and Right) are selected. Click OK, and Photoshop will trim away the excess space around your circle.
Step 6. Save Your Image in a Format That Supports Transparency
Now that we’ve cropped our image into a circle, we need to save it in a format that preserves the transparency of the corners. JPEG doesn’t support transparency, so we’ll save it as a PNG file, which does.
Go to File > Save As and in the dialog box, select PNG from the file type dropdown. Give your file a name and save it in your preferred location. In the PNG Options dialog, select Smallest File Size for faster load times.
Your cropped image is now ready with a clean circular shape and transparent background, perfect for use in any design or graphic project!
Pro Tip: When saving your image, double-check that the file format supports transparency. PNG is the best option for preserving transparency in the corners if you need to place the image on any background later.
Pro Tips: Crop Images in Batch and Keep Details
If you have multiple images to crop, you can record a Photoshop Action, which records your workflow when dealing with a single image, then apply it to other images by repeating that action. Once the action starts, you cannot customize settings for each image.
Cropped images may look blurry when zoomed in, or displayed on a large screen. In that case, you will have to upscale images in Photoshop, and repeat that Action recording for batch tasks again.
To enhance your efficient and achieve decent image quality with details, you can use a dedicated image enhancer, with quick editing features and image quality enhancement modules.
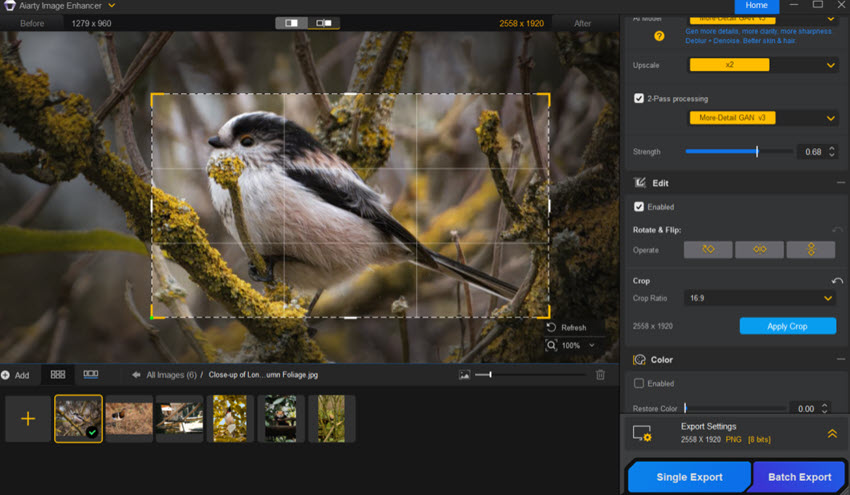
For this long-tailed tit siting on branch, the bird is small in the frame. I want to crop the image and re-compositing to put the bird in focus. The tool I used is Aiarty Image Enhancer, a standalone desktop software to enhance photo quality, restore image details, with upscaling and editing features built-in.
Step 1. Install Aiarty Image Enhancer and import photos.
Step 2. Choose a target resolution before cropping.
You can choose x1 to keep the original resolution, and then crop to a smaller size.
Or scale x2, x4, or custom resolutions, then crop the image. The result will be larger than the source image resolution.
Either way, its build in AI models will enhance image quality, fix blurriness, and keep natural details.
Step 3. Apply to multiple photos, and export the files in batch.
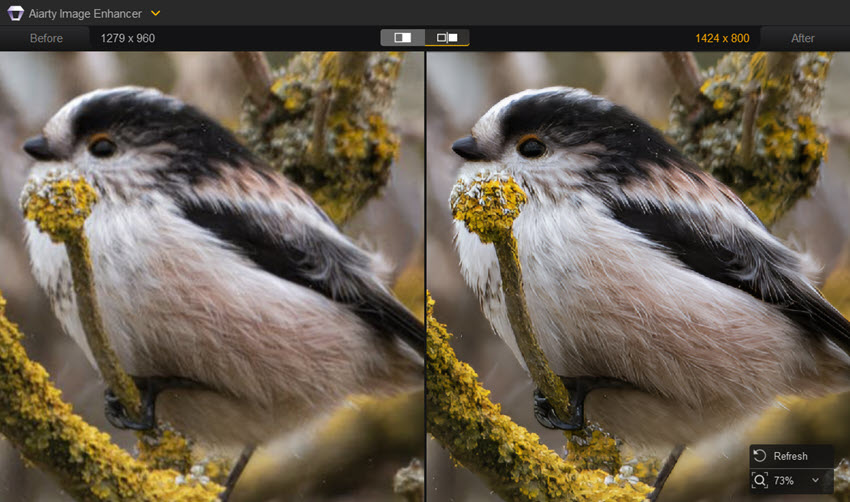
As shown in the before and after comparison above, natural details in its feather and around the branches are kept. The software also allows you to adjust enhancement strength to avoid over sharpening.
 FAQs: How to Crop an Image in Photoshop
To crop an image in Photoshop, select the Crop Tool from the toolbar or press the shortcut key C. Drag the corners to adjust the cropping area. Press Enter to apply the crop. For more precise control, use the options in the top menu bar to set specific aspect ratios or straighten the image.
To maintain the aspect ratio, hold down the Shift key while dragging the crop handles. Alternatively, set a specific aspect ratio in the options bar at the top before cropping. This ensures the image is cropped proportionally.
Yes, you can crop to a specific size by entering the dimensions in the options bar before using the Crop Tool. You can input the width, height, or resolution to crop the image to those exact measurements.
For precise cropping around an object, use the Quick Selection Tool or the Pen Tool to make a selection. Once you’ve outlined the object, click the Refine Edge button to smooth the selection, and then crop the image using the selected area.
If your image isn't cropping, check if you are on the correct layer. Sometimes, the layer may be locked or you might be trying to crop a smart object. Unlock the layer or rasterize the smart object before cropping.
If you accidentally crop an image, press Ctrl + Z (Windows) or Cmd + Z (Mac) to undo the crop. If you’ve already deselected the crop area, you can also use the History panel to revert to an earlier state.
You May Also Like
This post was written by Brenda Peng who is a seasoned editor at Digiarty Software who loves turning ordinary photos into extraordinary works of art. With AI assistance for brainstorming and drafting, the post is reviewed for accuracy by our expert Abby Poole for her expertise in this field.