


"Composition is the strongest way of seeing." — Edward Weston

Have you ever taken a photo that felt flat, lifeless, or like it was missing a sense of place? You framed your subject perfectly and nailed the exposure—yet something just didn't click. The secret to unlocking that missing dimension might be hiding right in front of you: foreground elements in photography.
In this guide, we will cover the importance of foreground in photography, how foreground elements shape composition, direct attention, and add depth—but what about photos you've already taken?
1. What Is Foreground in Photography
Simply put, the foreground is the part of the image closest to the viewer, or the space between the camera and the subject. By strategically using foreground elements, photographers can enhance the sense of depth and perspective in their images while adding visual interest.
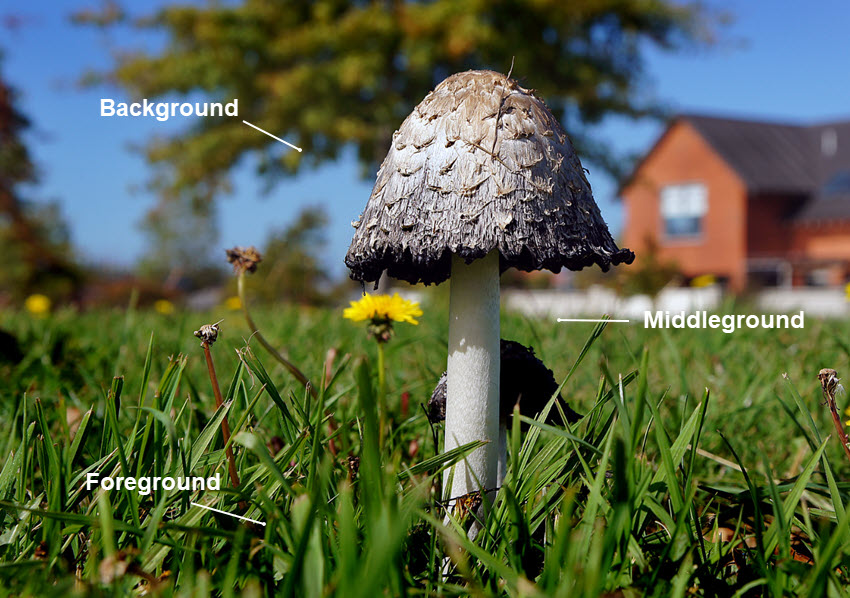
2. Foreground, Middle Ground and Background: The Composition Layers
The foreground is just one piece of the puzzle. A strong composition often involves layering different elements within the frame—foreground, middle ground, and background in photography.
These layers work together to create depth, balance, and narrative.
- Foreground: The closest part of the image to the viewer. It sets the stage, adds depth, and can lead the eye into the scene.
- Middleground: The heart of the image, where the primary subject or action resides. This layer connects the foreground and background.
- Background: The farthest layer, a backdrop that complements the subject, providing context and atmosphere. It sets the scene's mood without stealing focus.
3. Why the Foreground in Photography Matters
1) Add Depth and Dimension
Our brains perceive layers as three-dimensional. A foreground element tricks the eye into seeing depth in a 2D image—be it a winding path or a textured rock.

For instance, for the photography on the left (the Minaret of the Grand Mosque in Dubai), the silhouette of the plant in the foreground leads the eye into the frame, making the scene feel more immersive.
In the photo on the right, the woman's veil flowing in the wind, with part of it blurred in the foreground, creating a dreamy atmosphere.
2) Create Leading Lines and Framing
Lines create movement and direction, while frames act like visual parentheses, isolating your subject from distractions and telling the viewer, "Look here first." They guide the viewer toward your subject or deeper into the scene.
💡 Think of Ansel Adams' iconic landscapes. His foregrounds aren't accidental—they're deliberate. A jagged rock in the lower third of a mountain serves as a scale reference, a texture contrast, and a visual stepping stone that pulls you deeper into the frame.

In the photograph above, the shadow of the statue creates an interesting contrast. The massive foreground element dwarfs the background, reversing traditional perspectives.

Tips: You can experiment with foreground lines, frames, or shadows—such as a road, a fence, leaves, a river, or a doorway—and observe how they lead into the subject.
3) Enhance Storytelling
Foreground elements provide context, set the mood, and reinforce the message of an image.

In the photograph above, the foreground sets the scene—looking through a chain-link fence, with a bridge fading into misty fog in the distance. It evokes a sense of isolation and moodiness.
Tips for novices: Train yourself to scan the ground (or table, or street) in front of your subject. Start with the rule of thirds, and if your foreground feels boring, change your angle.
💡 One of my personal favorites is Henri Cartier-Bresson's street photography.
In Behind the Gare Saint-Lazare (1932), he captured a man leaping mid-air over a murky puddle. The foreground element—the puddle's reflection—doubles the action, adding surrealism and depth.
4. Tips and Tricks for Foreground Photography
Next time you raise your camera, pause for three seconds. Scan the edges of your frame. What's closest to you? Could a fallen leaf, a shadow, or a textured wall become the foreground element that elevates your scene?
1) Get Low
Changing your perspective is one of the secrets to be photogenic, it can transform a mundane scene into a dynamic composition. Shooting from a low angle not only exaggerates the size and impact of foreground elements but also adds a sense of drama.
Imagine wildflowers appearing as towering forests or pebbles serving as bold anchors in your frame, or the laundry-wash blue sea stretching in front of your lens, revealing the buildings across the water.

Pro Tip:
Use a tripod with a tilting screen or lie flat on the ground to keep your shot stable. Sometimes, a low angle can make your subject feel more heroic or whimsical.
2) Experiment with Depth of Field
Your choice of aperture can dramatically alter the role of your foreground:
- Sharp Foregrounds (e.g., f/16): Keep everything in focus, which is perfect for grand landscapes where every detail counts.
- Blurred Foregrounds (e.g., f/2.8): Soften elements like foliage or water, turning them into abstract washes of color to direct attention to your subject.
3) Foreground as Obstruction
While most photographers use foregrounds to clarify, you can use them to complicate. Add tension. Disrupt. Make the foreground elements work for the story.
Try shooting through objects like windows, fences, or even out-of-focus hands to create a sense of mystery or voyeurism. A blurred foreground can add depth and make the viewer feel like they’re peering into a hidden moment.

💡 For more inspirations, see Alex Webb's street photography, where chaos becomes poetry.
4) Avoid Overcomplicating the Frame
Cramming too many foreground elements (e.g., rocks, flowers, shadows) into one shot creates visual chaos and leaves viewers unsure where to focus.
If you've already shot a busy scene, crop in post-processing to eliminate distractions.
5. Revisit A Photo: Ready to Enhance With Your New Skills?
We've explored how foregrounds and compositional layers can transform an image. Now here is the fun part: Can you rescue a photo that lacks depth or balance?
Option 1: Revisit a photo you've taken in the past that lacks foreground interest, and reshoot it with what you've learned here to make the photo professional.
Option 2: Post-processing the photo.
If the composition already works but the file is limited by noise, softness, or low resolution, and you don't have the chance to reshoot, post-processing can help bring out the details you've already captured.
Tools such as Aiarty Image Enhancer can fit naturally into this part of the workflow. Think of it as an optional finishing step rather than a replacement for the photographer's eye. While making your creative adjustments in Lightroom or another editor, you can use it to upscale an image, reduce noise, and enhance clarity and fine details, Aiarty works seamlessly as the external editor for your existing tools.
You can also use it as a standalone tool when you simply want to give an older or lower-resolution photo a cleaner, more refined finish.
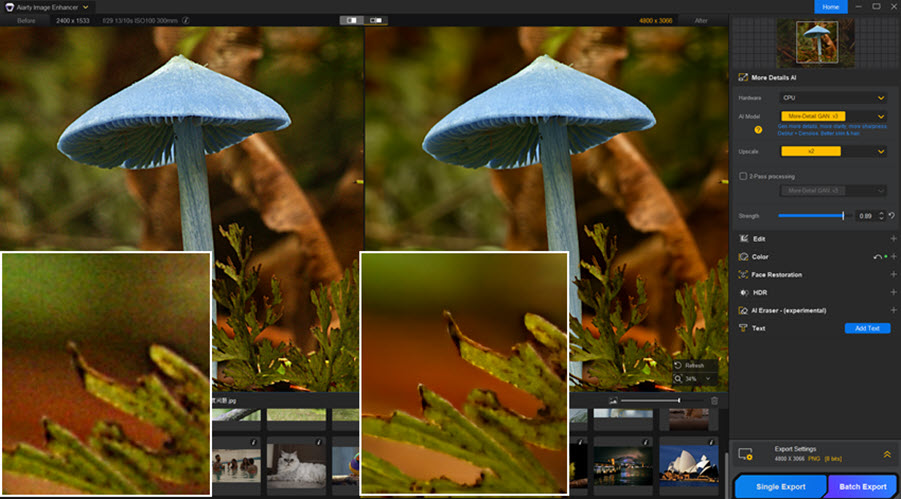
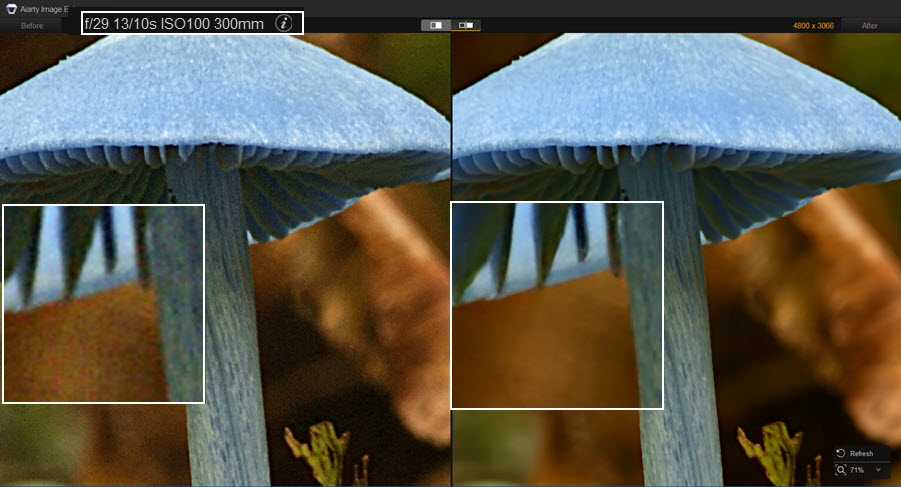
In dim woodland, the 1.3s exposure allows more light to reach the sensor, but can still introduce sensor noise and color noise in the shadows; with its deep-learning models, Aiarty Image Enhancer can help reduce noise and clean up the image while preserving realistic details.
Parting Words

Foreground is a tool for depth, emotion, and narrative. The more you experiment with it, the more you'll see its impact on your images.
We'd love to see how you use foreground elements to elevate your shots! Share your enhanced images and tag @aiarty_official on X (Twitter). We'll be excited to check them out and celebrate your creativity.
You May Also Like


This post was written by Brenda Peng who is a seasoned editor at Digiarty Software who loves turning ordinary photos into extraordinary works of art. With AI assistance for brainstorming and drafting, the post is reviewed for accuracy by our expert Abby Poole for her expertise in this field.
