Blurry images can be frustrating, making it hard to see important details. Common causes of blur include out of focus, camera shake, low lighting, and compression. The good news is that there are ways to fix it, especially with powerful tools like Photoshop. In this article, we’ll explore how to unblur an image in Photoshop.
Photoshop offers several tools that can help make a blurry image clear. However, it’s worth noting that fixing blurry pictures in Photoshop usually isn’t a one-click process.
💡 To sharpen blurry photos in Photoshop, you'll often need to:
- Adjust sharpening levels manually (e.g., Radius, Amount, Reduce Noise).
- Switch between different tools like Smart Sharpen, Shake Reduction, or High Pass.
- Try multiple settings to find the best result.
- Zoom in and out to avoid over-sharpening or introducing artifacts.
It can take a bit of time, patience, and trial-and-error to get a result you're happy with.
Looking for a quicker, more beginner-friendly solution?
You might want to try Aiarty Image Enhancer. This AI-powered tool automatically analyzes and sharpens blurry photos in just one click. No manual adjustments required. It’s especially helpful when you don’t have access to Photoshop or simply want faster, effortless results.
Download Aiarty Image Enhancer to remove blur from image automatically:
5 Methods to Fix Blurry Images in Photoshop
To make a blurry image clear in Photoshop, you can use several specialized tools depending on the nature of the blur. Whether you are dealing with camera shake, motion blur, or general soft focus, Photoshop provides professional-grade filters like Smart Sharpen, Shake Reduction, and High Pass to restore image clarity and fine details.
1. Using the Shake Reduction Filter
This tool is particularly helpful if the blur was caused by camera shake. I’ve found it to be incredibly effective for correcting slight motion blur, especially in images where the camera moved during the shot.
Steps:
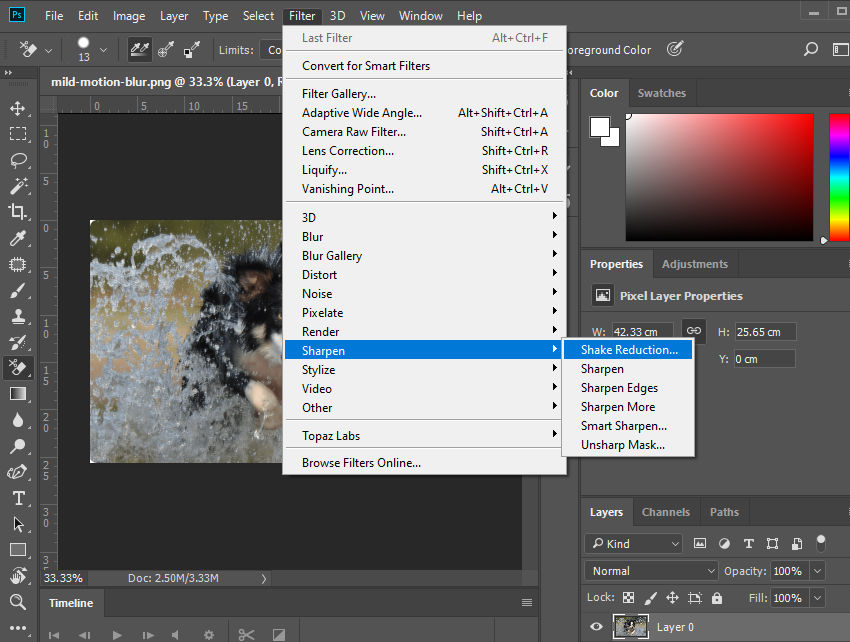
- Open your image in Photoshop.
- Go to Filter > Sharpen > Shake Reduction.
- Photoshop will automatically analyze the image and attempt to correct the blur.
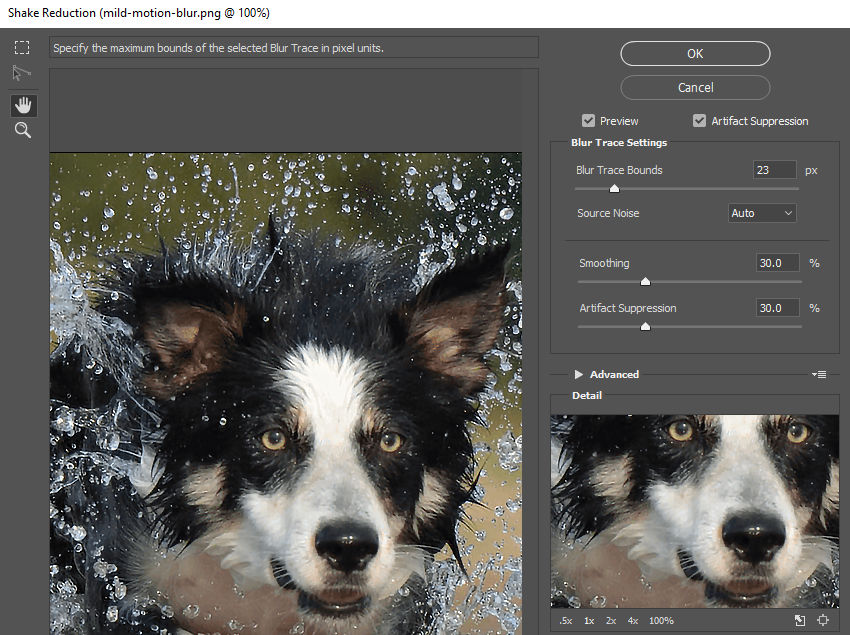
- Adjust the sliders (like Blur Trace Bounds and Smoothing) to fine-tune the result. I usually find that leaving the settings at default works well, but you can tweak them for more precise adjustments.
- Click OK to apply the filter.
Blur Trace Bounds
What it is: This setting determines the size (in pixels) of the blur path that Photoshop analyzes to correct camera shake.
How to set: Increase this value if the image has long, noticeable blur streaks (heavy shake). Decrease it for minor, subtle blur. Pro Tip: Match this as closely as possible to the actual length of the blur for the best result.
Smoothing
What it is: This slider reduces the digital noise and "grainy" textures that can appear as a side effect of sharpening.
How to set: Increase the slider if the image looks "gritty" or pixelated after deblurring. Avoid setting it too high, as excessive smoothing can lead to a loss of fine detail and a "plastic" look.
Artifact Suppression
What it is: This controls "artifacts"—the unnatural halos or white outlines that often appear around high-contrast edges after fixing blur.
How to set: Increase this setting if you notice glowing outlines around your subjects. A value between 20% and 40% is typically the "sweet spot" for maintaining sharp edges without unnatural halos.
Personal Experience: I’ve used this method when shooting handheld in low light, and it’s saved many of my photos from looking unusable. However, it’s important to note that the tool can sometimes overcompensate, creating unnatural-looking details, so I recommend using it subtly.
2. Using the High Pass Filter for Sharpening
Another method for fixing blur is sharpening, especially when the image is blurry due to slight focus issues. The High Pass filter can help bring out detail without affecting the overall sharpness too much.
Steps:
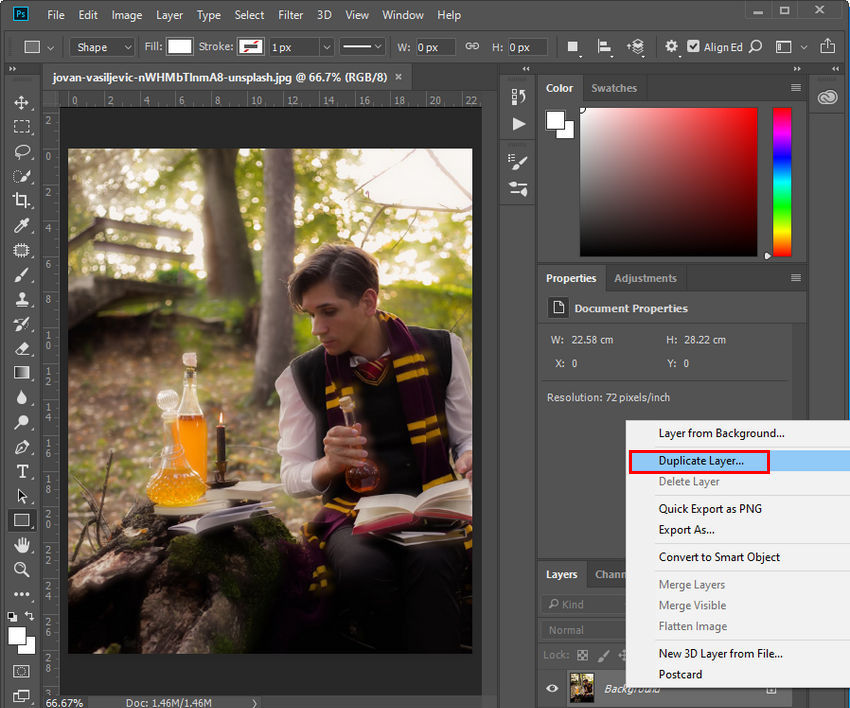
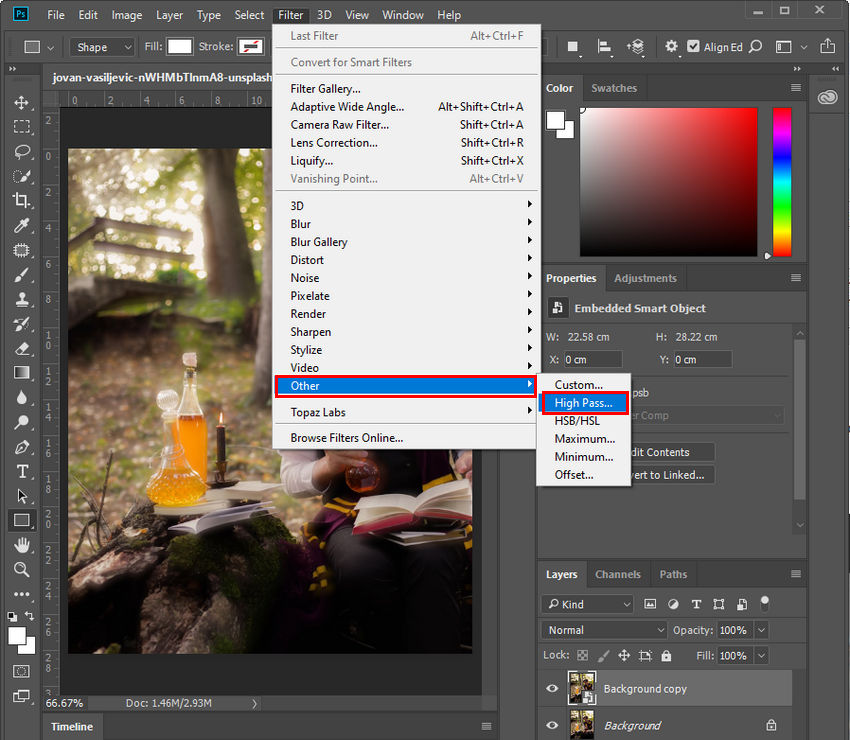
- Duplicate your image layer by pressing Ctrl + J (Windows) or Cmd + J (Mac).
- With the duplicated layer selected, go to Filter > Other > High Pass.
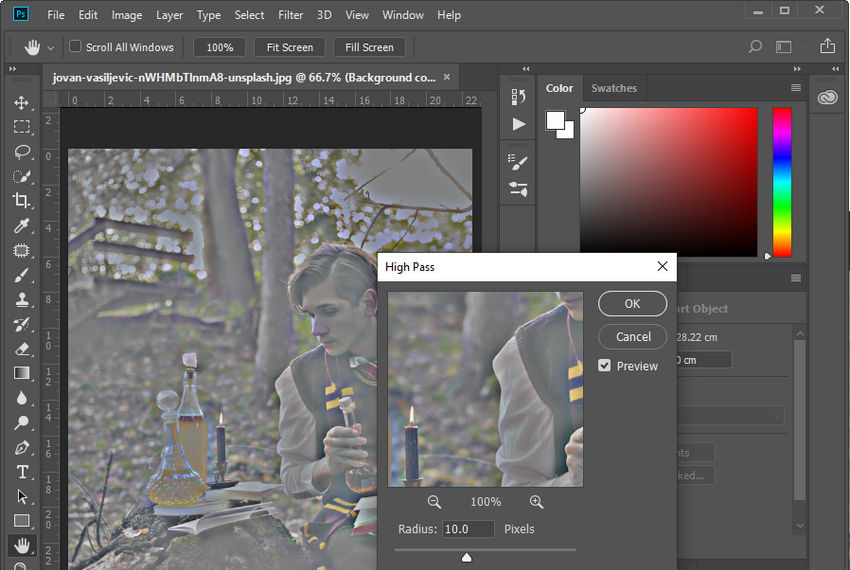
- Set the radius and click OK.
- Low Radius: Focuses only on the finest details and sharpest edges.
- High Radius: Makes the edges thicker and more pronounced, but can lead to unwanted glowing effects.
- Start at 0.1: Move the slider all the way to the left so the image is a flat, solid gray.
- Slowly Increase: Drag the slider to the right until you can just barely see the outlines of your subject appearing through the gray.
- Stop Before "Haloing": If you start seeing colors or thick "halos" around objects, the radius is too high.
- 0.5 – 2.0 Pixels: Ideal for subtle sharpening and enhancing fine textures like skin pores or fabric.
- 3.0 – 5.0 Pixels: Better for architectural photos or images with very soft edges that need a stronger "kick."
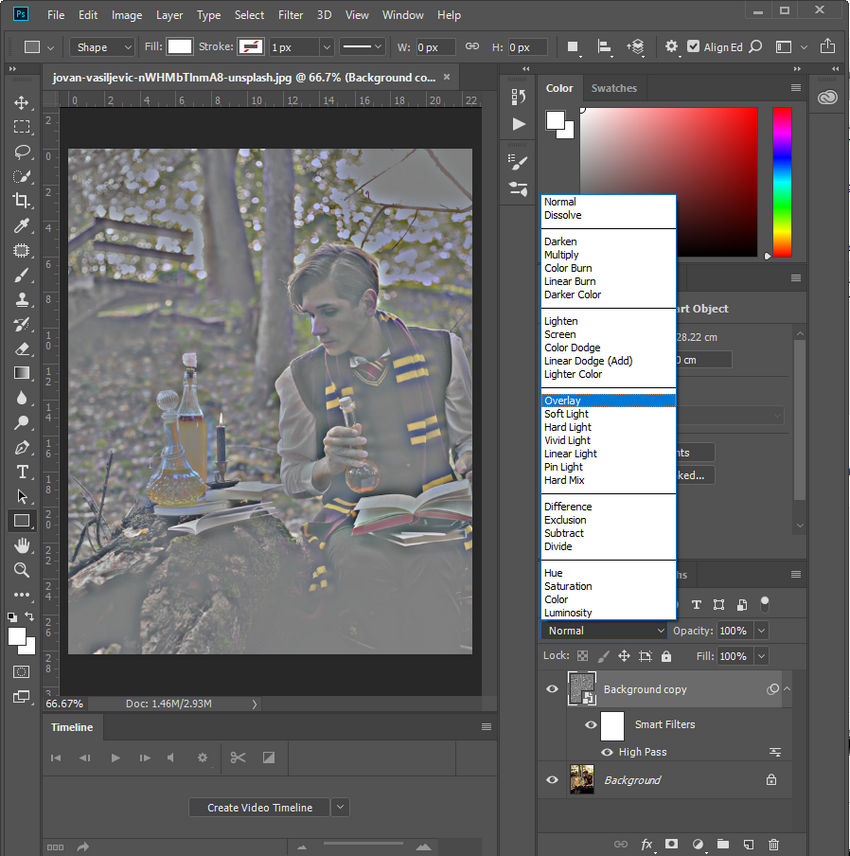
- Pro Tip: Always use High Pass on a separate layer and set the Blend Mode to Overlay or Soft Light to see the final sharpening effect.
- Change the layer mode to Overlay or Soft Light in the Layers panel.
- If necessary, reduce the layer opacity to control the intensity of the effect.
What does Radius mean in High Pass
The Radius setting determines the width of the edges that Photoshop identifies and highlights. Technically, it tells the filter how far from an edge it should look to find contrast.
How to set Radius
To find the perfect Radius for your photo, follow these steps while looking at the gray preview window:
Common values:
Personal Experience: This method works wonders when the image looks slightly soft due to focus issues. Photoshop sharpens the image details without introducing too much noise. However, if there’s significant blur, the results can be a bit hit or miss, so I usually combine it with other methods for better results.
3. Using the Smart Sharpen Tool
For more general blur, the Smart Sharpen filter is one of the best go-to tools in Photoshop. It allows for detailed adjustments and can effectively correct both motion blur and out-of-focus blur.
Steps:
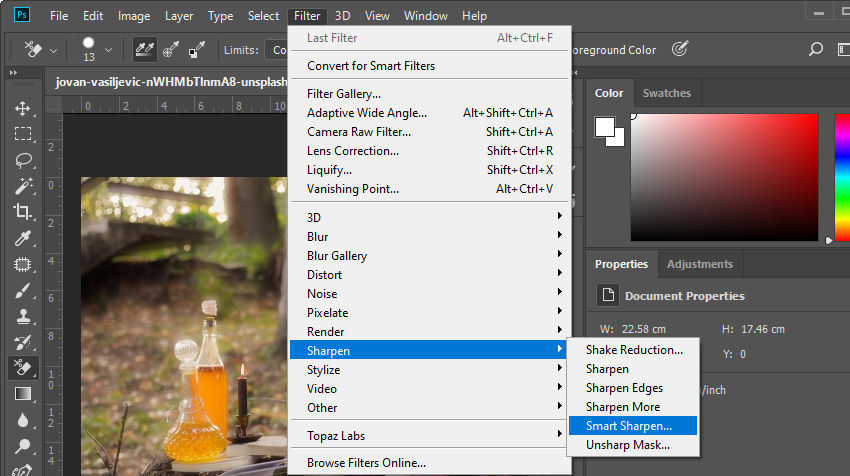
- Open your image in Photoshop.
- Go to Filter > Sharpen > Smart Sharpen.
- In the dialog box, adjust the Amount slider to control how much sharpening is applied.
- Adjust the Radius slider.
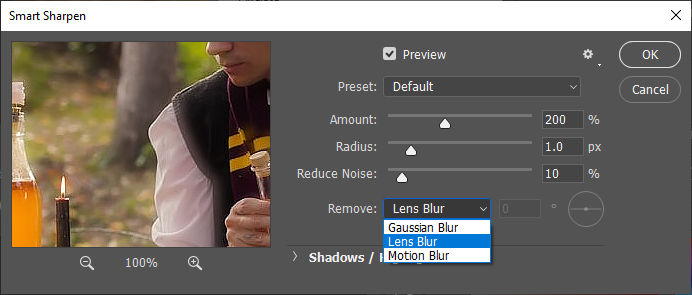
- If necessary, use the Remove dropdown to select between Gaussian Blur, Lens Blur, or Motion Blur, depending on the type of blur in your image.
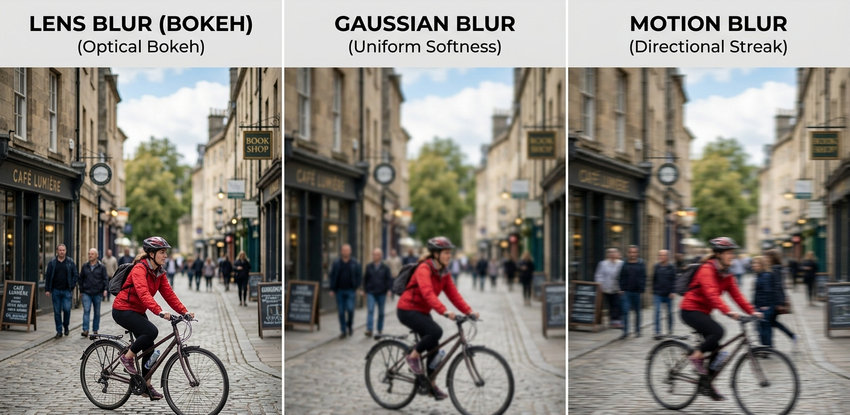
- Lens Blur: Best for general deblurring; it provides finer detail recovery and reduced halos.
- Gaussian Blur: Good for simple, soft-focus issues.
- Motion Blur: Specifically designed to fix blur caused by camera or subject movement. When selected, you must also set the Angle to match the direction of the movement.
- Click OK to apply.
How to set Amount?
This controls the overall intensity of the sharpening effect. It increases the contrast between pixels at the edges. For most photos, a value between 100% and 200% is effective. If the image starts to look "crunchy" or unnatural, lower the amount. For blur, I usually start at a low value and gradually increase it.
How to set Radius?
The radius determines the size of the image edges being sharpened. It tells Photoshop how many pixels surrounding edge pixels should be affected. If you increase the radius, the edges become thicker and more pronounced. A low radius (e.g., 1.0 px) is best for fine details, while a higher radius is better for very blurry or low-resolution photos.
The Remove dropdown menu allows you to choose the specific mathematical model Photoshop uses to deblur the image.
Personal Experience: This tool is my go-to when I need to fix slightly out-of-focus images. It provides a lot of control over the sharpening process, allowing you to enhance the details without making the image look too harsh or grainy.
4. Using the Unsharp Mask Tool
When dealing with mild blur or images that just need a bit more clarity, Unsharp Mask is a classic and reliable sharpening filter in Photoshop. Despite its name, this tool sharpens by increasing contrast along the edges in your image.
Steps:
- Open your image in Photoshop.
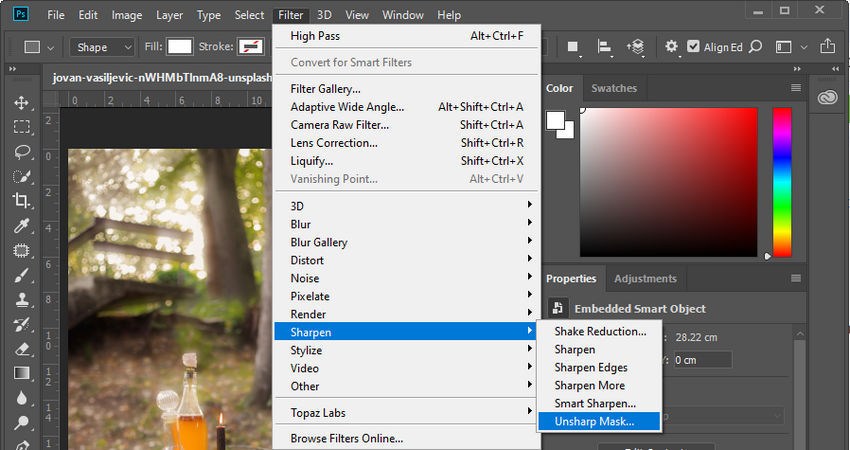
- Go to Filter > Sharpen > Unsharp Mask.
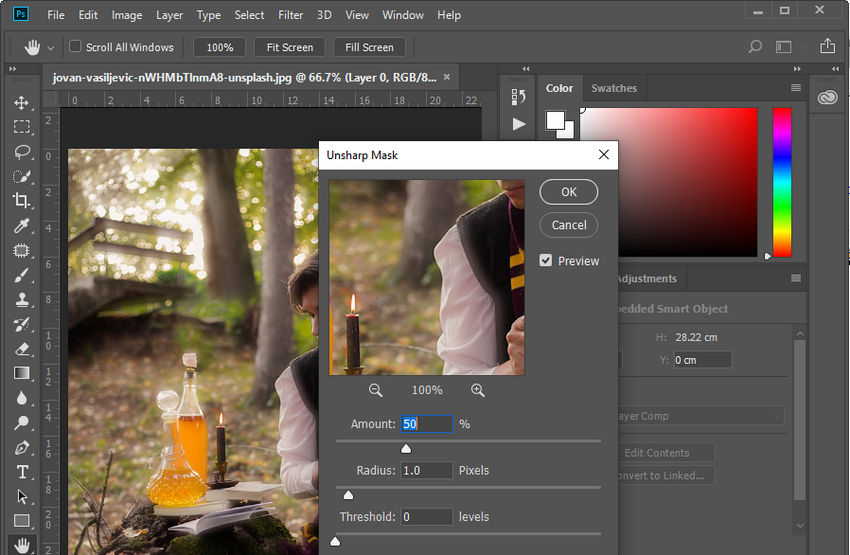
- In the dialog box, adjust the Amount slider to control how much contrast is added to edges. Start around 100% and tweak based on your image.
- Set the Radius—lower values (e.g., 0.5–1.5) work better for fine details, while higher values suit broader edges.
- Adjust the Threshold to limit sharpening to more defined areas. A low value sharpens more of the image, a higher one restricts it to edges.
- Threshold at 0: Every pixel in the image is sharpened, which can significantly increase digital noise and grain.
- Higher Threshold: Only the most distinct edges (high contrast) are sharpened, while areas with low contrast (like smooth skin, blue skies, or out-of-focus backgrounds) are ignored.
- Find your base: First, adjust the Amount and Radius until your main subject looks sharp. At this point, you might see unwanted noise or "halos" in the smoother areas of the photo.
- Slide to the right: Gradually increase the Threshold slider (usually between 3 and 10 levels).
- The "Sweet Spot": Stop when the noise in the flat areas (like skin or sky) disappears, but the important edges of your subject remain crisp.
- Click OK to apply.
What it is Threshold?
The Threshold setting is a critical control that tells Photoshop which pixels should be sharpened and which should be left alone. It defines the minimum brightness difference (contrast) that must exist between adjacent pixels before the filter recognizes them as an "edge."
How to set Threshold?
Setting the Threshold correctly is the best way to prevent your image from looking "over-processed" or grainy:
Pro Tip: Use the Threshold to protect skin textures in portraits. By setting a small threshold, you can sharpen the eyes and hair while keeping the skin looking natural and smooth.
Personal Experience: Unsharp Mask works best for subtle touch-ups. I often use it when a photo looks slightly soft or when I want to bring out fine texture without over-processing. It’s especially effective on web graphics, scanned photos, and close-up shots where you need crisp edges without introducing too much noise.
5. Using the Camera Raw Filter
For more advanced users, the Camera Raw filter provides even greater control over sharpening and noise reduction. It’s particularly useful when working with RAW files, but it can be applied to JPEGs as well.
Steps:
- Open your image in Photoshop.
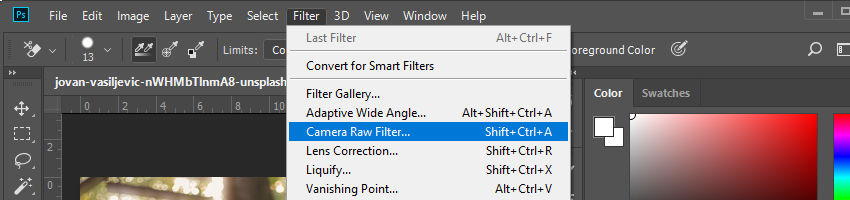
- Go to Filter > Camera Raw Filter.
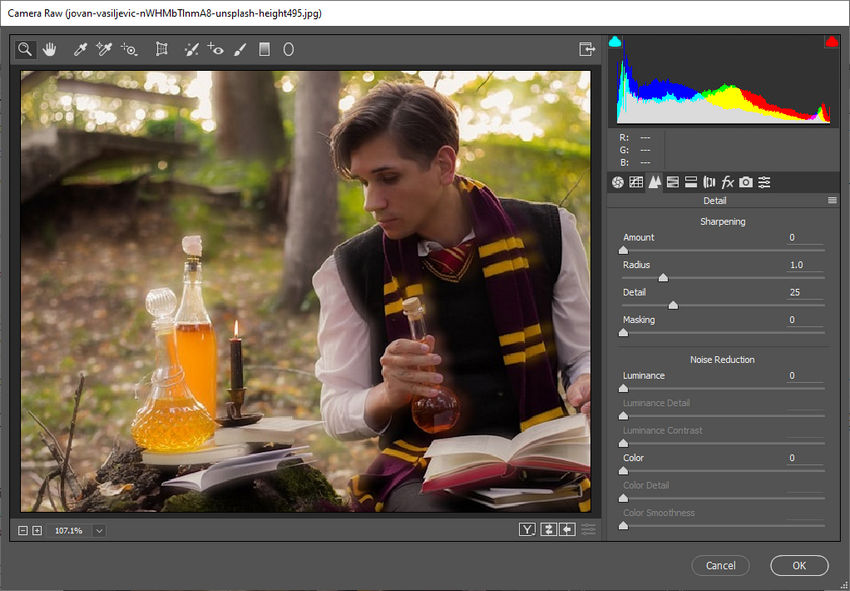
- In the Camera Raw dialog, go to the Detail tab (the third one from the left).
- Adjust the Sharpening sliders, Amount, Radius, Detail, and Masking, to correct the blur. I usually start with the Amount at around 50 and fine-tune from there.
- Use the Noise Reduction sliders to reduce any noise that might have been introduced during sharpening.
- Click OK to apply.
How to set Detail?
This slider controls how much high-frequency information (the finest textures) is sharpened.
Low setting (10-25) only sharpens the most prominent edges. This is excellent for portraits because it avoids over-sharpening skin pores or minor blemishes.
High setting (50+) sharpens the smallest, most intricate textures. Ideal for nature photography, landscapes, or macro shots where you want every tiny detail to pop.
What is Masking and how to set it?
Masking acts as a protective shield. It restricts the sharpening effect strictly to the edges, preventing flat, smooth areas (like a blue sky, out-of-focus background, or smooth skin) from becoming noisy or grainy.
Pro Tip for Perfect Sharpening: Hold down the Alt key (Windows) or Option key (Mac) while clicking and dragging the Masking slider. Your image will temporarily turn black and white.
White areas show exactly what is being sharpened while black areas show what is protected from sharpening.
Drag the slider to the right (usually between 30 and 70) until your subject's edges are white, and the flat backgrounds turn completely black.
Personal Experience: This is my favorite method for correcting blur when I’m working with RAW files, as it provides the most flexibility and fine control over the image. It takes a bit of time to master, but once you get the hang of it, it’s incredibly effective.
Tips for Better Results
Here are some practical tips to keep in mind when using Photoshop to unblur your images. Following these can help you achieve cleaner, sharper results without compromising the natural look of your photos.
- Work with a duplicate layer – Always duplicate your image layer before applying any sharpening. This allows for non-destructive editing and easy comparison.
- Zoom to 100% – When adjusting sharpening settings, view your image at 100% zoom to see the real effect on details and avoid oversharpening.
- Combine methods if needed – Don’t hesitate to use multiple tools (e.g., Smart Sharpen + High Pass) to get the best results depending on your image’s blur type.
- Use layer masks – Apply sharpening selectively using masks to avoid exaggerating noise in smooth areas like skin or backgrounds.
- Don’t overdo it – Sharpening can enhance details, but too much can introduce halos and noise. Subtle adjustments often look more natural.
Photoshop Too Complicated for Sharpening Blurry Image? Try an AI Tool
After exploring the various ways to unblur pictures in Photoshop, it's clear that while these methods are powerful, they require a certain level of expertise and often involve time-consuming manual adjustments. That’s where AI-powered tools like Aiarty Image Enhancer come into play.
Aiarty offers a much simpler, more intuitive approach to sharpening blurry images. Powered by advanced AI algorithms, it automatically enhances image quality, removes blur, and improves sharpness—all without the need for complex steps or fine-tuning.
While Photoshop can offer more control, Aiarty simplifies the process and delivers excellent results with just a few clicks. Now, let's take a look at the steps to get started with Aiarty Image Enhancer.
Step-by-Step Guide to Sharpening Blurry Photos with Aiarty Image Enhancer
Step 1: Download and install Aiarty
Click the download button below to get started with the installation process.
Step 2: Open Aiarty Image Enhancer and upload your image
Once installed, open the app and upload the image you want to fix. Aiarty supports a wide variety of image formats, so you don’t have to worry about compatibility.
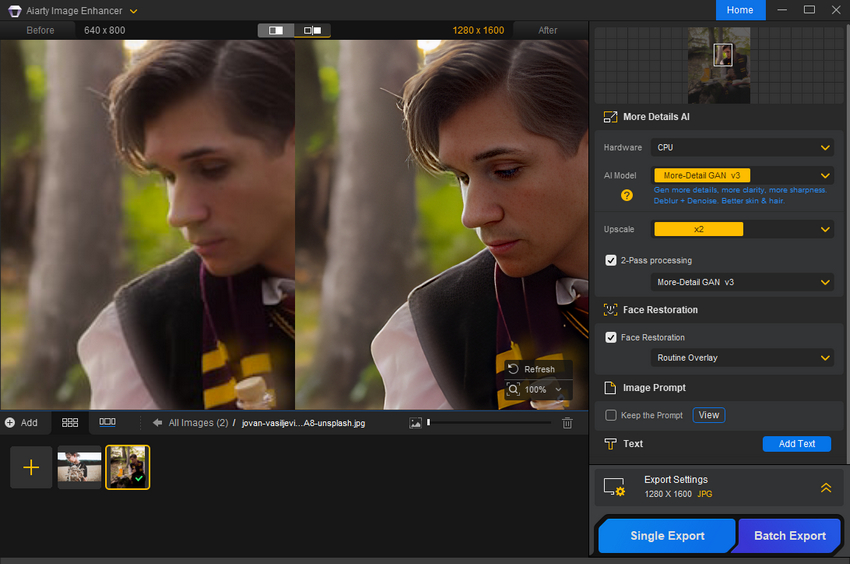
Step 3: Select the appropriate AI model
Aiarty offers five different AI models to choose from, based on the type and characteristics of the image you’re enhancing. Here are your options: More-Detail GAN v3, AIGCsmooth v3, More-Detail GAN v2, Smooth Diff v2, and Real-Photo v3
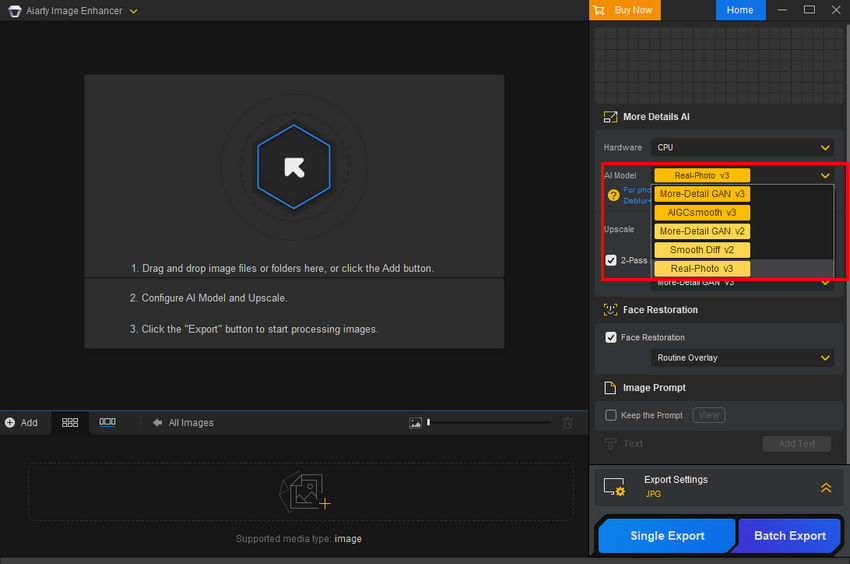
Select the model that best suits your image’s needs. You can always experiment with different models if you’re unsure about which one will work best.
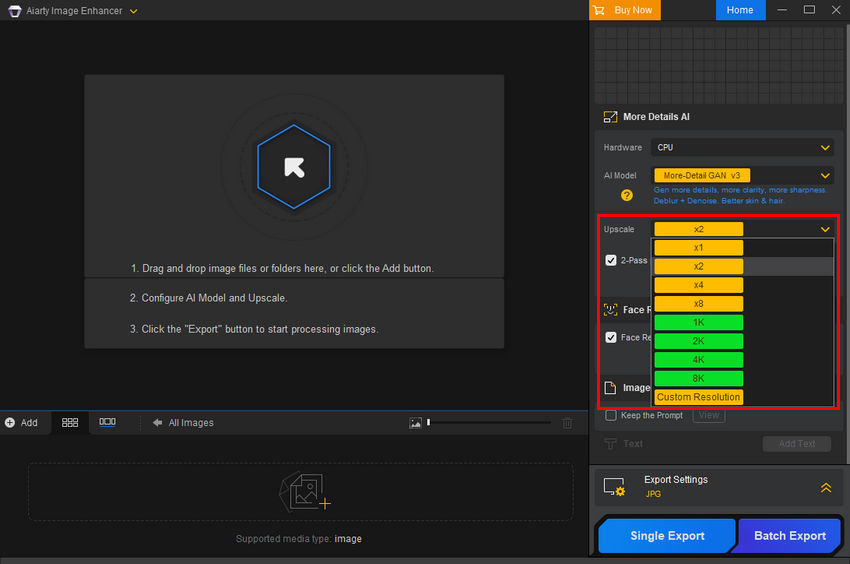
Step 4: Choose upscale settings
You can choose whether to upscale the image or keep it at its original resolution. In the Upscale drop-down menu, select your desired magnification (1x, 2x, 4x, 8x) or specific resolution (1k, 2k, 4k, 8k), or even set a custom resolution. If you choose 1x, the software will maintain the original resolution. Regardless of the settings, Aiarty will automatically enhance the image, removing blur, noise, and other imperfections, without requiring manual tweaks.
Once you’ve selected your settings, the software will begin processing your image. Afterward, you can preview the result and see if the blurry image becomes sharper. If you’re happy with the enhancement, move to the next step; if not, you can switch to another AI model and try again.
Step 5: Export your enhanced image(s)
Once you’re satisfied with the result, you can either export the image individually or batch process multiple images at once. For batch processing, simply click the “Batch Export” option.
With Aiarty Image Enhancer, removing blur and improving photo quality has never been easier. Whether you’re working with one image or many, this AI tool streamlines the process and saves you valuable time.
Conclusion
Sharpening blurry images in Photoshop requires a combination of techniques and a bit of trial and error. While tools like the Shake Reduction filter and Smart Sharpen are excellent for general cases, sometimes a more hands-on approach (like using the Camera Raw filter or High Pass filter) might give you the best results.
My experience has shown that while Photoshop can’t always fix every blur perfectly, with patience and practice, you can significantly improve many blurry images.
That said, if you've tried everything in Photoshop and still aren’t satisfied with the outcome, it’s worth giving Aiarty Image Enhancer a shot. This AI-powered tool can automatically remove blur from photos with just one click—and the results might just exceed your expectations.
You May Also Like
This post was written by Brenda Peng who is a seasoned editor at Digiarty Software who loves turning ordinary photos into extraordinary works of art. With AI assistance for brainstorming and drafting, the post is reviewed for accuracy by our expert Abby Poole for her expertise in this field.