You poured hours, days, or even weeks of heart and soul into creating a beautiful physical work of art. But once the paint dries and the pencil is lifted, a crucial next step awaits: bringing that masterpiece into the digital world. Scanning your artwork isn't just about taking a picture; it's about creating a perfect digital twin—a high-fidelity archive that safeguards your creation and unlocks its commercial potential.
If you've ever struggled with faded colors, fuzzy details, or weird reflections in your digital copies, this guide is for you.
Step 1: Preparation and Gear Selection for the Scanning
Digitization starts long before you press the "Scan" button. You need the right gear and a pristine working environment. The choice between a scanner and a camera depends entirely on the size, medium, and texture of your artwork.
Choosing the Right Tool for the Job
1. Flatbed Scanners (Best for Most Art)
Flatbeds are your first choice for drawings, watercolor paintings, and most media up to 12"x17". They provide highly consistent light and sharp, repeatable focus without complex setup. When selecting a scanner, prioritize optical resolution (measured in DPI, e.g., 4800 x 9600 DPI) and color depth (48-bit color is standard). These specs determine the amount of detail and color information the scanner can physically capture.
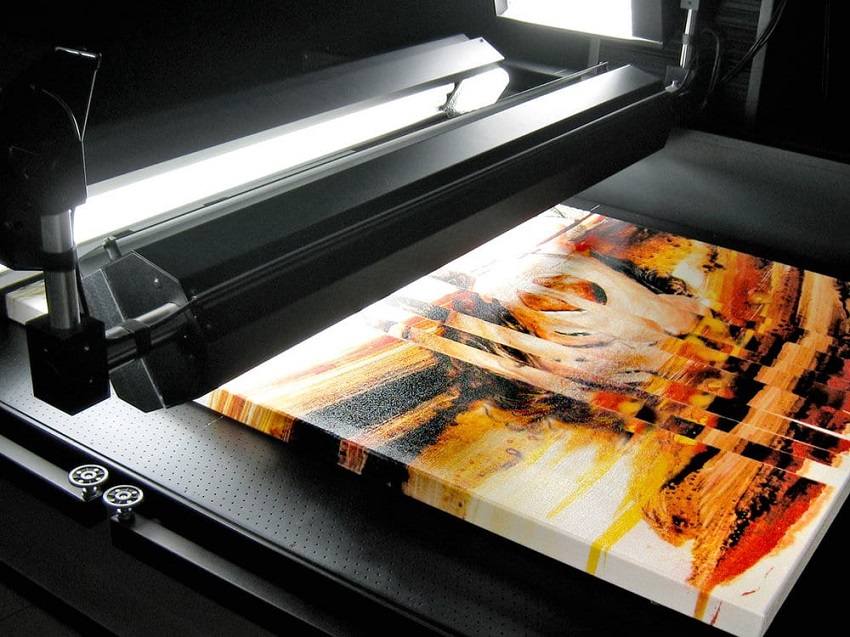
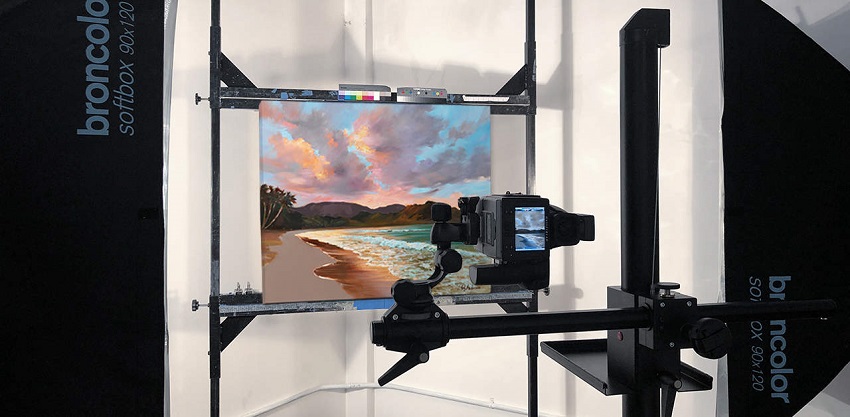
2. Camera Capture (For Large or Textured Art)
This method is necessary when your art exceeds the flatbed dimensions or has high relief and texture (like thick oil paint or heavy canvas). Camera capture requires a DSLR or mirrorless camera, a sturdy tripod, and the most critical element: proper, even lighting.
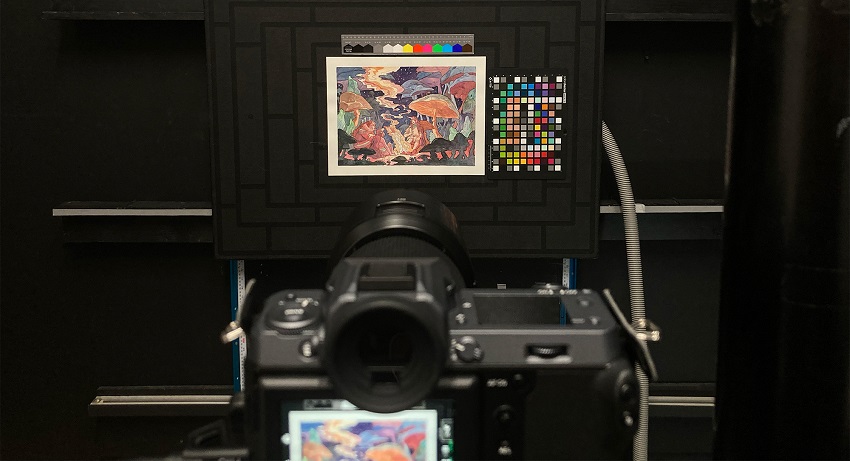
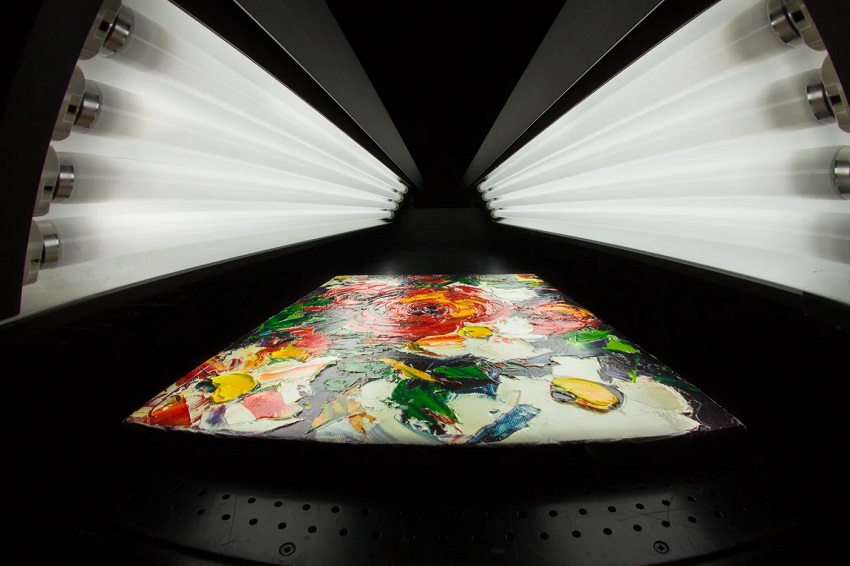
To photograph reflective media (like glossy oils), set up two lights at 45-degree angles to the art and place polarizing filters over both the lights and the camera lens. This eliminates specular highlights (glare), capturing only the true color and texture of the paint.
Preparing the Artwork and Scanner
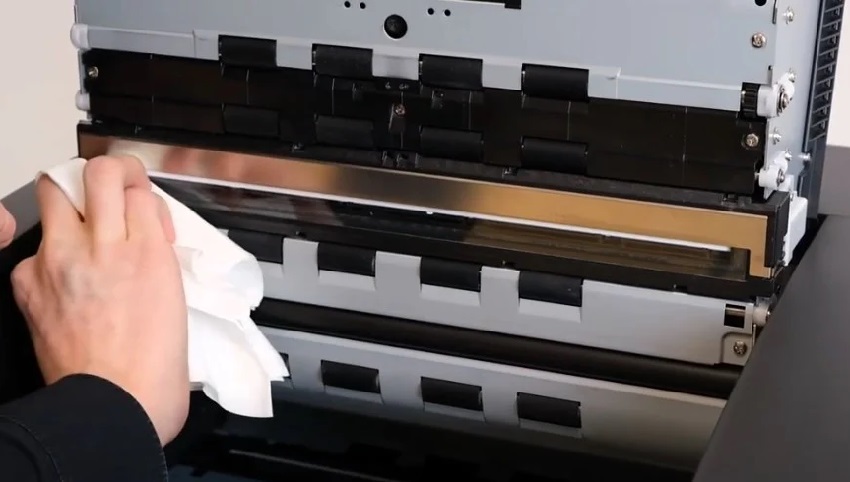
1. Cleaning the Scanner Surface
At 600 or 1200 DPI, a tiny speck of dust becomes a prominent artifact that you will waste time manually removing in post-production. So before every session, inspect the glass bed. Use a lint-free microfiber cloth and glass cleaner designed for electronics. Never use abrasive cleaners.
2. Preparing the Artwork
Gently dust the piece using a soft, clean brush (a clean makeup brush works well) to dislodge any surface debris; never wipe or rub the surface as this can smear soft media. Ensure paint, ink, or fixative is fully cured and dry before scanning to prevent damage to the work and the scanner glass.
Tip: Charcoal, pastel, and graphite pieces are fragile. Before scanning, spray a light layer of quality fixative, or carefully place a sheet of clear, archival acetate or thin glass over the work to prevent pigment from transferring to the scanner glass.
Step 2: Optimal Scanner Settings (The Archival Standard)
Once your gear is ready and your art is clean, the next step is perhaps the most critical: setting up your scanner software. Many artists make the mistake of using default settings, resulting in files that look okay on screen but fail spectacularly when printed. We need to set the archival standard for resolution, color depth, and file type right now.
The Resolution Mandate (DPI)
Resolution, or Dots Per Inch (DPI), determines the sheer amount of detail captured. Scanning at a low DPI is a permanent mistake—you can't add detail later, even with powerful AI tools.
Scan at a minimum of 300 DPI for basic web viewing or small, personal prints. This is the baseline resolution for quality printing. For any art you intend to sell, reproduce, or archive permanently, scan at 600 DPI to 1200 DPI.
Scanning at this high resolution allows for robust post-processing and ensures you can print the artwork larger than the original without noticeable loss of quality or pixelation.
For example, a 6x8 inch painting scanned at 1200 DPI results in a digital file large enough to be beautifully printed at 12x16 inches (or even larger with AI enhancement) while maintaining 300 DPI print quality.
Color and Format Selection
Capturing the full spectrum of color and saving it correctly ensures color fidelity throughout the workflow.
For the color mode, always select "Full Color," "True Color," or preferably, "48-bit Color." Avoid 24-bit color, grayscale, or black and white unless the original artwork strictly contains only those tones. 48-bit color captures millions more colors than the standard display and is essential for providing maximum data for color correction in your editing software.
For the master file format, ave the initial, raw, high-resolution scan as a Lossless TIFF. TIFF is a non-destructive format that preserves all the data, resolution, and color information captured by the scanner. Never use JPEG for the master archival file as it compresses data and reduces quality every time it is saved.
But for the working file format, only after you have the TIFF master saved should you create compressed copies, such as JPEG (high quality) or PNG, for web use, emails, and sharing.
White and Black Point Adjustment
Your scanner software usually offers a preview window with a histogram or input sliders. Using these before you scan can save considerable editing time later.
Use the software's preview function to manually set the white point and black point. This prevents "clipping"—losing detail in areas that are crushed to pure black or blown out to pure white. Crucially, adjust the white point slider so that it accurately reflects the white color of your paper or canvas. This ensures the digitized background isn't a muddy gray, but a true white (or off-white, as intended).
Step 3: Executing the Scan and Handling Large Art
With your scanner settings locked in at 600+ DPI and TIFF format, it's time for the physical action. This step focuses on two core concerns: perfect alignment for small works and the specialized technique required to digitize large pieces that won't fit on your scanner bed.
1. Precise Artwork Placement
Even a slight misalignment can lead to noticeable distortion and require complex correction in editing software. Precision here saves significant time later.
Carefully place your artwork face-down on the scanner glass. Use the molded edge guides (usually an L-shape corner) to align two sides of your artwork perfectly.
If your artwork is slightly curled or prone to shifting, use small pieces of low-tack painter's tape to secure the edges to the scanner bed. Apply the tape only to the border of the art, never on the image itself, to prevent the work from moving during the scanning pass.
Be careful of Thick Media (Canvas or Frame), because artwork on thick board or stretched canvas often prevents the scanner lid from closing fully. If the lid cannot close, the scanner's internal calibration light will be exposed, resulting in light leakage and distorted colors. To prevent this, use a large, heavy, opaque cloth (like black velvet or a thick towel) to completely cover the artwork and the lifted lid. This blocks all external light.
The scanner's camera needs consistent spacing to focus correctly. If the lid is propped up, you must ensure the artwork remains flat. Do not place additional weight on the canvas itself, but you can place small, dense, flat weights on the edges of the lid (if applicable) to keep it stable and consistent during the scan.
2. Scanning Large Art (Stitching Technique)
When your artwork is larger than the scanner bed, you must scan it in sections and digitally "stitch" the pieces together in post-production.
To give your stitching software enough information to flawlessly merge the images, scan the artwork in overlapping sections. Ensure you have at least a 1-inch overlap on all adjacent scans.
Once the first scan is complete, do not move the artwork until all necessary adjacent sections are scanned. Move the art only enough to place the next section on the glass, ensuring the 1-inch overlap.
A highly effective way to ensure exact realignment if the artwork is accidentally shifted is to mark the position of the artwork on the scanner glass using small pieces of painter's tape outside the scan area. This provides registration points for perfect alignment.
Step 4: Post-Processing and Perfection (The Editor's Workflow)
The TIFF master file you just created is the raw, unedited gold. Now, we move into the digital darkroom—your image editing software (like Photoshop, GIMP, or Affinity Photo) to perfect the scan. Our goal is to make the digital file indistinguishable from the physical original.
Essential Image Editing (Post-Scan)
The first steps involve cleaning up the edges and ensuring perfect tonal representation.
1. Straightening and Cropping
Use the Crop tool to remove the outer edges of the scanner bed, which often appear black or gray. Even if you aligned the artwork perfectly, always use the Rotate or Level tool to check for slight angular skew. Even a half-degree tilt is noticeable in a large print.
2. Tonal Correction (Levels and Curves)
This is where you finalize the background color and contrast.
Using the Levels tool, fine-tune the white point again. If your artwork uses white paper, ensure the histogram's lightest point is pure white (RGB 255, 255, 255). Adjusting the Curves tool gives you granular control over the mid-tones, bringing back subtle contrast and depth that the scanning process might have softened.
Always perform these adjustments (Levels, Curves, Hue/Saturation) using adjustment layers rather than applying them directly to the background image. This allows you to revert changes or modify the intensity non-destructively later.
Leveraging AI for Enhancement and Speed
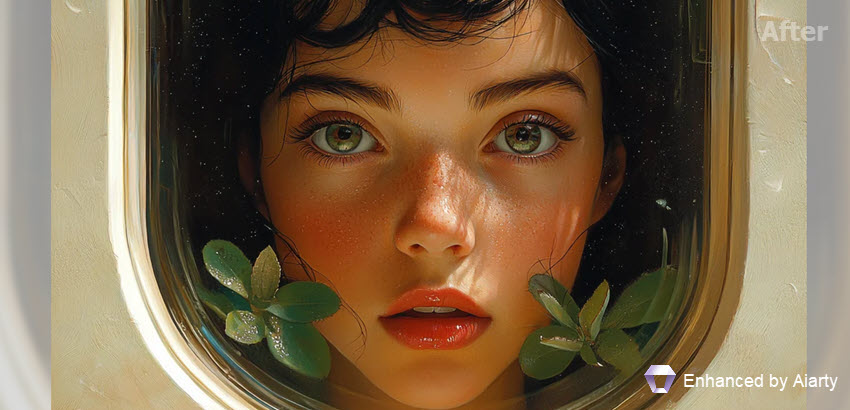
For many artists, manual touch-ups are the most time-consuming part of the workflow. This is where AI-powered tools become invaluable. One standout option of them is Aiarty Image Enhancer.
This specialized software uses advanced machine learning models designed to understand and preserve artistic detail. It can drastically speed up the cleanup process and ensure maximum print quality.
Use Aiarty to automatically and intelligently eliminate common digital flaws like scanner noise, minor dust specks, and slight compression artifacts—all without softening the genuine texture of your brushstrokes or paper grain, which is a major advantage over traditional manual methods.
For artists planning gallery-sized prints (e.g., printing a 9x12 inch original to a 24x36 inch canvas), Aiarty can safely increase the image resolution (DPI) far beyond the scanner's physical limits, ensuring sharp, print-ready detail at massive sizes.

Color Matching and Final Detail
These final steps bring the digital file into perfect harmony with the physical piece.
1. Color Comparison
This requires patience. Place the physical art next to your monitor (ensure both are under the same, consistent, neutral light source). Compare the digital image and the original side-by-side, making small, iterative adjustments to the Hue/Saturation or Color Balance until the digital colors mirror the physical work perfectly.
2. Sharpening and Clarity
Apply a very subtle Unsharp Mask or Smart Sharpen filter. Be careful not to over-sharpen, as this can introduce halos or digital artifacts. The goal is to restore tiny details lost in the initial capture process, not to create a crunchy-looking image.
3. Stitching the Large Pieces
If you scanned multiple sections (from Step 3), the final task is blending them. Use the specialized automatic stitching feature in your software (e.g., the "Photomerge" feature in Photoshop) to automatically blend the overlapped scans into a single, seamless, high-resolution file. Check the seam lines carefully for any color or brightness inconsistencies.
Troubleshooting Common Scanning Errors
Even with perfect preparation, issues can arise. Knowing how to quickly diagnose and fix these problems is the mark of a seasoned digital editor. Here are the most common scanning headaches and their fast solutions:
1. Dealing with Glare and Reflections
Problem: You notice bright spots, shiny streaks, or reflections appearing on the digital file, usually on glossy media like heavy ink, high-gloss varnishes, or wet-look oil paintings.
Solution: This is caused by ambient light bouncing off the art and back into the scanner lens (or camera lens). If using a scanner, reposition the artwork and rely completely on the heavy, black cloth cover technique (as discussed in Step 3). This creates a completely dark environment, forcing the scanner's internal, calibrated light to be the only light source.
2. Fixing Digital Noise and Dust Lines
These issues are almost always physical, caused by tiny specks of debris, but they can be fixed quickly in post-production.
Problem: dust lines - Long, thin, faint horizontal lines that appear across the entire scan are usually caused by a dust speck on the scanner's light bar or calibration sensor, not on the glass. And random specks - Small black or white dots are caused by dust on the artwork itself or on the glass.
Editing Fixes: While tools like Aiarty Image Enhancer can automatically handle much of the noise, for stubborn or unique artifacts, use the Healing Brush or Clone Stamp tools in your editing software. These tools allow you to seamlessly sample clean areas of the surrounding color/paper and cover the dust specks or minor scratches.
Conclusion: Your Digital Masterpiece is Ready
Congratulations! By following these steps, you've moved beyond quick snapshots and embraced the professional workflow for digitizing your art. You didn't just capture an image; you created a high-fidelity digital master file—an asset that is future-proof, print-ready, and a true archival twin of your original creation.
Remember, the quality of your digital file is the ceiling for the quality of your prints and reproductions. By using a high-DPI, 48-bit color TIFF master file, and then leveraging smart tools like Aiarty Image Enhancer for touch-ups and upscaling, you ensure that every print you sell or every time you share your work online, you are presenting the absolute best version of your art to the world.
Now, go share your work with confidence. You've mastered the digital handshake your art deserves!
You May Also Like
This post was written by Brenda Peng who is a seasoned editor at Digiarty Software who loves turning ordinary photos into extraordinary works of art. With AI assistance for brainstorming and drafting, the post is reviewed for accuracy by our expert Abby Poole for her expertise in this field.