How to Set Up SeedVR2 Video Upscaler in ComfyUI (Beginner-Friendly Guide)
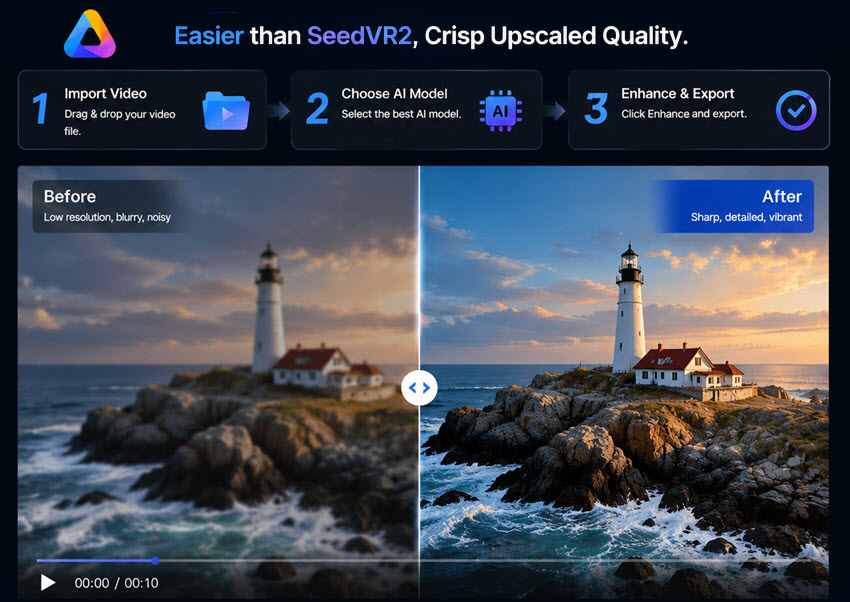
SeedVR2 is quickly becoming one of the most powerful AI video upscaling models in 2026, capable of transforming low-resolution or noisy footage into sharp, cinematic-quality output using a single-step Diffusion Transformer (DiT) architecture. Unlike traditional enhancement tools that rely on sharpening or interpolation, SeedVR2 reconstructs missing textures through deep generative priors.
But despite its impressive capabilities, SeedVR2 has one major barrier: complexity. Because it is deeply integrated into ComfyUI workflows and requires careful node configuration, model handling, and parameter tuning, many creators find the setup process overwhelming, especially those who just want fast, production-ready results.
In this guide, we will break down the SeedVR2 video upscaler workflow step by step and show how to properly configure and optimize it for stable, high-quality 4K output without artifacts or dynamic blur.
💡 Lightweight Alternative for Faster AI Video Upscaling
While the SeedVR2 video upscaler workflow offers incredible customization inside ComfyUI, setting up open-source nodes, managing Python dependencies, and fine-tuning parameters can be time-consuming.
If you want the same cinematic 4K clarity, flawless motion stability, and micro-texture reconstruction without the complex technical setup, try Aiarty Video Enhancer.
- No setup required: no nodes, Python, or manual optimization. Just drag, drop, and upscale.
- Crisp 4K quality: upscale 480p/720p/SD to HD 4K while eliminating compression artifacts, noise, and blur in a single click.
- Fast speed: Built to maximize your local GPU performance automatically without sudden Out-of-Memory (OOM) crashes.
What is the SeedVR2 Upscaler?
Developed by ByteDance's research team, SeedVR2 is a next-generation AI model designed to rescue low-resolution media. It is widely considered one of the most powerful tools for transforming compressed footage into 4K clarity.
Traditional upscalers often create a flat, "plastic" look or cause background textures to flicker wildly. SeedVR2 upscaler solves this by using a unique One-Step Diffusion Transformer (DiT) architecture. It condenses the massive detail-reconstruction power of generative AI into a single, lightning-fast step, delivering two massive advantages:
- Cinematic Micro-Textures: Instead of just stretching pixels and blurring them out to hide the roughness, SeedVR2 looks at blurry faces, clothing, or landscapes and physically "weaves" realistic skin pores, hair strands, and fabric textures back into your footage.
- Flawless Motion Stability: Because it was trained directly on continuous video sequences rather than standalone images, it understands how objects move. This means the details it generates stay locked in place from frame to frame, giving you a smooth, natural output completely free of the annoying "strobe-light" flashing effect common in older AI tools.
By integrating this advanced model into a simplified ComfyUI setup, you can easily deploy a studio-grade seedvr2 video upscaler workflow directly on your home computer without the technical headache.
Requirements for SeedVR2 Upscaler
Before diving into the step-by-step SeedVR2 video upscaler workflow, it is important to first prepare a proper working environment.
Because SeedVR2 runs on a ComfyUI-based architecture, the setup process may look technical at first glance. However, in reality, it can be broken down into two simple requirements: installing ComfyUI and loading the SeedVR2 workflow template.
Below we will guide you through the complete setup process in a beginner-friendly way, ensuring you can successfully run the SeedVR2 video upscaler workflow for 480p and 720p videos, even if you have never used ComfyUI before.
Requirement 1. How to Set Up ComfyUI (The 1-Click Method)
You don’t need to be a programmer or know how to code to use SeedVR2 video upscaler. We will use ComfyUI, a free visual tool where you just connect blocks together.
Step 1. Download the ComfyUI 1-Click Package
Go to the official ComfyUI GitHub page and download the "ComfyUI Windows Portable" ZIP file. This is a standalone, all-in-one package that already includes everything ComfyUI needs to run, so you don't have to install Python or setup a system environment yourself.
Step 2. Unzip and Open
Right-click the downloaded file and extract it to a folder on your computer. To ensure smooth AI video processing, we highly recommend using an SSD drive with at least 10GB of free space (for example, D:\ComfyUI_windows_portable).
Step 3. Launch ComfyUI
Open the extracted folder and look for the launch scripts. Double-click run_nvidia_gpu.bat (if you have an NVIDIA graphics card) or run_cpu.bat (for CPU-only systems).
A black command window will pop up—don't worry, that's just the background engine starting up. Within a few seconds, ComfyUI will automatically launch and open the interface in your internet browser, usually at [http://127.0.0.1:8188](http://127.0.0.1:8188).

Requirement 2. Load the SeedVR2 Workflow Template
Once ComfyUI is open in your browser, the next step is to prepare the SeedVR2 video upscaler workflow environment by installing the required tools and loading a ready-made template.
This step is important because SeedVR2 runs through a visual workflow system, meaning you do not build everything manually, you load a pre-configured setup and start using it immediately.
Step 1. Install the ComfyUI Manager Tool
Once ComfyUI is open in your browser, look at the control panel on the right and click Manager. (If you don't see it, download the ComfyUI-Manager extension first).
Step 2. Get the SeedVR2 Blocks
Inside the Manager, click "Install Custom Nodes", search for SeedVR2, and click install next to ComfyUI-SeedVR2_VideoUpscaler. Once it finishes downloading, click "Restart" to refresh your screen.
Step 3. Load the Prebuilt SeedVR2 Workflow
Instead of building connections from scratch, download the community SeedVR2 Beginner Workflow file (.json file). Drag and drop that single file directly onto your ComfyUI browser screen. The interface will automatically load a complete SeedVR2 workflow, including video input, processing nodes, and output settings.
Step 4. Select the Right Model for Your Hardware
Once the workflow is loaded, locate the main Upscaler Model node and choose the model based on your system capability.
- If you have an everyday PC (6GB–8GB memory): Select the Lightweight (GGUF) model. It runs smoothly on normal laptops.
- If you have a powerful gaming PC (12GB+ memory): Select the Standard (FP8) model for the crispest details. If you are unsure, start with the lightweight model first, then upgrade later for better quality.
Step-by-Step to Upscale Your Video in SeedVR2
Now that your SeedVR2 video upscaler workflow is fully loaded, you can begin processing your first video. This section is optimized for low-resolution inputs such as 480p and 720p footage, where AI reconstruction is most effective.
Step 1. Upload Your Video File
To get started, locate the Load Video block on the left side of your workspace to upload your source footage, and make sure the final Video Combine block at the end is configured to your preferred output format (such as MP4).
Then click "Upload" and select your video file.
💡 Beginner Tip: For your very first run, look for the box that says frame_load_cap and set a small value (around 20-30 frames). This tells the AI to only process the first 1 to 2 seconds of the video as a quick test, so you can verify your seedvr2 video upscaler workflow setup before committing to long renders. Leave select_every_nth disabled, as frame skipping breaks smooth motion.
Step 2. Set the Video Length Per Batch.
Look at the batch_size box in your workflow. Batch size controls memory usage and frame stability in SeedVR2 video upscaling. Smaller values improve stability for long 480p videos, while higher values improve processing efficiency on powerful GPUs.
- To keep the video smooth without crashing your computer, change this number to 5.
- If you have a top-tier gaming PC, you can change it to 9.
Step 3. Choose a Target Resolution
Look for the resolution settings based on the source video.
If your source is 480p (especially anime or old videos), apply a stronger restoration workflow:
- Set pre_downscale_factor = 0.5 to reduce compression artifacts before processing.
- Do not upscale directly to 4K. Instead, use a two-pass workflow to set output to 1080p to generate a clean intermediate video in first pass, and take the 1080p result and upscale again to 4K (2160p).
This approach significantly improves stability and reduces artifact amplification in the SeedVR2 video upscaler 480 workflow.
If your source is 720p, the structure is already stable, so focus on enhancement rather than reconstruction.
- Set output resolution directly to 2160p (4K)
- Set Input Noise Scale = 0 to preserve original structure
- Add slight texture enhancement using Latent Noise Scale ≈ 0.015
This helps SeedVR2 inject fine details such as material texture and micro-contrast without altering composition, making it ideal for the SeedVR2 upscaler 720 workflow.
Step 4. Control AI Creativity (Prevent Flickering)
Find the setting called cfg_scale. This controls how much creative freedom the AI has. Lower values ensure frame-to-frame consistency. If set too high, SeedVR2 video upscaler may generate inconsistent details between frames, causing flickering or visual instability. Set this strictly to around 1.0-1.2, such as 1.05.
Step 5. Export Your Upscaled Video
Connect the final line to the Video Combine block. Set your format to mp4 and set the compression quality (crf) to 19. Click the purple "Queue Prompt" button at the top right of your screen. Sit back, and let the SeedVR2 video upscaler workflow begin!
Quick Troubleshooting: Common SeedVR2 Upscaler Problems & Solutions
1. The process stops mid-way and says "Out of Memory (OOM)".
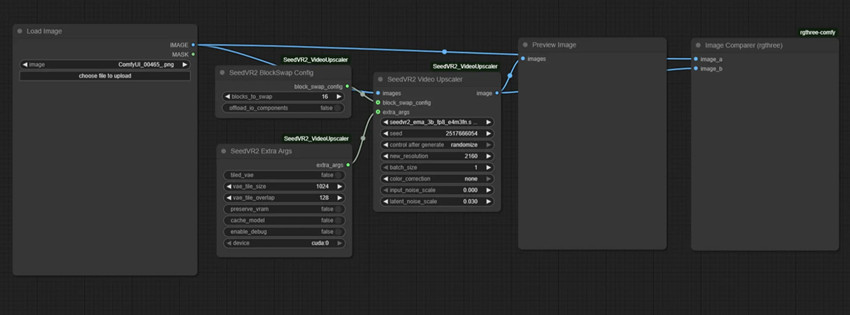
SeedVR2 utilizes a heavy Diffusion Transformer (DiT) structure. While the frame-by-frame processing might pass seamlessly, the final VAE Decode phase forces ComfyUI to rebuild the entire video batch into pixel space all at once, which instantly spikes VRAM consumption. To fix this SeedVR2 video upscaling issue, you can:
- Right-click your canvas, add a SetVAE_Tile_Size node (or locate the VAE section in your template) and enable VAE Tiling. Set the tile size to 512 or 640.
- In the main SeedVR2 node, ensure blocks_to_swap is set to 20 or higher to offload model weights dynamically into system RAM.
2. The video background is vibrating or flashing weirdly.
Your cfg_scale (Classifier-Free Guidance) is set too high. Because SeedVR2 recreates micro-textures via generative priors, giving the AI too much "creative freedom" causes it to invent slightly different patterns on walls, grass, or skin from one frame to the next, resulting in temporal flickering.
Keep your cfg_scale strictly between 1.0 and 1.05. Unlike standard image generation where a CFG of 5.0–7.0 is normal, video diffusion models require an ultra-low CFG to maintain strict frame-to-frame consistency.
3. There are strange vertical lines cutting through my beautiful output.
This is a known issue tied exclusively to the larger 7B parameters model weight. When the workflow tries to divide large 4K resolution canvases into spatial splits, the 7B architecture can fail to blend the borders smoothly. To get rid of this problem, you need to:
- For hassle-free rendering, switch your model selection to the community-favorite 3B model variant (GGUF or FP8)—it is structurally immune to these line glitches.
- If you absolutely must use the 7B model for extreme photorealism, look for the VAE_CONV_MAX_MEM parameter in your advanced settings and set it to float("inf") to disable spatial splitting.
4. SeedVR2 output look worse or blurrier than the original video
This issue is widely discussed in both Reddit threads and GitHub issues. This error often happens when source video is already heavily compressed (e.g. WhatsApp, TikTok re-encoded clips), over-aggressive denoising destroys fine texture detail, or skipping multi-pass workflow and going directly to 4K.
Optional: A Simpler Alternative for SeedVR2 Workflow
While SeedVR2 offers extremely powerful AI upscaling through ComfyUI workflows, it may feel complex for users who prefer a faster, plug-and-play solution.
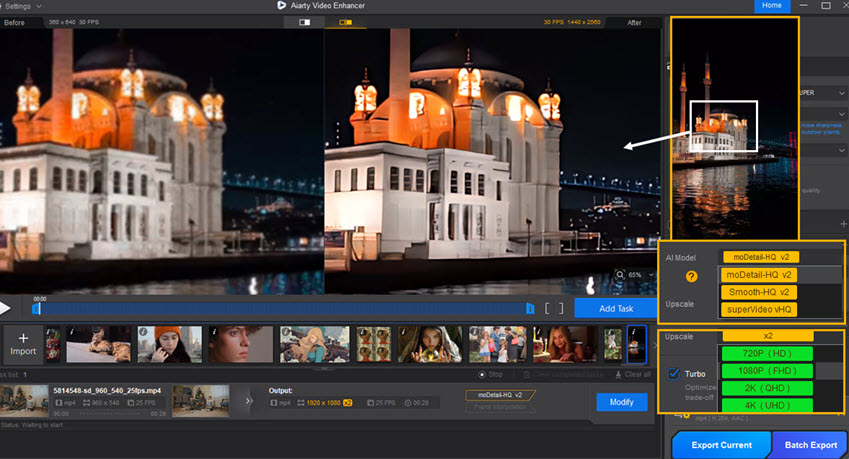
If you want similar AI video enhancement results without manually configuring nodes or parameters, a dedicated tool likeAiarty Video Enhancer can be a more beginner-friendly option. Aiarty provides an all-in-one AI video upscaling solution designed for users who want:
- One-click video upscaling to HD/4K crisp quality without ComfyUI setup
- Automatic removal of noise, blur, and compression artifacts in low-resolution videos
- Stable frame enhancement without flickering or temporal inconsistency issues
- Built-in optimization to reduce GPU crashes and VRAM overload
- Fast processing for creators who prioritize workflow efficiency
Compared to the complexCompared to the complex SeedVR2 video upscaler workflow in ComfyUI, Aiarty Video Enhancer is designed for a fully automated, beginner-friendly experience with no technical setup required. Aiarty Video Enhancer is designed for a fully automated, beginner-friendly experience with no technical setup required.
Step 1. Import your video file into Aiarty by simply dragging and dropping it into the interface, supporting common formats like 480p, 720p, and standard HD footage.
Step 2. Select an AI enhancement mode designed for automatic upscaling and denoising, where the system intelligently improves clarity without requiring manual settings or GPU optimization.
Step 3. Click “Start Processing” and export your enhanced video, typically upscaled to 1080p or 4K, depending on your output preference.
Final Words
SeedVR2 represents one of the most powerful advancements in AI video upscaling, especially for users who want maximum control over quality, texture reconstruction, and motion consistency through a ComfyUI-based workflow. However, this level of flexibility also comes with a learning curve, requiring setup, parameter tuning, and a deeper understanding of workflow design.
For users working with 480p or 720p footage, SeedVR2 offers exceptional restoration potential when configured correctly, particularly with multi-pass upscaling and careful control of noise and stability settings.
At the same time, not every creator needs this level of complexity. Tools like Aiarty provide a much faster, more accessible alternative for everyday video enhancement, allowing users to achieve clean 4K upscaling without workflow setup or technical configuration.
Ultimately, the choice depends on your workflow needs: SeedVR2 for advanced control and maximum quality potential, or Aiarty for speed, simplicity, and production efficiency.
 FAQs
FAQs
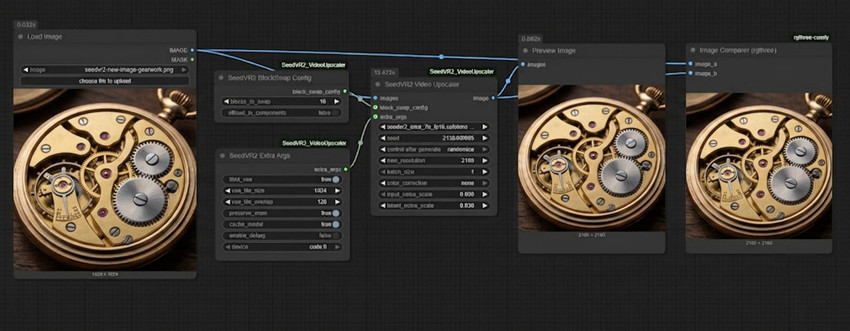
The image enhancement workflow in SeedVR2 upscaler follows the same core AI logic as video upscaling, but it is simpler because there is no frame-to-frame motion to maintain consistency.
Step 1. Drag your image into the Load Image block. In the upscaler block next to it, make sure the batch_size is set to 1 since we are only fixing one picture.
Step 2. Since static images do not require motion consistency, SeedVR2 can focus more on detail reconstruction. Find that cfg_scale setting again, and turn it up to 2.0 or 3.0. Higher values allow SeedVR2 upscaler to generate richer textures and restore missing visual information, especially in low-quality or compressed images.
Step 3. Want to add realistic skin pores, clothing fabric, or crisp environmental details? Find the setting called Latent Noise Scale and set it to 0.025. This tells the AI to weave fine, lifelike textures right into the blurry areas of your photo.
Step 4. Hit "Queue Prompt". The system will show you a side-by-side comparison using the built-in tools. Right-click the new high-res image and click "Save Image" to finish.
Yes, in most cases. SeedVR2 is primarily built and distributed as an open-source custom node ecosystem for ComfyUI. To unlock its full potential, you must operate within its node-based interface and use prebuilt community .json templates to manage video inputs and rendering. While a few cloud APIs or standalone command-line forks exist for developers, they lack the flexibility of the main build. The overwhelming community consensus on Reddit and GitHub remains clear: ComfyUI is the most stable, customizable, and widely supported environment for running SeedVR2 reliably.
Community benchmarks show that SeedVR2 is significantly slower than traditional GAN-based upscalers, primarily due to its advanced single-step Diffusion Transformer (DiT) architecture. Unlike older models that use quick, straightforward mathematical sharpening, SeedVR2 relies on iterative reconstruction and heavy temporal attention layers to keep the motion stable. Processing continuous video context windows puts a massive compute load on your hardware and creates a strict dependency on high VRAM.
Because of this heavy hardware tax, users on Reddit and AI forums overwhelmingly treat SeedVR2 as a "quality-first, not speed-first" asset. It is rarely used for quick, on-the-fly renders; instead, creators typically queue up their projects and leave them running overnight to achieve flawless, cinematic 4K output.
It comes down to reconstruction vs. enhancement. Traditional tools like Topaz or GAN-based models (RealESRGAN) excel at sharpening lines, deblocking, and rendering at fast speeds, but they often leave footage looking flat or "plastic." SeedVR2, being a Diffusion Transformer (DiT), actually generates missing realistic micro-textures like skin pores, fabric weaves, and environmental details. However, this superior quality comes at the cost of speed; SeedVR2 is significantly slower and requires much more VRAM than traditional software.
Yes, absolutely! SeedVR2 is highly capable of transforming low-resolution 480p footage directly into crisp 4K clarity. Because it uses a advanced Diffusion Transformer (DiT) architecture, it doesn’t just stretch and blur the pixels like traditional upscalers. Instead, it physically reconstructs missing details, generating realistic micro-textures like hair strands, skin pores, and fabric weaves out of thin air.
However, jumping straight from 480p to 4K multiplies the pixel count by roughly 27 times, which can sometimes over-amplify compression artifacts or cause visual instability. To get the best possible result, the community-recommended approach is to use a two-pass workflow
This post was written by Brenda Peng who is a seasoned editor at Digiarty Software who loves turning ordinary photos into extraordinary works of art. With AI assistance for brainstorming and drafting, the post is reviewed for accuracy by our expert Abby Poole for her expertise in this field.