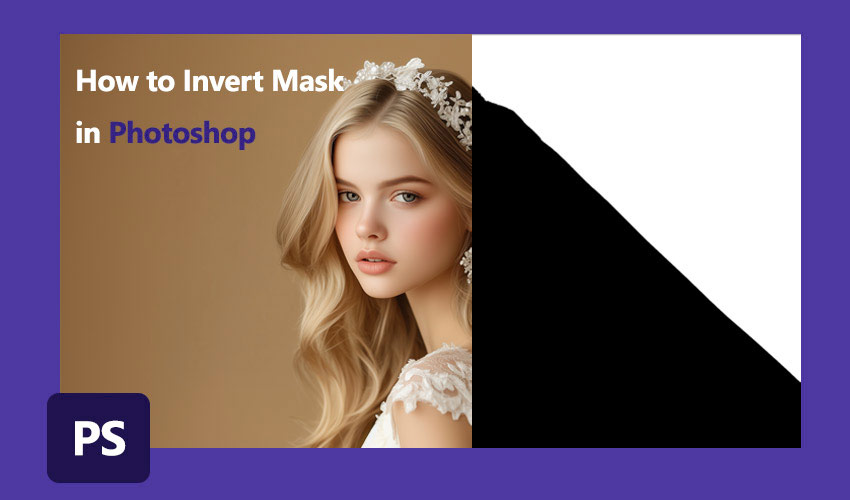
Photoshop masking is essential for precise image editing, allowing you to isolate subjects, make clipping mask, and transform photos. Mastering mask inversion is key to refining selections and achieving your vision. But while inverting a mask should be simple, the overall Photoshop masking process, especially for background removal, can become surprisingly complex for clean results.
Knowing how to invert a mask in Photoshop is indeed useful. However, users often find themselves inverting masks because creating accurate initial masks for background removal in Photoshop is challenging and time-consuming, leading to a need for constant adjustments and inversions. This can be frustrating when you need quick, professional results.
💡 Problems with Photoshop Masking & Frequent Mask Inversion:
- Initial masks in Photoshop are often imperfect, requiring inversion for correction.
- Inverting is just one step in a lengthy Photoshop background removal workflow.
- Clean transparency in Photoshop is hard to achieve even after mask inversion.
- Photoshop's menus and panels make even simple inversions feel cumbersome.
Want to Skip Endless Photoshop Mask Adjustments for Clean Background Removal?
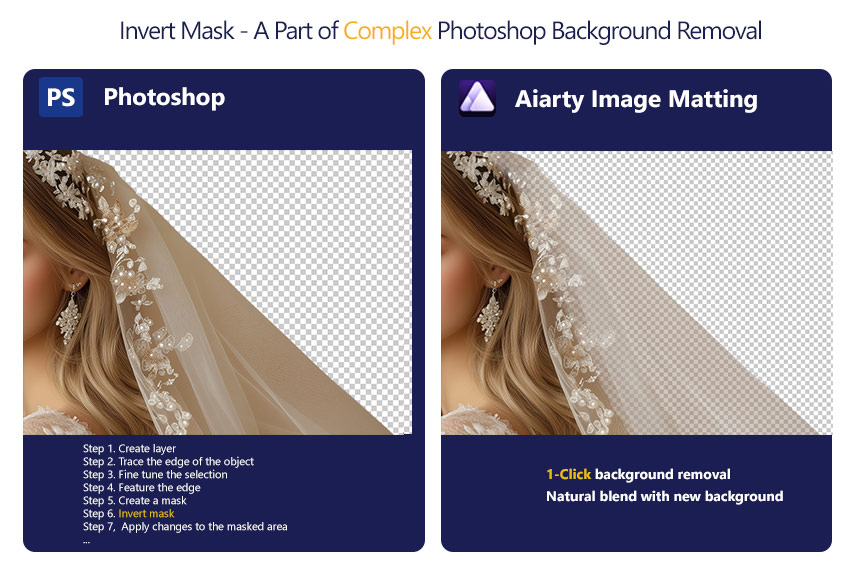
Photoshop masking is a multi-step process, and inverting masks is just one adjustment within it. Yet, even with these steps, achieving truly refined masks in Photoshop, especially with transparent elements and intricate details, remains challenging. Aiarty Image Matting offers a revolutionary alternative: 1-click background removal. Its AI automatically delivers refined masks, eliminating the need for complex inversions and overcoming Photoshop's limitations with tricky edges.
4 Methods to Invert a Mask in Photoshop (Can Be Time-Consuming)
As we discussed earlier, creating perfect masks in Photoshop, especially for background removal, is rarely straightforward. You often end up with initial masks that need refinement – and that's where inverting a mask becomes incredibly useful. It's a crucial technique for correcting those inevitable imperfections in your selections and pushing towards a cleaner result within Photoshop. So, while it's just one step in a potentially longer process, let's explore 4 essential methods to invert a mask in Photoshop to refine those masks you've worked so hard to create.
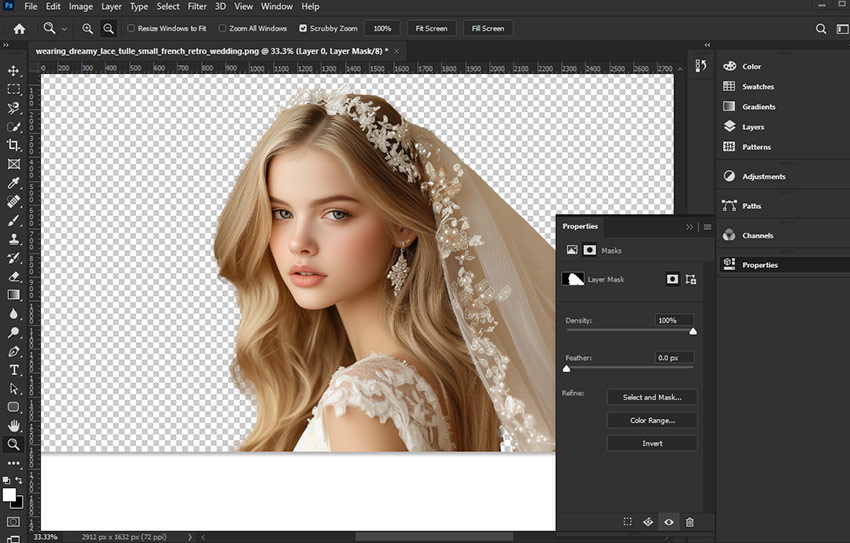
Method 1. Invert Mask in Photoshop Using the Properties Panel
After you've initially created a mask in Photoshop – perhaps using the Quick Selection tool, or even painstakingly drawing paths – you'll often need to tweak it. The Properties panel provides a handy way to make quick adjustments like inversion, right after mask creation.
Step 1. Select the layer with the mask in the layers panel.
Make sure you've clicked on the layer that contains the mask you want to invert. It will be highlighted, indicating it's active.
Step 2. Open the properties panel (window > properties).
If the Properties panel isn't already visible, navigate to the Window menu at the top of Photoshop and select Properties from the dropdown. This will open the Properties panel, usually docked on the side of your workspace.
Step 3. Invert the mask.
In the Properties panel, you'll see a button labeled Invert within the Mask section. Clicking this button will instantly reverse your mask. White areas become black, and black areas become white, effectively inverting the masked selection. However, remember this is after you've already created a mask, which can take time.
Method 2. Invert a Mask in Photoshop with Keyboard Shortcut
Keyboard shortcuts are essential for efficient Photoshop use. This shortcut speeds up this specific mask inversion task within Photoshop, but efficiency in Photoshop often comes with memorizing many such shortcuts.
Step 1. Select the layer mask.
As with the other methods, start by selecting the layer mask thumbnail in the Layers panel.
Step 2. Press Ctrl + I (windows) or Cmd + I (mac).
Simply press these keys together! This shortcut is a direct command to invert the selected mask, instantly flipping the black and white values. Super quick and efficient.
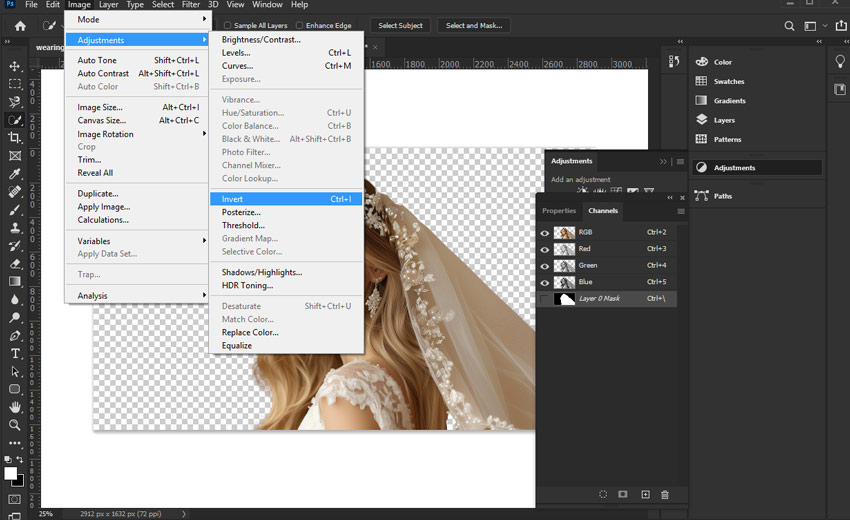
Method 3. Invert a Mask with the Adjustments Panel
For a more non-destructive approach to mask adjustments in Photoshop, using an Invert Adjustment Layer can be beneficial. This method allows you to reverse the mask's effect without directly altering the original mask data – a common practice in Photoshop workflows.
Step 1. Select the layer mask.
Always begin by selecting the mask you intend to modify within Photoshop's layer structure.
Step 2. Invert the mask with the adjustment tool
Go to the top menu, click Image > Adjustment, and click Invert.
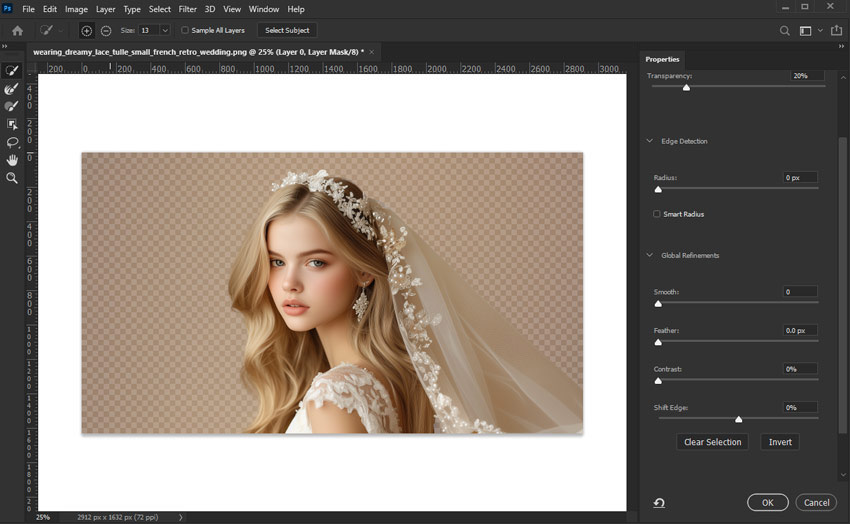
Method 4. Invert mask within the select and mask workspace
When you're using Photoshop's dedicated Select and Mask workspace to tackle particularly challenging selections – like hair or fur – inverting the mask is often part of the advanced refinement process within that specialized Photoshop environment.
Step 1. Open the select and mask workspace.
Go to the Select menu at the top of Photoshop and choose Select and Mask…. This launches the dedicated Select and Mask workspace.
Step 2. Invert the mask in Photoshop
Locate and click the Invert button to invert the mask you are working on within the Select and Mask environment.
Photoshop Masks Too Complex? Try This 1-Click Backgrounds Removal Method
Tired of complex Photoshop masks for simple background removal? Are you finding yourself lost in layers, selections, and endless refinements?
Aiarty Image Matting offers the relief you've been searching for: enjoy true 1-click background removal that completely eliminates the need for complex Photoshop masking – or any manual masking at all!
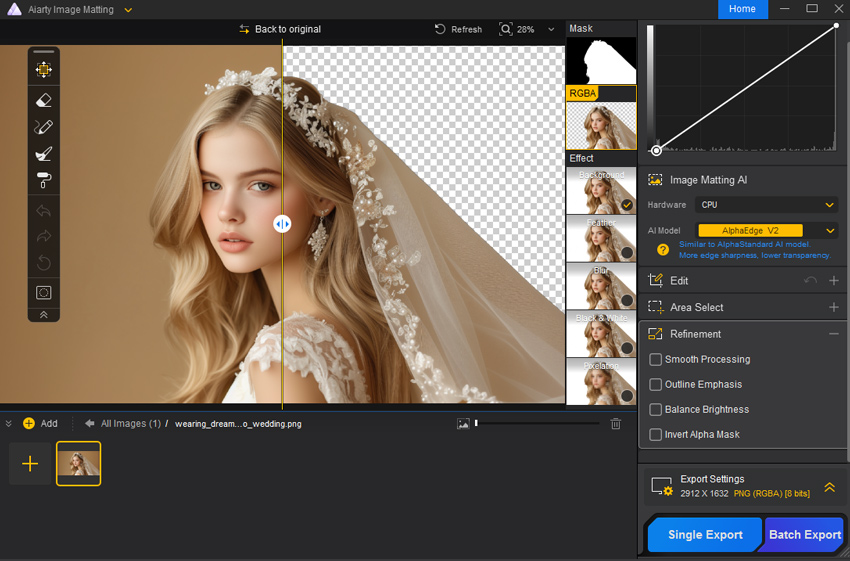
This powerful AI image background remover really does the hard work for you! It automatically and accurately seperate subjects, even tricky stuff like hair, fur, and see-through areas. You'll get pro-level results super fast – like, in seconds – without ever having to mess with those complicated Photoshop masking tools. Plus, you can even process tons of images offline, making it incredibly quick and easy.
Step 1. Launch Aiarty Image Matting and drag your images directly into the interface. Process single images or load batches for efficient workflow.
Step 2. Click the Start button. This AI image background remover will automatically analyze your images, identify subjects, and remove backgrounds with precision in seconds.
Tips:
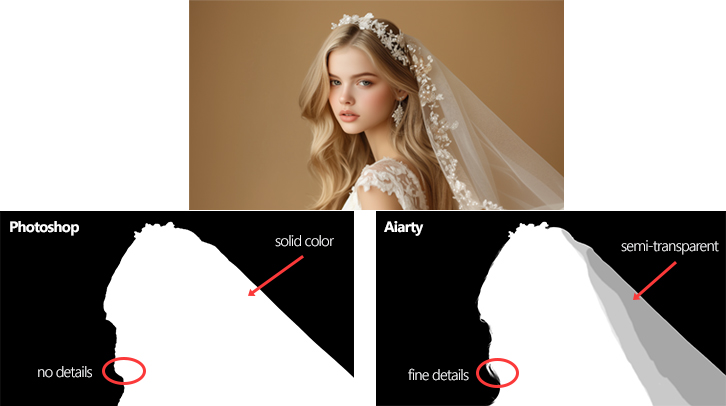
1. Aiary's mask includes an alpha channel and offers brush tools for refining transparency. This is especially useful for semi-transparent materials like the tulle in this test image. In contrast, Photoshop struggles to retain semi-transparent details.
A quick comparison highlights the difference - Aiary generates an accurate mask in seconds for non-destructive background removal, whereas a manually created mask in Photoshop often fails to preserve the same level of detail.
2. If necessary, click Background to add a custom image or color as the new background.
3. If necessary, click Invert Mask to reverse the mask created by Aiary.
Step 3. Click Single Export for the current image or Batch Export to process all.
Tips:
Batch process thousands of images in minutes for massive time savings! Aiarty Image Matting excels in efficient batch processing, perfect for e-commerce, marketing, and large image libraries.
Conclusion
While Photoshop offers powerful masking tools, inverting masks is often a necessary step in a complex and time-consuming background removal process. Aiarty Image Matting provides a streamlined alternative, delivering 1-click background removal with AI precision. For users seeking efficiency and simplicity without sacrificing quality, Aiarty Image Matting is the superior choice.
By choosing Aiarty Image Matting, you can skip the tedious steps of Photoshop masking and achieve professional-level transparent backgrounds instantly and effortlessly.
 FAQs
FAQs
Inverting masks in Photoshop is often necessary because initial selections are rarely perfect. It allows you to reverse the selected and unselected areas, making it easier to correct imperfections and refine your mask to accurately isolate the subject.
Yes, inverting masks is a very common and essential step in Photoshop workflows, especially in tasks like background removal and image compositing. It's a fundamental technique for achieving precise and refined selections.
Yes, Aiarty Image Matting is designed to handle complex selections automatically using AI. Its advanced algorithms are capable of precisely identifying and isolating subjects from backgrounds, even with intricate details, often eliminating the need for manual mask inversion or refinement.
Yes, Aiarty Image Matting is suitable for both beginners and experienced Photoshop users. For those familiar with Photoshop masking, Aiarty Image Matting offers a significantly faster and simpler alternative for background removal and achieving transparency, while still providing high-quality results.
You May Also Like
This post was written by Brenda Peng who is a seasoned editor at Digiarty Software who loves turning ordinary photos into extraordinary works of art. With AI assistance for brainstorming and drafting, the post is reviewed for accuracy by our expert Abby Poole for her expertise in this field.