Hey there, photography enthusiasts! As a long-time editor who loves turning the ordinary into the extraordinary, I know one thing for sure: good product photography is the backbone of online sales. But let's be real, shooting high-quality images takes serious time, expensive gear, and often, a hefty budget for professional studios. It's a massive challenge, especially for small businesses and independent creators.
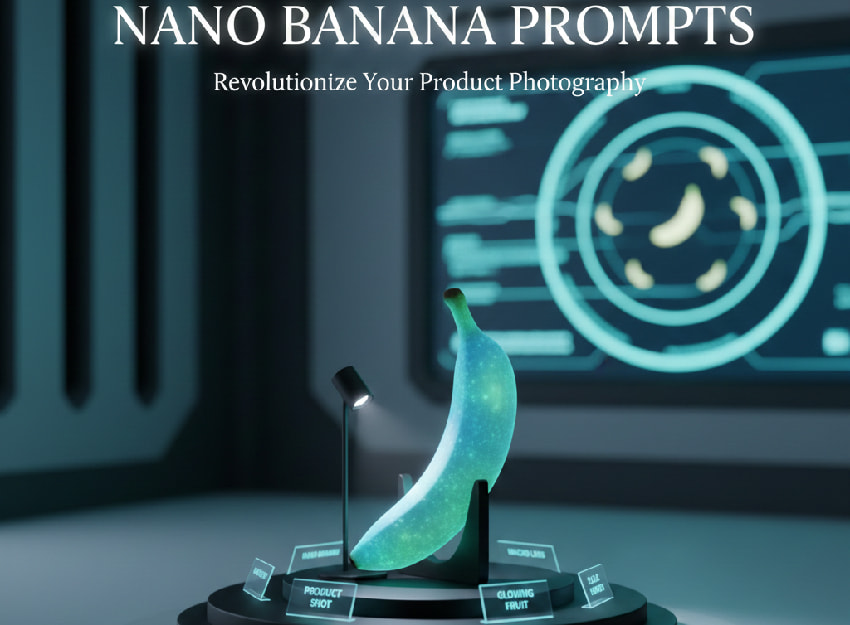
What if I told you that the secret to getting those stunning, magazine-quality product shots is now literally at your fingertips—in a text box? Enter the game-changer: the "nano banana" model, which is the fun nickname for the powerful Gemini 2.5 Flash Image Preview AI.
This tool isn't just churning out generic images; it's a virtual studio that follows your text commands. It totally democratizes professional-grade product visuals. Suddenly, you don't need a $5,000 lens or a studio full of diffusers. You just need a smart prompt.
The trick, however, isn't just typing "make a shoe look good." If you want an extraordinary image, you need precision. Think of the prompt as talking directly to your digital photographer. Every detail you provide—the lighting, the background material, the camera angle—influences the final masterpiece.
- Vague Prompt: A red lipstick. (Result: Boring, generic stock photo.)
- Nano Banana Prompt: A vibrant crimson lipstick tube, slightly open, casting a sharp shadow on a reflective black marble surface, shot with a 100mm macro lens, high-key studio lighting. (Result: Stunning, editorial-quality visual.)
That's the difference! Precision is the key that unlocks the model's true potential.
Ready to transform your product listings, social media feeds, and marketing materials? That's exactly what this article is for!
I've curated a list of creative and practical nano banana prompts for product photography, broken down by style and complexity. We're going to dive into specific templates—from clean e-commerce hero shots to moody, high-contrast editorials—so you can easily create reliable, eye-catching images without ever clicking a camera shutter. Let's get prompting!
Aiarty Image Matting - Best Image Matting Tool for Nano Banana Product Photographs
- Accurate subject separation with transparent details and fine edges in a click
- Produce smooth, gradient-based alpha edges for natural background blending
- Obtain the original quality. Upscale/enhance images to maximize quality with AI
- Provide an AI-powered brush for quick, easy, and flexible manual adjustments
- Bulk processing. Run entirely locally to ensure user data privacy and security
I. Foundational Prompting Principles for AI Imagery
Think of your prompt as a four-part contract with the AI. When I'm crafting a prompt, I make sure to include these elements every single time. Nail these four components, and you'll get a reliable result that you can then polish with style keywords.
These are the non-negotiables. If you miss one, the AI has to guess, and you usually won't like the guess. We want to eliminate guesswork!
1. Product Description (The "What"): This is the simplest part, but don't just say "watch." Be specific about color, material, and form. Example: "A sleek silver smartwatch."
2. Setting or Background (The "Where"): Where is the product resting? Is it isolated? The background sets the mood and context. Example: "Sitting on a slab of polished white marble."
3. Visual Style/Aesthetics (The "How it Looks"): This covers the technical feel of the image. Are you going for light and airy, or dark and dramatic? Example: "Minimalist, high-key lighting, depth of field."
4. Camera/Lens Specifications (The "How it's Shot"): This is where you simulate expensive gear. Mentioning focal length, aperture, or camera model instantly elevates the realism. Example: "Shot on a 50mm lens, F/1.4, detailed macro."
When you string those four parts together, you get a powerful, descriptive prompt. It's like writing code for an image!
Once your core prompt is solid, we can start adding flavor. Keywords act as modifiers, fine-tuning the look and emotional impact of the final image. They are critical for achieving that editorial quality we're aiming for.
We use these keywords to define artistic styles, such as:
- Cinematic: Think moody, deep colors, and complex lighting (like a movie still).
- Editorial: Clean, fashion-forward, and often high-contrast, ready for a magazine page.
- E-commerce: Simple, isolated, and focused entirely on the product for fast consumption.
- Flat Lay: Specifies the top-down perspective and focuses on prop arrangement.
It's also smart to think about negative prompts. We won't focus on them much in this guide, but they are keywords you use to tell the AI what you don't want. For instance, adding "negative prompt: blurry, text, logo, amateur" is a quick way to clean up the generation and ensure professional quality.
With these foundations in place, you're ready to move from theory to practical application. Let's start generating some serious visuals!
II. Nano Banana Prompts for Essential Product Styles (List Article Core)
The following prompts are designed to be practical templates. Just swap out the bracketed information ([Product Type]) for your item, and watch the AI work its magic.
1. The E-commerce Hero Shot (Clean & Conversion-Focused)
When shopping online, the first image a customer sees is the most important. This is your Hero Shot. Its whole job is to present the product clearly, build trust, and meet the strict guidelines of marketplaces like Amazon or Etsy, which usually require a white background. Our goal here is isolation, sharpness, and clear branding—nothing distracting, just pure product focus.
Prompt Templates & Examples
The template below is the ultimate starting point for a high-key, clean look. Notice how we specify 8k photo and sharp focus to get maximum resolution and detail—critical for zoom features on e-commerce sites.
Template: [Product Type], standing vertical, isolated on a perfect white or gradient background, studio flash lighting, 8k photo, sharp focus.
Let's see it in action with a couple of real-world product types:
Example 1 (Cosmetics):
Glass dropper bottle of serum, dew drops clinging to the glass, isolated on a pale teal-to-white gradient background, soft box lighting, commercial photography, extremely high detail.
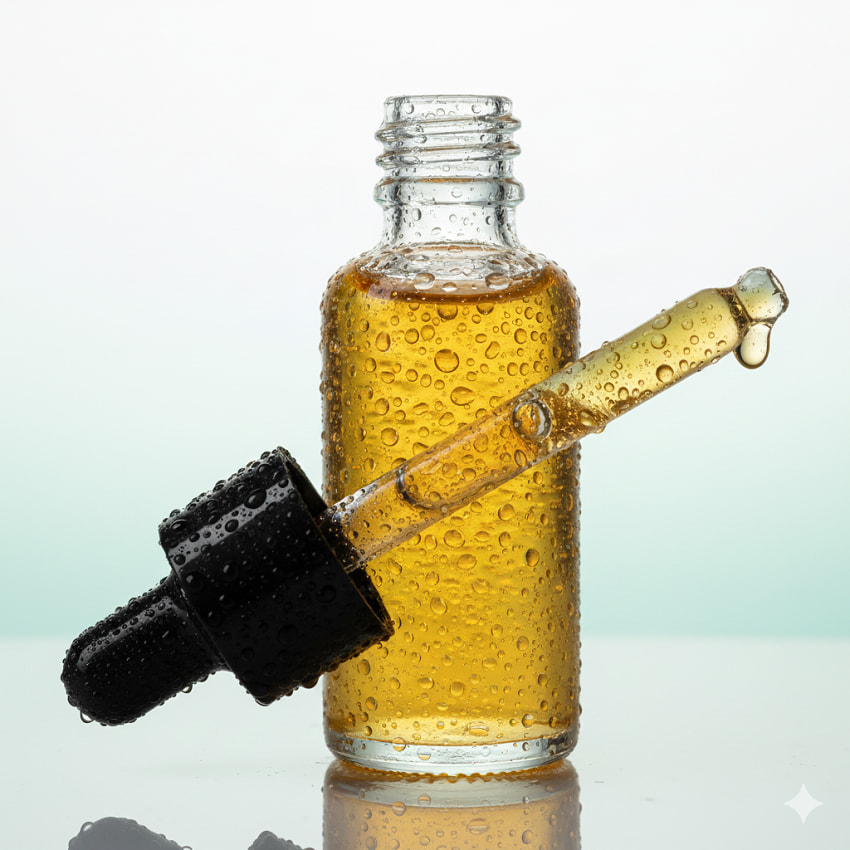
Why it works: Adding "dew drops clinging to the glass" instantly injects a sense of freshness, hydration, and premium quality, all without adding clutter to the background.
Example 2 (Hardware):
Brushed aluminum portable speaker, isolated, casting a subtle shadow, photorealistic, shot with a Canon R5.
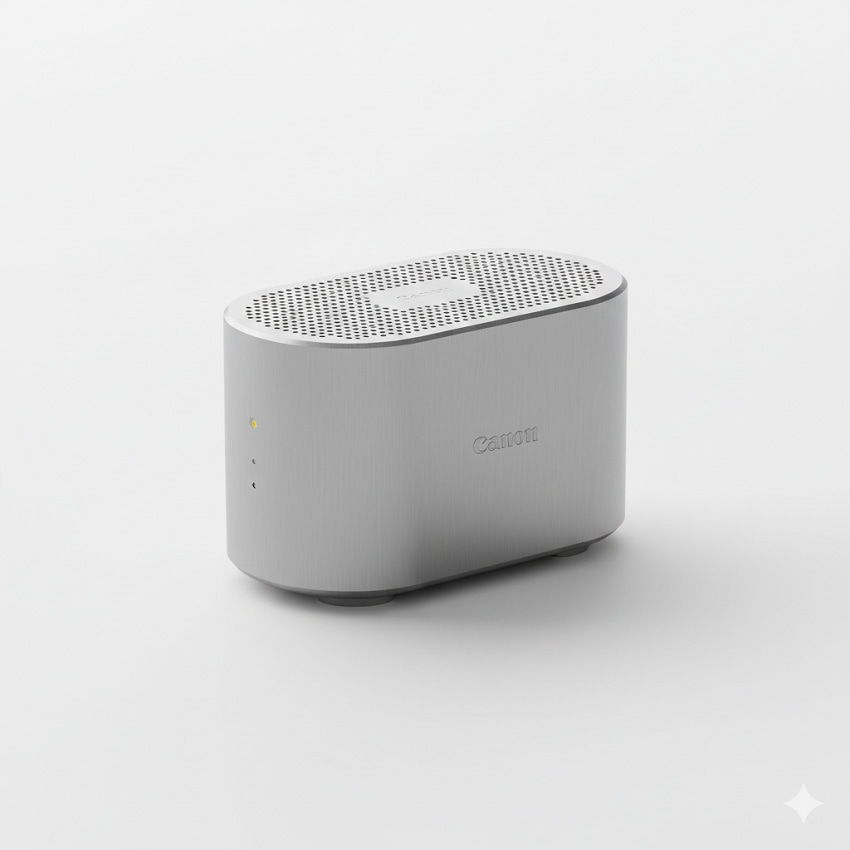
Why it works: Naming a specific high-end camera (Canon R5) is a neat trick. It cues the AI to replicate the exact depth, sharpness, and color profile of professional equipment, guaranteeing that photorealistic look we want.
2. Lifestyle & Contextual Prompts (Storytelling & Aspiration)
Once you have your perfect white-background shots, you need to transition from selling an object to selling a lifestyle. This is where context comes in. People don't just buy a watch; they buy the feeling of success and adventure it represents.
The nano banana model excels at environment building. Your focus here should be on usage, environment, and emotional resonance. We want to generate visuals that make the customer think, "That's my life, or the life I aspire to have!" This style is perfect for Instagram and high-end marketing campaigns.
Prompt Templates & Examples
The secret sauce in these prompts is defining the scene before the subject. Notice how we use shallow depth of field to keep the focus razor-sharp on the product, blurring the background just enough to provide context without distraction.
Template: [Product Type] being used by a [Demographic/Activity], focus on the product, shallow depth of field, warm morning light.
Let's see how to craft compelling scenes:
Example 1 (Food):
A single, perfectly baked artisanal sourdough loaf resting on a rustic wooden cutting board, scattered flour, deep, warm kitchen lighting, soft cinematic bokeh.
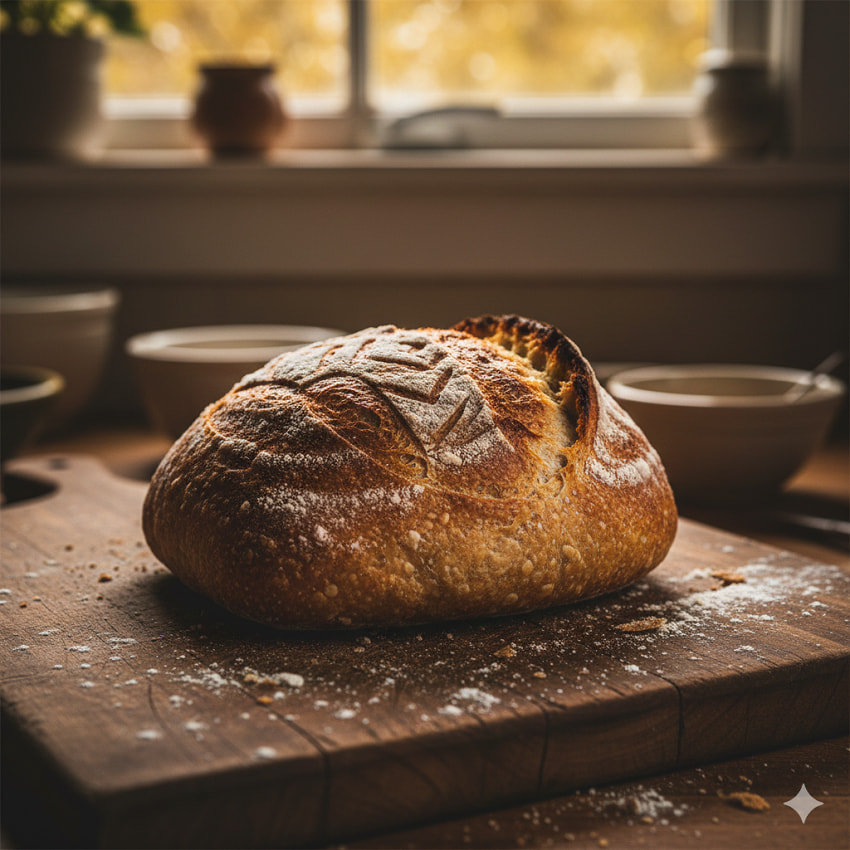
Why it works: This isn't just a photo of bread; it's a scene of cozy, home-baked quality. The keywords rustic wooden cutting board, scattered flour, and deep, warm kitchen lighting convey authenticity and comfort. The finishing touch, soft cinematic bokeh, ensures a professional, appealing aesthetic.
Example 2 (Apparel):
Close-up of a dark leather wallet being slipped into the pocket of distressed denim jeans, subtle street lighting, editorial style photo, hyper-detailed texture.
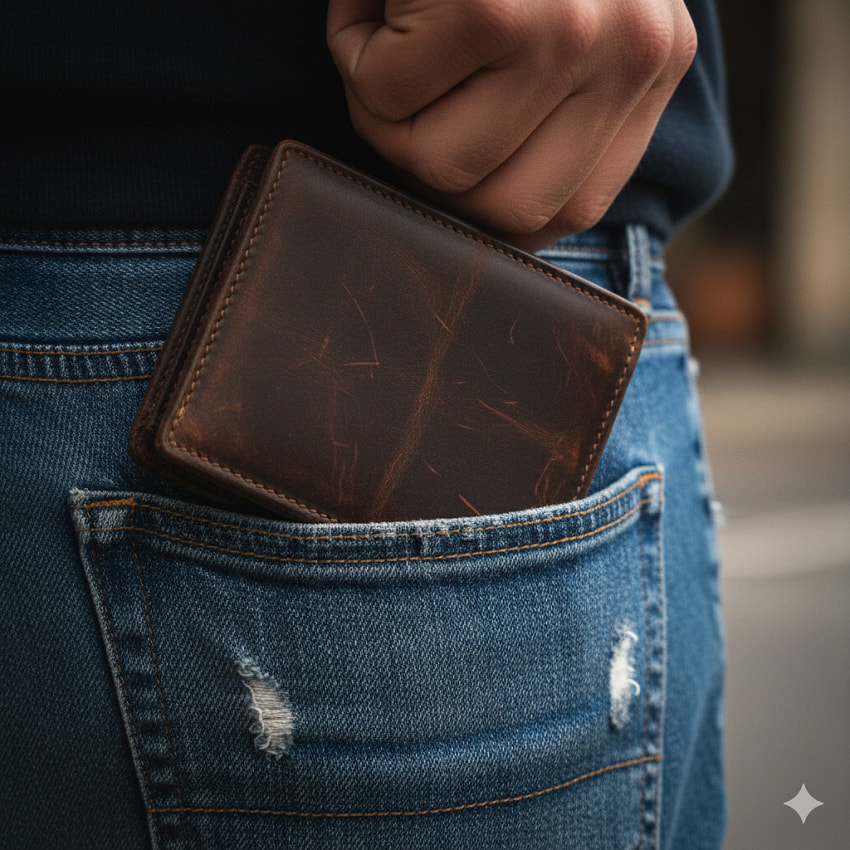
Why it works: This prompt tells a story of utility and durability. You can almost feel the leather and the denim. By specifying subtle street lighting, we move the setting out of a sterile studio and into a real, aspirational moment, giving the image an editorial style edge.
3. High-Contrast & Dramatic Prompts (Visual Impact)
Okay, let's pivot from the aspirational lifestyle shots to something with a bit more punch. If your brand is high-end, mysterious, or focuses on luxury, you need drama. This style is all about creating high visual impact through the expert use of light and, more importantly, shadows. It sets a mood, almost giving your product a cinematic presence. Our focus here is deliberately on shadow play, deep colors, and mood.
Prompt Templates & Examples
Achieving this look with the nano banana model requires deliberately forcing the contrast. We're going to use terms that evoke film techniques, like harsh, single key light and chiaroscuro lighting (the classic contrast of light and dark, like in Renaissance painting). The goal is bold shadow play and deep colors. You want the AI to understand that the product should be a beacon in the darkness.
Template: [Product Type] illuminated by a harsh, single key light from the side, deep shadows, dark moody background, high contrast, film grain effect.
Let's break down how specific terms maximize the drama:
Example 1 (Jewelry):
Diamond solitaire ring on a bed of dark, volcanic rock, sharp spotlight from above, macro photography, extremely reflective surfaces, cinematic noir.
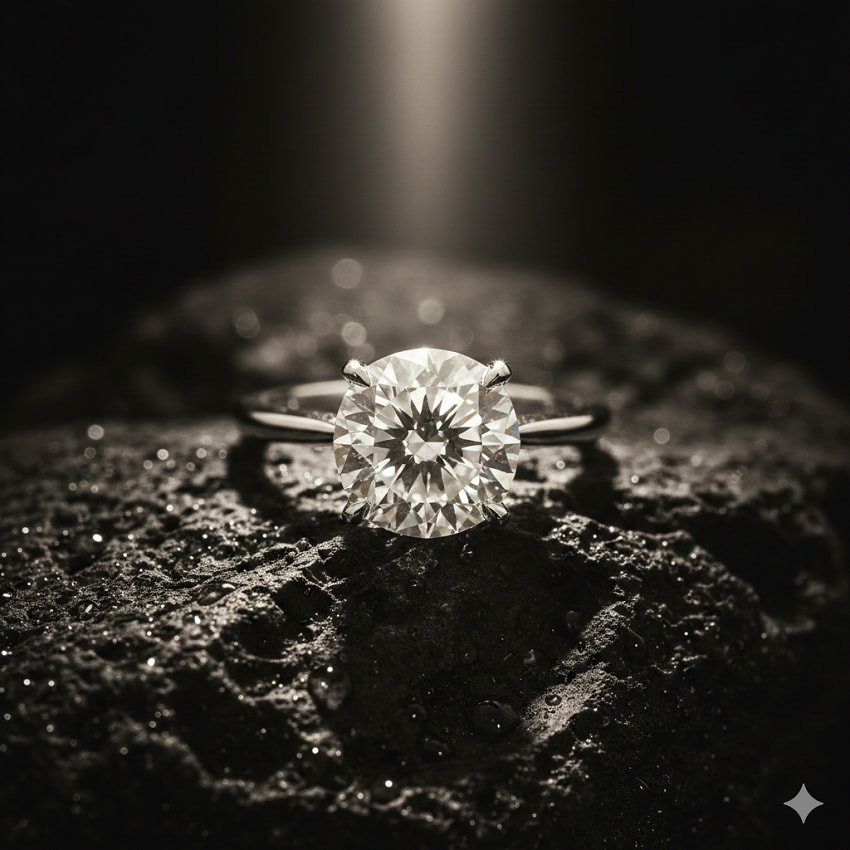
Why it works: The combination of dark, wet volcanic rock and the sharp spotlight guarantees incredible texture and deep, rich black tones. Plus, adding cinematic noir instantly tells the AI to dial up the drama and mood to movie-poster level, emphasizing the product's brilliance against a stark backdrop.
Example 2 (Fragrance):
Square bottle of amber perfume, mist gently floating around the base, high-contrast chiaroscuro lighting, black reflective surface.
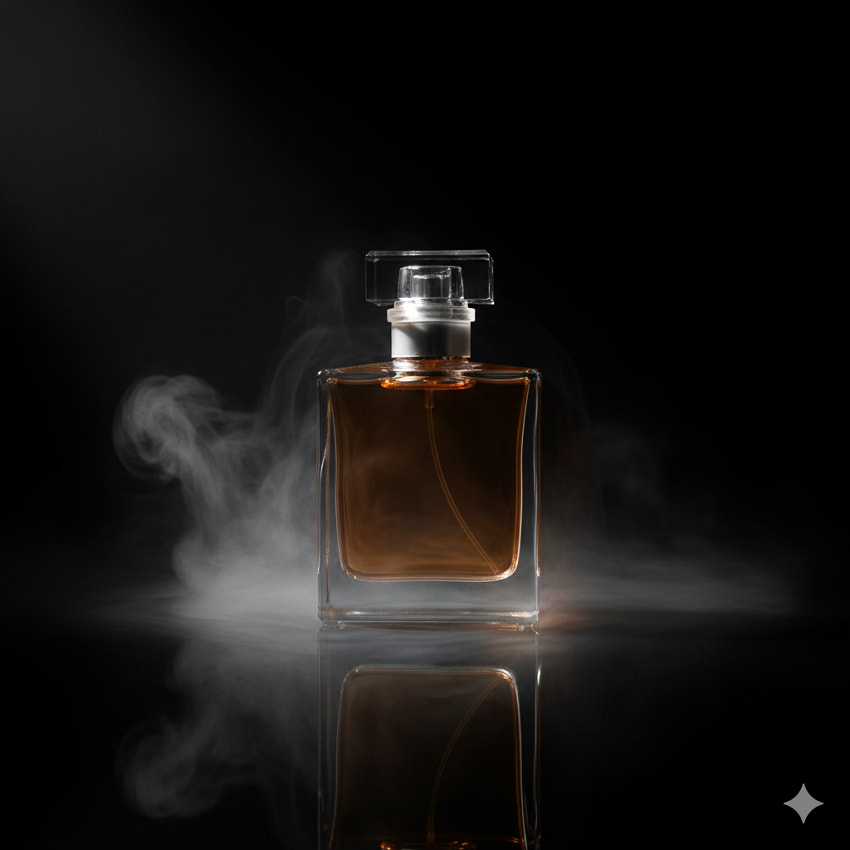
Why it works: For something like a perfume bottle, reflections are your best friend. The addition of mist gently floating softens the severity of the light, while the black reflective surface captures and duplicates the strong light source, doubling the visual intrigue. It's effective, high-impact branding that screams premium.
4. The Macro/Detail Shot (Focus on Texture & Quality)
If your product's selling point is quality craftsmanship, unique material, or intricate design, you need to zoom in. Macro shots build immense consumer trust by showcasing texture, stitching, or fine engineering—details often lost in full product images. This is where we simulate expensive macro lenses to create extreme close-ups, focusing intently on texture and quality.
Prompt Templates & Examples
To achieve true macro realism, we must explicitly use terms like macro, ultra-macro, and specific focal lengths (100mm macro lens). Using backlit or rim lighting is crucial as it emphasizes the three-dimensional texture by creating dramatic highlights along the edges.
Template: Ultra-macro shot of [Product Feature/Texture], extreme depth of field, sharp detail, backlit to reveal texture, 100mm macro lens.
Let's look at examples that showcase texture and fine work:
Example 1 (Electronics):
Close-up on the woven mesh grill of a premium headphone earcup, small dust particles visible, illuminated by soft rim lighting, high-end commercial photo.
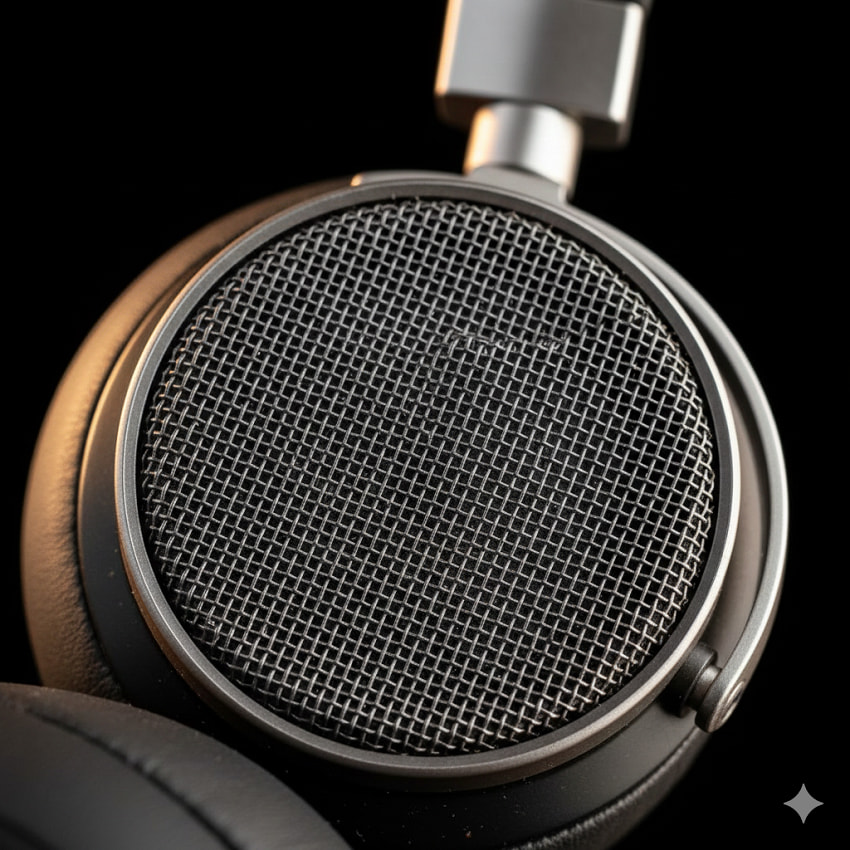
Why it works: Specifying woven mesh grill and small dust particles visible injects a layer of extreme realism. The soft rim lighting separates the earcup from the background and highlights the texture of the weave.
Example 2 (Textiles):
Ultra-close-up of silk fabric with complex embroidery pattern, lit by diffused daylight, focusing sharply on three individual threads, rich color saturation.
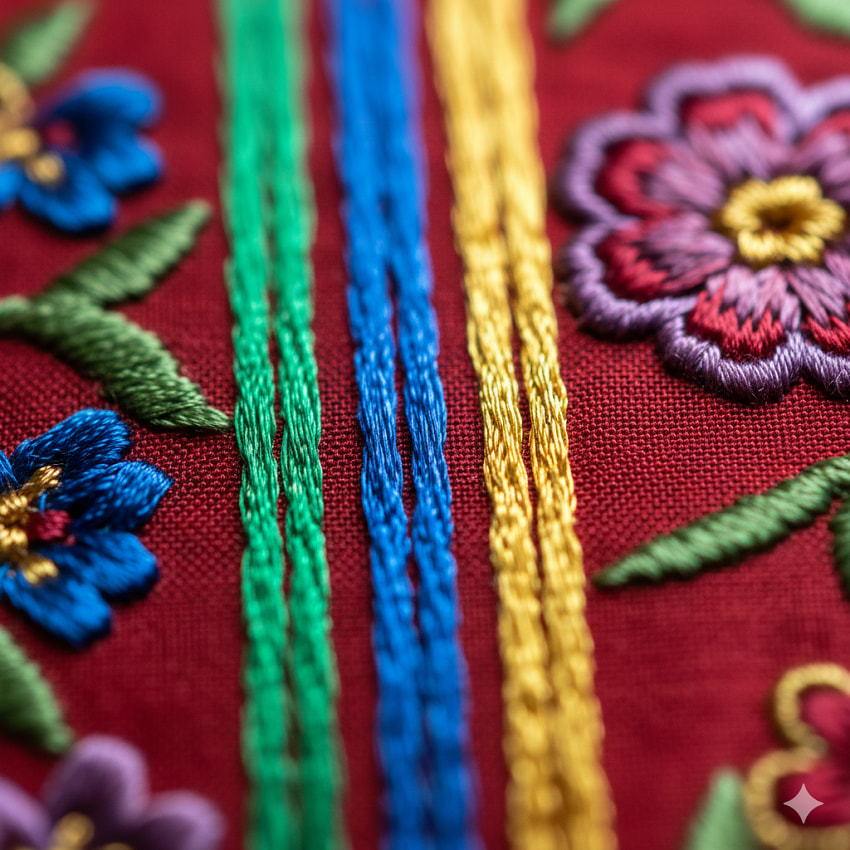
Why it works: Asking the AI to focus on three individual threads is a powerful trick that forces the model to generate a level of detail that conveys luxury and craftsmanship, confirming the material quality without a long description.
5. The Flat-Lay/Overhead Composition (Focus on Organization & Curation)
Flat lays (or overhead compositions) are social media gold. They allow you to tell a full story by curating a collection of props and accessories that enhance the main product. The view is always 90 degrees directly above the scene, and the key is composition, visual flow, and soft, even lighting to eliminate harsh shadows. Your focus here is on curation of props, organization, top-down perspective, and visual flow. This style is essential for stationery, beauty kits, food, and organized tech gear.
Prompt Templates & Examples
To achieve a magazine-worthy flat lay, focus on the perfect overhead perspective and a highly organized scene. The keywords for lighting, such as bright diffused light, are crucial to achieving the shadowless, clean look this style demands.
Template: Overhead flat lay of [Product Type] surrounded by related thematic props, bright diffused light, minimalist background (e.g., concrete or wood), organized composition.
Let's look at examples that emphasize organization and context:
Example 1 (Desk Supplies):
Top-down view of a set of colorful gel pens and a spiral notebook, placed symmetrically on a light oak desk, soft, shadowless light, playful, vibrant aesthetic.
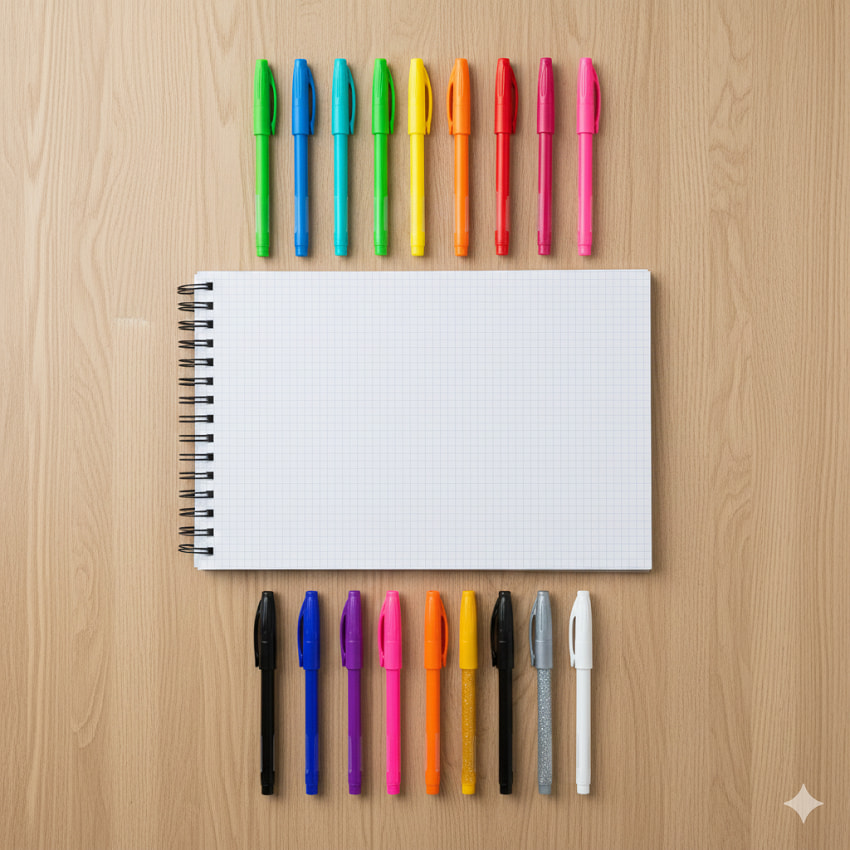
Why it works: Specifying symmetrically placed is a strong composition instruction that the AI follows well. Soft, shadowless light is critical for the flat-lay look, preventing distractions and keeping the focus squarely on the organized arrangement.
Example 2 (Kitchenware):
Ceramic measuring cups and spoons arranged neatly on a dark slate counter, small amount of scattered sea salt, captured in diffused light, high resolution.
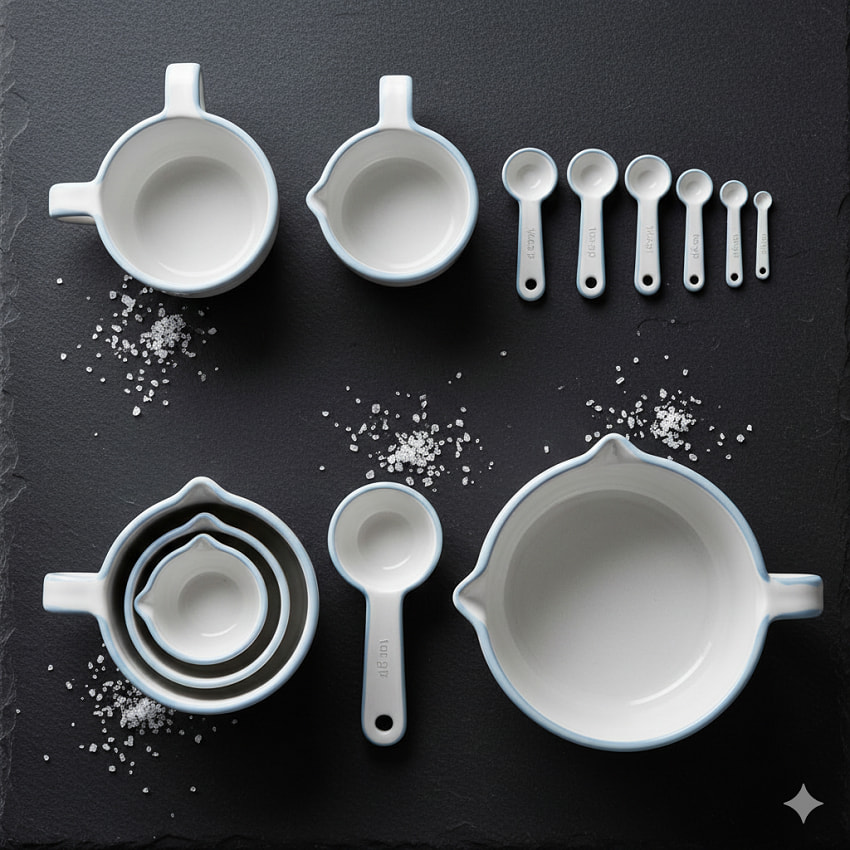
Why it works: The dark slate counter provides high contrast for the light ceramic products. The inclusion of a small dynamic element like scattered sea salt adds texture and a sense of "in-use" realism without breaking the clean composition.
III. Advanced Prompting: Controlling Sensory Details
Ready to go from good to exceptional? Advanced prompting is all about controlling the sensory details—the texture you can almost feel and the light that sets the mood. This is where your AI becomes a true collaborator, allowing you to fine-tune the image down to the smallest detail, ensuring your final render looks more like a professional editorial shot and less like a generic graphic.
1. Mastering Texture and Material Prompts
Texture is the difference between a flat product image and one that screams quality. In the digital space, consumers rely on visual cues to confirm the material's properties (softness, rigidity, shine) before making a purchase. To effectively sell quality through AI, you must use a vocabulary that forces the model to render these properties with photorealistic fidelity.
Use highly specific adjectives in your prompt to cue the AI on the exact look and feel you want to achieve:
- Soft & Fibrous: For textiles, use knitted wool, individual fibers visible, cashmere weave, velvet-soft, frayed edges, or tightly woven linen.
- Hard & Reflective: For metals, glass, or ceramics, specify the finish: smooth brushed chrome, high-polish mirror reflection, satin finish aluminum, matte black ceramic with fine grain, or subtle fingerprint smudge (to enhance realism).
- Organic & Natural: For wood, stone, or leather, focus on character: rough-hewn wood grain, weathered patina, deep brown leather with subtle scratches and aged texture, or polished white marble, veining clearly visible.
Prompt Example (Leather Goods):
Ultra-macro shot of a deep brown leather wallet, subtle scratches and aged texture visible, illuminated by a low-angle spotlight to maximize texture contrast, 100mm lens.
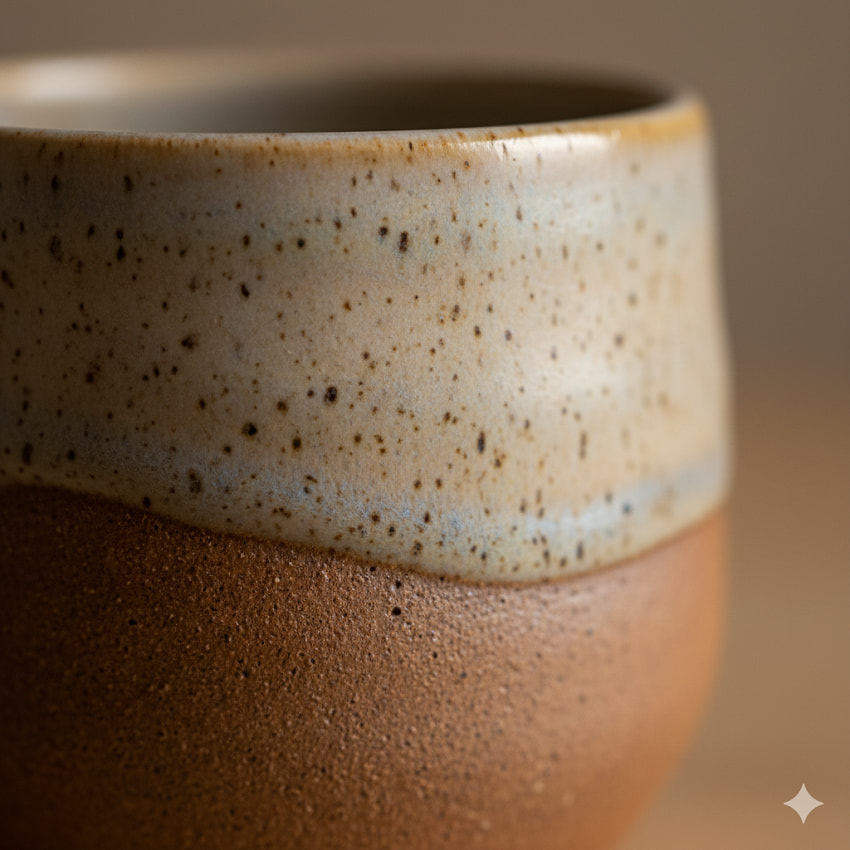
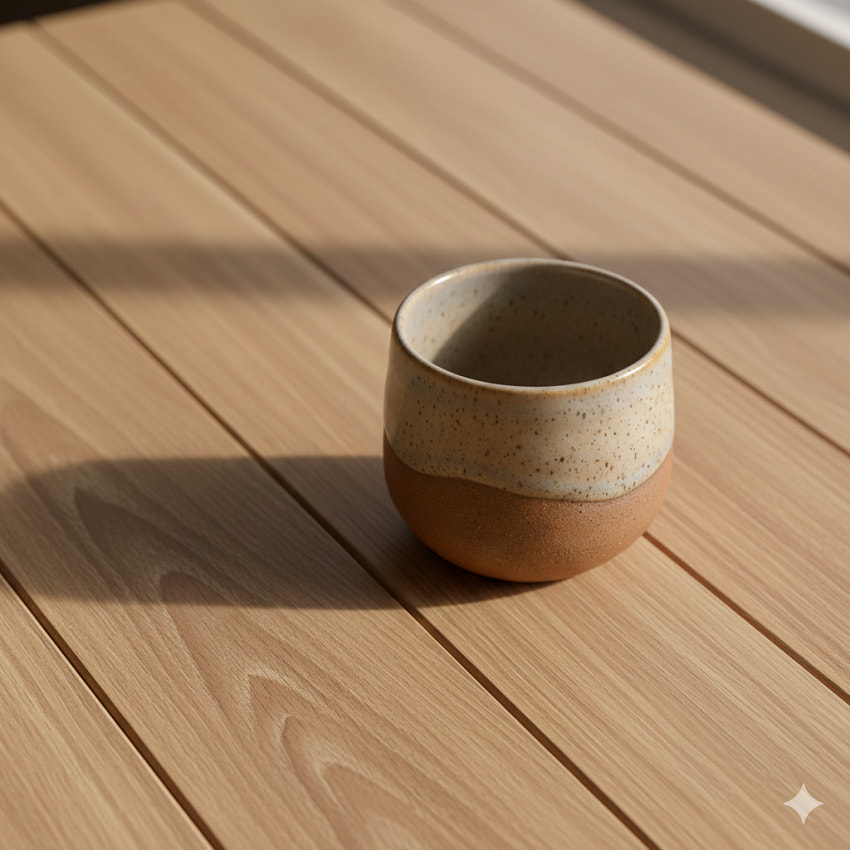
Prompt Example (Ceramics/Glass):
Macro photograph of a hand-thrown ceramic mug, speckled matte glaze texture, with a soft, diffused sidelight to reveal the slight unevenness of the surface, photorealistic.
2. Precise Lighting Techniques
Lighting is arguably the single most important element in product photography. It defines the mood, highlights details, and manages reflections. By naming professional lighting setups, you instruct the nano banana model to replicate specific studio conditions, eliminating the need for complex rendering or multiple post-processing steps.
1. Mastering Studio Lighting Setups
Professional studios rely on specific, named configurations to achieve predictable results. Using these terms gives the AI clear instructions on the number of lights, their positions, and their intensity.
Three-Point Lighting: The gold standard for dimensional, balanced light. It involves a Key Light (main source), a Fill Light (to soften shadows), and a Backlight or Rim Light (to separate the product from the background). Prompt Element: detailed studio photography, classic three-point lighting setup, high-key. (Achieves depth without harsh shadows.)
Soft Box Diffusion: Essential for a clean, non-reflective look on glossy or curved surfaces. The soft box mimics a large, diffused window. Prompt Element: product illuminated entirely by a single large soft box, shadowless light, uniform diffusion. (Perfect for e-commerce.)
Ring Light: Used for an intense, frontal light that eliminates shadows and creates a specific circular highlight. Prompt Element: close-up shot, sharp ring light reflection visible on the glossy surface, high-resolution photo. (Excellent for beauty products and electronics.)
Snoot/Spotlight: Creates a narrow, hard beam of light for drama. Prompt Element: dark background, product isolated in a sharp, circular spotlight (snoot lighting), deep contrast. (Ideal for luxury goods.)
2. Natural and Ambient Light Prompts
To ground your product in a real-world, atmospheric setting, specify the time of day and the quality of the light source.
Golden Hour: The soft, warm light shortly after sunrise or before sunset. Prompt Element: golden hour sunlight, long, soft shadows stretching diagonally across the frame, warm bokeh.
Overcast Window Light: The perfect, even, shadowless light achieved near a large window on a cloudy day. Prompt Element: overcast window light, gentle diffusion, subtle reflection on the wooden floor, cozy atmosphere.
Midday Sun/Hard Light: Used for intense contrast and sharp, geometric shadows. Prompt Element: product casting a razor-sharp shadow from midday tropical sun, high-contrast monochrome style.
3. Controlling Color and Mood (Gels and Temperature)
Beyond brightness, control the emotional mood by specifying the color and temperature (warm/cool) of the light source, mimicking colored gels used in professional studios.
Warm Tones: For comfort, luxury, or food. Use amber candlelight, deep orange glow, tungsten warmth. Prompt Example (Ambient Mood): Jewelry box on a velvet surface, illuminated only by warm, amber candlelight, deep bokeh, cinematic mood.
Cool Tones: For high-tech, clinical, or mysterious looks. Use neon blue edge light, cyan wash, fluorescent white. Prompt Example (Vibrant Energy): White sneaker against a pastel pink backdrop, lit with a neon blue edge light for a vaporwave aesthetic, zero shadows.
Contrasting Gels: Combine two opposing colors for an artistic, dramatic effect. Advanced Prompt: A silver metallic product, lit from the left with a deep magenta gel, and from the right with a bright teal gel, cinematic lighting, high saturation. (This is a powerful editorial look.)
4. Managing Reflections (The Key to Glossy Products)
For products with high-gloss surfaces (e.g., glass, polished metal, screens), precise reflection control is mandatory to prevent distractions and unwanted glare.
Prompt Elements to Control Reflections: matte light reflection (for minimal shine); specular highlight on the glass surface (for a defined, controlled sparkle); seamless reflection in the black marble surface (for a clean mirror effect); reflection of studio softbox visible on the chrome surface (shows controlled, professional lighting).
3. Integrating Negative Space & Composition
Composition dictates where the viewer's eye goes. It's the framework that turns a simple image into a professional piece of art. Negative space—the empty, often plain area surrounding your product—is just as important as the product itself. Using these compositional rules ensures your image feels balanced, professional, and draws the viewer's eye exactly where you want it.
1. Leveraging Negative Space for Focus
Negative space provides "breathing room," making the product stand out without competition. It's the cornerstone of minimalist product photography, perfect for high-end or clean branding.
Prompt Element (Emphasis): product placed in the center of a vast, empty white room, or minimalist composition, product isolated against a smooth gradient background.
Prompt Element (Off-Center): off-center placement, large portion of the frame dedicated to negative space.
2. The Rule of Thirds
The most fundamental rule: imagining the image divided into nine equal segments by two horizontal and two vertical lines. Placing the main product or key details along these lines or at their intersections creates visual interest and dynamism.
Prompting for Grid Placement:
Example 1: product occupying the lower right intersection of the rule of thirds grid, sharp focus.
Example 2: product along the upper horizontal line, large empty space below it.
3. Leading Lines
Leading lines are actual or implied elements (like a table edge, a shadow, or a road) that draw the viewer's eye from one part of the image to the main subject. This is excellent for guiding the viewer quickly to the product.
Prompt Example (Leading Lines): Ceramic coffee mug, placed off-center, with wooden leading lines of a table guiding the eye toward the product, top-down view.
Prompt Example (Implied Lines): Product resting at the convergence point of strong diagonal shadows, cinematic, high contrast.
4. Symmetry and Balance
Symmetry provides a sense of calm, formality, and luxury. It works exceptionally well when using reflective surfaces or pairing identical products.
Prompting for Symmetry:
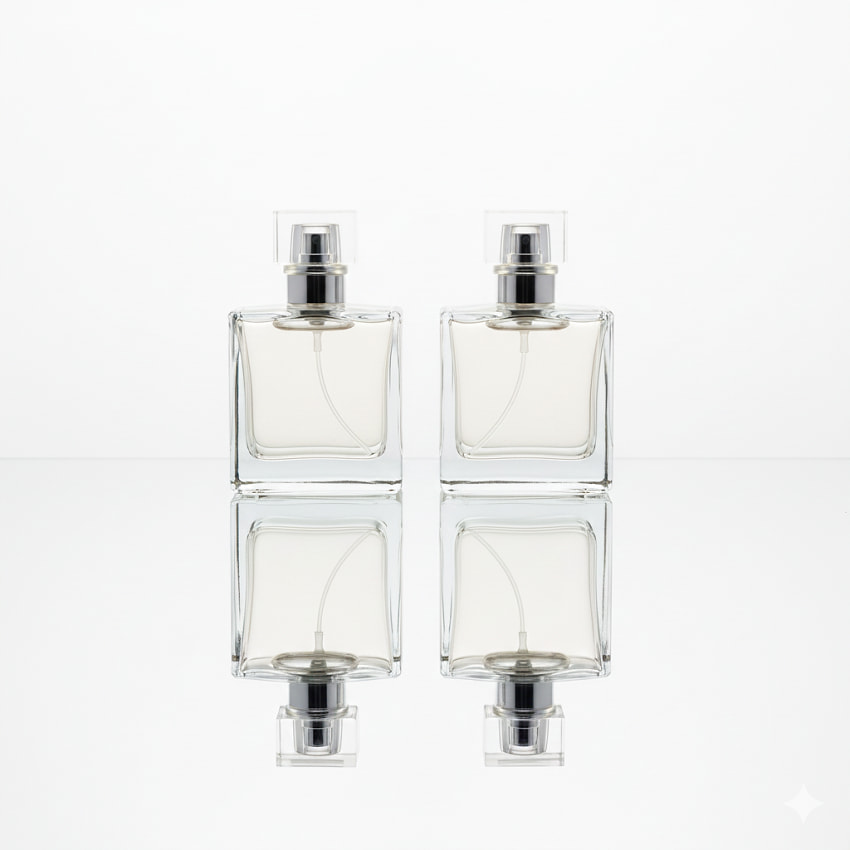
Example 1 (Reflection): Perfectly symmetrical composition of two identical perfume bottles, reflected in a mirror surface, centered focus, high-key light.
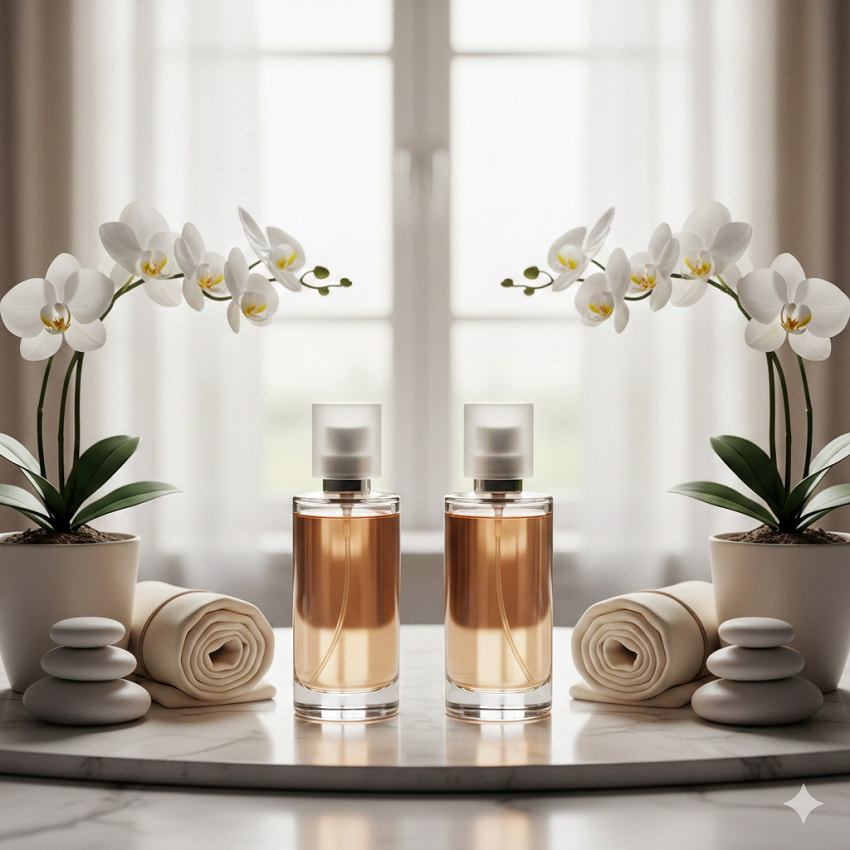
Example 2 (Formal Balance): [Product Type] placed dead center, with matching props arranged symmetrically on both the left and right sides.
5. Advanced Technique: The Golden Ratio/Spiral
For a more organic, visually appealing flow than the Rule of Thirds, prompt the AI to use the Golden Ratio (Phi) or the Golden Spiral (often called the Fibonacci Spiral). This creates a natural, balanced composition that naturally draws the eye along a curved path.
Prompt Element (Advanced Composition): composition utilizing the golden ratio, spiral perspective focusing on the central object, editorial quality.
IV. Step-by-Step Guide: Creating a Stunning Product Flat Lay
The flat lay is a perfect example of how complex visual ideas can be broken down into manageable prompt steps. It requires planning, just like a real photoshoot.
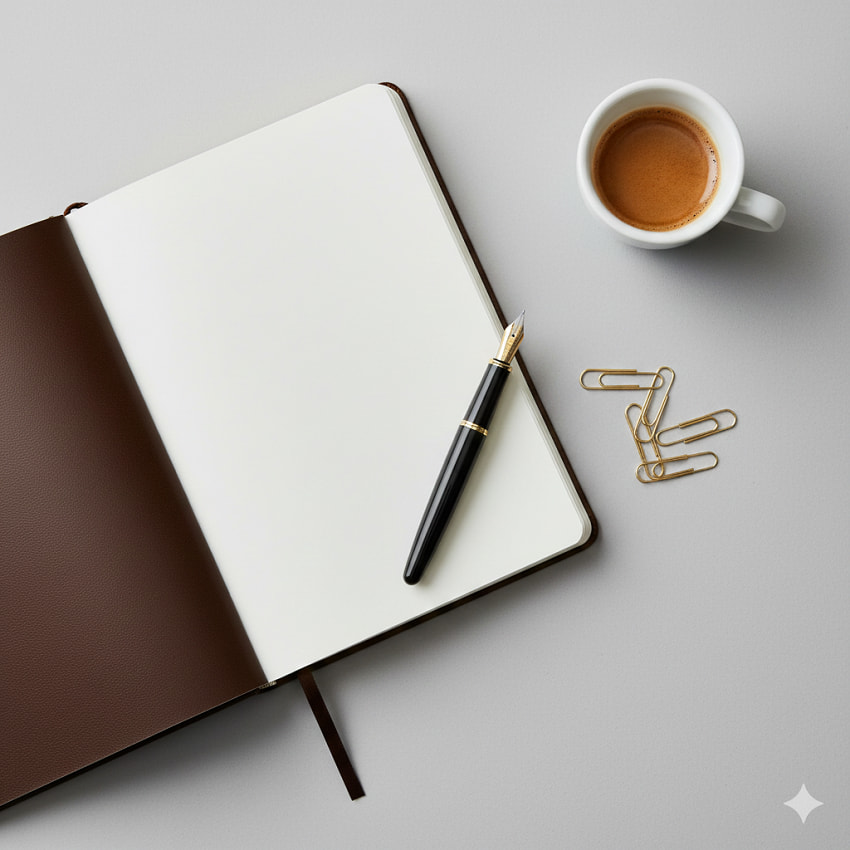
Step 1: Define the core product and establish the visual brand narrative. (e.g., A leather-bound journal and fountain pen, surrounded by artistic desk supplies). Specify the primary item and 3-5 complementary objects (e.g., gold paperclips, small ceramic mug of black coffee, monstera leaf). The props reinforce the product's use case and brand aesthetic. Define the mood or theme (e.g., minimalist, back-to-school, cozy winter morning). This keyword sets the color palette and overall emotional feel of the scene.
Step 2: Dictate the arrangement and the mood-setting light source. (overhead flat lay shot, perfectly balanced, bright, even lighting). Use composition keywords like symmetrical arrangement, organized chaos, or diagonal flow. This controls the visual hierarchy and where the viewer's eye travels within the frame. Specify light quality: shadowless light (for clean e-commerce looks), diffused daylight from a window (for soft, warm shadows), studio strobe light (for punchy definition).
Step 3: Add style and technical keywords to mimic professional post-processing and equipment. (editorial quality, high resolution, minimalist aesthetic). Include camera/lens specifics for realism: shot on 85mm lens, f/2.8 (for slight blur/depth), or F/11 (for complete sharpness across the surface). Add format keywords: 4K photo, commercial photography, Pinterest-ready image, and specific film keywords like Kodak Portra 400 for a warm, filmic look.
Final Prompt Example
High-end leather-bound journal open to a blank page, next to a gold-nib fountain pen, minimalist desk flat lay with gold paperclips and a small cup of espresso, overhead view, even soft box lighting, photorealistic editorial photography, 8K.
V. Troubleshooting and Refining Your Nano Banana Prompts
Every artist—even an AI artist—needs to troubleshoot. If your first results aren't perfect, here is how to quickly refine your prompts without starting over.
1. When the Results Fall Flat
Tip 1: Reduce complexity (simplify the scene/background). If you include too many conflicting descriptive words or props, the model can get confused, leading to visual artifacts or strange mergers. Start with the core product and background, then add one prop at a time.
Tip 2: Vary the style keywords (try photorealistic vs. CGI render). Photorealistic tells the AI to mimic a physical camera, lens defects, and real-world lighting imperfections. CGI render yields a cleaner, often hyper-perfect, digital look. Experiment with both to see which better fits your product's brand.
Tip 3: Check for unwanted text or logos (a common AI generation issue). AI models sometimes struggle with generating legible text or will create garbled watermarks. If this happens, use negative prompting: add no text, no logo, no lettering, or no watermark to your prompt.
2.Iteration and Prompt Chaining
Use successful prompt elements as a base for future, more complex prompts. The most powerful trick is chaining: identify the part of a successful image (the lighting, the background texture, or the aesthetic style) that worked perfectly. Copy that specific descriptive chunk and use it as the foundation for your next prompt, only changing the product itself.
Focus on what worked in the initial result and build upon it. If the composition was great but the color was wrong, don't change the composition section of your prompt—only adjust the color descriptors (e.g., change warm morning light to cool, diffused daylight).
Conclusion
By breaking down your visual idea into four core components—Product, Setting, Style, and Shot—you gain immediate control over the outcome.
We've covered the spectrum, from clean, isolated e-commerce hero shots to moody, high-contrast luxury displays, giving you a full toolkit for any visual need.
Remember, there's no limit to the number of "photos" you can take. Treat the prompt box as your virtual studio, changing lenses, light sources, and backgrounds in seconds. Don't be afraid to try weird combinations of keywords; sometimes the most unexpected prompt yields the most unique, extraordinary result.
Now share your favorite prompts or successful images! We'd love to see the creative visuals you're generating with these nano banana prompts.
This post was written by Brenda Peng who is a seasoned editor at Digiarty Software who loves turning ordinary photos into extraordinary works of art. With AI assistance for brainstorming and drafting, the post is reviewed for accuracy by our expert Abby Poole for her expertise in this field.