Have you ever stumbled upon an old photo or saved an image online, only to zoom in and be met with a blurry mess of pixel blocks? Whether you're trying to use it for a design project, touch it up, or simply set it as your wallpaper, that pixelated look can be a real letdown. And that’s when the question hits: Can I unpixelate an image in Photoshop while keeping a natural look?
The truth is, Photoshop isn’t a magic wand that can instantly restore perfect detail to a low-res image. But with the right tools and a bit of patience, you can reduce that harsh pixelation, improve clarity, and achieve more natural-looking, realistic results. In this guide, I’ll walk you through a few handy methods to fix pixelated pictures — all using tools right inside Photoshop (and a couple of helpful extras if needed).
💡 Trying to unpixelate an image in Photoshop?
- You’ll likely need to combine multiple techniques like blurring, sharpening, and layer blending.
- Manual tweaks with filters such as Surface Blur, Smart Sharpen, or Reduce Noise are often required.
- It takes trial-and-error to reduce pixelation without losing important details.
- Zooming in and constant adjustments can be time-consuming and frustrating for beginners.
Want to fix pixelated images with clearer results, lower cost, and one-click AI?
Aiarty Image Enhancer is an AI-powered tool that restores clarity and smooths out pixelation in one click—no manual editing needed. Trained on 6.78 million real and AI-generated photos, Aiarty delivers cleaner, more natural-looking results than many other AI enhancers on the market.
Give Aiarty Image Enhancer a try to unpixelate your images effortlessly and intelligently:
Method 1: Reduce Noise + Smart Sharpen
If you're looking for how to unpixelate an image in Photoshop, this is one of the simplest and most effective starting points. By combining two built-in filters — Reduce Noise and Smart Sharpen — you can often make a pixelated image look noticeably smoother and clearer.
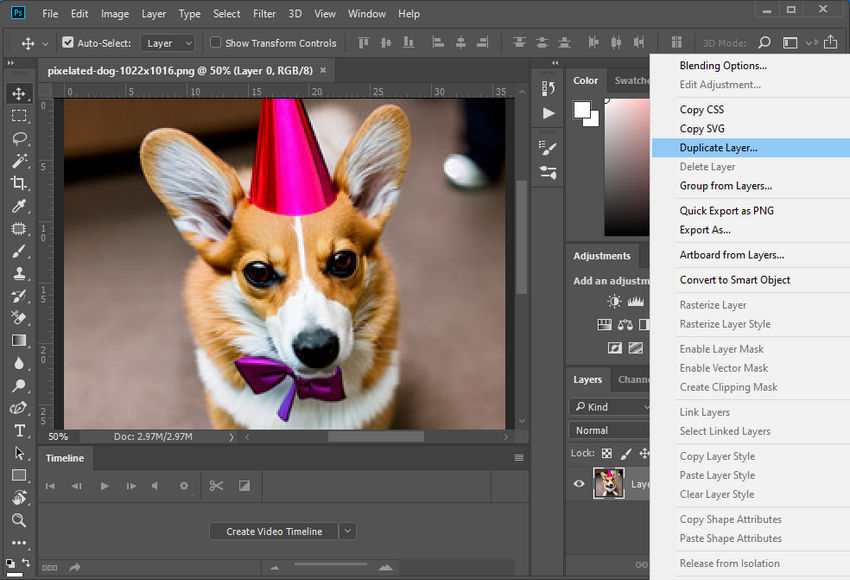
Step 1: Open and Duplicate Your Image
Open your pixelated image in Photoshop. Then, duplicate the layer (Right-click the layer > Duplicate Layer) so you can work non-destructively. This way, your original stays untouched while you test out edits.
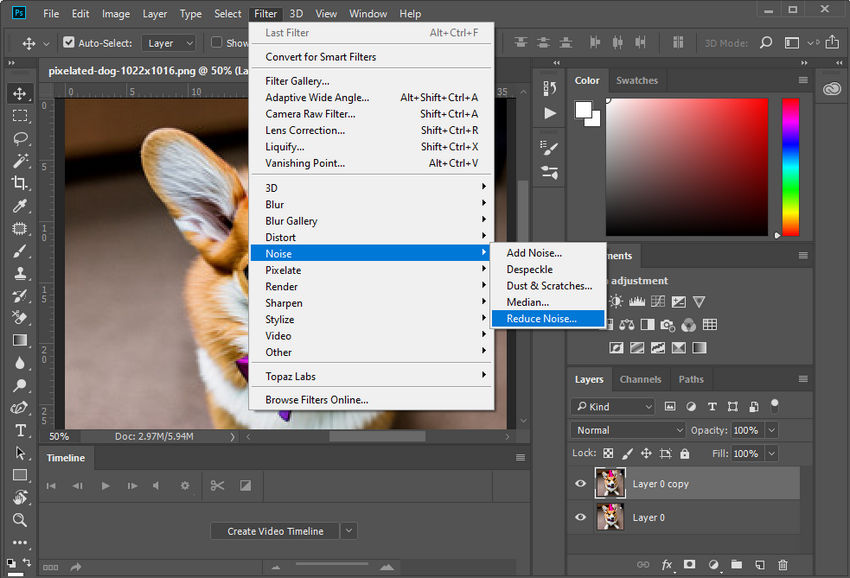
Step 2: Apply Reduce Noise
Go to the top menu and click: Filter > Noise > Reduce Noise
In the dialog box:
- Increase the Strength slider to soften the harsh pixel edges.
- Lower the Preserve Details slightly to avoid over-sharpening.
- Adjust Reduce Color Noise if your image has blotchy color patches.
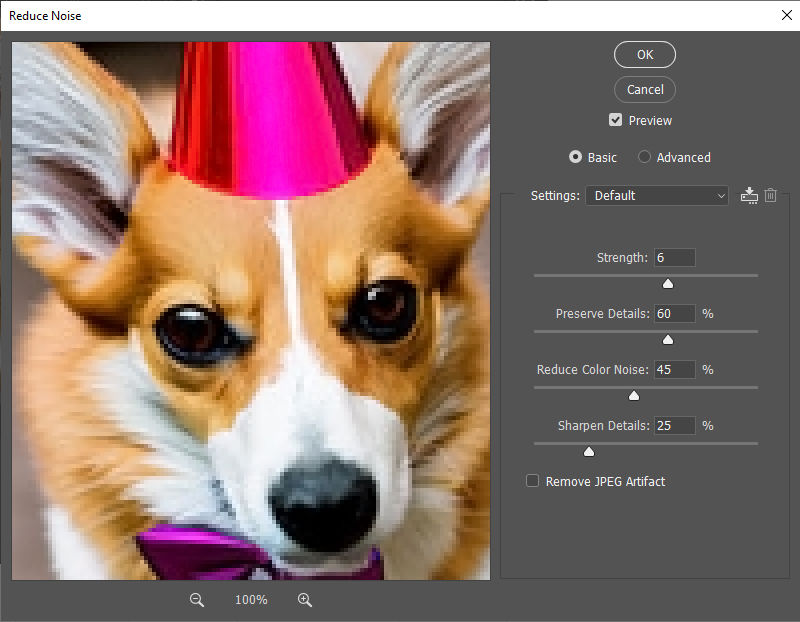
You won’t be able to completely depixelate the image, but this step can gently smooth out the blocky areas.
Step 3: Use Smart Sharpen
Next, head to: Filter > Sharpen > Smart Sharpen
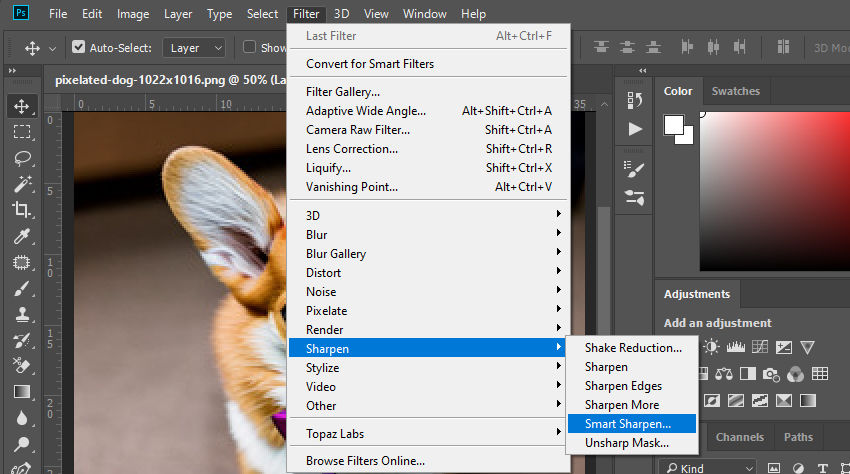
This tool can bring back a bit of definition after softening the image. In the Smart Sharpen panel:
- Set a moderate Amount (start around 100%)
- Use a Radius of 0.5 to 1.5 pixels depending on your image
- Check Remove: Gaussian Blur for general sharpening
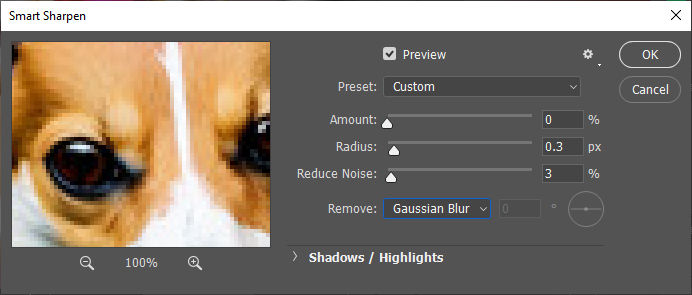
Try to strike a balance — you want to sharpen enough to bring back clarity, but not so much that you reintroduce harsh pixel edges.
By carefully using these two filters together, you can significantly fix a pixelated image in Photoshop. It won’t be perfect, but it’s a solid first step to make a picture look unpixelated without relying on external tools.
Method 2: Surface Blur + Contrast Adjustments
This method uses Surface Blur to smooth out the blocky areas, then adds contrast back in to prevent the image from looking too soft.
This combination won’t magically depixelate an image, but it can make it much easier on the eyes — especially if you're just trying to create a cleaner version for display or design use. For many cases, it’s a solid way to make a picture look less pixelated using nothing but built-in Photoshop features.
Step 1: Duplicate the Layer
As always, start by duplicating your image layer so you can experiment freely.
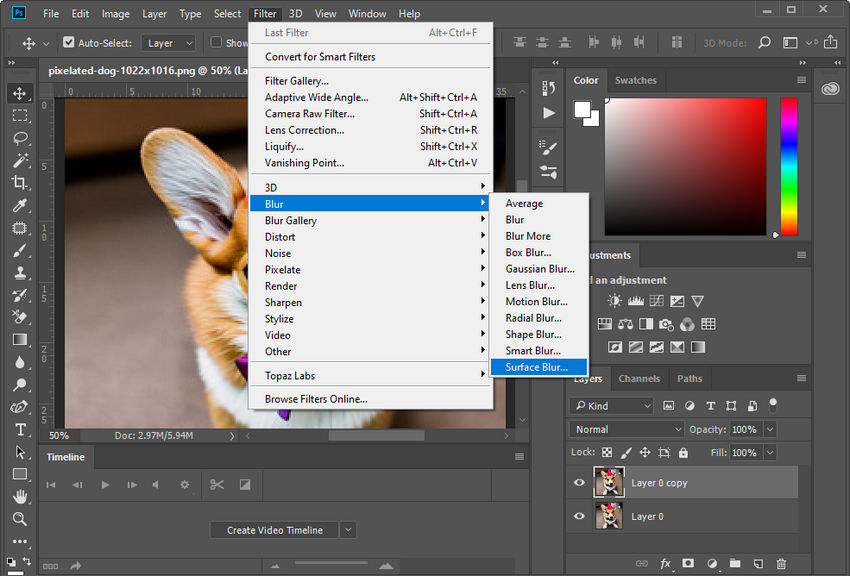
Step 2: Apply Surface Blur
Go to: Filter > Blur > Surface Blur
Set values like:
- Radius: 5–20 pixels depending on image size
- Threshold: 10–30 for preserving more detail
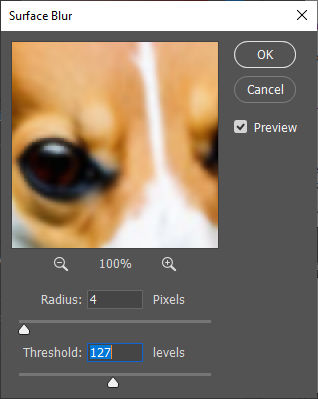
Surface Blur helps smooth out harsh pixel edges while trying to preserve shapes and transitions better than a regular blur.
Step 3: Adjust Brightness/Contrast
Go to: Image > Adjustments > Brightness/Contrast

Increase Contrast slightly to restore definition. This step helps the image avoid that “washed out” or overly smoothed look after the blur.
Method 3: Use Gaussian Blur to Smooth Out Harsh Pixels
Just like Surface Blur, Gaussian Blur is another go-to tool when you're trying to fix a pixelated image in Photoshop — especially if you want to soften jagged edges and reduce that blocky look. The key difference? Gaussian Blur is more straightforward and evenly applied across the image, which makes it a great option for simpler pixelation fixes.
If Surface Blur didn’t quite give you the results you wanted, or if you're working on an older Photoshop version, Gaussian Blur is a solid alternative to help make a picture unpixelated — especially when paired with sharpening tools.
Step 1: Duplicate the Layer
Always start by duplicating your image layer, so you can easily compare before and after.
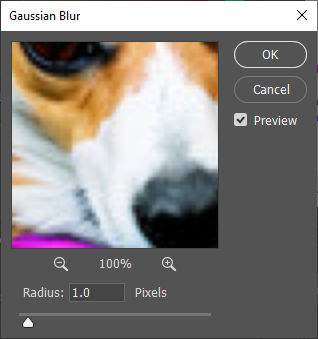
Step 2: Apply Gaussian Blur
Go to: Filter > Blur > Gaussian Blur
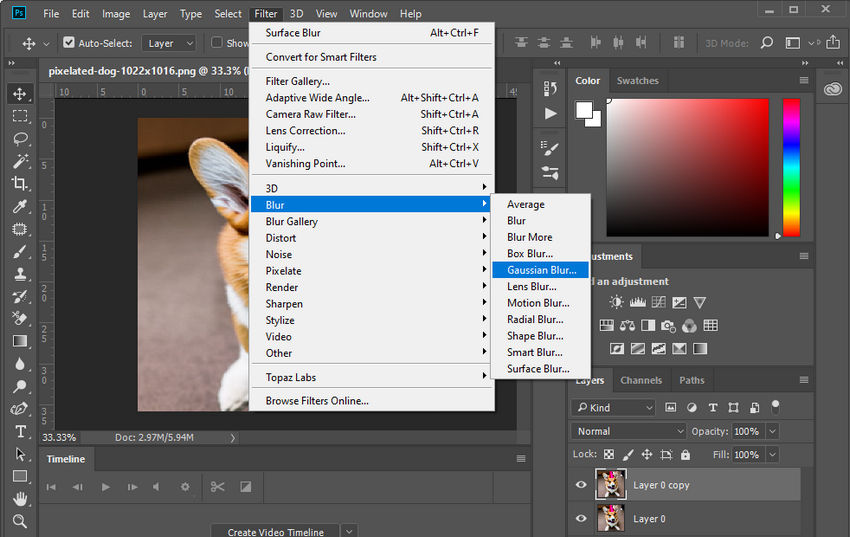
Start with a Radius of around 1–3 pixels. Too much blur can ruin the image, so be subtle. You’ll see the pixels begin to blend and the harsh lines fade slightly.
Step 3: Add Sharpness Back (Optional but Recommended)
To prevent your image from becoming too soft:
- Go to Filter > Sharpen > Smart Sharpen
- Adjust the settings to lightly bring back some edge definition
This combination — softening then sharpening — often helps depixelate an image by blending the jagged edges while keeping important details visible.
While this method won’t magically create high-resolution detail, it’s a simple and surprisingly effective way to make pictures look less pixelated — especially when you're dealing with minor pixelation or overly compressed images.
Method 4: Sharpen with Camera Raw for More Control
If you want more precision and control over your image corrections, try using Camera Raw — especially when working with RAW files or high-res JPEGs. It gives you access to advanced sharpening sliders that can help fix pixelated images with more finesse.
Even though it doesn’t technically “depixelate” your picture, it gives you a better shot at enhancing edges without introducing new artifacts.
Step 1: Open the Image in Camera Raw
In Photoshop, go to Filter > Camera Raw Filter. Then, your image will open in a new editing panel.

Step 2: Go to the Detail Panel
Click on the Detail tab (it looks like two triangles). Here you’ll find the main sharpening tools:
- Amount adjusts the overall intensity of sharpening.
- Radius determines how wide the sharpening effect spreads around edges — a smaller value targets finer details.
- Detail controls the sharpening of textures and small patterns.
- Masking helps protect flat or smooth areas (like skin or sky) from being oversharpened — a lifesaver when dealing with blocky, pixelated images.
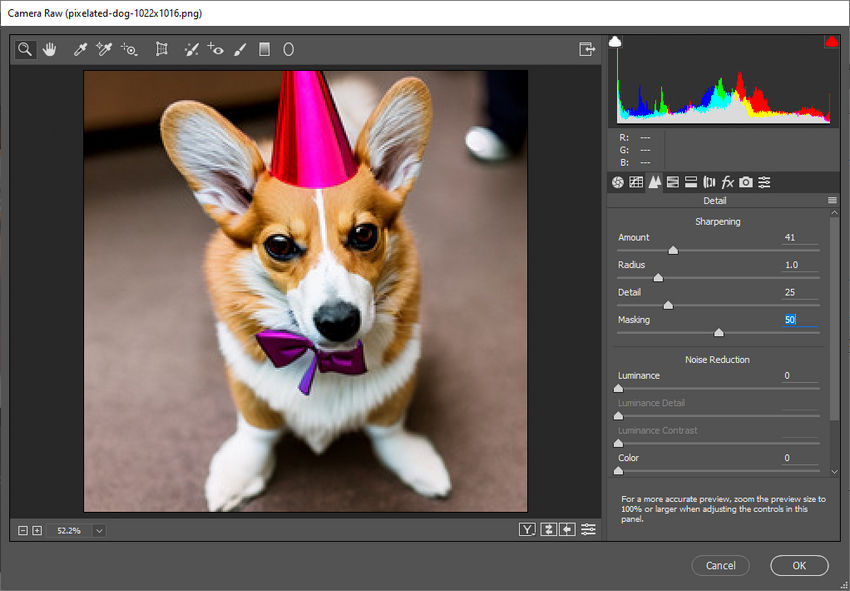
A good starting point is: Amount: 40–70, Radius: 1.0, Detail: 25, Masking: 50+
These numbers aren’t set in stone — feel free to tweak them depending on how blurry or blocky your image looks.
Step 3: Zoom In and Preview
Zoom in to 100% to see how your settings affect the image. Adjust until the image feels cleaner but not overly crispy.
When it comes to how to unpixelate an image in Photoshop, the Camera Raw filter offers more flexibility than the standard sharpen tools — and it’s a great option when you want to recover detail in faces, textures, or landscapes.
Method 5: Use an AI Image Enhancer Alongside Photoshop
Sometimes, no matter how many tricks you try in Photoshop, the result still looks... meh. That’s when an external AI image enhancer can really save the day — especially if you're trying to fix pixelated images that are too low-quality for manual touch-ups alone.
One great tool for the job is Aiarty Image Enhancer, a lightweight desktop app that can depixelate, denoise, deblur, sharpen, and upscale your images — all with just one click.
Step 1. Run Your Image Through Aiarty
- Download and install Aiarty Image Enhancer
- Open your pixelated image in Aiarty
- Choose the AI model that best matches your image type.
- Select an Upscale preset — go for “x1” if you don’t want to increase the resolution
- Aiarty will automatically process your image and give you a live preview
- Once you're happy with the result, hit Export to save the enhanced image
From the comparison images below, we can see that Aiarty stands out with the clearest and most visually pleasing result. It effectively eliminates pixelation and restores smooth, sharp details—outperforming even Photoshop in clarity in this case. With just one click, Aiarty transforms a heavily pixelated image into a clean, natural-looking photo, making it the ideal choice for users who want powerful enhancement with minimal effort.
Step 2. Refine in Photoshop
After Aiarty has cleaned up your photo, bring it back into Photoshop for final touches. You can:
- Apply subtle effects like Surface Blur or Soft Light blending for mood
- Adjust color, contrast, or incorporate the image into a larger design project
It’s the best of both worlds: AI precision meets Photoshop creativity.
So if you’re stuck wondering how to unpixelate an image in Photoshop, pairing it with a smart tool like Aiarty can give you a massive head start — and save you hours of frustrating, manual work.
 FAQs about Fixing Pixelated Images
Photoshop cannot fully restore missing details, but it can significantly reduce pixelation using filters like Reduce Noise, Smart Sharpen, and Surface Blur. These adjustments can make an image appear smoother and sharper.
There is no single “best” filter. A combination of Reduce Noise and Smart Sharpen works for most cases, while Surface Blur and Gaussian Blur are great for smoothing jagged edges and reducing blocky areas.
AI tools like Aiarty Image Enhancer often produce cleaner and more natural results in one click, especially for low-resolution or heavily compressed images. Photoshop offers more manual control but requires time and skill.
Yes. AI image upscalers can enlarge images while reducing pixelation and preserving more detail. Photoshop alone struggles to upscale without losing sharpness unless paired with smart techniques or AI plugins.
Use Surface Blur to smooth harsh edges, then apply Smart Sharpen or Camera Raw for added definition. For the best results, vectorizing the text or using an AI enhancer is recommended.
Pixelation occurs when an image is displayed at a size larger than its resolution can support, or when it's heavily compressed, resulting in visible pixel blocks.
A blurry image has smooth but unclear details due to focus or motion issues, while a pixelated image shows sharp blocky squares from low resolution.
Use high-resolution images, avoid excessive compression, and resize images proportionally. For existing photos, AI upscalers can enhance quality and reduce pixelation.
You May Also Like
This post was written by Brenda Peng who is a seasoned editor at Digiarty Software who loves turning ordinary photos into extraordinary works of art. With AI assistance for brainstorming and drafting, the post is reviewed for accuracy by our expert Abby Poole for her expertise in this field.