Stable Diffusion Img2Img (Image to Image): Beginner's Guide
Updated on
Want to go beyond generating images from scratch? Stable Diffusion's Img2Img (Image-to-Image) feature is your key to create AI art from the existing image.
Unlike text-to-image generation, Img2Img lets you start with your own image, using text prompts or sometimes just the image itself to create fresh variations, refined edits, or imaginative remixes. If you're an artist, designer, or creator looking to evolve your visuals or explore new creative directions based on existing artwork, this beginner's guide will show you exactly how to harness the power of Img2Img for your projects.
What Are the Applications for Stable Diffusion Img2Img
Img2Img is an AI-driven technique that lets you create new variations or iterations of an existing image while preserving specific elements or features, such as poses, lines, color segments, composition, and color that you want to keep consistent across the variations. This powerful tool opens up a world of creative possibilities, such as:
- Upscale/enhance images for higher resolution and better clarity.
- Turn armature drawing like doodles, sketches, and lines into art.
- Change the facial expressions, certain facial features, and more.
- Modify the skin color, hair color, hairstyle, dressing, and more.
- Fine-tuning the lighting, color, styles, aesthetics, etc.
- Fix broken faces, scratches, and other imperfections in old photos.
- Blend elements you like from different images.
- And more.
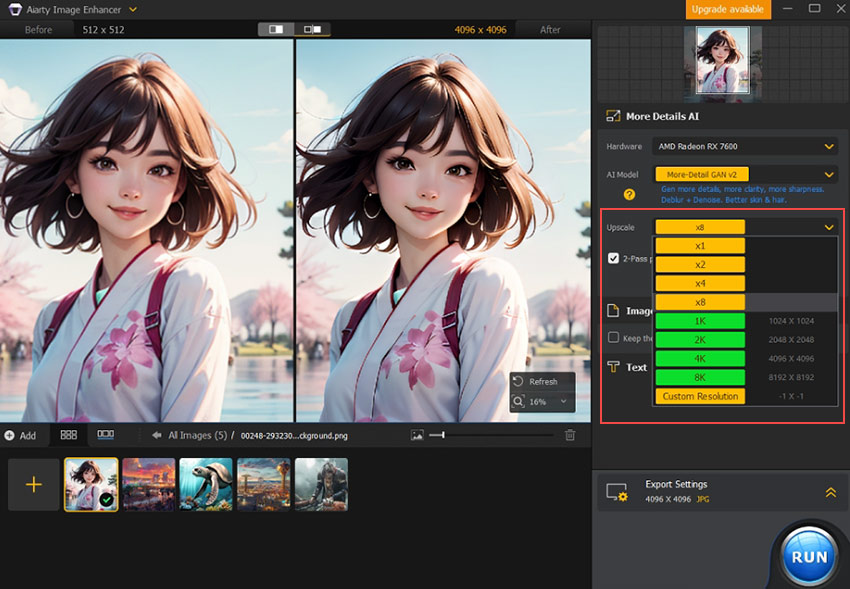
Stable Diffusion's 512-pixel limit got you down? Aiarty Image Enhancer can boost resolution up to 32K, enhancing clarity and adding details.
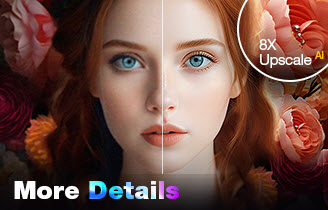
AI Upscale and Enhance AI-generated Images
- Boost image resolution to 4K, 8K, 16K, or 32K
- Sharpen clarity by fixing imperfections like noise and blur
- 3 Next-gen AI model to restore and even generate details
How to Use Img2img in Stable Diffusion
Stable Diffusion is a versatile tool that can be accessed and used through various user interfaces, including popular options like AUTOMATIC1111, ComfyUI, and Forge. AUTOMATIC1111 is often considered the most beginner-friendly option. Therefore, this guide will walk you through the step-by-step process of using the img2img feature specifically within the Stable Diffusion AUTOMATIC1111 Web UI.
Step 0. Set Up Stable Diffusion Img2Img
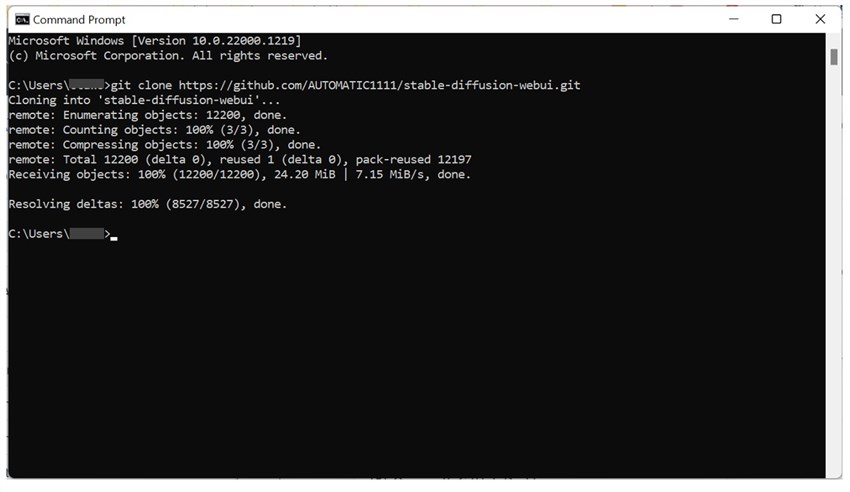
Download and install Python 3.10.6 (64-bit) from python.org, ensuring to select "Add Python 3.10 to PATH" during installation. After that, download and install Git from git-scm.com. Next, press the Windows key and R to open the Command Prompt window. Enter CMD and press RUN to lauch the Command Prompt window. Herein, type the following command and press Enter to clone the Stable Diffusion Webui repository:
git clone https://github.com/AUTOMATIC1111/stable-diffusion-webui
Step 1. Upload or Create the Starting Image
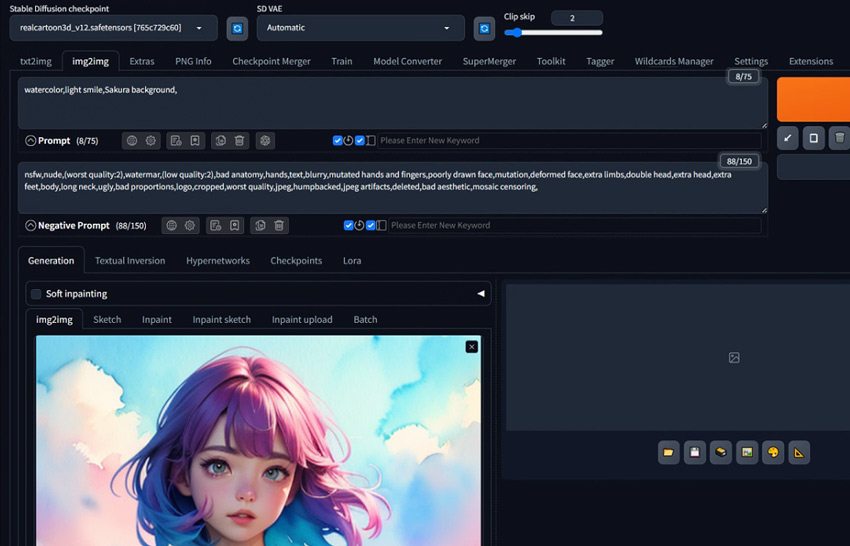
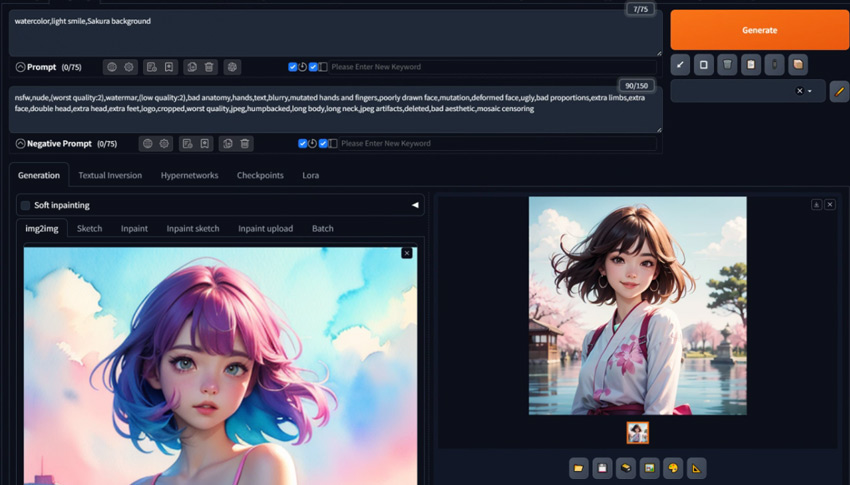
Come over to the Stable Diffusion img2img tab. Drag and drop the starting image that has the concept, features, composition, or everything else you like into the canvas area.
Tips:
Many Stable Diffusion models work best starting with images around 512x512 or 768x768 pixels, as they were primarily trained on these sizes.
You can also easily send an image you just generated in txt2img directly to the img2img tab using the Send to img2img button.
Step 2. Write Your Prompt
To get your ideal image, describe what you want to see in the positive prompt. In my case, I want to give the image a watercolor effect, add a light smile to the girl, and change the background from buildings to Sakura. So, I go to the Prompt setion and enter: watercolor, light smile, Sakura background. Similarly, to avoid unwanted elements or effects, go to the Negative Prompt section and describe what you dislike.
Step 3. Adjust the Key Settings
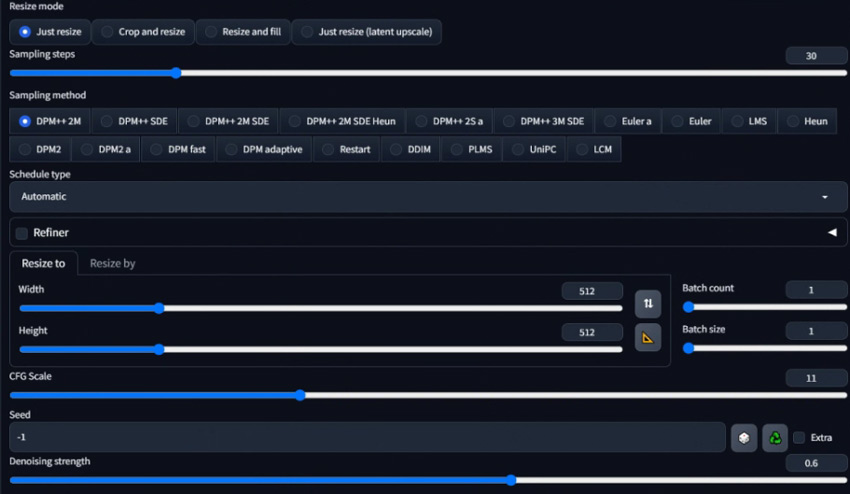
There are many settings options available on the img2img tab. It's not necessary to adjust all of them. The two parameters you want to play with are the CFG scale and denoising strength.
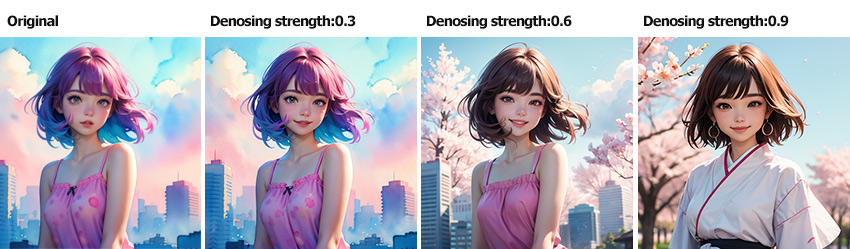
Denoising Strength: I like to use 0.6 to 0.7 as a good starting point. As what's shown in the image below, lower Denoising Strength settings won't change the Image that much and higher settings will make bigger changes.
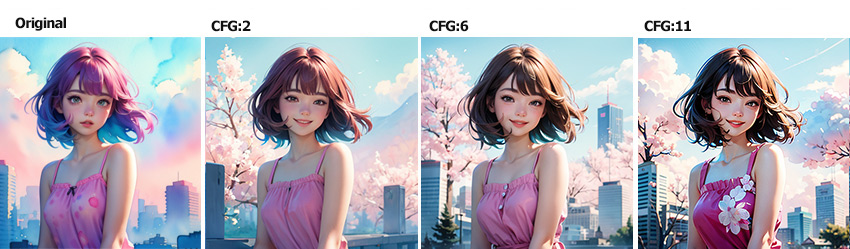
CFG Scale: In the beginning, you can set the CFG scale to 11. The higher the number, the more you want it to do what you tell it through the text prompt. CFG scale is a parameter that controls Stable Diffusion and how 'strict' it should follow the prompt input in image generation.
Step 4. Adjust Other Settings
Depending on your needs, you might also adjust:
- Checkpoint: Just like what you see in the text-to-image prompt tab. Checkpoint is also known as models. I'm using Realcartoon-XL which is good for creating real cartoon-style images. You can also experiment with other models.
- Resize mode: this should be applied when you want to change the image resolution or aspect ratio. The most commonly used mode is Resize which lets you change resolution while maintaining the aspect ratio (e.g., 512x512 to 1024x1024).
- Sampling Method: The choice depends on the desired balance between quality, speed, and computational resources. DPM++ 2M Karras, DPM++ SDE Karras, and Euler are the popular choices as they offer balanced quality and speed. Learn more about stable diffusion sampling method > >
- Sampling Steps: For most users looking for a good balance, starting with 20 to 30 steps is recommended. More sampling steps generally produce better details but take longer. But also noted that some samplers work well with fewer steps than others.
- Schedule Type: Control how the AI gradually refines the image from random noise to the final result. Different schedules can affect image quality and generation speed.
- Resize: Enter the target length and width ratio. You can click the ruler icon to check the original image resolution.
- Batch Count: Decide the number of images you need for each generation.
- Batch Size: Decide how many images are processed simultaneously by your GPU. Typically, this is left at 1 to manage memory usage effectively.
- Seed: Use -1 for a random seed, which means each generation will start from a different random noise pattern, leading to varied outcomes.
Step 4. Generate the Image
Once you've completed the settings, hit Generate. If you're not happy with the result, just do one or more rounds of img2img to add more details. For example, you can experiment with different text prompts, GSC scale, and denoising strength…for more desired results. When you're happy with the result, click Save to save it locally.
Stable Diffusion Img2Img Tips and Tricks
Here are some tips to help you get the most out of Stable Diffusion img2img when generating and editing images:
1. Iterative Approach: Don't expect perfection in one go. Generate an image, then use that image or a modified version of it for another round of img2img to refine details or correct issues.
2. Experiment with Denoising Strength:
Low denoising strength (0.2-0.4) is good for slight changes or when you want to keep most of the original image.
Medium denoising strength (0.4-0.7) is ideal for balanced changes where you want to introduce new elements while retaining some original features.
High denoising (0.7-1.0) is needed when you want to see significant changes.
3. Play with CFG Scale: The CFG scale affects how closely the AI sticks to your prompt. Lower values allow for more creative freedom, while higher values make the result adhere more strictly to the prompt. If you feel the outcome looks too different from the original one, try lowering this value.
4. ControlNet: For precise control over the composition, pose, or structure derived from your input image, consider using ControlNet models in conjunction with img2img.
5. Generate at 512x512, then upscale: To get high-resolution, detailed images without artifacts like extra limbs often caused by generating directly at large sizes, generate at a standard training resolution (like 512x512) first, then upscale it with Aiarty Image Enhancer.
You May Also Like
Kistent Waung is a quality-driven writer who has extensive knowledge of the multimedia market. She started her journey managing and supporting content at Digiarty Software, where she shared her expertise on a range of multimedia products spanning AI and codec trends, software reviews, and comparisons. She's now a writer for aiarty.com, with a focus on AI technology.